全局注册组件
Vue.component('my-component-name', {


  // ... 选项 ...
})
我们可以用这种方式来创建全局组件,在实例化Vue之前用Vue.component来创建组件,这样我们可以在任何实例化Vue的组件(new Vue)中使用。
可能会报错:
[Vue warn]: You are using the runtime-only build of Vue where the template compiler is not available. Either pre-compile the templates into render functions, or use the compiler-included build.
处理方法:在项目vue.config.js中,修改runtimeCompiler为true
局部注册组件
我们可以以普通对象的方式创建组件,对象中可以包含我们常用的data、methods等属性和方法,比如下面这样
var ComponentA = {

     /* ... */ }
注册局部组件的话。需要我们在要使用组件的地方(大多数情况下也是组件)使用components来注册
单文件组件
Demo.vue
<template>
  <div>Demo</div>
</template>
首先导入组件,然后使用components注册组件,最后在template中使用组件
<template>
   <demo></demo>
</template>

<script>
import Demo from './Demo';
export default {


  ......
  components: {


    Demo,
  }
}
</script>
使用x-template引入模板
<script type="text/x-template" id="xTemplate">
    <div>content</div>
</script>

<script>
    Vue.component('xTemplateDemo', {


        template: '#xTemplate',
        ......
    });
</script>
jsx注册组件(后续补充)
方法调用式创建(render函数注册组件)
使用过像elementUI和iview之类的第三方组件库的同学可能都知道,他们提供了很多全局的API可以很方便的创建组件,比如弹出框等,他们是怎么做的呢,我们下面就来看看。
// components/Dialog/Dialog.vue
<template>
  <transition name="fade">
    <div class="dialog-page" @click.self="close" v-if="isShow">
      <div class="dialog-box">
        <h3 class="title">{

    {

     title }}</h3>
        <span class="close" @click="close">X</span>
        <el-button type="primary" class="confirm-btn" @click="confirm">确定</el-button>
      </div>
    </div>
  </transition>
</template>

<script>
export default {


  name: "Dialog",
  props: {


    title: {


      type: String,
      default: '提示',
    }
  },
  data() {


    return {


      isShow: false
    }
  },
  mounted() {


    window.addEventListener('keyup', this.close)
    this.isShow = true;
  },
  methods: {


    close() {


      this.isShow = false;
      // 这里使用$nextTick是因为我们使用了过渡效果,关闭的时候先过渡,再销毁
      this.$nextTick(() => {


        this.$emit('close')
      })
    },

    confirm() {


      this.$emit('confirm')
    }
  }
}
</script>

<style lang="scss" scoped>
.dialog-page {


  position: fixed;
  top: 0;
  left: 0;
  width: 100vw;
  height: 100vh;
  background-color: rgba(0, 0, 0, 0.6);
  z-index: 99999;
  .dialog-box {


    position: absolute;
    top: 20%;
    left: 50%;
    transform: translateX(-50%);
    margin: auto;
    width: 700px;
    height: 400px;
    padding-top: 20px;
    background-color: #fff;
    border-radius: 10px;
    box-shadow: 0 0 6px 0 #fff;
    .title {


      text-align: center;
      font-size: 22px;
      color: #333;
    }
    .close {


      position: absolute;
      right: 20px;
      top: 20px;
      cursor: pointer;
    }
    .confirm-btn {


      width: 80%;
      position: absolute;
      left: 10%;
      bottom: 50px;
    }
  }
}
.fade-enter-active,
.fade-leave-active {


  transition: opacity 0.2s;
}
.fade-enter, .fade-leave-to /* .fade-leave-active below version 2.1.8 */ {


  opacity: 0;
}
</style>
新建文件
// components/Dialog/index.js
import Vue from 'vue';
import Dialog from "@/components/Dialog/Dialog";

let vm;
function createVNode(resolve, reject, props) {


    return new Vue({


        mixins: [{


            mounted() {


                document.body.appendChild(this.$el);
            },
            beforeDestroy() {


                document.body.removeChild(this.$el);
            },
        }],
        beforeDestroy() {


            vm = null;
        },

        methods: {


            confirm() {


                resolve('点击确认');
                this.$destroy();
            },
            close() {


                reject('点击关闭');
                this.$destroy();
            }
        },
        render(createElement) {


            return createElement(Dialog, {


                on: {


                    confirm: this.confirm,
                    close: this.close
                },
                props,
                style: {


                    color: 'red'
                },
            });
        }
    })
}

function show(props) {


    return new Promise((resolve, reject) => {


        // 如果有vm这个实例,先销毁
        if (vm) {


            vm.$destroy();
        }
        vm = createVNode(resolve, reject, props);
        vm.$mount();
    })
}

export default show;
倒着看,我们导出了一个show方法,它返回的是一个Promise,这就是说我们在调用这个方法的时候可以用.then的语法在未来某一个时刻(关闭弹框,或者点击确认)执行一些操作。
接着我们创建了一个vm实例,调用了$mount,是不是看着比较熟悉,没错,在main.js文件中
// main.js
...
new Vue({


    ...
    render: h => h(App),
}).$mount('#app');
它把new vue生成的虚拟DOM转换成真实DOM挂载到了#app上面,那上面我们的$mount没有传参数,会挂载到哪里呢?
其实是需要我们手动挂载的。当前组件在渲染完成后,手动把当前组件的DOM插入到body中,在组件销毁前移除掉。
接着说我们的组件,这里我们又看到一个createVNode方法,不用说,这个就是用来创建组件的方法了,可以看到它返回了一个Vue的实例化对象(虚拟DOM),new Vue的参数混入了一些生命周期函数,和两个methods方法,以及上段所说挂载dom与销毁dom。
最重要的还是下面的render函数,这个内容很多,就不展开说了,想深入了解可以单击传送门,可以简单理解render可以生成VNode,就是虚拟节点。它的第一个参数是刚才我们编写的组件,第二个参数是一个对象,可以定义一些参数,比如要传给组件的参数、样式还有监听的事件等。
这样我们new Vue的时候,没有用template的方式,而是用了render函数来生成我们要的组件,手动挂载到DOM中去(不在#app里面,是并列的关系,都在body下面)。
接下来我们就可以在需要的地方调用了,比如App.vue
// App.vue
<template>
  <div id="app">
      <button @click="handleClick">Dialog</button>
  </div>
</template>

<script>
import Dialog from '@/components/Dialog/index'
export default {


  name: 'app',
  methods: {


    handleClick() {


      Dialog({


        title: '测试弹框'
      }).then(res => {


        console.log(res)
      }).catch(err => {


        console.log(err)
      })
    }
  }
}
</script>
点击按钮的时候,我们调用导入的Dialog方法,传了title参数,现在我们可以看看效果。
到现在我们已经完成了组件的创建和调用,而且我们点击关闭和确认的时候可以看看控制台,是不是分别打印了
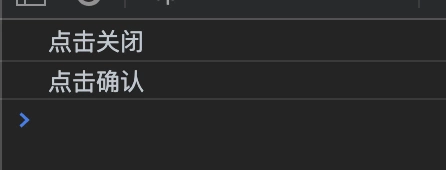
这就是我们在App.vue里面调用Dialog方法的时候分别在then和catch里面打印的,回到上面/components/Dialog/index.js文件中的show方法,我们返回的是promise,而且我们把resolve和reject两个参数传入了createVNode方法中,分别在methods中的两个对应确认和关闭的方法中别调用,那么confirm和close是怎么被触发的呢
可以看/components/Dialog/Dialog.vue文件中,我们在点击的时候,使用了$emit来触发对应的事件,那么事件是在哪里被接收的呢?回到/components/Dialog/index.js文件中的render函数,我们在createElement方法的第二个参数中有一个on对象,是不是感觉很熟悉,没错,就是用来监听事件的,我们上面用$emit触发的事件也是在这里监听的。这样我们就在点击确认或者关闭后,执行resolve或者reject方法,然后就可以在then和catch中执行相应的操作了。
注册全局插件
到上面为止,我们已经可以很方便的以API的形式来创建组件,但是可能有人会觉得还不够方便,每次还要先导入,再调用,有没有更方便的方式呢?肯定是有的,现在我们就来试试。
其实也很简单,只需要把刚才的代码稍微改一下就可以了
// /component/Dialog/index.js
...
- export default show;
+ export default {


+     install(vue) {


+        vue.prototype.$Dialog = show;
+     }
+ }
// main.js
+ import Dialog from '@/components/Dialog/index'

+ Vue.use(Dialog);
看到Vue.use又有了熟悉的感觉吧,我们平常使用插件不就是这么用的嘛!没错,第三方的插件能够以Vue.use的方式注册,是因为他们都在插件里面导出了一个install方法,不清楚的看这里哦 Vue.use。
这样我们就可以在需要的地方使用this.$Dialog调用了,也不需要先导入了,因为方法已经被挂到了Vue的原型上。
现在就来试一下
// App.vue
<template>
  <div id="app">
      <button @click="handleClick">Dialog</button>
  </div>
</template>

<script>
export default {


  name: 'app',
  methods: {


    handleClick() {


      this.$Dialog({


        title: '测试弹框'
      }).then(res => {


        console.log(res)
      }).catch(err => {


        console.log(err)
      })
    }
  }
}
</script>
效果和刚才是一样的。ok,到这里是不是觉得和ElementUI提供的一些方法有点相似呢,没错,其实他们也是这么做的。