文章目录
CentOS 7 - 从源码安装 Nginx
环境信息
操作系统
# cat /etc/centos-release
CentOS Linux release 7.7.1908 (Core)
# uname --kernel-release
3.10.0-1062.el7.x86_64
准备
Wget 非交互式网络下载器
我们需要使用 Wget 下载 Nginx 源码包,如果系统没有预装,执行命令 yum install --assumeyes wget 安装即可。
GCC - C & C++ 编译器
编译 Nginx 需要使用 GCC 编译器,如果系统没有预装,执行命令 yum install --assumeyes gcc 安装即可。
PCRE - Perl 语言兼容的正则表达式
Nginx 的 HTTP 重写模块需要 PCRE 库的支持,如果系统没有预装,执行命令 yum install --assumeyes pcre-devel 安装即可。
zlib - 提供数据压缩的函数库
Nginx 的 HTTP gzip 模块需要 zlib 库的支持,如果系统没有预装,执行命令 yum install --assumeyes zlib-devel 安装即可。
安装
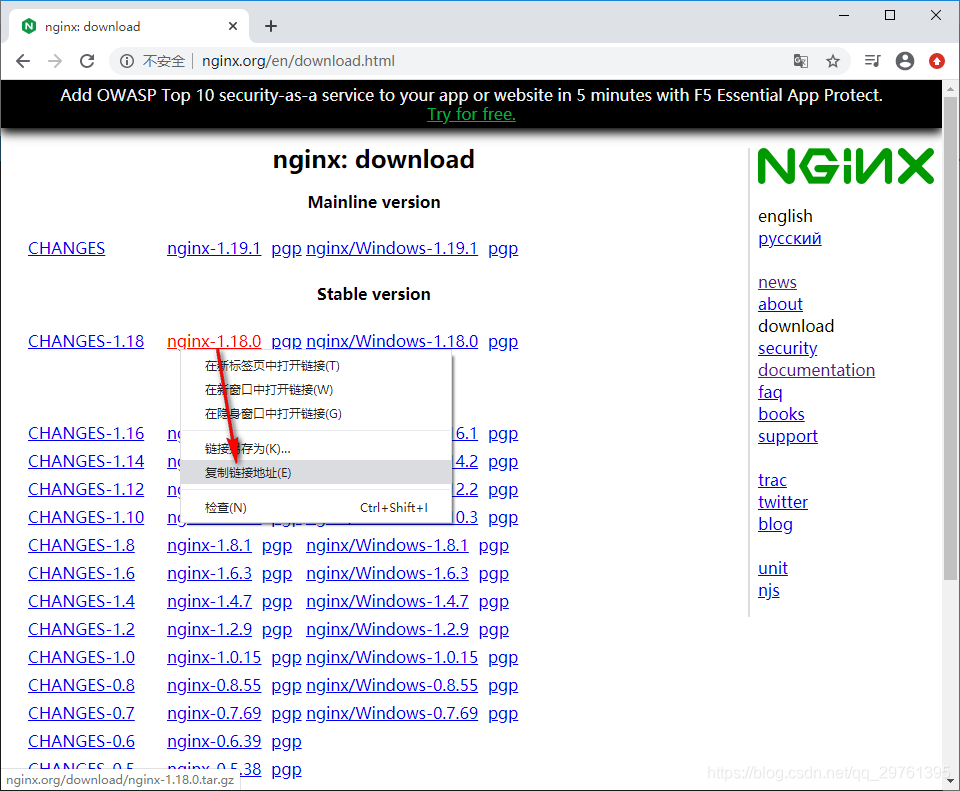
访问 Nginx 下载页,找到你希望下载的版本,右击选择“复制链接地址”:
回到 CentOS 7 系统终端,执行以下命令下载 Nginx 源码压缩包:
# wget http://nginx.org/download/nginx-1.18.0.tar.gz
下载完成之后,执行以下命令解压 Nginx 源码压缩包:
# tar -zxvf nginx-1.18.0.tar.gz
解压完成之后,进入解压得到的 Nginx 源码包,执行可执行文件 configure 进行配置。
配置完成之后,依次执行命令 make 和 make install 完成重新编译和安装即可。Nginx 默认安装在 /usr/local/nginx 目录。
启动、访问 Nginx
开放 80 端口
Nginx 默认监听 80 端口,在访问 Nginx 之前,需先开放 80 端口。
执行以下命令查看防火墙是否开启:
# systemctl status firewalld
● firewalld.service - firewalld - dynamic firewall daemon
   Loaded: loaded (/usr/lib/systemd/system/firewalld.service; enabled; vendor preset: enabled)
   Active: active (running) since Fri 2020-07-24 15:55:29 CST; 8s ago
     Docs: man:firewalld(1)
 Main PID: 6647 (firewalld)
   CGroup: /system.slice/firewalld.service
           └─6647 /usr/bin/python2 -Es /usr/sbin/firewalld --nofork --nopid

Jul 24 15:55:28 192.168.88.173 systemd[1]: Starting firewalld - dynamic firewall daemon...
Jul 24 15:55:29 192.168.88.173 systemd[1]: Started firewalld - dynamic firewall daemon.
根据以上第 4 行可知防火墙已经开启。如果没有,执行以下命令开启防火墙:
# systemctl start firewalld
执行以下命令列出所有可用的区域规则:
# firewall-cmd --list-all
public (active)
  target: default
  icmp-block-inversion: no
  interfaces: ens33
  sources:
  services: dhcpv6-client ssh
  ports:
  protocols:
  masquerade: no
  forward-ports:
  source-ports:
  icmp-blocks:
  rich rules:
可知,当前可用的区域规则是 public,已经允许的服务是 dhcpv6-client 和 ssh。
80 端口是 HTTP 协议默认使用的端口。所以,我们只需要将 HTTP 服务添加到已激活的 public 区域规则中即可。
编辑防火墙默认的区域文件 /etc/firewalld/zones/public.xml,将以下内容中的第 7 行添加到该文件中:
<?xml version="1.0" encoding="utf-8"?>
<zone>
  <short>Public</short>
  <description>For use in public areas. You do not trust the other computers on networks to not harm your computer. Only selected incoming connections are accepted.</description>
  <service name="ssh"/>
  <service name="dhcpv6-client"/>
  <service name="http"/>
</zone>
这表示将 /usr/lib/firewalld/services/http.xml 配置文件中的参数添加到 public 区域规则中。
配置完成之后,执行以下命令重载防火墙:
# firewall-cmd --reload
success
启动 Nginx
Nginx 默认安装在 /usr/local/nginx 目录,可执行文件位于安装目录下的 sbin 文件夹中。
进入 /usr/local/nginx/sbin 目录,执行命令 ./nginx 即可启动 Nginx。
启动完成之后,可以执行以下命令查看 Nginx 是否启动成功:
# ps -ef | grep nginx
root       6857      1  0 16:08 ?        00:00:00 nginx: master process ./nginx
nobody     6858   6857  0 16:08 ?        00:00:00 nginx: worker process
root       6860   1328  0 16:08 pts/0    00:00:00 grep --color=auto nginx
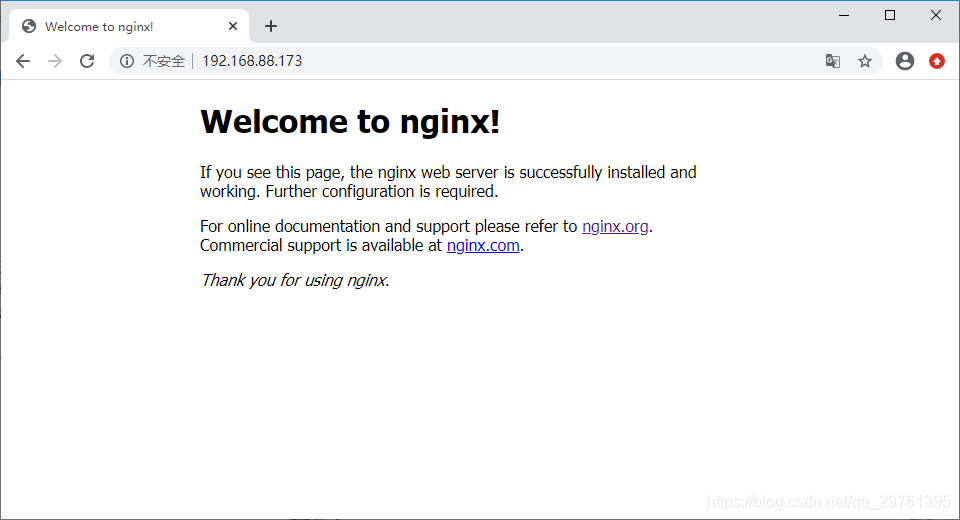
访问 Nginx
通过浏览器访问 Nginx 所在服务器的 IP 地址,验证其是否启动:
停止 Nginx
在 Nginx 安装目录下执行以下命令,即可停止 Nginx:
# ./nginx -s quit