准备工作
hadoop官方提供了两个YARN应用程序的示例,这里修改distributedshell
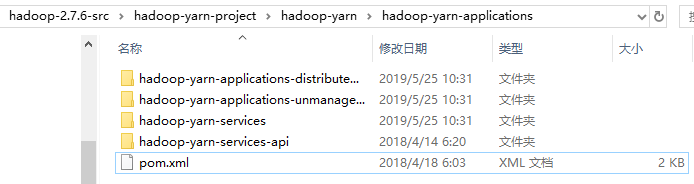
hadoop-2.7.6-src\hadoop-yarn-project\hadoop-yarn\hadoop-yarn-applications
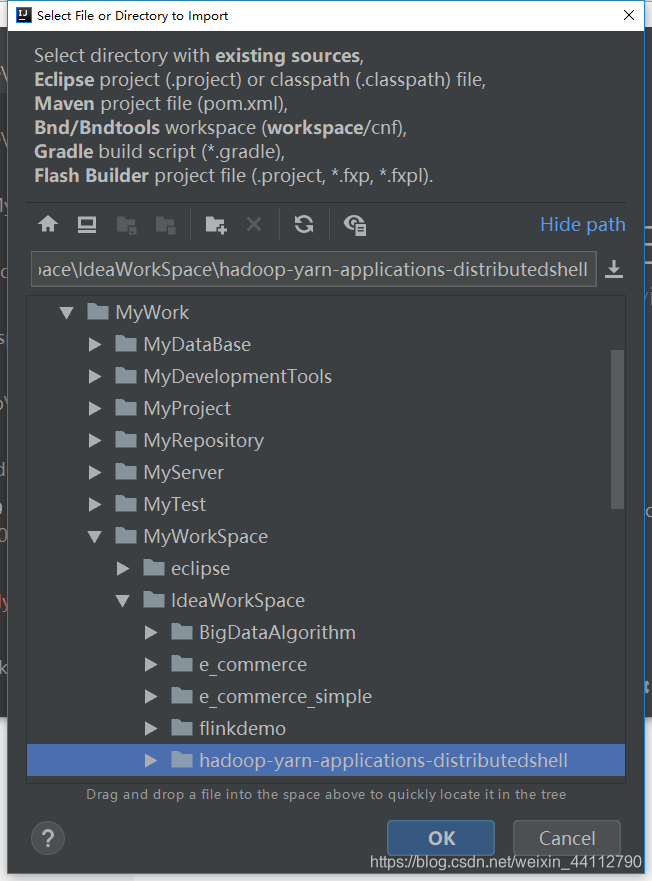
将这个模块复制一份到自己的工作空间,然后导入idea
导入的时候所有选项默认即可,不了解的不建议修改,甚至是项目名也不可随意更改
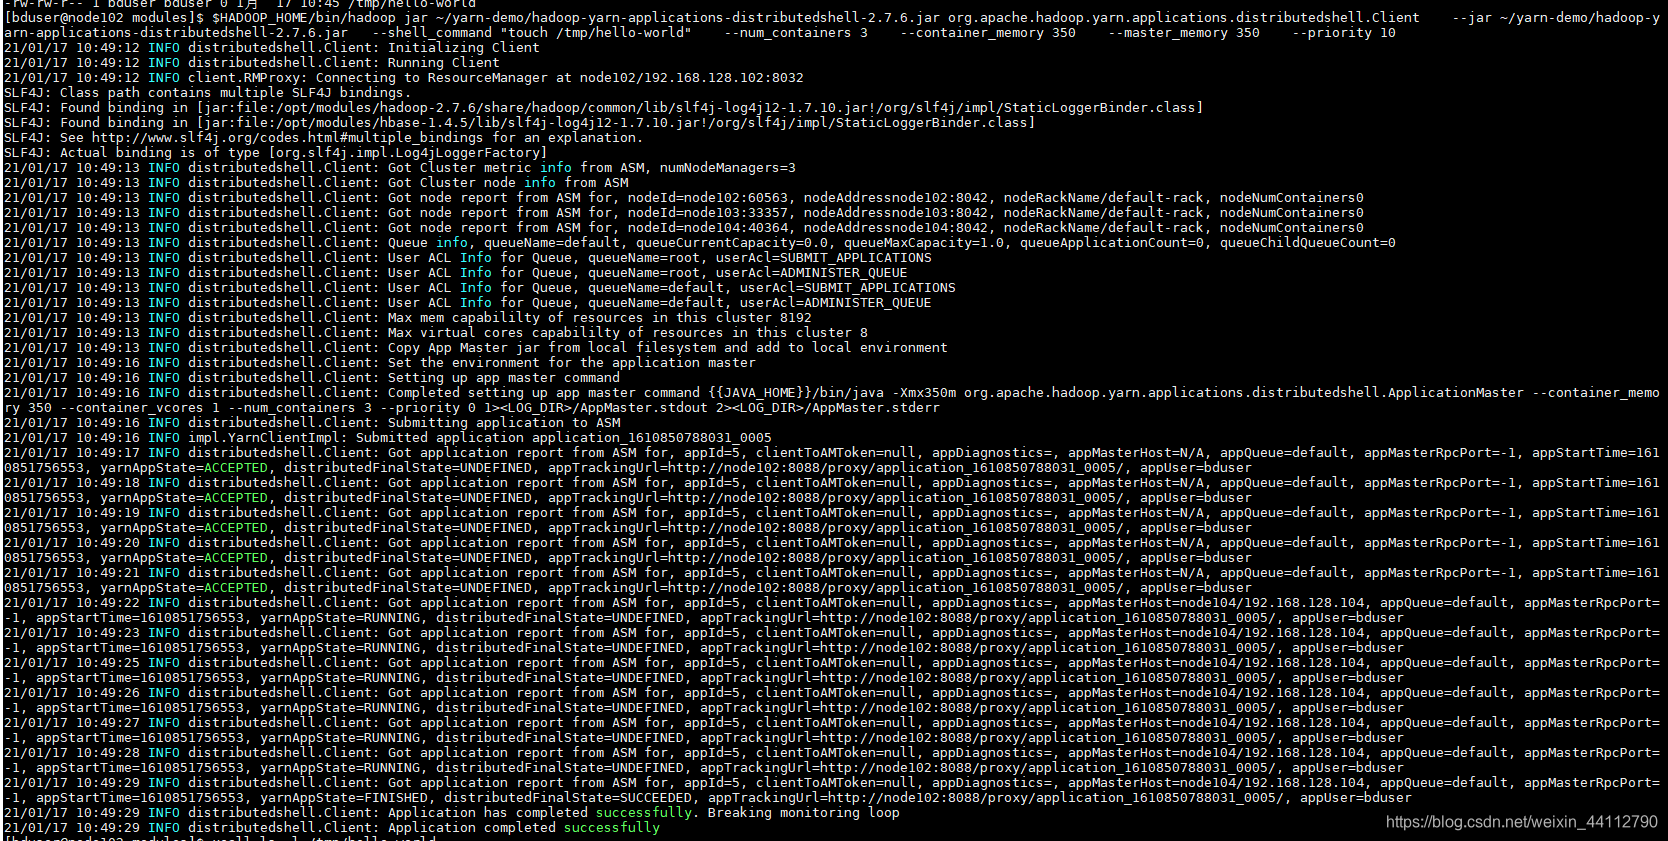
mvn package -Dmaven.test.skip=true跳过测试直接打包,我将jar包上传到了家目录下的yarn-demo中,再用自己打包的运行看看
$HADOOP_HOME/bin/hadoop jar ~/yarn-demo/hadoop-yarn-applications-distributedshell-2.7.6.jar \
org.apache.hadoop.yarn.applications.distributedshell.Client \
   --jar ~/yarn-demo/hadoop-yarn-applications-distributedshell-2.7.6.jar\
   --shell_command "touch /tmp/hello-world" \
   --num_containers 3 \
   --container_memory 350 \
   --master_memory 350 \
   --priority 10
执行成功后可以发现被创建的新文件

通过准备工作确认开发环境、运行环境都正常后,可以放心进行代码的开发了
代码剖析
代码较多,本人水平有限,仅仅分析部分代码,抛砖引玉
Client
先从提交的这个mainclass的main方法开始
  public static void main(String[] args) {
    boolean result = false;
     /**注意try-catch的对应关系,外层的try-catch**/
    try {
      Client client = new Client();
      LOG.info("Initializing Client");
      /**注意try-catch的对应关系,内层的try-catch**/
      try {
        boolean doRun = client.init(args);//初始化
        if (!doRun) {
          System.exit(0);
        }
      } catch (IllegalArgumentException e) {/*参数异常退出*/
        System.err.println(e.getLocalizedMessage());
        client.printUsage();
        System.exit(-1);
      }
      /**注意try-catch的对应关系,内层的try-catch**/
      result = client.run();//运行
    } catch (Throwable t) {/*运行出错退出*/
      LOG.fatal("Error running Client", t);
      System.exit(1);
    }
    /**注意try-catch的对应关系,外层的try-catch**/
    /**运行结束,但不一定有正常的结果,下面根据结果来判断**/
    if (result) {
      LOG.info("Application completed successfully");//成功
      System.exit(0);
    }
    LOG.error("Application failed to complete successfully");
    System.exit(2);
  }
这当中主要涉及的就是init()和run(),下面主要分析这两个方法
当然构造方法也很重要,不过构造方法中主要是准备很多参数绑定ApplicationMaster,直接看一堆参数并不一定能理解多少
init()
代码较长,只抽取出当中的主要逻辑,不难发现就是对命令行输入的参数进行解析、校验、赋值给该对象
public boolean init(String[] args) throws ParseException {
    CommandLine cliParser = new GnuParser().parse(opts, args);
    if (args.length == 0) {throw new IllegalArgumentException("No args specified for client to initialize");}
	//客户端解析的一些参数
    if (cliParser.hasOption("log_properties")) {...}
    if (cliParser.hasOption("help"))  {...}
    if (cliParser.hasOption("debug")) {...}
    if (cliParser.hasOption("keep_containers_across_application_attempts")) {...}
	//app的名字、ApplicationMaster相关的一些参数
    appName = cliParser.getOptionValue("appname", "DistributedShell");
    amPriority = Integer.parseInt(cliParser.getOptionValue("priority", "0"));
    amQueue = cliParser.getOptionValue("queue", "default");
    amMemory = Integer.parseInt(cliParser.getOptionValue("master_memory", "10"));
    amVCores = Integer.parseInt(cliParser.getOptionValue("master_vcores", "1"));
    if (amMemory < 0) {...}
    if (amVCores < 0) {...}
    //jar包
    if (!cliParser.hasOption("jar")) {...}
    appMasterJar = cliParser.getOptionValue("jar");
	//shell相关的参数处理
    if (!cliParser.hasOption("shell_command") && !cliParser.hasOption("shell_script")) {
      throw new IllegalArgumentException(
          "No shell command or shell script specified to be executed by application master");
    } else if (cliParser.hasOption("shell_command") && cliParser.hasOption("shell_script")) {
      throw new IllegalArgumentException("Can not specify shell_command option " +
          "and shell_script option at the same time");
    } else if (cliParser.hasOption("shell_command")) {shellCommand = cliParser.getOptionValue("shell_command");
    } else {shellScriptPath = cliParser.getOptionValue("shell_script");}
    if (cliParser.hasOption("shell_args")) {shellArgs = cliParser.getOptionValues("shell_args");}
    if (cliParser.hasOption("shell_env")) { ... }
    shellCmdPriority = Integer.parseInt(cliParser.getOptionValue("shell_cmd_priority", "0"));
   //容器相关的参数
    containerMemory = Integer.parseInt(cliParser.getOptionValue("container_memory", "10"));
    containerVirtualCores = Integer.parseInt(cliParser.getOptionValue("container_vcores", "1"));
    numContainers = Integer.parseInt(cliParser.getOptionValue("num_containers", "1"));
    if (containerMemory < 0 || containerVirtualCores < 0 || numContainers < 1) {...}
    //节点标签
    nodeLabelExpression = cliParser.getOptionValue("node_label_expression", null);
    //超时时间
    clientTimeout = Integer.parseInt(cliParser.getOptionValue("timeout", "600000"));
	//失败的尝试次数
    attemptFailuresValidityInterval =Long.parseLong(cliParser.getOptionValue("attempt_failures_validity_interval", "-1"));
    log4jPropFile = cliParser.getOptionValue("log_properties", "");//日志配置
    // Get timeline domain options
    if (cliParser.hasOption("domain")) {...}
    return true;
  }
run()
run方法更长,这里拆分开来一段段看
//客户端启动中
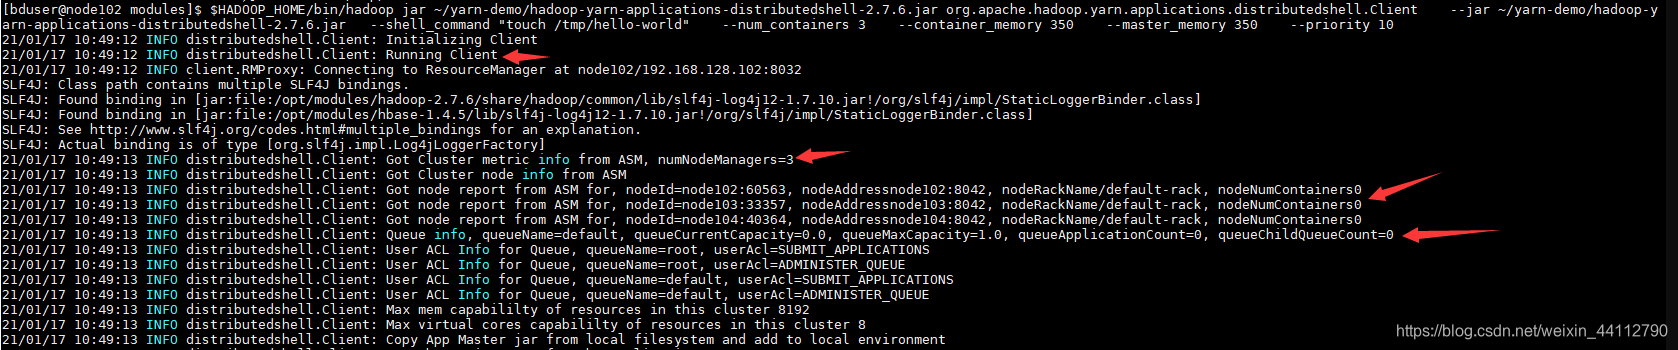
LOG.info("Running Client");
yarnClient.start();
//获得yarn集群的情况并输出
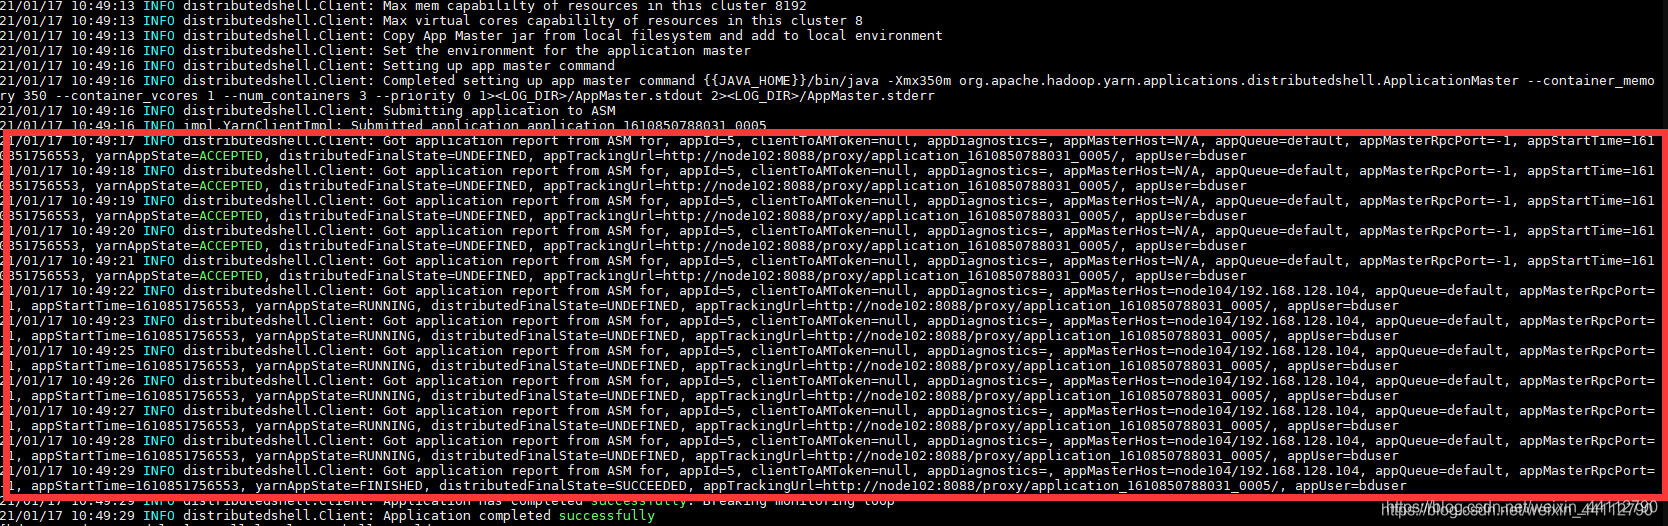
YarnClusterMetrics clusterMetrics = yarnClient.getYarnClusterMetrics();
LOG.info("Got Cluster metric info from ASM"
+ ", numNodeManagers=" + clusterMetrics.getNumNodeManagers());
//获得node的分布情况并输出
List<NodeReport> clusterNodeReports = yarnClient.getNodeReports(
NodeState.RUNNING);
LOG.info("Got Cluster node info from ASM");
for (NodeReport node : clusterNodeReports) {
LOG.info("Got node report from ASM for"
+ ", nodeId=" + node.getNodeId()
+ ", nodeAddress" + node.getHttpAddress()
+ ", nodeRackName" + node.getRackName()
+ ", nodeNumContainers" + node.getNumContainers());
}
//获得队列信息并输出
QueueInfo queueInfo = yarnClient.getQueueInfo(this.amQueue);
LOG.info("Queue info"
+ ", queueName=" + queueInfo.getQueueName()
+ ", queueCurrentCapacity=" + queueInfo.getCurrentCapacity()
+ ", queueMaxCapacity=" + queueInfo.getMaximumCapacity()
+ ", queueApplicationCount=" + queueInfo.getApplications().size()
+ ", queueChildQueueCount=" + queueInfo.getChildQueues().size());
这些信息在刚刚运行的日志中很容易找到
同样的经过很多参数的设置,比如下面这个AM的容器设置(其他的省略)
    // Set up the container launch context for the application master
    ContainerLaunchContext amContainer = ContainerLaunchContext.newInstance(
      localResources, env, commands, null, null, null);
      ...
    appContext.setAMContainerSpec(amContainer);
这些参数都记录到appContext,将它提交到YARN
    LOG.info("Submitting application to ASM");

    yarnClient.submitApplication(appContext);//提交

    // TODO
    // Try submitting the same request again
    // app submission failure?

    // Monitor the application
    return monitorApplication(appId);
提交之后还需要监视着任务的执行状态,并对状态做出相应的操纵
 private boolean monitorApplication(ApplicationId appId)
      throws YarnException, IOException {

    while (true) {

      // Check app status every 1 second.
      try {
        Thread.sleep(1000);
      } catch (InterruptedException e) {
        LOG.debug("Thread sleep in monitoring loop interrupted");
      }

      // Get application report for the appId we are interested in
      ApplicationReport report = yarnClient.getApplicationReport(appId);

	 ...//打印report:Got application report from ASM for ...

      YarnApplicationState state = report.getYarnApplicationState();
      FinalApplicationStatus dsStatus = report.getFinalApplicationStatus();
      if (YarnApplicationState.FINISHED == state) {
        if (FinalApplicationStatus.SUCCEEDED == dsStatus) {
          LOG.info("Application has completed successfully. Breaking monitoring loop");
          return true;
        }
        else {
          LOG.info("Application did finished unsuccessfully."
              + " YarnState=" + state.toString() + ", DSFinalStatus=" + dsStatus.toString()
              + ". Breaking monitoring loop");
          return false;
        }
      }
      else if (YarnApplicationState.KILLED == state	|| YarnApplicationState.FAILED == state) {...}

      if (System.currentTimeMillis() > (clientStartTime + clientTimeout)) {...}
    }

  }
接着之前的日志,不难发现重复打印很多的这一段就对应这里的report(1秒打印依次)
ApplicationMaster
这个类比较复杂,有三个内部类:两个回调处理类、一个多线程的Runnable
这也是hadoop官方强调YARN应用程序需要专业人员编写的原因之一。从官方文档中可以知道需要注意三个角色的交互:
- Client<–>ResourceManager
这个上面的client分析过了- ApplicationMaster<–>ResourceManager
此处对应AM的内部类RMCallbackHandler,实现AMRMClientAsync.CallbackHandler接口- ApplicationMaster<–>NodeManager
此处对应AM的内部类NMCallbackHandler,实现NMClientAsync.CallbackHandler接口
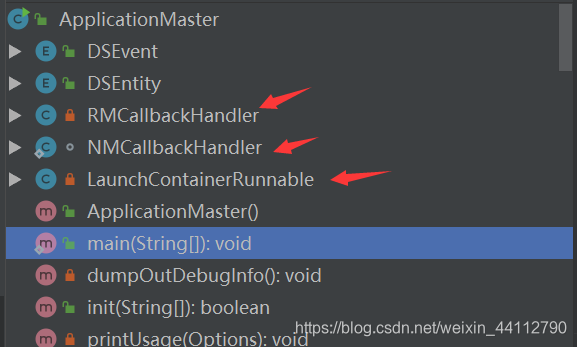
依旧先从main方法入手,发现main方法和Client的非常相似
 public static void main(String[] args) {
    boolean result = false;
    try {
      ApplicationMaster appMaster = new ApplicationMaster();
      LOG.info("Initializing ApplicationMaster");
      boolean doRun = appMaster.init(args);//初始化
      if (!doRun) {
        System.exit(0);
      }
      appMaster.run();//执行
      result = appMaster.finish();//等待执行结束获得结果
    } catch (Throwable t) {
      LOG.fatal("Error running ApplicationMaster", t);
      LogManager.shutdown();
      ExitUtil.terminate(1, t);
    }
    if (result) {
      LOG.info("Application Master completed successfully. exiting");
      System.exit(0);
    } else {
      LOG.info("Application Master failed. exiting");
      System.exit(2);
    }
  }
RMCallbackHandler
NMCallbackHandler
想了解更多,推荐阅读YARN编程实例—distributedshell源码分析