3.1.1 HADOOP框架
文章目录
四.Apache Hadoop 完全分布式集群搭建

4.1 虚拟机环境准备
- 三台虚拟机(静态IP,关闭防⽕墙,修改主机名,配置免密登录,集群时间同步)
- 在/opt⽬录下创建⽂件夹
mkdir -p /opt/lagou/software --软件安装包存放⽬录
mkdir -p /opt/lagou/servers --软件安装⽬录
- Hadoop下载地址:
https://archive.apache.org/dist/hadoop/common/hadoop-2.9.2/
Hadoop官⽹地址:
http://hadoop.apache.org/
- 上传hadoop安装⽂件到/opt/lagou/software
4.2 集群规划

4.3 安装Hadoop
- 登录linux121节点;进⼊/opt/lagou/software,解压安装⽂件到/opt/lagou/servers
tar -zxvf hadoop-2.9.2.tar.gz -C /opt/lagou/servers
- 查看是否解压成功
ll /opt/lagou/servers/hadoop-2.9.2
- 添加Hadoop到环境变量 vim /etc/profile
##HADOOP_HOME
export HADOOP_HOME=/opt/lagou/servers/hadoop-2.9.2
export PATH=$PATH:$HADOOP_HOME/bin
export PATH=$PATH:$HADOOP_HOME/sbin
- 使环境变量⽣效
source /etc/profile
- 验证hadoop
hadoop version

- hadoop⽬录
drwxr-xr-x. 2 root root 194 Nov 13 2018 bin
drwxr-xr-x. 3 root root 20 Nov 13 2018 etc
drwxr-xr-x. 2 root root 106 Nov 13 2018 include
drwxr-xr-x. 3 root root 20 Nov 13 2018 lib
drwxr-xr-x. 2 root root 239 Nov 13 2018 libexec
-rw-r--r--. 1 root root 106210 Nov 13 2018 LICENSE.txt
-rw-r--r--. 1 root root 15917 Nov 13 2018 NOTICE.txt
-rw-r--r--. 1 root root 1366 Nov 13 2018 README.txt
drwxr-xr-x. 3 root root 4096 Nov 13 2018 sbin
drwxr-xr-x. 4 root root 31 Nov 13 2018 share

1. bin⽬录:对Hadoop进⾏操作的相关命令,如hadoop,hdfs等
2. etc⽬录:Hadoop的配置⽂件⽬录,⼊hdfs-site.xml,core-site.xml等
3. lib⽬录:Hadoop本地库(解压缩的依赖)
4. sbin⽬录:存放的是Hadoop集群启动停⽌相关脚本,命令
5. share⽬录:Hadoop的⼀些jar,官⽅案例jar,⽂档等
4.3.1 集群配置
Hadoop集群配置 = HDFS集群配置 + MapReduce集群配置 + Yarn集群配置
- HDFS集群配置
- 将JDK路径明确配置给HDFS(修改hadoop-env.sh)
- 指定NameNode节点以及数据存储⽬录(修改core-site.xml)
- 指定SecondaryNameNode节点(修改hdfs-site.xml)
- 指定DataNode从节点(修改etc/hadoop/slaves⽂件,每个节点配置信息占⼀⾏)
- MapReduce集群配置
- 将JDK路径明确配置给MapReduce(修改mapred-env.sh)
- 指定MapReduce计算框架运⾏Yarn资源调度框架(修改mapred-site.xml)
- Yarn集群配置
- 将JDK路径明确配置给Yarn(修改yarn-env.sh)
- 指定ResourceManager⽼⼤节点所在计算机节点(修改yarn-site.xml)
- 指定NodeManager节点(会通过slaves⽂件内容确定)
集群配置具体步骤:
HDFS集群配置
cd /opt/lagou/servers/hadoop-2.9.2/etc/hadoop
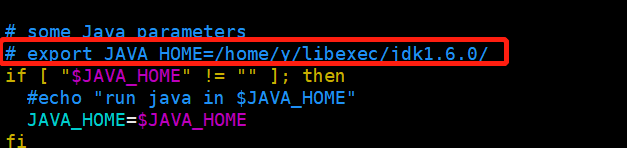
- 配置:hadoop-env.sh
将JDK路径明确配置给HDFS
vim hadoop-env.sh
将export JAVA_HOME=${JAVA_HOME} 改为:
export JAVA_HOME=/opt/lagou/servers/jdk1.8.0_231
- 指定NameNode节点以及数据存储⽬录(修改core-site.xml)
vim core-site.xml
<!-- 指定HDFS中NameNode的地址 -->
<property>
 <name>fs.defaultFS</name>
 <value>hdfs://linux121:9000</value>
</property>
<!-- 指定Hadoop运⾏时产⽣⽂件的存储⽬录 -->
<property>
 <name>hadoop.tmp.dir</name>
 <value>/opt/lagou/servers/hadoop-2.9.2/data/tmp</value>
</property>
- 指定secondarynamenode节点(修改hdfs-site.xml)
vim hdfs-site.xml
<!-- 指定Hadoop辅助名称节点主机配置 -->
<property>
 <name>dfs.namenode.secondary.http-address</name>
 <value>linux123:50090</value>
</property>
<!--副本数量 -->
<property>
 <name>dfs.replication</name>
 <value>3</value>
</property>
官⽅默认配置
https://hadoop.apache.org/docs/r2.9.2/hadoop-project-dist/hadoop-hdfs/hdfs-default.xml
- 指定datanode从节点(修改slaves⽂件,每个节点配置信息占⼀⾏)
vim slaves
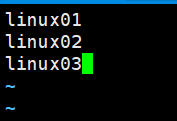
注意:该⽂件中添加的内容结尾不允许有空格,⽂件中不允许有空⾏。
MapReduce集群配置
- 指定MapReduce使⽤的jdk路径(修改mapred-env.sh)
vim mapred-env.sh

修改为
export JAVA_HOME=/opt/lagou/servers/jdk1.8.0_231
- 指定MapReduce计算框架运⾏Yarn资源调度框架(修改mapred-site.xml)
执行:
mv mapred-site.xml.template mapred-site.xml
vim mapred-site.xml
<configuration>

<!-- 指定MR运行在Yarn上 -->
<property>
         <name>mapreduce.framework.name</name>
         <value>yarn</value>
 </property>

</configuration>
== mapred-site.xml默认配置: ==
https://hadoop.apache.org/docs/r2.9.2/hadoop-mapreduce-client/hadoop-mapreduce-client-core/mapred-default.xml

Yarn集群配置
- 指定JDK路径
vim yarn-env.sh
修改为:
export JAVA_HOME=/opt/lagou/servers/jdk1.8.0_231
- 指定ResourceMnager的master节点信息(修改yarn-site.xml)
vim yarn-site.xml
<!-- 指定YARN的ResourceManager的地址 -->
<property>
 <name>yarn.resourcemanager.hostname</name>
 <value>linux123</value>
</property>
<!-- Reducer获取数据的方式 -->
<property>
 <name>yarn.nodemanager.aux-services</name>
 <value>mapreduce_shuffle</value>
</property>
yarn-site.xml的默认配置
https://hadoop.apache.org/docs/r2.9.2/hadoop-yarn/hadoop-yarn-common/yarn-default.xml
- 指定NodeManager节点(slaves⽂件已修改)
注意:
Hadoop安装⽬录所属⽤户和所属⽤户组信息,默认是501 dialout,⽽我们操作Hadoop集群的⽤户使
⽤的是虚拟机的root⽤户,
所以为了避免出现信息混乱,修改Hadoop安装⽬录所属⽤户和⽤户组!!
chown -R root:root /opt/lagou/servers/hadoop-2.9.2
4.3.2 分发配置
编写集群分发脚本rsync-script
- rsync 远程同步⼯具
rsync主要⽤于备份和镜像。具有速度快、避免复制相同内容和⽀持符号链接的优点。
rsync和scp区别:⽤rsync做⽂件的复制要⽐scp的速度快,rsync只对差异⽂件做更新。scp是把所有⽂件都复制过去。
ccp命令:scp -r hadoop-2.9.2/ linux02:/opt/lagou/servers/
- 基本语法
rsync -rvl $pdir/$fname $user@$host:$pdir/$fname
命令 :选项参数 要拷⻉的⽂件路径/名称 ⽬的⽤户@主机:⽬的路径/名称
- 选项参数说明

- rsync案例
- 三台虚拟机安装rsync (执⾏安装需要保证机器联⽹)
[root@linux121 ~]# yum install -y rsync
- 把linux121机器上的/opt/lagou/software⽬录同步到linux122服务器的root⽤户下的/opt/⽬录
[root@linux121 opt]$ rsync -rvl /opt/lagou/software/ root@linux122:/opt/lagou/software

- 集群分发脚本编写
- 需求:循环复制⽂件到集群所有节点的相同⽬录下
rsync命令原始拷⻉:
rsync -rvl /opt/module root@linux123:/opt/
- 期望脚本
脚本+要同步的⽂件名称 - 说明:在/usr/local/bin这个⽬录下存放的脚本,root⽤户可以在系统任何地⽅直接执⾏。
- 脚本实现
(1)在/usr/local/bin⽬录下创建⽂件rsync-script,⽂件内容如下:
[root@linux121 bin]$ touch rsync-script
[root@linux121 bin]$ vim rsync-script
在⽂件中编写shell代码
#!/bin/bash
#1 获取命令输入参数的个数,如果个数为0,直接退出命令
paramnum=$#
if((paramnum==0));
then
	echo no params;
exit;
fi
#2 根据传入参数获取⽂件名称
p1=$1
file_name=`basename $p1`
echo fname=$file_name
#3 获取输入参数的绝对路径
pdir=`cd -P $(dirname $p1); pwd`
echo pdir=$pdir
#4 获取用户名称
user=`whoami`
#5 循环执行rsync
for((host=1; host<4; host++));
do
echo ------------------- linux$host --------------
 rsync -rvl $pdir/$file_name $user@linux0$host:$pdir
done
(2)修改脚本 rsync-script 具有执⾏权限
[root@linux121 bin]$ chmod 777 rsync-script
(3)调⽤脚本形式:rsync-script ⽂件名称
[root@linux121 bin]$ rsync-script /home/root/bin
(4) 调⽤脚本分发Hadoop安装⽬录到其它节点
[root@linux121 bin]$ rsync-script /opt/lagou/servers/hadoop-2.9.2
4.4启动集群
注意:如果集群是第⼀次启动,需要在Namenode所在节点格式化NameNode,⾮第⼀次不⽤执⾏格式化Namenode操作!!
4.4.1 单节点启动
[root@linux121 hadoop-2.9.2]$ hadoop namenode -format

格式化后创建的⽂件:/opt/lagou/servers/hadoop-2.9.2/data/tmp/dfs/name/current

- 在linux121上启动NameNode
[root@linux121 hadoop-2.9.2]$ hadoop-daemon.sh start namenode
[root@linux121 hadoop-2.9.2]$ jps

- 在linux121、linux122以及linux123上分别启动DataNode
[root@linux121 hadoop-2.9.2]$ hadoop-daemon.sh start datanode
[root@linux121 hadoop-2.9.2]$ jps
3461 NameNode
3608 Jps
3561 DataNode

#到这个目录下执行 :cd /opt/lagou/servers/hadoop-2.9.2/sbin
或者配件另外两台Hadoop环境变量:vim /etc/profile
[root@linux122 hadoop-2.9.2]$ hadoop-daemon.sh start datanode
[root@linux122 hadoop-2.9.2]$ jps
3190 DataNode
3279 Jps
[root@linux123 hadoop-2.9.2]$ hadoop-daemon.sh start datanode
[root@linux123 hadoop-2.9.2]$ jps
3237 Jps
3163 DataNode

- web端查看Hdfs界⾯
http://linux121:50070/dfshealth.html#tab-overview
小插曲:云服务器中需要添加防火墙TCP端口50070 才能够正常访问


vim /etc/hosts 需要配置外网对应映射
113.31.113.28 linux01
113.31.111.188 linux02
113.31.112.223 linux03

查看HDFS集群正常节点:

- Yarn集群单节点启动
[root@linux123 servers]# yarn-daemon.sh start resourcemanager
[root@linux123 servers]# jps
7881 ResourceManager
8094 Jps
[root@linux122 servers]# yarn-daemon.sh start nodemanager
[root@linux122 servers]# jps
8166 NodeManager
8223 Jps
[root@linux121 servers]# yarn-daemon.sh start nodemanager
[root@linux121 servers]# jps
8166 NodeManager
8223 Jps
- 思考:Hadoop集群每次需要⼀个⼀个节点的启动,如果节点数增加到成千上万个怎么办?
4.4.2 集群群起
- 如果已经单节点⽅式启动了Hadoop,可以先停⽌之前的启动的Namenode与Datanode进程,如果之前Namenode没有执⾏格式化,这⾥需要执⾏格式化!!!
之前执行过不能重复执行
hadoop namenode -format
- 启动HDFS
[root@linux121 hadoop-2.9.2]$ sbin/start-dfs.sh
[root@linux121 hadoop-2.9.2]$ jps
4166 NameNode
4482 Jps
4263 DataNode
- 启动YARN
[root@linux123 hadoop-2.9.2]$ sbin/start-yarn.sh
注意:NameNode和ResourceManger不是在同⼀台机器,不能在NameNode上启动 YARN,应该在ResouceManager所在的机器上启动YARN。
4.4.3 Hadoop集群启动停⽌命令汇总
都是在cd /opt/lagou/servers/hadoop-2.9.2/sbin/ 目录下执行
- 各个服务组件逐⼀启动/停⽌
(1)分别启动/停⽌HDFS组件
hadoop-daemon.sh start / stop namenode / datanode / secondarynamenode
(2)启动/停⽌YARN
yarn-daemon.sh start / stop resourcemanager / nodemanager
- 各个模块分开启动/停⽌(配置ssh是前提)常⽤
(1)整体启动/停⽌HDFS
start-dfs.sh / stop-dfs.sh
(2)整体启动/停⽌YARN
start-yarn.sh / stop-yarn.sh
4.5 集群测试
- HDFS 分布式存储初体验
从linux本地⽂件系统上传下载⽂件验证HDFS集群⼯作正常
#本地root⽬录下创建⼀个⽂件
cd /root
vim test.txt
文件内容:hello hdfs

hdfs dfs -mkdir -p /test/input

#上传linxu⽂件到Hdfs
hdfs dfs -put /root/test.txt /test/input
#从Hdfs下载⽂件到linux本地
hdfs dfs -get /test/input/test.txt


2. MapReduce 分布式计算初体验
- 在HDFS⽂件系统根⽬录下⾯创建⼀个wcinput⽂件夹
[root@linux121 hadoop-2.9.2]$ hdfs dfs -mkdir /wcinput
- 在/root/⽬录下创建⼀个wc.txt⽂件(本地⽂件系统)
[root@linux121 hadoop-2.9.2]$ cd /root/
[root@linux121 wcinput]$ touch wc.txt
- 编辑wc.txt⽂件
[root@linux121 wcinput]$ vi wc.txt
- 在⽂件中输⼊如下内容
hadoop mapreduce yarn
hdfs hadoop mapreduce
mapreduce yarn lagou
lagou
lagou
- 保存退出
esc按键后
: wq!
- 上传wc.txt到Hdfs⽬录/wcinput下
hdfs dfs -put wc.txt /wcinput
- 回到Hadoop⽬录/opt/lagou/servers/hadoop-2.9.2
- 执⾏程序
[root@linux121 hadoop-2.9.2]$ hadoop jar /opt/lagou/servers/hadoop-2.9.2/share/hadoop/mapreduce/hadoop-mapreduce-examples-2.9.2.jar wordcount /wcinput /wcoutput

- 查看结果
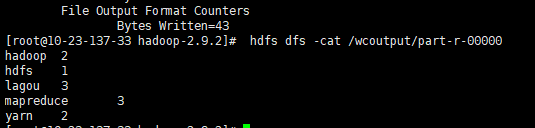
[root@linux121 hadoop-2.9.2]$ hdfs dfs -cat /wcoutput/part-r-00000
hadoop 2
hdfs 1
lagou 3
mapreduce 3
yarn 2
4.6 配置历史服务器
在Yarn中运⾏的任务产⽣的⽇志数据不能查看,为了查看程序的历史运⾏情况,需要配置⼀下历史⽇志服务器。具体配置步骤如下:
- 配置mapred-site.xml
[root@linux121 hadoop]$ vi mapred-site.xml
在该⽂件⾥⾯增加如下配置。
<!-- 历史服务器端地址 -->
<property>
 <name>mapreduce.jobhistory.address</name>
 <value>linux01:10020</value>
</property>
<!-- 历史服务器web端地址 -->
<property>
 <name>mapreduce.jobhistory.webapp.address</name>
 <value>linux01:19888</value>
</property>
- 分发mapred-site.xml到其它节点
rsync-script mapred-site.xml
- 启动历史服务器
[root@linux121 hadoop-2.9.2]$ sbin/mr-jobhistory-daemon.sh start historyserver
- 查看历史服务器是否启动
[root@linux121 hadoop-2.9.2]$ jps
- 查看JobHistory
http://linux121:19888/jobhistory

4.6.1 配置⽇志的聚集
⽇志聚集:应⽤(Job)运⾏完成以后,将应⽤运⾏⽇志信息从各个task汇总上传到HDFS系统上。
⽇志聚集功能好处:可以⽅便的查看到程序运⾏详情,⽅便开发调试。
注意:开启⽇志聚集功能,需要重新启动NodeManager 、ResourceManager和HistoryManager。
开启⽇志聚集功能具体步骤如下:
- 配置yarn-site.xml
[root@linux121 hadoop]$ vi yarn-site.xml
在该⽂件⾥⾯增加如下配置。
<!-- 日志聚集功能使能 -->
<property>
	<name>yarn.log-aggregation-enable</name>
	<value>true</value>
</property>
<!-- 日志保留时间设置7天 -->
<property>
	<name>yarn.log-aggregation.retain-seconds</name>
	<value>604800</value>
</property>
- 分发yarn-site.xml到集群其它节点
[root@10-23-137-33 hadoop]# rsync-script yarn-site.xml
- 关闭NodeManager 、ResourceManager和HistoryManager
[root@linux123 hadoop-2.9.2]$ sbin/yarn-daemon.sh stop resourcemanager
[root@linux123 hadoop-2.9.2]$ sbin/yarn-daemon.sh stop nodemanager
[root@linux121 hadoop-2.9.2]$ sbin/mr-jobhistory-daemon.sh stop historyserver
- 启动NodeManager 、ResourceManager和HistoryManager
[root@linux123 hadoop-2.9.2]$ sbin/yarn-daemon.sh start resourcemanager
[root@linux123 hadoop-2.9.2]$ sbin/yarn-daemon.sh start nodemanager
[root@linux121 hadoop-2.9.2]$ sbin/mr-jobhistory-daemon.sh start historyserver
- 删除HDFS上已经存在的输出⽂件
[root@linux121 hadoop-2.9.2]$ bin/hdfs dfs -rm -R /wcoutput
- 执⾏WordCount程序
[root@linux121 hadoop-2.9.2]$ hadoop jar share/hadoop/mapreduce/hadoop-mapreduce-examples-2.9.2.jar wordcount /wcinput /wcoutput

- 查看⽇志,如图所示
http://linux121:19888/jobhistory


五、 HDFS分布式⽂件系统
5.1 HDFS 简介
HDFS (全称:Hadoop Distribute File System,Hadoop 分布式⽂件系统)是 Hadoop 核⼼组成,是分布式存储服务。
分布式⽂件系统横跨多台计算机,在⼤数据时代有着⼴泛的应⽤前景,它们为存储和处理超⼤规模数据提供所需的扩展能⼒。
HDFS是分布式⽂件系统中的⼀种。
5.2 HDFS的重要概念
HDFS 通过统⼀的命名空间⽬录树来定位⽂件; 另外,它是分布式的,由很多服务器联合起来实现其功能,集群中的服务器有各⾃的⻆⾊(分布式本质是拆分,各司其职);
- 典型的 Master/Slave 架构
HDFS 的架构是典型的 Master/Slave 结构。
HDFS集群往往是⼀个NameNode(HA架构会有两个NameNode,联邦机制)+多个DataNode组成;
NameNode是集群的主节点,DataNode是集群的从节点。 - 分块存储(block机制)
HDFS 中的⽂件在物理上是分块存储(block)的,块的⼤⼩可以通过配置参数来规定;
Hadoop2.x版本中默认的block⼤⼩是128M; - 命名空间(NameSpace)
HDFS ⽀持传统的层次型⽂件组织结构。⽤户或者应⽤程序可以创建⽬录,然后将⽂件保存在这些⽬录⾥。⽂件系统名字空间的层次结构和⼤多数现有的⽂件系统类似:⽤户可以创建、删除、移动或重命名⽂件。
Namenode 负责维护⽂件系统的名字空间,任何对⽂件系统名字空间或属性的修改都将被Namenode 记录下来。
HDFS提供给客户单⼀个抽象⽬录树,访问形式:hdfs://namenode的hostname:port/test/input
hdfs://linux121:9000/test/input - NameNode元数据管理
我们把⽬录结构及⽂件分块位置信息叫做元数据。
NameNode的元数据记录每⼀个⽂件所对应的block信息(block的id,以及所在的DataNode节点的信息) - DataNode数据存储
⽂件的各个 block 的具体存储管理由 DataNode 节点承担。⼀个block会有多个DataNode来存储,DataNode会定时向NameNode来汇报⾃⼰持有的block信息。 - 副本机制
为了容错,⽂件的所有 block 都会有副本。每个⽂件的 block ⼤⼩和副本系数都是可配置的。应⽤程序可以指定某个⽂件的副本数⽬。副本系数可以在⽂件创建的时候指定,也可以在之后改变。副本数量默认是3个。 - ⼀次写⼊,多次读出
HDFS 是设计成适应⼀次写⼊,多次读出的场景,且不⽀持⽂件的随机修改。 (⽀持追加写⼊,不
只⽀持随机更新)
正因为如此,HDFS 适合⽤来做⼤数据分析的底层存储服务,并不适合⽤来做⽹盘等应⽤(修改不⽅便,延迟⼤,⽹络开销⼤,成本太⾼)
5.3 HDFS 架构

- NameNode(nn):Hdfs集群的管理者,Master
··维护管理Hdfs的名称空间(NameSpace)
··维护副本策略
··记录⽂件块(Block)的映射信息
··负责处理客户端读写请求 - DataNode:NameNode下达命令,DataNode执⾏实际操作,Slave节点。
·· 保存实际的数据块
·· 负责数据块的读写 - Client:客户端
·· 上传⽂件到HDFS的时候,Client负责将⽂件切分成Block,然后进⾏上传
·· 请求NameNode交互,获取⽂件的位置信息
·· 读取或写⼊⽂件,与DataNode交互
·· Client可以使⽤⼀些命令来管理HDFS或者访问HDFS

5.4 HDFS 客户端操作
5.4.1 Shell 命令⾏操作HDFS
- 基本语法
bin/hadoop fs 具体命令 OR bin/hdfs dfs 具体命令
- 命令⼤全
[root@linux121 hadoop-2.9.2]# bin/hdfs dfs
Usage: hadoop fs [generic options]
 [-appendToFile <localsrc> ... <dst>]
 [-cat [-ignoreCrc] <src> ...]
 [-checksum <src> ...]
 [-chgrp [-R] GROUP PATH...]
 [-chmod [-R] <MODE[,MODE]... | OCTALMODE> PATH...]
 [-chown [-R] [OWNER][:[GROUP]] PATH...]
 [-copyFromLocal [-f] [-p] [-l] [-d] <localsrc> ... <dst>]
 [-copyToLocal [-f] [-p] [-ignoreCrc] [-crc] <src> ... <localdst>]
 [-count [-q] [-h] [-v] [-t [<storage type>]] [-u] [-x] <path> ...]
 [-cp [-f] [-p | -p[topax]] [-d] <src> ... <dst>]
 [-createSnapshot <snapshotDir> [<snapshotName>]]
 [-deleteSnapshot <snapshotDir> <snapshotName>]
 [-df [-h] [<path> ...]]
 [-du [-s] [-h] [-x] <path> ...]
 [-expunge]
 [-find <path> ... <expression> ...]
 [-get [-f] [-p] [-ignoreCrc] [-crc] <src> ... <localdst>]
 [-getfacl [-R] <path>]
 [-getfattr [-R] {-n name | -d} [-e en] <path>]
 [-getmerge [-nl] [-skip-empty-file] <src> <localdst>]
 [-help [cmd ...]]
 [-ls [-C] [-d] [-h] [-q] [-R] [-t] [-S] [-r] [-u] [<path> ...]]
 [-mkdir [-p] <path> ...]
 [-moveFromLocal <localsrc> ... <dst>]
 [-moveToLocal <src> <localdst>]
 [-mv <src> ... <dst>]
 [-put [-f] [-p] [-l] [-d] <localsrc> ... <dst>]
 [-renameSnapshot <snapshotDir> <oldName> <newName>]
 [-rm [-f] [-r|-R] [-skipTrash] [-safely] <src> ...]
 [-rmdir [--ignore-fail-on-non-empty] <dir> ...]
 [-setfacl [-R] [{-b|-k} {-m|-x <acl_spec>} <path>]|[--set <acl_spec>
<path>]]
 [-setfattr {-n name [-v value] | -x name} <path>]
 [-setrep [-R] [-w] <rep> <path> ...]
 [-stat [format] <path> ...]
 [-tail [-f] <file>]
 [-test -[defsz] <path>]
 [-text [-ignoreCrc] <src> ...]
 [-touchz <path> ...]
 [-truncate [-w] <length> <path> ...]
 [-usage [cmd ...]]
Generic options supported are:
-conf <configuration file> specify an application configuration file
-D <property=value> define a value for a given property
-fs <file:///|hdfs://namenode:port> specify default filesystem URL to use,
overrides 'fs.defaultFS' property from configurations.
-jt <local|resourcemanager:port> specify a ResourceManager
-files <file1,...> specify a comma-separated list of files to
be copied to the map reduce cluster
-libjars <jar1,...> specify a comma-separated list of jar files
to be included in the classpath
-archives <archive1,...> specify a comma-separated list of archives
to be unarchived on the compute machines
3.HDFS命令演示
- 启动Hadoop集群(⽅便后续的测试)
[root@linux121 hadoop-2.9.2]$ sbin/start-dfs.sh
[root@linux122 hadoop-2.9.2]$ sbin/start-yarn.sh
- -help:输出这个命令参数
[root@linux121 hadoop-2.9.2]$ hadoop fs -help rm
- -ls: 显示⽬录信息
[root@linux121 hadoop-2.9.2]$ hadoop fs -ls /
- -mkdir:在HDFS上创建⽬录
[root@linux121 hadoop-2.9.2]$ hadoop fs -mkdir -p /lagou/bigdata
- -moveFromLocal:从本地剪切粘贴到HDFS
[root@linux121 hadoop-2.9.2]$ touch hadoop.txt
[root@linux121 hadoop-2.9.2]$ hadoop fs -moveFromLocal ./hadoop.txt
/lagou/bigdata
- -appendToFile:追加⼀个⽂件到已经存在的⽂件末尾
[root@linux121 hadoop-2.9.2]$ touch hdfs.txt
[root@linux121 hadoop-2.9.2]$ vim hdfs.txt

输⼊:namenode datanode block replication
[root@linux121 hadoop-2.9.2]$ hadoop fs -appendToFile hdfs.txt /lagou/bigdata/hadoop.txt
- -cat:显示⽂件内容
[root@linux121 hadoop-2.9.2]$ hadoop fs -cat /lagou/bigdata/hadoop.txt
- -chgrp 、-chmod、-chown:Linux⽂件系统中的⽤法⼀样,修改⽂件所属权限
[root@linux121 hadoop-2.9.2]$ hadoop fs -chmod 666 /lagou/bigdata/hadoop.txt
[root@linux121 hadoop-2.9.2]$ hadoop fs -chown root:root /lagou/bigdata/hadoop.txt
- -copyFromLocal:从本地⽂件系统中拷⻉⽂件到HDFS路径去
[root@linux121 hadoop-2.9.2]$ hadoop fs -copyFromLocal README.txt /
- -copyToLocal:从HDFS拷⻉到本地
[root@linux121 hadoop-2.9.2]$ hadoop fs -copyToLocal /lagou/bigdata/hadoop.txt/
- -cp :从HDFS的⼀个路径拷⻉到HDFS的另⼀个路径
[root@linux121 hadoop-2.9.2]$ hadoop fs -cp /lagou/bigdata/hadoop.txt /hdfs.txt
- -mv:在HDFS⽬录中移动⽂件
[root@linux121 hadoop-2.9.2]$ hadoop fs -mv /hdfs.txt /lagou/bigdata/
- -get:等同于copyToLocal,就是从HDFS下载⽂件到本地
[root@linux121 hadoop-2.9.2]$ hadoop fs -get /lagou/bigdata/hadoop.txt ./
- -put:等同于copyFromLocal
[root@linux121 hadoop-2.9.2]$ hadoop fs -mkdir -p /user/root/test/
#本地⽂件系统创建yarn.txt
[root@linux121 hadoop-2.9.2]$ vim yarn.txt
输入:resourcemanager nodemanager
[root@linux121 hadoop-2.9.2]$ hadoop fs -put ./yarn.txt /user/root/test/
- -tail:显示⼀个⽂件的末尾
[root@linux121 hadoop-2.9.2]$ hadoop fs -tail /user/root/test/yarn.txt
- -rm:删除⽂件或⽂件夹
[root@linux121 hadoop-2.9.2]$ hadoop fs -rm /user/root/test/yarn.txt
- -rmdir:删除空⽬录
[root@linux121 hadoop-2.9.2]$ hadoop fs -mkdir /test
[root@linux121 hadoop-2.9.2]$ hadoop fs -rmdir /test
- -du统计⽂件夹的⼤⼩信息
[root@linux121 hadoop-2.9.2]$ hadoop fs -du -s -h /user/root/test
[root@linux121 hadoop-2.9.2]$ hadoop fs -du -h /user/root/test

- -setrep:设置HDFS中⽂件的副本数量
[root@linux121 hadoop-2.9.2]$ hadoop fs -setrep 10 /lagou/bigdata/hadoop.txt
图3-3 HDFS副本数量
这⾥设置的副本数只是记录在NameNode的元数据中,是否真的会有这么多副本,还得看DataNode的
数量。因为⽬前只有3台设备,最多也就3个副本,只有节点数的增加到10台时,副本数才能达到10。

5.4.2 JAVA客户端
5.4.2.1 客户端环境准备
- 将Hadoop-2.9.2安装包解压到⾮中⽂路径(例如:E:\hadoop-2.9.2)。

- 配置HADOOP_HOME环境变量

- 配置Path环境变量。

- 创建⼀个Maven⼯程ClientDemo
- 导⼊相应的依赖坐标+⽇志配置⽂件
<dependencies>
  <dependency>
    <groupId>junit</groupId>
    <artifactId>junit</artifactId>
    <version>RELEASE</version>
  </dependency>
  <dependency>
    <groupId>org.apache.logging.log4j</groupId>
    <artifactId>log4j-core</artifactId>
    <version>2.8.2</version>
  </dependency>
  <dependency>
    <groupId>org.apache.hadoop</groupId>
    <artifactId>hadoop-common</artifactId>
    <version>2.9.2</version>
  </dependency>
  <!-- https://mvnrepository.com/artifact/org.apache.hadoop/hadoop-client -->
  <dependency>
    <groupId>org.apache.hadoop</groupId>
    <artifactId>hadoop-client</artifactId>
    <version>2.9.2</version>
  </dependency>
  <!-- https://mvnrepository.com/artifact/org.apache.hadoop/hadoop-hdfs
-->
  <dependency>
    <groupId>org.apache.hadoop</groupId>
    <artifactId>hadoop-hdfs</artifactId>
    <version>2.9.2</version>
  </dependency>
</dependencies>
为了便于控制程序运⾏打印的⽇志数量,需要在项⽬的src/main/resources⽬录下,新建⼀个⽂件,命名为“log4j.properties”,⽂件内容:
log4j.rootLogger=INFO, stdout
log4j.appender.stdout=org.apache.log4j.ConsoleAppender
log4j.appender.stdout.layout=org.apache.log4j.PatternLayout
log4j.appender.stdout.layout.ConversionPattern=%d %p [%c] - %m%n
log4j.appender.logfile=org.apache.log4j.FileAppender
log4j.appender.logfile.File=target/spring.log
log4j.appender.logfile.layout=org.apache.log4j.PatternLayout
log4j.appender.logfile.layout.ConversionPattern=%d %p [%c] - %m%n
- 创建包名:com.lagou.hdfs
- 创建HdfsClient类
public class HdfsClient{


 @Test
 public void testMkdirs() throws IOException, InterruptedException,
URISyntaxException {


 // 1 获取⽂件系统
 Configuration configuration = new Configuration();
 // 配置在集群上运⾏
 // configuration.set("fs.defaultFS", "hdfs://linux121:9000");
 // FileSystem fs = FileSystem.get(configuration);
 FileSystem fs = FileSystem.get(new URI("hdfs://linux121:9000"),
configuration, "root");
 // 2 创建⽬录
 fs.mkdirs(new Path("/test"));
 // 3 关闭资源
 fs.close();
 } }
遇到问题:
如果不指定操作HDFS集群的⽤户信息,默认是获取当前操作系统的⽤户信息,出现权限被拒绝的问题,报错如下:

5.4.2.2 HDFS的API操作
1 上传⽂件
- 编写源代码
@Test
    public void testCopyFromLocalFile()
        throws IOException, InterruptedException, URISyntaxException {


        // 1 获取文件系统
        Configuration configuration = new Configuration();
        configuration.set("dfs.replication", "2");

        FileSystem fs = FileSystem.get(new URI("hdfs://linux121:9000"),
                configuration, "root");
        // 2 上传文件
        fs.copyFromLocalFile(new Path("e:/lagou.txt"), new Path("/lagou.txt"));
        // 3 关闭资源
        fs.close();
        System.out.println("end");
    }
允许报如下错误:Windows下将winutils.exe 放在Hadoop的bin目录下

- 将hdfs-site.xml拷⻉到项⽬的根⽬录下(resources下面)
<?xml version="1.0" encoding="UTF-8"?>
<?xml-stylesheet type="text/xsl" href="configuration.xsl"?>

<configuration>
     <property>
         <name>dfs.replication</name>
         <value>1</value>
     </property>
</configuration>
- 参数优先级
参数优先级排序:(1)代码中设置的值 >(2)⽤户⾃定义配置⽂件 >(3)服务器的默认配置
2 下载⽂件
@Test
    public void testCopyToLocalFile()
        throws IOException, InterruptedException, URISyntaxException {


        // 1 获取⽂件系统
        Configuration configuration = new Configuration();
        FileSystem fs = FileSystem.get(new URI("hdfs://linux121:9000"),
                configuration, "root");

        // 2 执⾏下载操作
        // boolean delSrc 指是否将原⽂件删除
        // Path src 指要下载的⽂件路径
        // Path dst 指将⽂件下载到的路径
        // boolean useRawLocalFileSystem 是否开启⽂件校验
        fs.copyToLocalFile(false, new Path("/lagou.txt"),
            new Path("e:/lagou_copy.txt"), true);
        // 3 关闭资源
        fs.close();
    }
3 删除⽂件/⽂件夹
@Test
    public void testDelete()
        throws IOException, InterruptedException, URISyntaxException {


        // 1 获取⽂件系统
        Configuration configuration = new Configuration();
        FileSystem fs = FileSystem.get(new URI("hdfs://linux121:9000"),
                configuration, "root");

        // 2 执⾏删除
        fs.delete(new Path("/api_test/"), true);

        // 3 关闭资源
        fs.close();
    }
4 查看⽂件名称、权限、⻓度、块信息
 @Test
    public void testListFiles()
        throws IOException, InterruptedException, URISyntaxException {


        // 1获取⽂件系统
        Configuration configuration = new Configuration();
        FileSystem fs = FileSystem.get(new URI("hdfs://linux121:9000"),
                configuration, "root");

        // 2 获取⽂件详情
        RemoteIterator<LocatedFileStatus> listFiles = fs.listFiles(new Path("/"),
                true);

        while (listFiles.hasNext()) {


            LocatedFileStatus status = listFiles.next();

            // 输出详情
            // ⽂件名称
            System.out.println(status.getPath().getName());
            // ⻓度
            System.out.println(status.getLen());
            // 权限
            System.out.println(status.getPermission());
            // 分组
            System.out.println(status.getGroup());

            // 获取存储的块信息
            BlockLocation[] blockLocations = status.getBlockLocations();

            for (BlockLocation blockLocation : blockLocations) {


                // 获取块存储的主机节点
                String[] hosts = blockLocation.getHosts();

                for (String host : hosts) {


                    System.out.println(host);
                }
            }

            System.out.println("-----------华丽的分割线----------");
        }

        // 3 关闭资源
        fs.close();
    }
5 ⽂件夹判断
@Test
    public void testListStatus()
        throws IOException, InterruptedException, URISyntaxException {


        // 1 获取⽂件配置信息
        Configuration configuration = new Configuration();
        FileSystem fs = FileSystem.get(new URI("hdfs://linux121:9000"),
                configuration, "root");

        // 2 判断是⽂件还是⽂件夹
        FileStatus[] listStatus = fs.listStatus(new Path("/"));

        for (FileStatus fileStatus : listStatus) {


            // 如果是⽂件
            if (fileStatus.isFile()) {


                System.out.println("f:" + fileStatus.getPath().getName());
            } else {


                System.out.println("d:" + fileStatus.getPath().getName());
            }
        }

        // 3 关闭资源
        fs.close();
    }
6 I/O流操作HDFS
以上我们使⽤的API操作都是HDFS系统框架封装好的。我们⾃⼰也可以采⽤IO流的⽅式实现⽂件的上传和下载。
6.1 ⽂件上传
- 需求:把本地e盘上的lagou.txt⽂件上传到HDFS根⽬录
- 编写代码
 @Test
    public void putFileToHDFS()
        throws IOException, InterruptedException, URISyntaxException {


        // 1 获取⽂件系统
        Configuration configuration = new Configuration();
        FileSystem fs = FileSystem.get(new URI("hdfs://linux121:9000"),
                configuration, "root");

        // 2 创建输⼊流
        FileInputStream fis = new FileInputStream(new File("e:/lagou.txt"));

        // 3 获取输出流
        FSDataOutputStream fos = fs.create(new Path("/lagou_io.txt"));
        // 4 流对拷
        IOUtils.copyBytes(fis, fos, configuration);
        // 5 关闭资源
        IOUtils.closeStream(fos);
        IOUtils.closeStream(fis);
        fs.close();
    }
6.2 ⽂件下载
- 需求:从HDFS上下载lagou.txt⽂件到本地e盘上
- 编写代码
//文件下载
@Test
    public void getFileFromHDFS()
        throws IOException, InterruptedException, URISyntaxException {


        // 1 获取⽂件系统
        Configuration configuration = new Configuration();
        FileSystem fs = FileSystem.get(new URI("hdfs://linux121:9000"),
                configuration, "root");

        // 2 获取输⼊流
        FSDataInputStream fis = fs.open(new Path("/lagou_io.txt"));

        // 3 获取输出流
        FileOutputStream fos = new FileOutputStream(new File(
                    "e:/lagou_io_copy.txt"));

        // 4 流的对拷
        IOUtils.copyBytes(fis, fos, configuration);

        // 5 关闭资源
        IOUtils.closeStream(fos);
        IOUtils.closeStream(fis);
        fs.close();
    }
6.3 seek 定位读取
- 需求:将HDFS上的lagou.txt的内容在控制台输出两次
- 编写代码
 @Test
    public void readFileSeek2()
        throws IOException, InterruptedException, URISyntaxException {


        // 1 获取⽂件系统
        Configuration configuration = new Configuration();
        FileSystem fs = FileSystem.get(new URI("hdfs://linux121:9000"),
                configuration, "root");

        // 2 打开输⼊流,读取数据输出到控制台
        FSDataInputStream in = null;

        try {


            in = fs.open(new Path("/lagou.txt"));
            IOUtils.copyBytes(in, System.out, 4096, false);
            in.seek(0); //从头再次读取
            IOUtils.copyBytes(in, System.out, 4096, false);
        } finally {


            IOUtils.closeStream(in);
        }
    }
- 注意
windows解压安装Hadoop后,在调⽤相关API操作HDFS集群时可能会报错,这是由于Hadoop安装缺少windows操作系统相关⽂件所致,如下图:

解决⽅案:
从资料⽂件夹中找到winutils.exe拷⻉放到windows系统Hadoop安装⽬录的bin⽬录下即可!! - HDFS⽂件系统权限问题
hdfs的⽂件权限机制与linux系统的⽂件权限机制类似!!
r:read w:write x:execute 权限x对于⽂件表示忽略,对于⽂件夹表示是否有权限访问其内容如果linux系统⽤户zhangsan使⽤hadoop命令创建⼀个⽂件,那么这个⽂件在HDFS当中的owner就是zhangsan
HDFS⽂件权限的⽬的,防⽌好⼈做错事,⽽不是阻⽌坏⼈做坏事。HDFS相信你告诉我你是谁,你就是谁!! - 解决⽅案
·· 指定⽤户信息获取FileSystem对象
·· 关闭HDFS集群权限校验
vim hdfs-site.xml

#添加如下属性
<property>
 <name>dfs.permissions.enabled</name>
 <value>false</value>
</property>
修改完成之后要分发到其它节点,同时要重启HDFS集群
·· 基于HDFS权限本身⽐较鸡肋的特点,我们可以彻底放弃HDFS的权限校验,如果⽣产环境中
我们可以考虑借助kerberos以及sentry等安全框架来管理⼤数据集群安全。所以我们直接修
改HDFS的根⽬录权限为777
hadoop fs -chmod -R 777 /
参考代码
package com.lagou.hdfs;

import org.apache.hadoop.conf.Configuration;
import org.apache.hadoop.fs.*;
import org.apache.hadoop.io.IOUtils;
import org.junit.Test;

import java.io.File;
import java.io.FileInputStream;
import java.io.FileOutputStream;
import java.io.IOException;
import java.net.URI;
import java.net.URISyntaxException;


public class HdfsClient {


    @Test
    public void testMkdirs() throws IOException, InterruptedException,
            URISyntaxException {


        // 1 获取⽂件系统
        Configuration configuration = new Configuration();
        // 配置在集群上运⾏
        // configuration.set("fs.defaultFS", "hdfs://linux01:9000");
        // FileSystem fs = FileSystem.get(configuration);
        FileSystem fs = FileSystem.get(new URI("hdfs://linux01:9000"),
                configuration, "root");
        // 2 创建⽬录
        fs.mkdirs(new Path("/test1"));
        // 3 关闭资源
        fs.close();
    }

    /**
     * 上传⽂件
     * @throws IOException
     * @throws InterruptedException
     * @throws URISyntaxException
     */
    @Test
    public void testCopyFromLocalFile()
            throws IOException, InterruptedException, URISyntaxException {


        // 1 获取文件系统
        Configuration configuration = new Configuration();
        configuration.set("dfs.replication", "2");

        FileSystem fs = FileSystem.get(new URI("hdfs://linux01:9000"),
                configuration, "root");
        // 2 上传文件
        fs.copyFromLocalFile(new Path("e:/lagou.txt"), new Path("/lagou.txt"));
        // 3 关闭资源
        fs.close();
        System.out.println("end");
    }

    /**
     * 下载⽂件
     * @throws IOException
     * @throws InterruptedException
     * @throws URISyntaxException
     */
    @Test
    public void testCopyToLocalFile()
            throws IOException, InterruptedException, URISyntaxException {


        // 1 获取⽂件系统
        Configuration configuration = new Configuration();
        FileSystem fs = FileSystem.get(new URI("hdfs://linux01:9000"),
                configuration, "root");

        // 2 执⾏下载操作
        // boolean delSrc 指是否将原⽂件删除
        // Path src 指要下载的⽂件路径
        // Path dst 指将⽂件下载到的路径
        // boolean useRawLocalFileSystem 是否开启⽂件校验
        fs.copyToLocalFile(false, new Path("/lagou.txt"),
                new Path("e:/lagou_copy.txt"), true);
        // 3 关闭资源
        fs.close();
    }

    /**
     * 删除⽂件/⽂件夹
     * @throws IOException
     * @throws InterruptedException
     * @throws URISyntaxException
     */
    @Test
    public void testDelete()
            throws IOException, InterruptedException, URISyntaxException {


        // 1 获取⽂件系统
        Configuration configuration = new Configuration();
        FileSystem fs = FileSystem.get(new URI("hdfs://linux01:9000"),
                configuration, "root");

        // 2 执⾏删除
        fs.delete(new Path("/test1/"), true);

        // 3 关闭资源
        fs.close();
    }


    /**
     * 查看⽂件名称、权限、⻓度、块信息
     * @throws IOException
     * @throws InterruptedException
     * @throws URISyntaxException
     */
    @Test
    public void testListFiles()
            throws IOException, InterruptedException, URISyntaxException {


        // 1获取⽂件系统
        Configuration configuration = new Configuration();
        FileSystem fs = FileSystem.get(new URI("hdfs://linux01:9000"),
                configuration, "root");

        // 2 获取⽂件详情
        RemoteIterator<LocatedFileStatus> listFiles = fs.listFiles(new Path("/"),
                true);

        while (listFiles.hasNext()) {


            LocatedFileStatus status = listFiles.next();

            // 输出详情
            // ⽂件名称
            System.out.print(status.getPath().getName());
            // ⻓度
            System.out.print(status.getLen());
            // 权限
            System.out.print(status.getPermission());
            // 分组
            System.out.println(status.getGroup());

            // 获取存储的块信息
            BlockLocation[] blockLocations = status.getBlockLocations();

            for (BlockLocation blockLocation : blockLocations) {


                // 获取块存储的主机节点
                String[] hosts = blockLocation.getHosts();

                for (String host : hosts) {


                    System.out.println("主机名称:"+host);
                }
            }

            System.out.println("-----------华丽的分割线----------");
        }

        // 3 关闭资源
        fs.close();
    }

    /**
     * ⽂件夹判断
     * @throws IOException
     * @throws InterruptedException
     * @throws URISyntaxException
     */
    @Test
    public void testListStatus()
            throws IOException, InterruptedException, URISyntaxException {


        // 1 获取⽂件配置信息
        Configuration configuration = new Configuration();
        FileSystem fs = FileSystem.get(new URI("hdfs://linux01:9000"),
                configuration, "root");

        // 2 判断是⽂件还是⽂件夹
        FileStatus[] listStatus = fs.listStatus(new Path("/"));

        for (FileStatus fileStatus : listStatus) {


            // 如果是⽂件
            if (fileStatus.isFile()) {


                System.out.println("f:" + fileStatus.getPath().getName());
            } else {


                System.out.println("d:" + fileStatus.getPath().getName());
            }
        }

        // 3 关闭资源
        fs.close();
    }

    /**
     * 把本地e盘上的lagou.txt⽂件上传到HDFS根⽬录
     * @throws IOException
     * @throws InterruptedException
     * @throws URISyntaxException
     */
    @Test
    public void putFileToHDFS()
            throws IOException, InterruptedException, URISyntaxException {


        // 1 获取⽂件系统
        Configuration configuration = new Configuration();
        FileSystem fs = FileSystem.get(new URI("hdfs://linux01:9000"),
                configuration, "root");

        // 2 创建输⼊流
        FileInputStream fis = new FileInputStream(new File("e:/lagou.txt"));

        // 3 获取输出流
        FSDataOutputStream fos = fs.create(new Path("/lagou_io.txt"));
        // 4 流对拷
        IOUtils.copyBytes(fis, fos, configuration);
        // 5 关闭资源
        IOUtils.closeStream(fos);
        IOUtils.closeStream(fis);
        fs.close();
    }

    //文件下载
    @Test
    public void getFileFromHDFS()
            throws IOException, InterruptedException, URISyntaxException {


        // 1 获取⽂件系统
        Configuration configuration = new Configuration();
        FileSystem fs = FileSystem.get(new URI("hdfs://linux01:9000"),
                configuration, "root");

        // 2 获取输⼊流
        FSDataInputStream fis = fs.open(new Path("/lagou_io.txt"));

        // 3 获取输出流
        FileOutputStream fos = new FileOutputStream(new File(
                "e:/lagou_io_copy.txt"));

        // 4 流的对拷
        IOUtils.copyBytes(fis, fos, configuration);

        // 5 关闭资源
        IOUtils.closeStream(fos);
        IOUtils.closeStream(fis);
        fs.close();
    }

    /**
     * 将HDFS上的lagou.txt的内容在控制台输出两次
     * @throws IOException
     * @throws InterruptedException
     * @throws URISyntaxException
     */
    @Test
    public void readFileSeek2()
            throws IOException, InterruptedException, URISyntaxException {


        // 1 获取⽂件系统
        Configuration configuration = new Configuration();
        FileSystem fs = FileSystem.get(new URI("hdfs://linux01:9000"),
                configuration, "root");

        // 2 打开输⼊流,读取数据输出到控制台
        FSDataInputStream in = null;

        try {


            in = fs.open(new Path("/lagou.txt"));
            IOUtils.copyBytes(in, System.out, 4096, false);
            in.seek(0); //从头再次读取
            IOUtils.copyBytes(in, System.out, 4096, false);
        } finally {


            IOUtils.closeStream(in);
        }
    }
}
5.5 HDFS读写解析
5.5.1 HDFS读数据流程

- 客户端通过Distributed FileSystem向NameNode请求下载⽂件,NameNode通过查询元数据,
找到⽂件块所在的DataNode地址。 - 挑选⼀台DataNode(就近原则,然后随机)服务器,请求读取数据。
- DataNode开始传输数据给客户端(从磁盘⾥⾯读取数据输⼊流,以Packet为单位来做校验)。
- 客户端以Packet为单位接收,先在本地缓存,然后写⼊⽬标⽂件。
5.5.2 HDFS写数据流程

- 客户端通过Distributed FileSystem模块向NameNode请求上传⽂件,NameNode检查⽬标⽂件是否已存在,⽗⽬录是否存在。
- NameNode返回是否可以上传。
- 客户端请求第⼀个 Block上传到哪⼏个DataNode服务器上。
- NameNode返回3个DataNode节点,分别为dn1、dn2、dn3。
- 客户端通过FSDataOutputStream模块请求dn1上传数据,dn1收到请求会继续调⽤dn2,然后
dn2调⽤dn3,将这个通信管道建⽴完成。 - dn1、dn2、dn3逐级应答客户端。
- 客户端开始往dn1上传第⼀个Block(先从磁盘读取数据放到⼀个本地内存缓存),以Packet为单
位,dn1收到⼀个Packet就会传给dn2,dn2传给dn3;dn1每传⼀个packet会放⼊⼀个确认队列
等待确认。 - 当⼀个Block传输完成之后,客户端再次请求NameNode上传第⼆个Block的服务器。(重复执⾏
3-7步)。
验证Packet代码
package com.lagou.hdfs;

import org.apache.hadoop.conf.Configuration;
import org.apache.hadoop.fs.FSDataOutputStream;
import org.apache.hadoop.fs.FileSystem;
import org.apache.hadoop.fs.Path;
import org.apache.hadoop.io.IOUtils;
import org.apache.hadoop.util.Progressable;
import org.junit.After;
import org.junit.Before;
import org.junit.Test;

import java.io.File;
import java.io.FileInputStream;
import java.io.IOException;
import java.net.URI;
import java.net.URISyntaxException;

public class HdfsClientDemo {


    FileSystem fs =null;
    Configuration configuration=null;

    @Before
    public void init() throws URISyntaxException, IOException, InterruptedException {


        // 1 获取Hadoop集群的configuration对象
        Configuration configuration = new Configuration();
        configuration.set("fs.defaultFS", "hdfs://linux01:9000");

        //2 根据configuration获取Filesystem对象
        fs=FileSystem.get(new URI("hdfs://linux01:9000"), configuration, "root");

    }

    @After
    public void destory() throws IOException {


        // 3 关闭资源
        fs.close();
    }


    /**
     * Packet代码
     * @throws IOException
     * @throws URISyntaxException
     * @throws InterruptedException
     */
    @Test
    public void testUploadPacket() throws IOException, URISyntaxException, InterruptedException {


        //1 准备读取本地⽂件的输⼊流
        final FileInputStream in = new FileInputStream(new
                File("e:/lagou.txt"));
        //2 准备好写出数据到hdfs的输出流
        final FSDataOutputStream out = fs.create(new Path("/lagou.txt"), new Progressable() {


            public void progress() {


                //这个progress⽅法就是每传输64KB(packet)就会执⾏⼀次,
                System.out.println("&");
            }
        });
        //3 实现流拷⻉
        IOUtils.copyBytes(in, out, configuration); //默认关闭流选项是true,所以会⾃动关闭
        //4 关流 可以再次关闭也可以不关了
    }
}
5.6 NN与2NN
5.6.1 HDFS元数据管理机制
问题1:NameNode如何管理和存储元数据?
计算机中存储数据两种:内存或者是磁盘
元数据存储磁盘:存储磁盘⽆法⾯对客户端对元数据信息的任意的快速低延迟的响应,但是安全性⾼
元数据存储内存:元数据存放内存,可以⾼效的查询以及快速响应客户端的查询请求,数据保存在内存,如果断点,内存中的数据全部丢失。
解决⽅案:内存+磁盘;NameNode内存+FsImage的⽂件(磁盘)
新问题:磁盘和内存中元数据如何划分?
两个数据⼀模⼀样,还是两个数据合并到⼀起才是⼀份完整的数据呢?
⼀模⼀样:client如果对元数据进⾏增删改操作,需要保证两个数据的⼀致性。FsImage⽂件操作起来效率也不⾼。
两个合并=完整数据:NameNode引⼊了⼀个edits⽂件(⽇志⽂件:只能追加写⼊)edits⽂件记录的是client的增删改操作,
不再选择让NameNode把数据dump出来形成FsImage⽂件(这种操作是⽐较消耗资源)。
元数据管理流程图

- 第⼀阶段:NameNode启动
·· 第⼀次启动NameNode格式化后,创建Fsimage和Edits⽂件。如果不是第⼀次启动,直接加载编辑⽇志和镜像⽂件到内存。
·· 客户端对元数据进⾏增删改的请求。
·· NameNode记录操作⽇志,更新滚动⽇志。
·· NameNode在内存中对数据进⾏增删改。 - 第⼆阶段:Secondary NameNode⼯作
·· Secondary NameNode询问NameNode是否需要CheckPoint。直接带回NameNode是否执⾏检查点操作结果。
·· Secondary NameNode请求执⾏CheckPoint。
·· NameNode滚动正在写的Edits⽇志。
·· 将滚动前的编辑⽇志和镜像⽂件拷⻉到Secondary NameNode。
·· Secondary NameNode加载编辑⽇志和镜像⽂件到内存,并合并。
·· ⽣成新的镜像⽂件fsimage.chkpoint。
·· 拷⻉fsimage.chkpoint到NameNode。
·· NameNode将fsimage.chkpoint重新命名成fsimage。
5.6.2 Fsimage与Edits⽂件解析
NameNode在执⾏格式化之后,会在/opt/lagou/servers/hadoop-2.9.2/data/tmp/dfs/name/current⽬录下产⽣如下⽂件

- Fsimage⽂件:是namenode中关于元数据的镜像,⼀般称为检查点,这⾥包含了HDFS⽂件系统
所有⽬录以及⽂件相关信息(Block数量,副本数量,权限等信息) - Edits⽂件 :存储了客户端对HDFS⽂件系统所有的更新操作记录,Client对HDFS⽂件系统所有的更新操作都会被记录到Edits⽂件中(不包括查询操作)
- seen_txid:该⽂件是保存了⼀个数字,数字对应着最后⼀个Edits⽂件名的数字
- VERSION:该⽂件记录namenode的⼀些版本号信息,⽐如:CusterId,namespaceID等
NameNode启动时会将Fsimage⽂件加载到内存中,同时也把之前未合并元数据的Edits⽂件加载,集合两个⽂件中的元数据这样保证了NameNode中的元数据是最新最全的。通俗点说就是NameNode启动时把Fsimage和Edits⽂件进⾏了合并。
5.6.2.1 Fsimage⽂件内容
官⽅地址
https://hadoop.apache.org/docs/r2.9.2/hadoop-project-dist/hadoop-hdfs/HdfsImageViewer.html
- 查看oiv和oev命令
[root@linux121 current]$ hdfs
oiv Offline Image Viewer View a Hadoop fsimage INPUTFILE using the specified
PROCESSOR,saving the results in OUTPUTFILE.
oev Offline edits viewer Parse a Hadoop edits log file INPUT_FILE and save results in OUTPUT_FILE
- 基本语法
hdfs oiv -p ⽂件类型 -i 镜像⽂件 -o 转换后⽂件输出路径 - 案例实操
[root@linux121 current]$ cd /opt/lagou/servers/hadoop-2.9.2/data/tmp/dfs/name/current
[root@linux121 current]$ hdfs oiv -p XML -i fsimage_0000000000000000508 -o /opt/lagou/servers/fsimage.xml
[root@linux121 current]$ cat /opt/lagou/servers/fsimage.xml


fsimage.xml
<?xml version="1.0"?>
<fsimage><version><layoutVersion>-63</layoutVersion><onDiskVersion>1</onDiskVersion><oivRevision>826afbeae31ca687bc2f8471dc841b66ed2c6704</oivRevision></version>
<NameSection><namespaceId>1803086015</namespaceId><genstampV1>1000</genstampV1><genstampV2>1051</genstampV2><genstampV1Limit>0</genstampV1Limit><lastAllocatedBlockId>1073741875</lastAllocatedBlockId><txid>508</txid></NameSection>
<INodeSection><lastInodeId>16463</lastInodeId><numInodes>48</numInodes><inode><id>16385</id><type>DIRECTORY</type><name></name><mtime>1611201690105</mtime><permission>root:supergroup:0777</permission><nsquota>9223372036854775807</nsquota><dsquota>-1</dsquota></inode>
<inode><id>16389</id><type>DIRECTORY</type><name>wcinput</name><mtime>1611062650862</mtime><permission>root:supergroup:0777</permission><nsquota>-1</nsquota><dsquota>-1</dsquota></inode>
<inode><id>16390</id><type>FILE</type><name>wc.txt</name><replication>3</replication><mtime>1611062650855</mtime><atime>1611109698043</atime><preferredBlockSize>134217728</preferredBlockSize><permission>root:supergroup:0777</permission><blocks><block><id>1073741826</id><genstamp>1002</genstamp><numBytes>77</numBytes></block>
</blocks>
<storagePolicyId>0</storagePolicyId></inode>
<inode><id>16391</id><type>DIRECTORY</type><name>tmp</name><mtime>1611111325161</mtime><permission>root:supergroup:0777</permission><nsquota>-1</nsquota><dsquota>-1</dsquota></inode>
<inode><id>16392</id><type>DIRECTORY</type><name>hadoop-yarn</name><mtime>1611063077422</mtime><permission>root:supergroup:0777</permission><nsquota>-1</nsquota><dsquota>-1</dsquota></inode>
<inode><id>16393</id><type>DIRECTORY</type><name>staging</name><mtime>1611064836781</mtime><permission>root:supergroup:0777</permission><nsquota>-1</nsquota><dsquota>-1</dsquota></inode>
<inode><id>16394</id><type>DIRECTORY</type><name>root</name><mtime>1611063077422</mtime><permission>root:supergroup:0777</permission><nsquota>-1</nsquota><dsquota>-1</dsquota></inode>
<inode><id>16395</id><type>DIRECTORY</type><name>.staging</name><mtime>1611111348447</mtime><permission>root:supergroup:0777</permission><nsquota>-1</nsquota><dsquota>-1</dsquota></inode>
<inode><id>16396</id><type>DIRECTORY</type><name>job_1611060568281_0001</name><mtime>1611063078360</mtime><permission>root:supergroup:0777</permission><nsquota>-1</nsquota><dsquota>-1</dsquota></inode>
<inode><id>16397</id><type>FILE</type><name>job.jar</name><replication>10</replication><mtime>1611063078241</mtime><atime>1611063078036</atime><preferredBlockSize>134217728</preferredBlockSize><permission>root:supergroup:0777</permission><blocks><block><id>1073741827</id><genstamp>1003</genstamp><numBytes>303323</numBytes></block>
</blocks>
<storagePolicyId>0</storagePolicyId></inode>
<inode><id>16398</id><type>FILE</type><name>job.split</name><replication>10</replication><mtime>1611063078321</mtime><atime>1611063078288</atime><preferredBlockSize>134217728</preferredBlockSize><permission>root:supergroup:0777</permission><blocks><block><id>1073741828</id><genstamp>1004</genstamp><numBytes>106</numBytes></block>
</blocks>
<storagePolicyId>0</storagePolicyId></inode>
<inode><id>16399</id><type>FILE</type><name>job.splitmetainfo</name><replication>3</replication><mtime>1611063078353</mtime><atime>1611063078324</atime><preferredBlockSize>134217728</preferredBlockSize><permission>root:supergroup:0777</permission><blocks><block><id>1073741829</id><genstamp>1005</genstamp><numBytes>43</numBytes></block>
</blocks>
<storagePolicyId>0</storagePolicyId></inode>
<inode><id>16400</id><type>FILE</type><name>job.xml</name><replication>3</replication><mtime>1611063078704</mtime><atime>1611063078360</atime><preferredBlockSize>134217728</preferredBlockSize><permission>root:supergroup:0777</permission><blocks><block><id>1073741830</id><genstamp>1006</genstamp><numBytes>168939</numBytes></block>
</blocks>
<storagePolicyId>0</storagePolicyId></inode>
<inode><id>16401</id><type>DIRECTORY</type><name>job_1611060568281_0002</name><mtime>1611063515469</mtime><permission>root:supergroup:0777</permission><nsquota>-1</nsquota><dsquota>-1</dsquota></inode>
<inode><id>16402</id><type>FILE</type><name>job.jar</name><replication>10</replication><mtime>1611063515283</mtime><atime>1611063514972</atime><preferredBlockSize>134217728</preferredBlockSize><permission>root:supergroup:0777</permission><blocks><block><id>1073741831</id><genstamp>1007</genstamp><numBytes>303323</numBytes></block>
</blocks>
<storagePolicyId>0</storagePolicyId></inode>
<inode><id>16403</id><type>FILE</type><name>job.split</name><replication>10</replication><mtime>1611063515412</mtime><atime>1611063515358</atime><preferredBlockSize>134217728</preferredBlockSize><permission>root:supergroup:0777</permission><blocks><block><id>1073741832</id><genstamp>1008</genstamp><numBytes>106</numBytes></block>
</blocks>
<storagePolicyId>0</storagePolicyId></inode>
<inode><id>16404</id><type>FILE</type><name>job.splitmetainfo</name><replication>3</replication><mtime>1611063515462</mtime><atime>1611063515416</atime><preferredBlockSize>134217728</preferredBlockSize><permission>root:supergroup:0777</permission><blocks><block><id>1073741833</id><genstamp>1009</genstamp><numBytes>43</numBytes></block>
</blocks>
<storagePolicyId>0</storagePolicyId></inode>
<inode><id>16405</id><type>FILE</type><name>job.xml</name><replication>3</replication><mtime>1611063515797</mtime><atime>1611063515469</atime><preferredBlockSize>134217728</preferredBlockSize><permission>root:supergroup:0777</permission><blocks><block><id>1073741834</id><genstamp>1010</genstamp><numBytes>168939</numBytes></block>
</blocks>
<storagePolicyId>0</storagePolicyId></inode>
<inode><id>16406</id><type>DIRECTORY</type><name>history</name><mtime>1611064836835</mtime><permission>root:supergroup:0777</permission><nsquota>-1</nsquota><dsquota>-1</dsquota></inode>
<inode><id>16407</id><type>DIRECTORY</type><name>done</name><mtime>1611111350893</mtime><permission>root:supergroup:0777</permission><nsquota>-1</nsquota><dsquota>-1</dsquota></inode>
<inode><id>16408</id><type>DIRECTORY</type><name>done_intermediate</name><mtime>1611111329721</mtime><permission>root:supergroup:1777</permission><nsquota>-1</nsquota><dsquota>-1</dsquota></inode>
<inode><id>16409</id><type>DIRECTORY</type><name>job_1611065723826_0001</name><mtime>1611066061103</mtime><permission>root:supergroup:0777</permission><nsquota>-1</nsquota><dsquota>-1</dsquota></inode>
<inode><id>16410</id><type>FILE</type><name>job.jar</name><replication>10</replication><mtime>1611066060913</mtime><atime>1611066060656</atime><preferredBlockSize>134217728</preferredBlockSize><permission>root:supergroup:0777</permission><blocks><block><id>1073741835</id><genstamp>1011</genstamp><numBytes>303323</numBytes></block>
</blocks>
<storagePolicyId>0</storagePolicyId></inode>
<inode><id>16411</id><type>FILE</type><name>job.split</name><replication>10</replication><mtime>1611066061041</mtime><atime>1611066060979</atime><preferredBlockSize>134217728</preferredBlockSize><permission>root:supergroup:0777</permission><blocks><block><id>1073741836</id><genstamp>1012</genstamp><numBytes>106</numBytes></block>
</blocks>
<storagePolicyId>0</storagePolicyId></inode>
<inode><id>16412</id><type>FILE</type><name>job.splitmetainfo</name><replication>3</replication><mtime>1611066061089</mtime><atime>1611066061046</atime><preferredBlockSize>134217728</preferredBlockSize><permission>root:supergroup:0777</permission><blocks><block><id>1073741837</id><genstamp>1013</genstamp><numBytes>43</numBytes></block>
</blocks>
<storagePolicyId>0</storagePolicyId></inode>
<inode><id>16413</id><type>FILE</type><name>job.xml</name><replication>3</replication><mtime>1611066061528</mtime><atime>1611066061103</atime><preferredBlockSize>134217728</preferredBlockSize><permission>root:supergroup:0777</permission><blocks><block><id>1073741838</id><genstamp>1014</genstamp><numBytes>168930</numBytes></block>
</blocks>
<storagePolicyId>0</storagePolicyId></inode>
<inode><id>16414</id><type>DIRECTORY</type><name>lagou</name><mtime>1611069262604</mtime><permission>root:supergroup:0777</permission><nsquota>-1</nsquota><dsquota>-1</dsquota></inode>
<inode><id>16415</id><type>DIRECTORY</type><name>bigdata</name><mtime>1611070315206</mtime><permission>root:supergroup:0777</permission><nsquota>-1</nsquota><dsquota>-1</dsquota></inode>
<inode><id>16416</id><type>FILE</type><name>hadoop.txt</name><replication>10</replication><mtime>1611069614382</mtime><atime>1611195451016</atime><preferredBlockSize>134217728</preferredBlockSize><permission>root:root:0777</permission><blocks><block><id>1073741839</id><genstamp>1015</genstamp><numBytes>36</numBytes></block>
</blocks>
<storagePolicyId>0</storagePolicyId></inode>
<inode><id>16417</id><type>FILE</type><name>README.txt</name><replication>3</replication><mtime>1611069955097</mtime><atime>1611069954890</atime><preferredBlockSize>134217728</preferredBlockSize><permission>root:supergroup:0777</permission><blocks><block><id>1073741840</id><genstamp>1016</genstamp><numBytes>1366</numBytes></block>
</blocks>
<storagePolicyId>0</storagePolicyId></inode>
<inode><id>16418</id><type>FILE</type><name>hdfs.txt</name><replication>3</replication><mtime>1611070190684</mtime><atime>1611146867614</atime><preferredBlockSize>134217728</preferredBlockSize><permission>root:supergroup:0777</permission><blocks><block><id>1073741841</id><genstamp>1017</genstamp><numBytes>36</numBytes></block>
</blocks>
<storagePolicyId>0</storagePolicyId></inode>
<inode><id>16424</id><type>DIRECTORY</type><name>logs</name><mtime>1611111325224</mtime><permission>root:root:1777</permission><nsquota>-1</nsquota><dsquota>-1</dsquota></inode>
<inode><id>16425</id><type>DIRECTORY</type><name>root</name><mtime>1611111325230</mtime><permission>root:root:0777</permission><nsquota>-1</nsquota><dsquota>-1</dsquota></inode>
<inode><id>16426</id><type>DIRECTORY</type><name>logs</name><mtime>1611111325241</mtime><permission>root:root:0777</permission><nsquota>-1</nsquota><dsquota>-1</dsquota></inode>
<inode><id>16427</id><type>DIRECTORY</type><name>application_1611065723826_0002</name><mtime>1611111355058</mtime><permission>root:root:0777</permission><nsquota>-1</nsquota><dsquota>-1</dsquota></inode>
<inode><id>16428</id><type>DIRECTORY</type><name>root</name><mtime>1611111350921</mtime><permission>root:supergroup:0777</permission><nsquota>-1</nsquota><dsquota>-1</dsquota></inode>
<inode><id>16430</id><type>DIRECTORY</type><name>wcoutput</name><mtime>1611111347101</mtime><permission>root:supergroup:0777</permission><nsquota>-1</nsquota><dsquota>-1</dsquota></inode>
<inode><id>16436</id><type>FILE</type><name>part-r-00000</name><replication>3</replication><mtime>1611111346944</mtime><atime>1611111346787</atime><preferredBlockSize>134217728</preferredBlockSize><permission>root:supergroup:0777</permission><blocks><block><id>1073741848</id><genstamp>1024</genstamp><numBytes>43</numBytes></block>
</blocks>
<storagePolicyId>0</storagePolicyId></inode>
<inode><id>16438</id><type>FILE</type><name>_SUCCESS</name><replication>3</replication><mtime>1611111347138</mtime><atime>1611132019576</atime><preferredBlockSize>134217728</preferredBlockSize><permission>root:supergroup:0777</permission><storagePolicyId>0</storagePolicyId></inode>
<inode><id>16441</id><type>FILE</type><name>job_1611065723826_0002-1611111323392-root-word+count-1611111347406-1-1-SUCCEEDED-default-1611111333908.jhist</name><replication>3</replication><mtime>1611111347305</mtime><atime>1611111347254</atime><preferredBlockSize>134217728</preferredBlockSize><permission>root:supergroup:0777</permission><blocks><block><id>1073741850</id><genstamp>1026</genstamp><numBytes>33575</numBytes></block>
</blocks>
<storagePolicyId>0</storagePolicyId></inode>
<inode><id>16442</id><type>FILE</type><name>job_1611065723826_0002_conf.xml</name><replication>3</replication><mtime>1611111347347</mtime><atime>1611111347318</atime><preferredBlockSize>134217728</preferredBlockSize><permission>root:supergroup:0777</permission><blocks><block><id>1073741851</id><genstamp>1027</genstamp><numBytes>196008</numBytes></block>
</blocks>
<storagePolicyId>0</storagePolicyId></inode>
<inode><id>16443</id><type>DIRECTORY</type><name>2021</name><mtime>1611111350893</mtime><permission>root:supergroup:0777</permission><nsquota>-1</nsquota><dsquota>-1</dsquota></inode>
<inode><id>16444</id><type>DIRECTORY</type><name>01</name><mtime>1611111350893</mtime><permission>root:supergroup:0777</permission><nsquota>-1</nsquota><dsquota>-1</dsquota></inode>
<inode><id>16445</id><type>DIRECTORY</type><name>20</name><mtime>1611111350893</mtime><permission>root:supergroup:0777</permission><nsquota>-1</nsquota><dsquota>-1</dsquota></inode>
<inode><id>16446</id><type>DIRECTORY</type><name>000000</name><mtime>1611111350921</mtime><permission>root:supergroup:0777</permission><nsquota>-1</nsquota><dsquota>-1</dsquota></inode>
<inode><id>16447</id><type>FILE</type><name>localhost_39073</name><replication>3</replication><mtime>1611111355051</mtime><atime>1611111354924</atime><preferredBlockSize>134217728</preferredBlockSize><permission>root:root:0777</permission><blocks><block><id>1073741852</id><genstamp>1028</genstamp><numBytes>107033</numBytes></block>
</blocks>
<storagePolicyId>0</storagePolicyId></inode>
<inode><id>16453</id><type>FILE</type><name>lagou_io.txt</name><replication>1</replication><mtime>1611160355953</mtime><atime>1611156695441</atime><preferredBlockSize>134217728</preferredBlockSize><permission>root:supergroup:0644</permission><storagePolicyId>0</storagePolicyId></inode>
<inode><id>16463</id><type>FILE</type><name>lagou.txt</name><replication>2</replication><mtime>1611201690774</mtime><atime>1611201690105</atime><preferredBlockSize>134217728</preferredBlockSize><permission>root:supergroup:0644</permission><blocks><block><id>1073741875</id><genstamp>1051</genstamp><numBytes>462</numBytes></block>
</blocks>
<storagePolicyId>0</storagePolicyId></inode>
</INodeSection>
<INodeReferenceSection></INodeReferenceSection><SnapshotSection><snapshotCounter>0</snapshotCounter><numSnapshots>0</numSnapshots></SnapshotSection>
<INodeDirectorySection><directory><parent>16385</parent><child>16417</child><child>16414</child><child>16463</child><child>16453</child><child>16391</child><child>16389</child><child>16430</child></directory>
<directory><parent>16389</parent><child>16390</child></directory>
<directory><parent>16391</parent><child>16392</child><child>16424</child></directory>
<directory><parent>16392</parent><child>16393</child></directory>
<directory><parent>16393</parent><child>16406</child><child>16394</child></directory>
<directory><parent>16394</parent><child>16395</child></directory>
<directory><parent>16395</parent><child>16396</child><child>16401</child><child>16409</child></directory>
<directory><parent>16396</parent><child>16397</child><child>16398</child><child>16399</child><child>16400</child></directory>
<directory><parent>16401</parent><child>16402</child><child>16403</child><child>16404</child><child>16405</child></directory>
<directory><parent>16406</parent><child>16407</child><child>16408</child></directory>
<directory><parent>16407</parent><child>16443</child></directory>
<directory><parent>16408</parent><child>16428</child></directory>
<directory><parent>16409</parent><child>16410</child><child>16411</child><child>16412</child><child>16413</child></directory>
<directory><parent>16414</parent><child>16415</child></directory>
<directory><parent>16415</parent><child>16416</child><child>16418</child></directory>
<directory><parent>16424</parent><child>16425</child></directory>
<directory><parent>16425</parent><child>16426</child></directory>
<directory><parent>16426</parent><child>16427</child></directory>
<directory><parent>16427</parent><child>16447</child></directory>
<directory><parent>16430</parent><child>16438</child><child>16436</child></directory>
<directory><parent>16443</parent><child>16444</child></directory>
<directory><parent>16444</parent><child>16445</child></directory>
<directory><parent>16445</parent><child>16446</child></directory>
<directory><parent>16446</parent><child>16441</child><child>16442</child></directory>
</INodeDirectorySection>
<FileUnderConstructionSection></FileUnderConstructionSection>
<SecretManagerSection><currentId>0</currentId><tokenSequenceNumber>0</tokenSequenceNumber><numDelegationKeys>0</numDelegationKeys><numTokens>0</numTokens></SecretManagerSection><CacheManagerSection><nextDirectiveId>1</nextDirectiveId><numDirectives>0</numDirectives><numPools>0</numPools></CacheManagerSection>
</fsimage>
问题:Fsimage中为什么没有记录块所对应DataNode?
在集群启动后,NameNode要求DataNode上报数据块信息,并间隔⼀段时间后再次上报。
5.6.2.2 Edits⽂件内容
- 基本语法
hdfs oev -p ⽂件类型 -i 编辑⽇志 -o 转换后⽂件输出路径 - 案例实操
[root@linux121 current]$ hdfs oev -p XML -i edits_0000000000000000002-0000000000000000003 -o /opt/lagou/servers/hadoop-2.9.2/edits.xml
[root@linux121 current]$ cat /opt/lagou/servers/hadoop-2.9.2/edits.xml

edits.xml
<?xml version="1.0" encoding="UTF-8"?>
<EDITS>
  <EDITS_VERSION>-63</EDITS_VERSION>
  <RECORD>
    <OPCODE>OP_START_LOG_SEGMENT</OPCODE>
    <DATA>
      <TXID>2</TXID>
    </DATA>
  </RECORD>
  <RECORD>
    <OPCODE>OP_END_LOG_SEGMENT</OPCODE>
    <DATA>
      <TXID>3</TXID>
    </DATA>
  </RECORD>
</EDITS>
备注:Edits中只记录了更新相关的操作,查询或者下载⽂件并不会记录在内!!
问题:NameNode启动时如何确定加载哪些Edits⽂件呢?

需要借助fsimage⽂件最后数字编码,来确定哪些edits之前是没有合并到fsimage中,启动时只需要加载那些未合并的edits⽂件即可
5.6.3 checkpoint周期
[hdfs-default.xml]
<!-- 定时⼀⼩时 -->
    <property>
        <name>dfs.namenode.checkpoint.period</name>
        <value>3600</value>
    </property>
    <!-- ⼀分钟检查⼀次操作次数,3当操作次数达到1百万时,SecondaryNameNode执⾏⼀次 -->
    <property>
        <name>dfs.namenode.checkpoint.txns</name>
        <value>1000000</value>
        <description>操作动作次数</description>
    </property>
    <property>
        <name>dfs.namenode.checkpoint.check.period</name>
        <value>60</value>
        <description>1分钟检查⼀次操作次数</description>
    </property>
5.7 NN故障处理
NameNode故障后,HDFS集群就⽆法正常⼯作,因为HDFS⽂件系统的元数据需要由NameNode来管理维护并与Client交互,如果元数据出现损坏和丢失同样会导致NameNode⽆法正常⼯作进⽽HDFS⽂件系统⽆法正常对外提供服务。
如果元数据出现丢失损坏如何恢复呢?
- 将2NN的元数据拷⻉到NN的节点下此种⽅式会存在元数据的丢失。
- 搭建HDFS的HA(⾼可⽤)集群,解决NN的单点故障问题!!(借助Zookeeper实现HA,⼀个Active的NameNode,⼀个是Standby的NameNode)
5.8 Hadoop的限额与归档以及集群安全模式
- ⾼级命令
- HDFS⽂件限额配置
HDFS⽂件的限额配置允许我们以⽂件⼤⼩或者⽂件个数来限制我们在某个⽬录下上传的⽂件数量或者⽂件内容总量,以便达到我们类似百度⽹盘⽹盘等限制每个⽤户允许上传的最⼤的⽂件的量
- 数量限额
hdfs dfs -mkdir -p /user/root/lagou #创建hdfs⽂件夹
hdfs dfsadmin -setQuota 2 /user/root/lagou # 给该⽂件夹下⾯设置最多上传
两个⽂件,上传⽂件,发现只能上传⼀个⽂件
hdfs dfsadmin -clrQuota /user/root/lagou # 清除⽂件数量限制
- 空间⼤⼩限额
hdfs dfsadmin -setSpaceQuota 4k /user/root/lagou # 限制空间⼤⼩4KB
#上传超过4Kb的⽂件⼤⼩上去提示⽂件超过限额
hdfs dfs -put /export/softwares/xxx.tar.gz /user/root/lagou
hdfs dfsadmin -clrSpaceQuota /user/root/lagou #清除空间限额
#查看hdfs⽂件限额数量
hdfs dfs -count -q -h /user/root/lagou

- HDFS的安全模式
安全模式是HDFS所处的⼀种特殊状态,在这种状态下,**⽂件系统只接受读数据请求,⽽不接受删除、修改等变更请求。**在NameNode主节点启动时,HDFS⾸先进⼊安全模式,DataNode在启动的时候会向NameNode汇报可⽤的block等状态,当整个系统达到安全标准时,HDFS⾃动离开安全模式。如果HDFS出于安全模式下,则⽂件block不能进⾏任何的副本复制操作,因此达到最⼩的副本数量要求是基于DataNode启动时的状态来判定的,启动时不会再做任何复制(从⽽达到最⼩副本数量要求),HDFS集群刚启动的时候,默认30S钟的时间是出于安全期的,只有过了30S之后,集群脱离了安全期,然后才可以对集群进⾏操作。
hdfs dfsadmin -safemode
- Hadoop归档技术
主要解决HDFS集群存在⼤量⼩⽂件的问题!!
由于⼤量⼩⽂件会占⽤NameNode的内存,因此对于HDFS来说存储⼤量⼩⽂件造成NameNode内存资源的浪费!
Hadoop存档⽂件HAR⽂件,是⼀个更⾼效的⽂件存档⼯具,HAR⽂件是由⼀组⽂件通过archive⼯具创建⽽来,在减少了NameNode的内存使⽤的同时,可以对⽂件进⾏透明的访问,通俗来说就是HAR⽂件对NameNode来说是⼀个⽂件减少了内存的浪费,对于实际操作处理⽂件依然是⼀个⼀个独⽴的⽂件。

案例
- 启动YARN集群
[root@linux121 hadoop-2.9.2]$ start-yarn.sh
- 归档⽂件
把/user/lagou/input⽬录⾥⾯的所有⽂件归档成⼀个叫input.har的归档⽂件,并把归档后⽂件存储到/user/lagou/output路径下。
[root@linux121 hadoop-2.9.2]$ bin/hadoop archive -archiveName input.har –p
/user/root/input /user/root/output
- 查看归档
[root@linux121 hadoop-2.9.2]$ hadoop fs -lsr /user/root/output/input.har
[root@linux121 hadoop-2.9.2]$ hadoop fs -lsr har:///user/root/output/input.har
- 解归档⽂件
[root@linux121 hadoop-2.9.2]$ hadoop fs -cp har:///user/root/output/input.har/* /user/root
案例:日志采集案例之采集上传功能

将e盘logs文件夹下日志上传到hdfs,同时转移到e盘logbak文件夹下
代码实现:
LogCollector主函数
package com.lagou.collect;

import java.util.Timer;

public class LogCollector {


    /**
     * - 定时采集已滚动完毕的日志文件
     * - 将待采集文件上传到临时目录
     * - 备份日志文件
     */
    public static void main(String[] args) {


        Timer timer=new Timer();
        //定时采集任务的调度
        //task:采集业务逻辑
        //延迟时间
        //周期时间
        timer.schedule(new LogCollectorTask(),0,3600*1000);
    }
}
LogCollectorTask类
package com.lagou.collect;

import org.apache.hadoop.conf.Configuration;
import org.apache.hadoop.fs.FileSystem;
import org.apache.hadoop.fs.Path;

import java.io.File;
import java.io.FilenameFilter;
import java.io.IOException;
import java.net.URI;
import java.net.URISyntaxException;
import java.text.SimpleDateFormat;
import java.util.Date;
import java.util.TimerTask;

public class LogCollectorTask extends TimerTask {


    @Override
    public void run() {


        //采集的业务逻辑

        SimpleDateFormat sdf = new SimpleDateFormat("yyyy-MM-dd");
        String todayStr = sdf.format(new Date());
        //1 扫描指定目录,找到待上传文件
        File logsDir = new File("e:/logs/");
        File[] uploadFiles = logsDir.listFiles(new FilenameFilter() {


            @Override
            public boolean accept(File dir, String name) {


                return name.startsWith("access.log");
            }
        });
        //2 把待上传文件转移到临时目录
        //判断临时目录是否存在
        File temFile = new File("e:/log_tmp/");
        if(!temFile.exists()){


            temFile.mkdirs();
        }
        for (File file:uploadFiles) {


            file.renameTo(new File(temFile.getPath() + "/" + file.getName()));
        }

        //3 使用hdfs api 上传日志文件到指定目录
        Configuration conf = new Configuration();
        //conf.set("fs.defaultFs","hdfs://linux01:9000");

        FileSystem fs=null;
        try {


            fs = FileSystem.get(new URI("hdfs://linux01:9000"),
                    conf, "root");
            //判断hdfs目标路径是否存在,备份目录是否存在
            Path path = new Path("/collect_log/"+todayStr);
            if(!fs.exists(path)){


                fs.mkdirs(path);
            }
            File bakFolder = new File("e:/log_bak/"+todayStr);
            if(!bakFolder.exists()){


                bakFolder.mkdirs();
            }
            File[] files = temFile.listFiles();
            for (File file:files
                 ) {


                //按照日期分类存放
                fs.copyFromLocalFile(new Path(file.getPath()),new Path("/collect_log/"+todayStr+"/"+file.getName()));
                //4 上传后的文件转移到备份目录
                file.renameTo(new File(bakFolder.getPath()+"/"+file.getName()));
            }
        } catch (IOException | URISyntaxException | InterruptedException e) {


            e.printStackTrace();
        }

    }
}


优化上述代码
- 将文件目录放在collector.properties配置文件中
LOGS.DIR=e:/logs/
LOG.PREFIX=access.log.
LOG.TMP.FOLDER=e:/log_tmp/
HDFS.TARGET.FOLDER=/collect_log/
BAK.FOLDER=e:/log_bak/
- 创建PropTool类,实现配件文件调用时加载
package com.lagou.singlton;

import com.lagou.collect.LogCollectorTask;

import java.io.IOException;
import java.util.Properties;

public class PropTool {


    /*
     //类加载时初始化一次即可
     private static Properties prop=null;
    //使用静态代码块实现 饿汉式加载
    static {
        prop=new Properties();
        try{
            prop.load(LogCollectorTask.class.getClassLoader().getResourceAsStream("collector.properties"));
        }catch (IOException e){
            e.printStackTrace();
        }
    }

    public static Properties getProp(){
        return prop;
    }
     */

    //调用时加载
    //volatile关键字中java中禁止指令了重排序的关键字,保证有序性和可见性
    private static volatile Properties prop=null;
    //synchronized 加锁,防止线程安全问题
    public static Properties getProp(){


        if(prop == null){


            synchronized("lock"){


                if(prop == null){


                    prop=new Properties();
                    try{


                        prop.load(LogCollectorTask.class.getClassLoader().getResourceAsStream("collector.properties"));
                    }catch (IOException e){


                        e.printStackTrace();
                    }
                }

            }
        }


        return prop;
    }
}
- 封装collector.properties配置文件里字段,方便调用
Constant类
package com.lagou.common;

//参数常量
public class Constant {


    public static final String LOGS_DIR="LOGS.DIR";
    public static final String LOG_PREFIX="LOG.PREFIX";
    public static final String LOG_TMP_FOLDER="LOG.TMP.FOLDER";
    public static final String HDFS_TARGET_FOLDER="HDFS.TARGET.FOLDER";
    public static final String BAK_FOLDER="BAK.FOLDER";

}
- 优化LogCollectorTask
package com.lagou.collect;

import com.lagou.common.Constant;
import com.lagou.singlton.PropTool;
import org.apache.hadoop.conf.Configuration;
import org.apache.hadoop.fs.FileSystem;
import org.apache.hadoop.fs.Path;

import java.io.File;
import java.io.FilenameFilter;
import java.io.IOException;
import java.net.URI;
import java.net.URISyntaxException;
import java.text.SimpleDateFormat;
import java.util.Date;
import java.util.Properties;
import java.util.TimerTask;

public class LogCollectorTask extends TimerTask {


    @Override
    public void run() {


        /*Properties properties = new Properties();
        try {
            properties.load(LogCollectorTask.class.getClassLoader().getResourceAsStream("collector.properties"));
        } catch (IOException e) {
            e.printStackTrace();
        }*/
        Properties properties = PropTool.getProp();


        //采集的业务逻辑
        SimpleDateFormat sdf = new SimpleDateFormat("yyyy-MM-dd");
        String todayStr = sdf.format(new Date());
        //1 扫描指定目录,找到待上传文件
        File logsDir = new File(properties.getProperty(Constant.LOGS_DIR));
        final String log_prefix = properties.getProperty(Constant.LOG_PREFIX);
        File[] uploadFiles = logsDir.listFiles(new FilenameFilter() {


            @Override
            public boolean accept(File dir, String name) {


                return name.startsWith(log_prefix);
            }
        });
        //2 把待上传文件转移到临时目录
        //判断临时目录是否存在
        File temFile = new File(properties.getProperty(Constant.LOG_TMP_FOLDER));
        if(!temFile.exists()){


            temFile.mkdirs();
        }
        for (File file:uploadFiles) {


            file.renameTo(new File(temFile.getPath() + "/" + file.getName()));
        }

        //3 使用hdfs api 上传日志文件到指定目录
        Configuration conf = new Configuration();
        //conf.set("fs.defaultFs","hdfs://linux01:9000");

        FileSystem fs=null;
        try {


            fs = FileSystem.get(new URI("hdfs://linux01:9000"),
                    conf, "root");
            //判断hdfs目标路径是否存在,备份目录是否存在
            Path path = new Path(properties.getProperty(Constant.HDFS_TARGET_FOLDER)+todayStr);
            if(!fs.exists(path)){


                fs.mkdirs(path);
            }
            File bakFolder = new File(properties.getProperty(Constant.BAK_FOLDER)+todayStr);
            if(!bakFolder.exists()){


                bakFolder.mkdirs();
            }
            File[] files = temFile.listFiles();
            for (File file:files
                 ) {


                //按照日期分类存放
                fs.copyFromLocalFile(new Path(file.getPath()),new Path(properties.getProperty(Constant.HDFS_TARGET_FOLDER)+todayStr+"/"+file.getName()));
                //4 上传后的文件转移到备份目录
                file.renameTo(new File(bakFolder.getPath()+"/"+file.getName()));
            }
        } catch (IOException | URISyntaxException | InterruptedException e) {


            e.printStackTrace();
        }

    }
}