一、 前言
使用Laravel和Tp5.1的朋友应该都有接触数据库迁移的功能,这个功能很方便做数据库版本管理,可以不用远程连接直接管理数据库结构,项目上线时也比较方面,直接执行迁移就自动生成了对应的数据表。我一直都喜欢用迁移,所以更换MixPHP框架后,也第一时间考虑这个框架的迁移怎么搞,还好,找到了phinx,下面将集成phinx的过程进行总结。
二、集成phinx的详细过程
1. 使用composer安装phinx。跳转到项目根目录执行如下命令:
composer require robmorgan/phinx2. 第一次安装phinx时,需要执行如下命令初始化生成phinx配置文件:
vendor/bin/phinx init生成的配置文件在项目根目录下:phinx.yml
3. 配置phinx.yml
paths:
migrations: '%%PHINX_CONFIG_DIR%%/db/migrations' // 迁移文件地址,可自定义,此处是根目录下的 /db/migrations
seeds: '%%PHINX_CONFIG_DIR%%/db/seeds' // 填充文件地址,可自定义,此处是根目录下的 /db/seeds
environments:
default_migration_table: phinxlog
default_database: development
production: // 生产环境下的数据库配置
adapter: mysql
host: xxx.com
name: project_pro
user: root
pass: 'pwd'
port: 3306
charset: utf8
development: // 开发环境下的数据库配置
adapter: mysql
host: localhost
name: project_dev
user: root
pass: 'pwd'
port: 3306
charset: utf8
testing: // 测试环境下的数据库配置
adapter: mysql
host: localhost
name: peoject_test
user: root
pass: 'pwd'
port: 3306
charset: utf8
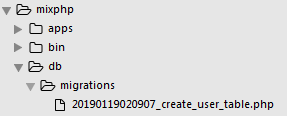
version_order: creation4. 创建迁移文件,此处以创建User表的迁移为例
vendor/bin/phinx create CreateUserTable此时在 /db/migrations/ 文件夹下生成迁移文件,如下所示:
5. 填充迁移文件user表的迁移文件
<?php

use Phinx\Migration\AbstractMigration;

class CreateUserTable extends AbstractMigration
{
    /**
     * Change Method.
     *
     * Write your reversible migrations using this method.
     *
     * More information on writing migrations is available here:
     * http://docs.phinx.org/en/latest/migrations.html#the-abstractmigration-class
     *
     * The following commands can be used in this method and Phinx will
     * automatically reverse them when rolling back:
     *
     *    createTable
     *    renameTable
     *    addColumn
     *    addCustomColumn
     *    renameColumn
     *    addIndex
     *    addForeignKey
     *
     * Any other destructive changes will result in an error when trying to
     * rollback the migration.
     *
     * Remember to call "create()" or "update()" and NOT "save()" when working
     * with the Table class.
     */
    public function change()
    {
        // create the table
        $table = $this->table('user', array('engine'=>'innodb'));
        // create these column, id字段自动生成且主键自增
        $table->addColumn('nickname', 'string', array('limit' => 60, 'default'=>'', 'comment'=>'用户昵称'))
            ->addColumn('account', 'string', array('limit' => 60, 'default'=>'', 'comment'=>'邮箱账号'))
            ->addColumn('password', 'string', array('limit' => 60, 'default'=>'', 'comment'=>'用户密码'))
            ->addIndex('account', ['unique' => true])        // 添加account唯一索引
            ->create();
    }

}
6. 执行迁移文件
vendor/bin/phinx migrate		// 默认执行开发配置迁移

// 指定执行开发配置迁移
vendor/bin/phinx migrate -e development

// 指定执行测试配置迁移
vendor/bin/phinx migrate -e testing

// 指定执行生产配置迁移
vendor/bin/phinx migrate -e production
7. 创建填充文件
vendor/bin/phinx seed:create UserSeeder此时在 /db/seeds/ 文件夹下生成填充文件。
8. 执行填充文件
// 默认执行开发配置,进行全部填充文件
vendor/bin/phinx seed:run

// 因为seed重复执行会重复填充,可以指定文件填充,如下
php vendor/bin/phinx seed:run -s UserSeeder

// 执行开发配置填充
vendor/bin/phinx seed:run -e development

// 执行测试配置填充
vendor/bin/phinx seed:run -e testing

// 执行生产配置填充
vendor/bin/phinx seed:run -e production
9. 注意
MixPHP在集成phinx后,不知道为什么,在调用Redis操作后变得非常慢,每次连接redis都要4~5秒,这个问题目前一直没找到原因,所以每次执行完迁移后,我都把phinx给移除出框架,具体移除命令如下:
composer remove robmorgan/phinx更多phinx操作可以参考:http://docs.phinx.org/en/latest/seeding.html