2.1Bean的配置
Spring是一个生产和管理Spring容器中Bean的工厂,支持XML和properties两种装配方式,其中XMl较为常用,关于XMl中配置文件中属性的介绍如下:
| 属性 | 描述 |
|---|---|
| id | bean的唯一标识 |
| name | 可以指定多个名称 |
| class | bean的具体实现类,是一个完整的类名 |
| scope | 设定作用域,主要介绍singleton和prototype |
| constructor-arg | 传入构造参数,完成实例化 |
| property | 调用set方法,完成依赖注入 |
| ref | 指定bean实例的引用 |
| value | 指定常量值 |
一般通过设定id和class属性即可。
2.2Bean的实例化
2.2.1构造器实例化
定义一个类,默认生成一个无参构造方法,我们首先定义一个类,在类中重写构造方法
public class Bean1 {


	public Bean1(){


		System.out.println("bean1构造方法");
	}
}
接着在xml中实例化,仅仅需要id和class两个属性值即可。
<bean id="bean1" class="com.itheima.instance.constructor.Bean1"></bean>
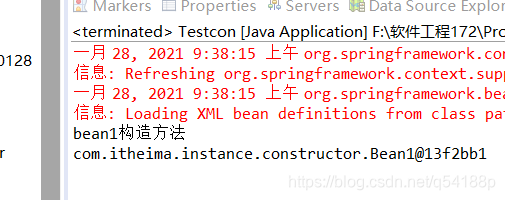
最后定义测试类,测试结果
	public static void main(String[] args) {


		ApplicationContext applicationconrtext = new ClassPathXmlApplicationContext("applicationContext.xml");
		Bean1  bean1 = (Bean1)applicationconrtext.getBean("bean1");
		System.out.println(bean1);
	}
成功创建对象,运行结果为
2.2.2静态工厂实例化
创建一个实体类,重写构造方法
public class Bean2 {


	public Bean2(){


		System.out.println("--bean2----");
	}
}
编写一个“生产实体类”的工厂类,创建静态工厂类
public class Bean2Factory {


	public static Bean2 createBean2(){


		return new Bean2();
	}
}
此时在xml中实例化有别于通常的方式,值得注意的是,此时class的路径是“静态工厂类”,而且添加了新的属性factory-method,指定静态方法
<bean id="bean2" class="com.itheima.instance.static_factory.Bean2Factory" factory-method="createBean2"/>
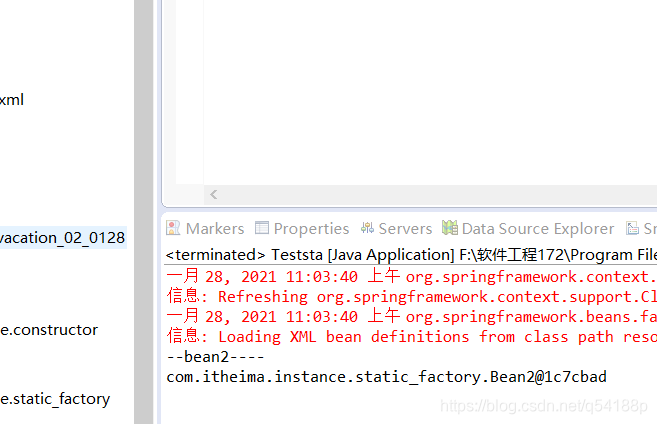
编写测试方法
ApplicationContext applicationconrtext = new ClassPathXmlApplicationContext("applicationContext.xml");
		Bean2  bean2 = (Bean2)applicationconrtext.getBean("bean2");
		System.out.println(bean2);
运行结果为
2.2.3实例工厂实例化
这种方式不需要将类的实例化放在静态方法中,采用直接创建Bean的方式
首先创建实体类
public class Bean3 {


	public Bean3(){


		System.out.println("bean3实例化完成");
	}
}
创建工厂类,注意区别于静态工厂类(这么没有使用static修饰)
public class Bean3Factory {


	public Bean3Factory(){


		System.out.println("正在实例化bean3");
	}
	public Bean3 createBean3(){


		return new Bean3();
	}
}
接着需要在xml文档中声明,声明时先实例化了工厂类,然后通过factory-bean和factory-method属性,实例化bean3
<bean id="createbean3" class="com.itheima.instance.factory.Bean3Factory"></bean>
<bean id="bean3" factory-bean="createbean3" factory-method="createBean3"></bean>
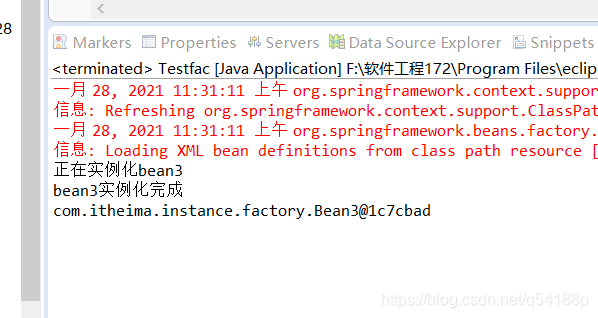
编写测试类
public static void main(String[] args) {


		ApplicationContext applicationconrtext = new ClassPathXmlApplicationContext("applicationContext.xml");
		Bean3  bean3 = (Bean3)applicationconrtext.getBean("bean3");
		System.out.println(bean3);
	}
程序运行结果
既然有了三种方法,我们的第一反应应该时比较他们的优劣,单凭写代码我们可以感觉静态工厂和实例工厂相比于构造器似乎更加麻烦,于是开始查找相关的内容。
这里给出了详细介绍.
2.3Bean的作用域
通过Spring容器创建一个Bean实例时,不仅可以完成Bean的实例化,还可以为Bean指定特定的作用域,主要介绍如下两种。
2.3.1singleton作用域
无论有多少个Bean引用它,始终指向同一个对象,这也是默认的。
在xml文档中声明bean时,可以编写scope属性,设定属性值为singleton,因为这个是默认属性,所以可以选择不写。
  <bean id="singleton1"  class="com.itheima.scope.Scope" scope="singleton"></bean>
  <bean id="singleton2"  class="com.itheima.scope.Scope" ></bean>
2.3.2prototype作用域
Spring容器会为每个对该Bean的请求创建一个新的实例,添加属性scope并设置属性为prototype
<bean id="prototype1" class="com.itheima.scope.Scope" scope="prototype"></bean>
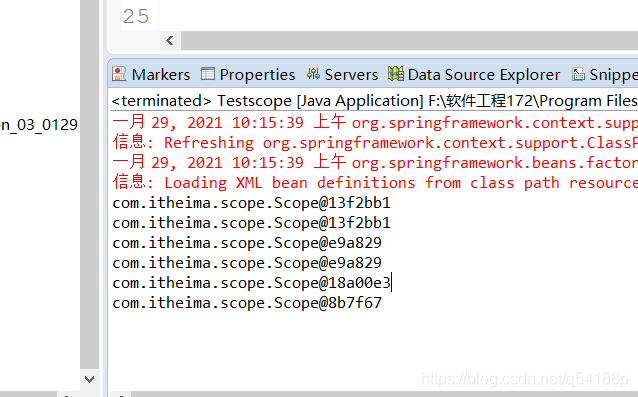
首先编写一个实体类,然后在xml中按照上面的格式声明三个bean实例,编写测试类,获取bean实例,打印查看测试结果
public static void main(String[] args) {


		ApplicationContext applicationconrtext = new ClassPathXmlApplicationContext("applicationContext.xml");
		Scope singleton1_1 = (Scope)applicationconrtext.getBean("singleton1");
		Scope singleton1_2 = (Scope)applicationconrtext.getBean("singleton1");
		Scope singleton2_1 = (Scope)applicationconrtext.getBean("singleton2");
		Scope singleton2_2 = (Scope)applicationconrtext.getBean("singleton2");
		Scope prototype1_1 = (Scope)applicationconrtext.getBean("prototype1");
		Scope prototype1_2 = (Scope)applicationconrtext.getBean("prototype1");
		System.out.println(singleton1_1);
		System.out.println(singleton1_2);
		System.out.println(singleton2_1);
		System.out.println(singleton2_2);
		System.out.println(prototype1_1);
		System.out.println(prototype1_2);
	}
程序运行结果如下
2.4Bean的生命周期
Spring容器可以管理Singleton作用域的Bean生命周期,在此作用域下,Spring 可以精确知道Bean何时被创建,何时初始化,何时被销毁。对于prototype作用域,Spring只负责创建,创建成功后Bean实例交给客户端代码来管理,容器不在跟踪其生命周期。
详细的可以参考
2.5Bean的装配方式
Bean的装配理解为依赖关系的注入。
2.5.1基于XML的装配
设值注入和构造注入是基于此的装配方式。
- 设值注入:要求Bean类中必须包含一个默认无参构造方法,以及需要注入属性的setter方法。
- 构造注入:提供带有所有参数的构造方法。
首先编写bean实体类,为了既可以实现设值注入和构造注入。故在类中给出了无参构造方法和set方法,也给出了包含所有参数的构造方法。
package com.itheima.assemble;

import java.util.List;

public class User {


	private String username;
	private Integer password;
	private List<String> list;
	public User() {


		super();
	}
	public void setUsername(String username) {


		this.username = username;
	}
	public void setPassword(Integer password) {


		this.password = password;
	}
	public void setList(List<String> list) {


		this.list = list;
	}
	public User(String username, Integer password, List<String> list) {


		super();
		this.username = username;
		this.password = password;
		this.list = list;
	}
	@Override
	public String toString() {


		return "User [username=" + username + ", password=" + password + ", list=" + list + "]";
	}
}
关键部分接下俩通过xml实现装配,值得注意的是构造注入采用constructor-arg标签,搭配index使用。设值注入使用property,结合name来完成。
<bean id="user1" class="com.itheima.assemble.User">
    	<constructor-arg index="0" value="tom"/>
    	<constructor-arg index="1" value="123"/>
    	<constructor-arg index="2">
    		<list>
    			<value>"zwl"</value>
    			<value>"cj"</value>
    		</list>
    	</constructor-arg>
    </bean>
    <bean id="user2" class="com.itheima.assemble.User">
    	<property name="username" value="jack"></property>
    	<property name="password" value="147258"></property>
    	<property name="list">
    		<list>
    			<value>set1</value>
    			<value>set2</value>
    		</list>
    	</property>
    </bean>
编写测试类,查看测试结果
User user1 = (User)applicationconrtext.getBean("user1");
User user2 = (User)applicationconrtext.getBean("user2");
System.out.println(user1.toString());
System.out.println(user2.toString());

2.5.2基于Annotation的装配
上面我们仅仅写了两个实例,就已经发现xml很臃肿,如果有更多的bean就会更加麻烦。Spring 提供了对 Annotation 技术的全面支持。
| 注解 | 解释 |
|---|---|
| @Component | 可以使用此注解描述 Spring 中的 Bean,但它是一个泛化的概念,仅仅表示一个组件(Bean),并且可以作用在任何层次。使用时只需将该注解标注在相应类上即可。 |
| @Repository | 用于将数据访问层(DAO层)的类标识为 Spring 中的 Bean,其功能与 @Component 相同。 |
| @Service | 通常作用在业务层(Service 层),用于将业务层的类标识为 Spring 中的 Bean,其功能与 @Component 相同。 |
| @Controller | 通常作用在控制层(如 Spring mvc 的 Controller),用于将控制层的类标识为 Spring 中的 Bean,其功能与 @Component 相同。 |
| @Autowired | 用于对 Bean 的属性变量、属性的 Set 方法及构造函数进行标注,配合对应的注解处理器完成 Bean 的自动配置工作。默认按照 Bean 的类型进行装配。 |
| @Resource | 按照 Bean 实例名称进行装配。 |
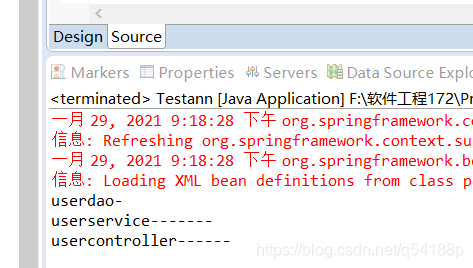
为了充分发挥注解,分别定义UserDao接口,及其实现类,UserService接口和实现类,以及UserController类,编写say方法。
public interface UserDao {


	public void save();
}
@Repository("userDao")
public class UserDaoImpl implements UserDao {


	public void save() {


		// TODO Auto-generated method stub
		System.out.println("userdao-");
	}
}
public interface UserService {


	public void say() ;
}
@Service("userService")
public class UserServiceImpl implements UserService {


	@Resource(name = "userDao")
	public UserDao userdao;
	@Override
	public void say() {


		// TODO Auto-generated method stub
		this.userdao.save();
		System.out.println("userservice-------");
	}
}
@Controller("userController")
public class UserController {


	@Resource(name="userService")
	private UserService userService;
	public void say() {


		this.userService.say();
		System.out.println("usercontroller------");
	}
}
编写XML文件
这里需要开启注解处理器,定义bean实例
值得注意的是,配置文件前面关于context的约束文件发生了变化,而且需要导入aop包
<?xml version="1.0" encoding="UTF-8"?>
<beans xmlns="http://www.springframework.org/schema/beans"
    xmlns:xsi="http://www.w3.org/2001/XMLSchema-instance"
    xmlns:context="http://www.springframework.org/schema/context"
    xsi:schemaLocation="http://www.springframework.org/schema/beans
        http://www.springframework.org/schema/beans/spring-beans.xsd
          http://www.springframework.org/schema/context
        http://www.springframework.org/schema/context/spring-context-4.3.xsd">
        <context:annotation-config />
    <bean id="userDao" class="com.itheima.annotation.UserDaoImpl">
        <!-- collaborators and configuration for this bean go here -->
    </bean>
	 <bean id="userService" class="com.itheima.annotation.UserServiceImpl">

    </bean>
	<bean id="userController" class="com.itheima.annotation.UserController">
        <!-- collaborators and configuration for this bean go here -->
    </bean>
</beans>
这样看上去上面的xml似乎并没有减少很多,当然有简便的如下,仅仅需要一句话就可以实现
<?xml version="1.0" encoding="UTF-8"?>
<beans xmlns="http://www.springframework.org/schema/beans"
    xmlns:xsi="http://www.w3.org/2001/XMLSchema-instance"
    xmlns:context="http://www.springframework.org/schema/context"
    xsi:schemaLocation="http://www.springframework.org/schema/beans
        http://www.springframework.org/schema/beans/spring-beans.xsd
          http://www.springframework.org/schema/context
        http://www.springframework.org/schema/context/spring-context-4.3.xsd">
        <context:annotation-config />
    <context:component-scan base-package="com.itheima.annotation"></context:component-scan>
</beans>
运行结果如下:
2.5.3自动装配
有什么办法既可以减少代码量,又可以实现装配呢?
使用Spring的bean元素中的autowire属性,属性值如下所示
| 名称 | 说明 |
|---|---|
| byName | 根据 Property 的 name 自动装配,如果一个 Bean 的 name 和另一个 Bean 中的 Property 的 name 相同,则自动装配这个 Bean 到 Property 中 |
| byType | 根据 Property 的数据类型(Type)自动装配,如果一个 Bean 的数据类型兼容另一个 Bean 中 Property 的数据类型,则自动装配。 |
| no | 默认情况下,不使用自动装配,Bean 依赖必须通过 ref 元素定义。 |
public class FishingRod {


	/**
	 * 被使用
	 */
	public void used() {


		System.out.println("钓鱼...");
	}
}
值得注意的是需要添加set方法。
public class Person {


	private FishingRod fr;

	/**
	 * 钓鱼
	 */
	public void fish() {


		fr.used();
	}

	public void setFr(FishingRod fr) {


		this.fr = fr;
	}
}
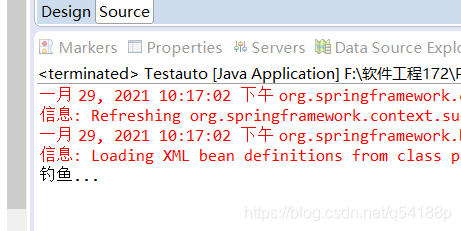
编写xml文档
	<bean id="person" class="com.itheima.auto.Person" autowire="byType"></bean>
	<bean id="fr" class="com.itheima.auto.FishingRod"></bean>
测试运行结果如图所示