图像增强
在做图像任务时,我们常常需要图像增强。今天来讲解下keras中的图像增强
ImageDataGenerator
官网
https://keras.io/api/preprocessing/image/
keras.preprocessing.image.ImageDataGenerator(
    featurewise_center=False, #输入值按照均值为0进行处理
    samplewise_center=False, #每个样本的均值按0处理
    featurewise_std_normalization=False, #输入值按照标准正态化处理
    samplewise_std_normalization=False, #每个样本按照标准正态化处理
    zca_whitening=False, # 是否开启增白
    zca_epsilon=1e-06,
    rotation_range=0, #图像随机旋转一定角度,最大旋转角度为设定值
    width_shift_range=0.0, #图像随机水平平移,最大平移值为设定值。若值为小于1的float值,则可认为是按比例平移,若大于1,则平移的是像素;若值为整型,平移的也是像素;假设像素为2.0,则移动范围为[-1,1]之间
    height_shift_range=0.0, #图像随机垂直平移,同上
    brightness_range=None, # 图像随机亮度增强,给定一个含两个float值的list,亮度值取自上下限值间
    shear_range=0.0, # 图像随机修剪
    zoom_range=0.0, # 图像随机变焦
    channel_shift_range=0.0,
    fill_mode='nearest', #填充模式,默认为最近原则,比如一张图片向右平移,那么最左侧部分会被临近的图案覆盖
    cval=0.0,
    horizontal_flip=False, #图像随机水平翻转
    vertical_flip=False, #图像随机垂直翻转
    rescale=None, #缩放尺寸
    preprocessing_function=None,
    data_format=None,
    validation_split=0.0,
    dtype=None)
可能用到的函数fit
fit(x, augment=False, rounds=1):计算依赖于数据的变换所需要的统计信息(均值方差等),只有使用featurewise_center,featurewise_std_normalization或zca_whitening时需要此函数。
X:numpy array,样本数据,秩应为4.在黑白图像的情况下channel轴的值为1,在彩色图像情况下值为3

augment:布尔值,确定是否使用随即提升过的数据

round:若设augment=True,确定要在数据上进行多少轮数据提升,默认值为1

seed: 整数,随机数种子
用到的函数flow
flow:
flow(self, X, y, batch_size=32, shuffle=True, seed=None, save_to_dir=None, save_prefix='', save_format='png'):接收numpy数组和标签为参数,生成经过数据提升或标准化后的batch数据,并在一个无限循环中不断的返回batch数据

x:样本数据,秩应为4.在黑白图像的情况下channel轴的值为1,在彩色图像情况下值为3

y:标签

batch_size:整数,默认32

shuffle:布尔值,是否随机打乱数据,默认为True

save_to_dir:None或字符串,该参数能让你将提升后的图片保存起来,用以可视化

save_prefix:字符串,保存提升后图片时使用的前缀, 仅当设置了save_to_dir时生效

save_format:"png"或"jpeg"之一,指定保存图片的数据格式,默认"jpeg"

yields:形如(x,y)的tuple,x是代表图像数据的numpy数组.y是代表标签的numpy数组.该迭代器无限循环.

seed: 整数,随机数种子
用到的函数flow_from_directory :
flow_from_directory(directory):
以文件夹路径为参数,生成经过数据提升/归一化后的数据,在一个无限循环中无限产生batch数据
- directory: 目标文件夹路径,对于每一个类,该文件夹都要包含一个子文件夹.子文件夹中任何JPG、PNG、BNP、PPM的图片都会被生成器使用.详情请查看此脚本
- target_size: 整数tuple,默认为(256, 256). 图像将被resize成该尺寸
- color_mode: 颜色模式,为"grayscale",“rgb"之一,默认为"rgb”.代表这些图片是否会被转换为单通道或三通道的图片.
- classes: 可选参数,为子文件夹的列表,如[‘dogs’,‘cats’]默认为None. 若未提供,则该类别列表将从directory下的子文件夹名称/结构自动推断。每一个子文件夹都会被认为是一个新的类。(类别的顺序将按照字母表顺序映射到标签值)。通过属性class_indices可获得文件夹名与类的序号的对应字典。
- class_mode: “categorical”, “binary”, "sparse"或None之一. 默认为"categorical. 该参数决定了返回的标签数组的形式, "categorical"会返回2D的one-hot编码标签,"binary"返回1D的二值标签."sparse"返回1D的整数标签,如果为None则不返回任何标签, 生成器将仅仅生成batch数据, 这种情况在使用model.predict_generator()和model.evaluate_generator()等函数时会用到.
- batch_size: batch数据的大小,默认32
- shuffle: 是否打乱数据,默认为True
- seed: 可选参数,打乱数据和进行变换时的随机数种子
- save_to_dir: None或字符串,该参数能让你将提升后的图片保存起来,用以可视化
- save_prefix:字符串,保存提升后图片时使用的前缀, 仅当设置了save_to_dir时生效
- save_format:“png"或"jpeg"之一,指定保存图片的数据格式,默认"jpeg”
- flollow_links: 是否访问子文件夹中的软链接
flow_from_directory(directory)伪代码如下
xm,y=getDataIndex()#获取所有文件夹中所有图片索引,以及文件夹名也即标签

while(True):
    if shuffle==True:
        shuffle(xm,y)#打乱图片索引及其标签
    for i in range(0,len(x),batch_size):
        xm_batch=xm[i:i+batch_size]#文件索引
        y_batch=y[i:i+batch_size]
        x_batch=getImg(xm_batch)#根据文件索引,获取图像数据
        ImagePro(x_batch)#数据增强
        #保存提升后的图片
        #saveToFile()
        yield (x_batch,y_batch)
算例flow
from keras.preprocessing.image import ImageDataGenerator, array_to_img, img_to_array, load_img
import numpy as np

datagen = ImageDataGenerator(
    rotation_range=40,
    width_shift_range=0.2,
    height_shift_range=0.2,
    rescale=1/255.0,
    shear_range=0.2,
    zoom_range=0.2,
    horizontal_flip=True,
    fill_mode='nearest'
)


from keras.preprocessing import image
import matplotlib.pyplot as plt
img_path1 = 'meinv.jpg'

img1 = image.load_img(img_path1) # plt格式的图片。

x = img_to_array(img1)
x = np.expand_dims(x, 0)#扩展维度

y_train = [1]  # 标签

# [生成图片]: 其中,gen可以作为生成器,用model.fit_generate(generate,)中来训练。
#datagen.fit(x, y_train) #fit这里用不上
gen = datagen.flow(x, y_train, batch_size=2)  # x_train —— 要求类型:numpy.array; 要求形状: (image_num, 长, 宽, 通道)
                                                          # y_train —— 要求类型:numpy.array; 要求形状: (image_num)
    # 注: (1) 每个batch中生成的图片是 从数据集的所有图片中,随机抽取一张并进行图片尺寸大小啥的变换后放入batch中, 这样抽取batch_size张图片后就形成一个batch。
    #    (2) 对图片进行旋转尺寸大小变换后的图片,图片大小[不会]改变。

for i in range(9):
    plt.subplot(3,3,i+1)
    x,y=next(gen)
    print(x.shape)

    i=np.squeeze(x)#降维
    i==np.array(i,dtype=np.uint8)#转换为图像格式,必须使用==
    plt.imshow(i)
plt.show()
结果

多图
from keras.preprocessing.image import ImageDataGenerator, array_to_img, img_to_array, load_img
import numpy as np
datagen = ImageDataGenerator(
rotation_range=40,
width_shift_range=0.2,
height_shift_range=0.2,
rescale=1/255.0,
)
from keras.preprocessing import image
import matplotlib.pyplot as plt
img_path1 = 'meinv.jpg'
img_path2 = 'meinv1.jpg'
img1 = image.load_img(img_path1) # plt格式的图片。
img2 = image.load_img(img_path2) # plt格式的图片。
x1 = np.array(img1)
x1=np.resize(x1,(600,400,3))
x2 = np.array(img2)
x2=np.resize(x2,(600,400,3))
x_train=np.array([x1,x2])#多图,必须统一尺寸
y_train = [1,2] # 标签
#print(x_train.shape)#(2, 400, 400, 3)
gen = datagen.flow(x_train, y_train, batch_size=2) # x_train —— 要求类型:numpy.array; 要求形状: (image_num, 长, 宽, 通道)
# y_train —— 要求类型:numpy.array; 要求形状: (image_num)
# 注: (1) 每个batch中生成的图片是 从数据集的所有图片中,随机抽取一张并进行图片尺寸大小啥的变换后放入batch中, 这样抽取batch_size张图片后就形成一个batch。
# (2) 对图片进行旋转尺寸大小变换后的图片,图片大小[不会]改变。
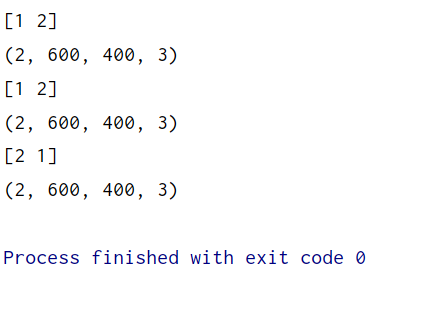
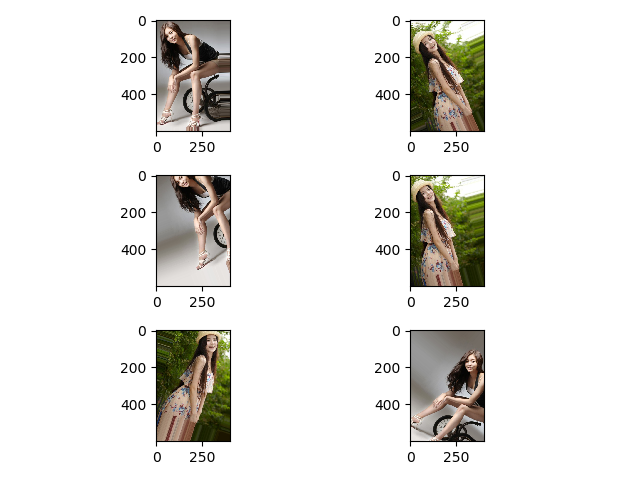
for i in range(3):
x,y=next(gen)
print(y)
print(x.shape)
photo1=np.squeeze(x[0])#降维
photo2=np.squeeze(x[1])#降维
photo1==np.array(photo1,dtype=np.uint8)#转换为图像格式,必须使用==
photo2 == np.array(photo2, dtype=np.uint8) # 转换为图像格式,必须使用==
plt.subplot(3,2,(i+1)*2-1)
plt.imshow(photo1)
plt.subplot(3,2, (i+1)*2)
plt.imshow(photo2)
plt.show()
批量生成保存到文件夹中
# -*- coding: utf-8 -*-

from keras.preprocessing.image import ImageDataGenerator, array_to_img, img_to_array, load_img
import numpy as np

datagen = ImageDataGenerator(
    rotation_range=40,
    width_shift_range=0.2,
    height_shift_range=0.2,
    rescale=1/255.0,
    shear_range=0.2,
    zoom_range=0.2,
    horizontal_flip=True,
    fill_mode='nearest'
)

import os

for root ,dirs,files in os.walk(r'C:\Users\Shineion\Desktop\新建文件夹'):
    for name in files:
        file_path=os.path.join(root,name)#包含路径的文件
        print(file_path)

        img = load_img(file_path)
        x = img_to_array(img)
        #print(x.shape)

        x = np.expand_dims(x, 0)
        #print(x.shape)

        i = 0
        for batch in datagen.flow(x, batch_size=1, save_to_dir='C:\\Users\\Shineion\\Desktop\\新建文件夹',
                                  save_prefix='new_photo', save_format='png'):
            i += 1
            if i == 20:
                break
        print('finished!')
原始文件夹
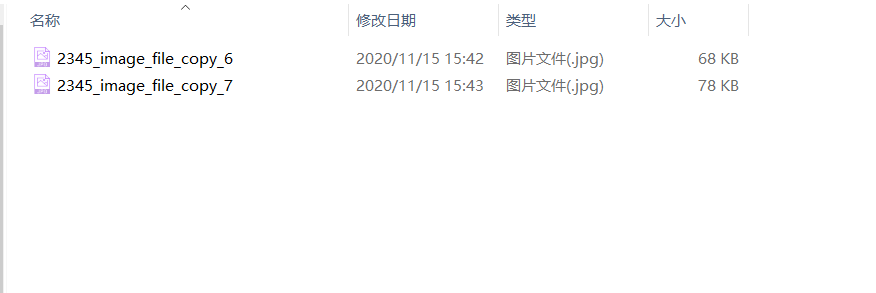
结果文件夹42张图

算例flow_from_directory
原始文件夹

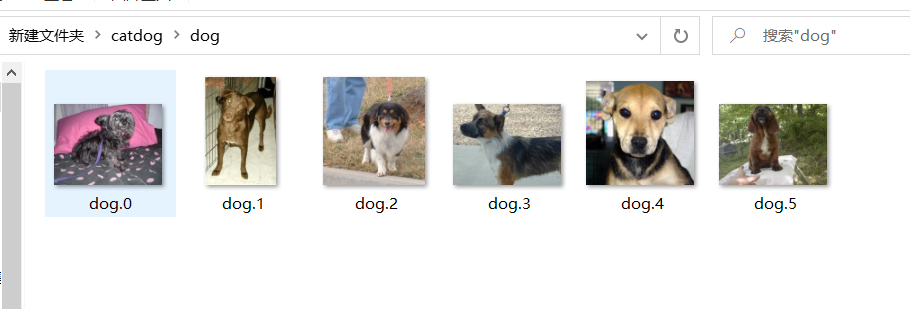
cat dog文件夹里有图

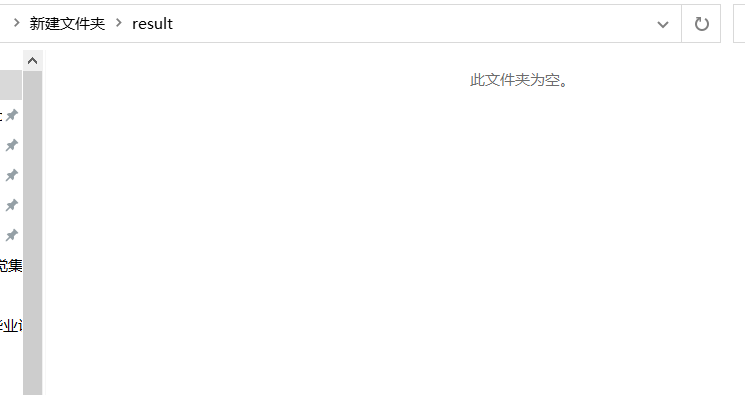
relult文件夹无图
from keras.preprocessing.image import ImageDataGenerator

path = r'C:\\Users\\Shineion\\Desktop\\新建文件夹\catdog'  # 类别子文件夹的上一级
dst_path = r'C:\Users\Shineion\Desktop\新建文件夹\result'  # save path

# 增强方式
datagen = ImageDataGenerator(rotation_range=5, width_shift_range=0.02, horizontal_flip=True, )

gen = datagen.flow_from_directory(path, target_size=(200, 200), batch_size=1,
                                  classes=['cat'],  # 可选对那几个文件夹进行数据增强,如classes=['1','2'],我只针对cat
                                  save_to_dir=dst_path,  # 生成后的图像保存路
                                  save_prefix='arg', save_format='jpg')
total_num = 12  # 增强的总数目
for i in range(total_num):
    gen.next()
结果

在模型中使用图像数据增强
还是使用上例中的文件夹,不同的是我扩充啦猫狗的数据集
猫和狗各有30张左右图
用到的知识点
对于小型,简单化的数据集,使用Keras的.fit函数是完全可以接受的。
这些数据集通常不是很具有挑战性,不需要任何数据增强。
但是,真实世界的数据集很少这么简单:
真实世界的数据集通常太大而无法放入内存中
它们也往往具有挑战性,要求我们执行数据增强以避免过拟合并增加我们的模型的泛化能力,这时候我们需要用到利用Keras的.fit_generator函数
fit_generator(self, generator,
                    steps_per_epoch=None,
                    epochs=1,
                    verbose=1,
                    callbacks=None,
                    validation_data=None,
                    validation_steps=None,
                    class_weight=None,
                    max_queue_size=10,
                    workers=1,
                    use_multiprocessing=False,
                    shuffle=True,
                    initial_epoch=0)
优点:通过Python generator产生一批批的数据用于训练模型。generator可以和模型并行运行,例如,可以使用CPU生成批数据同时在GPU上训练模型。
- generator:一个generator或Sequence实例,为了避免在使用multiprocessing时直接复制数据。
- steps_per_epoch:从generator产生的步骤的总数(样本批次总数)。通常情况下,应该等于数据集的样本数量除以批量的大小。(即一次多少样本)
- epochs:整数,在数据集上迭代的总数。
- works:在使用基于进程的线程时,最多需要启动的进程数量。
from keras.models import Sequential
from keras.layers import Dense, Dropout, Flatten, Conv2D, MaxPooling2D
import keras
#定义模型
def define_model():
model = Sequential()
model.add(Conv2D(filters=16,
kernel_size=(5, 5),
padding='same',
input_shape=(200, 200, 3),
activation='relu')) # 卷积层1
model.add(MaxPooling2D(pool_size=(2, 2))) # 池化层2
model.add(Dropout(0.25))
model.add(Flatten()) # 平坦层
model.add(Dense(10,activation='relu')) # 隐藏层
model.add(Dense(2, activation='softmax')) # 输出层
model.compile(optimizer='adam', loss='categorical_crossentropy', metrics=['accuracy'])#
model.summary()
return model
model = define_model()
#图片数据增强
from keras.preprocessing.image import ImageDataGenerator
from keras.preprocessing import image
path = r'C:\\Users\\Shineion\\Desktop\\新建文件夹\catdog' # 类别子文件夹的上一级
dst_path = r'C:\Users\Shineion\Desktop\新建文件夹\result' # save path
# 增强方式
datagen = ImageDataGenerator(rotation_range=5, width_shift_range=0.02, horizontal_flip=True )
#训练集增强
train_generator = datagen.flow_from_directory(path, target_size=(200, 200), batch_size=10,
classes=['cat','dog'] # 可选对那几个文件夹进行数据增强,如classes=['1','2'],我只针对cat
,class_mode='categorical')
#测试集增强
validation_generator = datagen.flow_from_directory(path, target_size=(200, 200), batch_size=10,
classes=['cat','dog'] # 可选对那几个文件夹进行数据增强,如classes=['1','2'],我只针对cat
,class_mode='categorical')
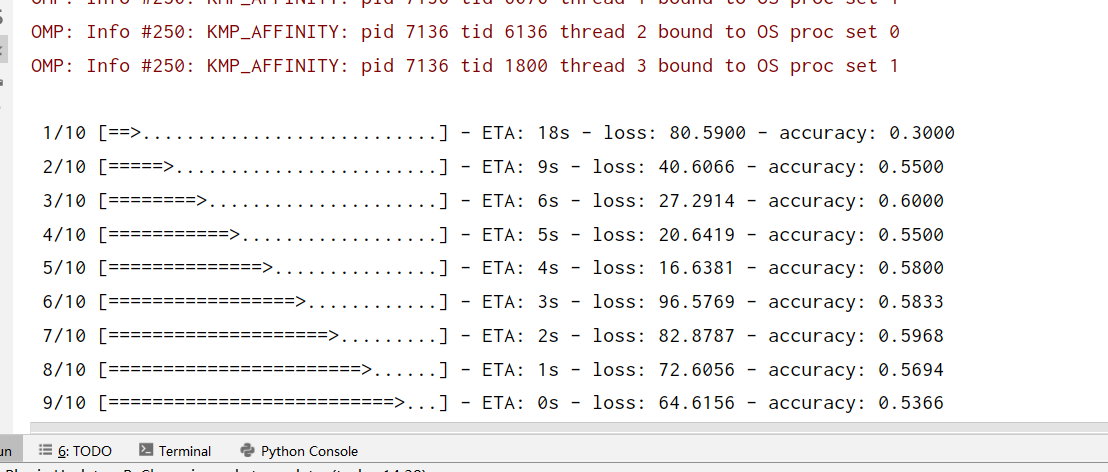
model.fit_generator(generator=train_generator,steps_per_epoch=10,epochs=2,validation_data=validation_generator,validation_steps=10)
model.save('猫狗分类1.h5')
代码可以运行

预测代码
from matplotlib import image as mping
from matplotlib import  pyplot as plt
import numpy as np
img=mping.imread(r'C:\Users\Shineion\Desktop\新建文件夹\catdog\dog\dog.3.jpg')#image.read()
plt.imshow(img)#图片显示
plt.show()#画布显示

img=np.array(img)
img=np.resize(img,(200, 200, 3))
img=np.expand_dims(img, 0)#扩展维度

predict=model.predict(img)
print(predict)
结果
为狗的概率0.49
我只有几十张图,当然准确度低

注意问题
在把数据增强和模型结合起来时容易出现这个问题
IOError: broken data stream when reading image file
这是因为数据在增强时出现损坏。
我还未研究如何解决,可能有些增强操作会造成文件损坏。
为保证万无一失,我还是倾向于先数据增强,把图保存到文件夹中。再使用模型,这样做的缺点是占内存。存储需要内存的
更多模型代码
下面代码来源于keras ImageDataGenerator用法
使用flow
(x_train, y_train), (x_test, y_test) = cifar10.load_data()
y_train = np_utils.to_categorical(y_train, num_classes)
y_test = np_utils.to_categorical(y_test, num_classes)

datagen = ImageDataGenerator(
    featurewise_center=True,
    featurewise_std_normalization=True,
    rotation_range=20,
    width_shift_range=0.2,
    height_shift_range=0.2,
    horizontal_flip=True)

# compute quantities required for featurewise normalization
# (std, mean, and principal components if ZCA whitening is applied)
datagen.fit(x_train)

# fits the model on batches with real-time data augmentation:
model.fit_generator(datagen.flow(x_train, y_train, batch_size=32),
                    steps_per_epoch=len(x_train), epochs=epochs)

# here's a more "manual" example
for e in range(epochs):
    print 'Epoch', e
    batches = 0
    for x_batch, y_batch in datagen.flow(x_train, y_train, batch_size=32):
        loss = model.train(x_batch, y_batch)
        batches += 1
        if batches >= len(x_train) / 32:
            # we need to break the loop by hand because
            # the generator loops indefinitely
            break
使用flow_from_directory(directory)
train_datagen = ImageDataGenerator(
        rescale=1./255,
        shear_range=0.2,
        zoom_range=0.2,
        horizontal_flip=True)

test_datagen = ImageDataGenerator(rescale=1./255)

train_generator = train_datagen.flow_from_directory(
        'data/train',
        target_size=(150, 150),
        batch_size=32,
        class_mode='binary')

validation_generator = test_datagen.flow_from_directory(
        'data/validation',
        target_size=(150, 150),
        batch_size=32,
        class_mode='binary')

model.fit_generator(
        train_generator,
        steps_per_epoch=2000,
        epochs=50,
        validation_data=validation_generator,
        validation_steps=800)

作者:重庆电网准新人-余登武
