这边引入了GitHub上的第三方控件。
除了第五步的点击事件源码需要根据实际情况再进行修改,其余的代码均已调通,在后面的项目中可直接复用。
一、需求UI图
以前的UI图找不到了,直接手绘了一个UI图如下。
可知这个弹窗中,包含一个标题TextView,一个关闭按钮ImageView,两个Button表示确定和取消,中间还需要一个可以拖动的选项条,这边使用了GitHub上一个第三方WheelView。
第三方WheelView的使用链接GitHub
说到这边正好总结一下GitHub上第三方控件的使用。
以本项目中的pickerview为例:
输入pickerview搜索,筛选java,sort选择Most stars,选择第一个,打开查看,阅读使用文档等。

二、代码设计步骤
(1)一个drawable:dialog_background,作为背景被几个弹窗复用。
(2)一个layout:picker_dialog.xml
(3)PickerDialogFragment.java
(4)DialogUtils工具类定义showPickerDialog方法
(5)Activity中设置点击事件弹出弹窗,使用showPickerDialog方法进行复用。
三、源码
(1)dialog_background.xml
<?xml version="1.0" encoding="utf-8"?>
<shape xmlns:android="http://schemas.android.com/apk/res/android">
    <corners android:radius="15dp" />
    <solid android:color="@color/cardview_shadow_start_color" />
</shape>
(2)一个layout:picker_dialog.xml
由于要导入一个第三方滑动选项条控件WheelView,我们需要先在build.gradle中导入依赖:
compile 'com.contrarywind:Android-PickerView:4.1.9'
导入后,layout中就可以直接使用WheelView控件了。
该第三方控件具体的使用方法可以参考上面已经给出的链接。
接下来就是picker_dialog.xml的代码:
<?xml version="1.0" encoding="utf-8"?>
<androidx.constraintlayout.widget.ConstraintLayout
    xmlns:android="http://schemas.android.com/apk/res/android"
    xmlns:app="http://schemas.android.com/apk/res-auto"
    android:layout_width="match_parent"
    android:layout_height="match_parent"
    android:background="@drawable/dialog_background">

    <ImageView
        android:id="@+id/close"
        android:layout_width="40dp"
        android:layout_height="40dp"
        android:layout_marginStart="20dp"
        android:layout_marginTop="20dp"
        app:layout_constraintStart_toStartOf="parent"
        app:layout_constraintTop_toTopOf="parent"
        app:srcCompat="@drawable/close" />

    <TextView
        android:id="@+id/title"
        android:layout_width="wrap_content"
        android:layout_height="wrap_content"
        android:layout_marginEnd="90dp"
        android:layout_marginStart="30dp"
        android:text="设定报警时速"
        android:textSize="26sp"
        app:layout_constraintBottom_toBottomOf="@+id/close"
        app:layout_constraintEnd_toEndOf="parent"
        app:layout_constraintStart_toEndOf="@+id/close"
        app:layout_constraintTop_toTopOf="@+id/close" />

    <LinearLayout
        android:layout_width="0dp"
        android:layout_height="0dp"
        android:orientation="vertical"
        app:layout_constraintBottom_toTopOf="@+id/sure"
        app:layout_constraintEnd_toEndOf="parent"
        app:layout_constraintStart_toStartOf="parent"
        app:layout_constraintTop_toBottomOf="@+id/title">

        <com.contrarywind.view.WheelView
            android:id="@+id/options"
            android:layout_width="match_parent"
            android:layout_height="match_parent" />

    </LinearLayout>

    <Button
        android:id="@+id/sure"
        android:layout_width="wrap_content"
        android:layout_height="wrap_content"
        android:layout_marginBottom="8dp"
        android:text="确定"
        app:layout_constraintBottom_toBottomOf="parent"
        app:layout_constraintEnd_toStartOf="@+id/guideline"
        app:layout_constraintStart_toStartOf="parent" />

    <androidx.constraintlayout.widget.Guideline
        android:id="@+id/guideline"
        android:layout_width="wrap_content"
        android:layout_height="wrap_content"
        android:orientation="vertical"
        app:layout_constraintGuide_percent="0.5" />

    <Button
        android:id="@+id/cancel"
        android:layout_width="wrap_content"
        android:layout_height="wrap_content"
        android:layout_marginBottom="8dp"
        android:text="取消"
        app:layout_constraintBottom_toBottomOf="parent"
        app:layout_constraintEnd_toEndOf="parent"
        app:layout_constraintStart_toStartOf="@+id/guideline" />
</androidx.constraintlayout.widget.ConstraintLayout>
(3)PickerDialogFragment.java:
public class PickerDialogFragment extends DialogFragment {


    List<String> items;
    PickerDialogFragmentListener pickerDialogFragmentListener;
    int index;

    @Nullable
    @Override
    public View onCreateView(LayoutInflater inflater,
                             @Nullable ViewGroup container, @Nullable Bundle savedInstanceState) {


        getDialog().requestWindowFeature(Window.FEATURE_NO_TITLE);

        View view = inflater.inflate(R.layout.picker_dialog, container, false);

        Bundle bundle = getArguments();
        items = bundle.getStringArrayList("data");
        String title = bundle.getString("title");
        index = bundle.getInt("index");

        ImageView close = view.findViewById(R.id.close);
        TextView titleText = view.findViewById(R.id.title);
        TextView sure = view.findViewById(R.id.sure);
        TextView cancel = view.findViewById(R.id.cancel);

        titleText.setText(title);
        sure.setOnClickListener(v -> {


            if (pickerDialogFragmentListener != null) {


                pickerDialogFragmentListener.getData(index);
            }
            getDialog().cancel();
        });
        cancel.setOnClickListener(v -> getDialog().cancel());
        close.setOnClickListener(v -> getDialog().cancel());
        initWheelView(view);
        return view;
    }

    private void initWheelView(View view) {


        WheelView options = view.findViewById(R.id.options);
        options.setCyclic(false);
        options.setTextColorCenter(Color.WHITE);
        options.setTextSize(26);
        options.setAdapter(new ArrayWheelAdapter(items));
        options.setOnItemSelectedListener(index -> this.index = index);
        options.setCurrentItem(index);
    }

    @Override
    public void onStart() {


        super.onStart();
        Dialog dialog = getDialog();
        if (dialog != null ) {


            DisplayMetrics dm = new DisplayMetrics();
            getActivity().getWindowManager().getDefaultDisplay().getMetrics(dm);
            int height = ViewGroup.LayoutParams.MATCH_PARENT;
            dialog.getWindow().setLayout((int) (dm.widthPixels * 0.5), height);
            dialog.getWindow().setBackgroundDrawable(new ColorDrawable(Color.TRANSPARENT));
        }
    }

    public void setPickerDialogFragmentListener(PickerDialogFragmentListener pickerDialogFragmentListener) {


        this.pickerDialogFragmentListener = pickerDialogFragmentListener;
    }

    public void setItems(List<String> items) {


        this.items = items;
    }

    public void setIndex(int index) {


        this.index = index;
    }

    public interface PickerDialogFragmentListener {


        void getData(int index);
    }
}
(4)DialogUtils工具类定义showPickerDialog方法
方法如下:
public static void showPickerDialog(
            AppCompatActivity activity,
            ArrayList<String> data,
            String title,
            int currentIndex,
            PickerDialogFragment.PickerDialogFragmentListener listener) {


        PickerDialogFragment fragment = new PickerDialogFragment();
        Bundle bundle = new Bundle();
        bundle.putStringArrayList("data", data);
        bundle.putString("title", title);
        bundle.putInt("index", currentIndex);
        fragment.setArguments(bundle);
        fragment.setPickerDialogFragmentListener(listener);
        fragment.show(activity.getSupportFragmentManager(), "fragment");
    }
(5)Activity中设置点击事件弹出弹窗,使用showPickerDialog方法进行复用。
首先在arrays.xml中定义我们WheelView中需要的数据:
<?xml version="1.0" encoding="utf-8"?>
<resources>
    <array name="alertSpeeds">
        <item>30</item>
        <item>35</item>
        <item>40</item>
        <item>45</item>
        <item>50</item>
        <item>55</item>
        <item>60</item>
        <item>65</item>
        <item>70</item>
        <item>75</item>
        <item>80</item>
        <item>85</item>
        <item>90</item>
        <item>95</item>
        <item>100</item>
        <item>105</item>
        <item>110</item>
        <item>115</item>
        <item>120</item>
        <item>125</item>
        <item>130</item>
        <item>135</item>
        <item>140</item>
        <item>145</item>
        <item>150</item>
        <item>155</item>
        <item>160</item>
        <item>165</item>
        <item>170</item>
        <item>175</item>
        <item>180</item>
        <item>185</item>
        <item>190</item>
        <item>195</item>
        <item>200</item>
        <item>205</item>
        <item>210</item>
        <item>215</item>
        <item>220</item>
    </array>
</resources>
然后再回到Activity中,
先声明一个ArrayList:
ArrayList<String> alertSpeeds;
然后在代码中把数据传入这个ArrayList:
alertSpeeds = new ArrayList<>();
        TypedArray alertSpeedsTypedArray = getResources().obtainTypedArray(R.array.alertSpeeds);

        for (int i = 0; i < alertSpeedsTypedArray.length(); i++) {


            alertSpeeds.add(alertSpeedsTypedArray.getInt(i, 0) + "km/h");
        }

        alertSpeedsTypedArray.recycle();
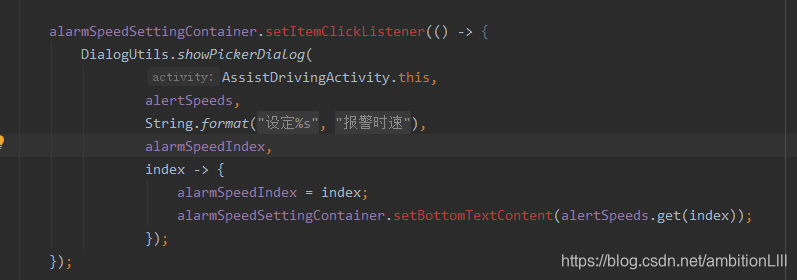
接着就是点击事件的实现,调用ShowPickerDialog方法:

上图代码如下:
alarmSpeedSettingContainer.setItemClickListener(() -> {


            DialogUtils.showPickerDialog(
                    AssistDrivingActivity.this,
                    alertSpeeds,
                    String.format(getString(R.string.setting_dialog_title), getString(R.string.alarm_speed)),
                    alarmSpeedIndex,
                    index -> {


                        alarmSpeedIndex = index;
                        alarmSpeedSettingContainer.setBottomTextContent(alertSpeeds.get(index));
                    });
        });