应用场景:
this.$nextTick()方法主要是用在随数据改变而改变的dom应用场景中,vue中数据和dom渲染由于是异步的,所以,要让dom结构随数据改变这样的操作都应该放进this.$nextTick()的回调函数中。
created()中使用的方法时,dom还没有渲染,如果此时在该钩子函数中进行dom赋值数据(或者其它dom操作)时无异于徒劳,所以,created()钩子函数进行的DOM操作一定要放在Vue.nextTick()的回调函数中,而与created()对应的是mounted()的钩子函数则是在dom完全渲染后才开始渲染数据,所以在mounted()中操作dom基本不会存在渲染问题。
简单的理解,vue.js中this.$nextTick()就是起到了一个等待数据的作用,也就是说,将一些回调延迟,等到DOM更新之后再开始执行。简单点说,相当于setTimeout()的作用。
例如:
1.你改变了dom元素数据,然后你又想输出dom,那你只能等到dom更新完成之后才会实现.
2.通过事件改变data数据,然后输出dom,在方法里直接打印的话, 由于dom元素还没有更新, 因此打印出来的还是未改变之前的值,而通过this.$nextTick()获取到的值为dom更新之后的值.
<template>
<section>
<div ref="hello">
<h1 ref="hello">{
{ value }}</h1>
</div>
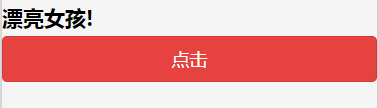
<button type="warn" @click="get">点击</button>
</section>
</template>
<script>
export default {
data() {
return {
value:'beautiful girl'
};
},
mounted() {
console.log("mounted首次执行")
console.log("mounted11",this.$refs["hello"])
this.$nextTick(function(){
console.log("mounted 中执行netxtTick函数")
console.log("mounted22",this.$refs["hello"])
})
},
created() {
console.log("created首次执行")
console.log("created11",this.$refs["hello"])
this.$nextTick(function(){
console.log("created 中执行netxtTick函数")
console.log("created22",this.$refs["hello"])
})
},
methods: {
get(){
this.value="漂亮女孩!"
console.log("methods11",this.$refs["hello"].innerText)
this.$nextTick(function(){
console.log("methods22",this.$refs["hello"].innerText)
})
}
}
};
</script>
<style scoped>
</style>