1,需要的包:
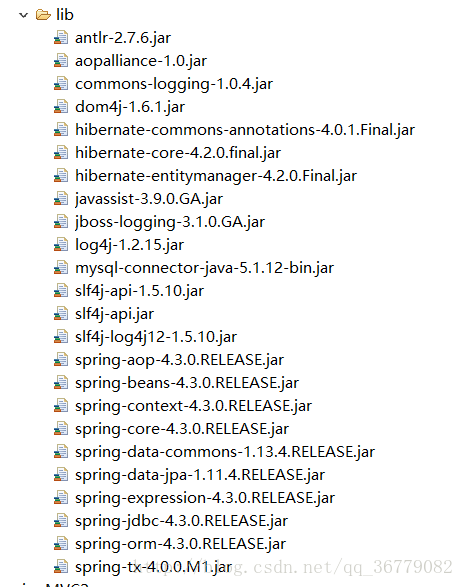
这些包的下载地址可以参考我的博文spring data jpa所需的所有包;
2,项目结构:
这是一个web项目,不过运行的环境是SE的。
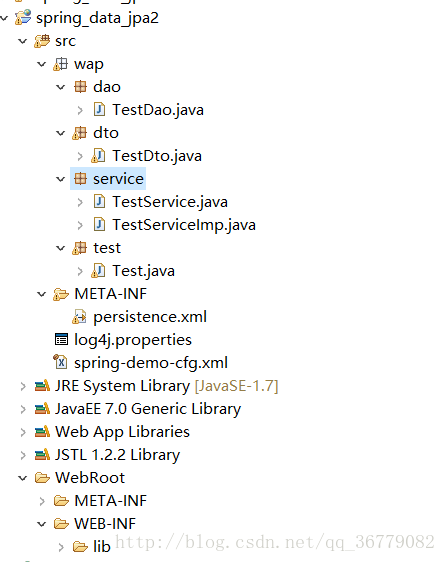
因为是SE环境,所以没有web.xml配置文件,persistence.xml配置文件在SE环境下放在src的META-INF目录下,如果是EE环境,则需要放在WebRoot的META-INF目录下。
3,配置文件persistence.xml和spring-demo-cfg.xml内容:
(1)persistence.xml:
<?xml version="1.0" encoding="UTF-8"?>
<persistence xmlns="http://java.sun.com/xml/ns/persistence" version="2.0">
    <persistence-unit name="SimplePU" transaction-type="RESOURCE_LOCAL">
        <provider>org.hibernate.ejb.HibernatePersistence</provider>
        <!-- SE环境需要显示指定dto(或者成为entity)实体类的路径,EE环境下则不需要 -->
         <class>wap.dto.TestDto</class>
        <properties>
            <!-- 数据库连接信息 begin-->
            <property name="hibernate.connection.driver_class" value="com.mysql.jdbc.Driver"/>
            <property name="hibernate.connection.url" value="jdbc:mysql://localhost:3306/jpa_test"/>
            <property name="hibernate.connection.username" value="root"/>
            <property name="hibernate.connection.password" value="root"/>
            <property name="hibernate.dialect" value="org.hibernate.dialect.MySQL5Dialect"/>
            <!-- 数据库连接信息 end-->
            <!-- 配置是否显示sql语句和格式化sql语句 -->
            <property name="hibernate.show_sql" value="true"/>
            <property name="hibernate.format_sql" value="true"/>
            <property name="hibernate.use_sql_comments" value="false"/>
            <property name="hibernate.hbm2ddl.auto" value="update"/>
        </properties>
    </persistence-unit>
</persistence>(2)spring-demo-cfg.xml:
<?xml version="1.0" encoding="UTF-8"?>
<beans xmlns="http://www.springframework.org/schema/beans"
       xmlns:xsi="http://www.w3.org/2001/XMLSchema-instance" xmlns:context="http://www.springframework.org/schema/context" xmlns:tx="http://www.springframework.org/schema/tx" xmlns:jpa="http://www.springframework.org/schema/data/jpa"
       xsi:schemaLocation="http://www.springframework.org/schema/beans http://www.springframework.org/schema/beans/spring-beans.xsd http://www.springframework.org/schema/context http://www.springframework.org/schema/context/spring-context.xsd http://www.springframework.org/schema/tx http://www.springframework.org/schema/tx/spring-tx-2.5.xsd http://www.springframework.org/schema/data/jpa http://www.springframework.org/schema/data/jpa/spring-jpa-1.0.xsd">
    <!-- spring扫描的包路径 -->
    <context:component-scan base-package="wap"/>

    <!-- 使用事务管理和设置处理事务的类,通过bean id进行关联 -->
    <tx:annotation-driven transaction-manager="transactionManager"/>

    <!-- jpa的配置 -->
    <jpa:repositories base-package="wap.dao"  repository-impl-postfix="Impl" entity-manager-factory-ref="entityManagerFactory" transaction-manager-ref="transactionManager"/>

    <bean id="transactionManager" class="org.springframework.orm.jpa.JpaTransactionManager">
        <property name="entityManagerFactory" ref="entityManagerFactory"/>
    </bean>

    <bean id="entityManagerFactory" class="org.springframework.orm.jpa.LocalContainerEntityManagerFactoryBean">
            <property name="jpaVendorAdapter">
                <bean class="org.springframework.orm.jpa.vendor.HibernateJpaVendorAdapter">
                <property name="generateDdl" value="false"/>
                <property name="showSql" value="true"/>
            </bean>
            </property>
    </bean>
</beans>
这里省略了log4j.properties配置的内容。。。需要的同学自己找一个来补上即可,网上大把大把的。
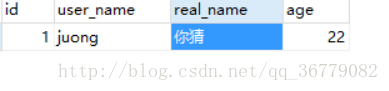
4,数据库jpa_test的数据表test:
5,java代码内容:
(1)TestDto.java:
package wap.dto;

import java.io.Serializable;
import javax.persistence.Column;
import javax.persistence.Entity;
import javax.persistence.Id;
import javax.persistence.Table;

@Entity
@Table(name="test")
public class TestDto implements Serializable{


    private Integer id;
    private String userName;
    private Integer age;
    private String realName;
    //主键注解
    @Id
    public Integer getId() {
        return id;
    }
    public void setId(Integer id) {
        this.id = id;
    }
    //entity类里面字段名要使用驼峰命名,不能使用下划线,使用下划线dao的查询方法会导致歧义;
    //如果数据库字段使用下划线命名方式就需要通过@Column注解去定义entity实体类属性和数据表字段的对应关系
    @Column(name="user_name")
    public String getUserName() {
        return userName;
    }
    public void setUserName(String userName) {
        this.userName = userName;
    }
    public Integer getAge() {
        return age;
    }
    public void setAge(Integer age) {
        this.age = age;
    }
    @Column(name="real_name")
    public String getRealName() {
        return realName;
    }
    public void setRealName(String realName) {
        this.realName = realName;
    }
}(2)TestDao.java:
package wap.dao;

import org.springframework.data.repository.Repository;
import wap.dto.TestDto;

public interface TestDao extends Repository<TestDto, String>{


    //查询可以使用getBy或findBy或readBy,一般CRUD方法命名查询jpa的方法命名规范即可掌握
    public TestDto getByUserName(String userName);
}
没错,jpa的dao就是这么简单,只需要按照jpa的方法规范去定义方法名即可实现简单的CRUD。需要实现CRUD的同学自己去查询jpa的方法命名规范即可,这里不赘述。
(3)接口TestService.java和对应的实现类TestServiceImp.java:
package wap.service;

import wap.dto.TestDto;

public interface TestService {


    public TestDto getByUserName(String userName);
}
package wap.service;
import org.springframework.beans.factory.annotation.Autowired;
import org.springframework.stereotype.Service;
import wap.dao.TestDao;
import wap.dto.TestDto;
//有这个注解才能从bean里面取得该service对象
@Service("userService")
public class TestServiceImp implements TestService {
//自动注入dao的注解
@Autowired
private TestDao dao;
@Override
public TestDto getByUserName(String userName) {
return dao.getByUserName(userName);
}
}至于为什么需要一个接口和一个实现类,这里不解释其原因,需要了解原理的同学可以去查询spring的相关知识。
(4)测试类Test.java:
package wap.test;
import org.springframework.context.ApplicationContext;
import org.springframework.context.support.ClassPathXmlApplicationContext;
import wap.service.TestService;
public class Test {
public static void main(String[] args) {
ApplicationContext ctx = new ClassPathXmlApplicationContext("spring-demo-cfg.xml");
//按注入的bean名获取对象,参数值为service中@Service注解的值
TestService userService = (TestService) ctx.getBean("userService", TestService.class);
System.out.println(userService.getByUserName("juong").getRealName());
}
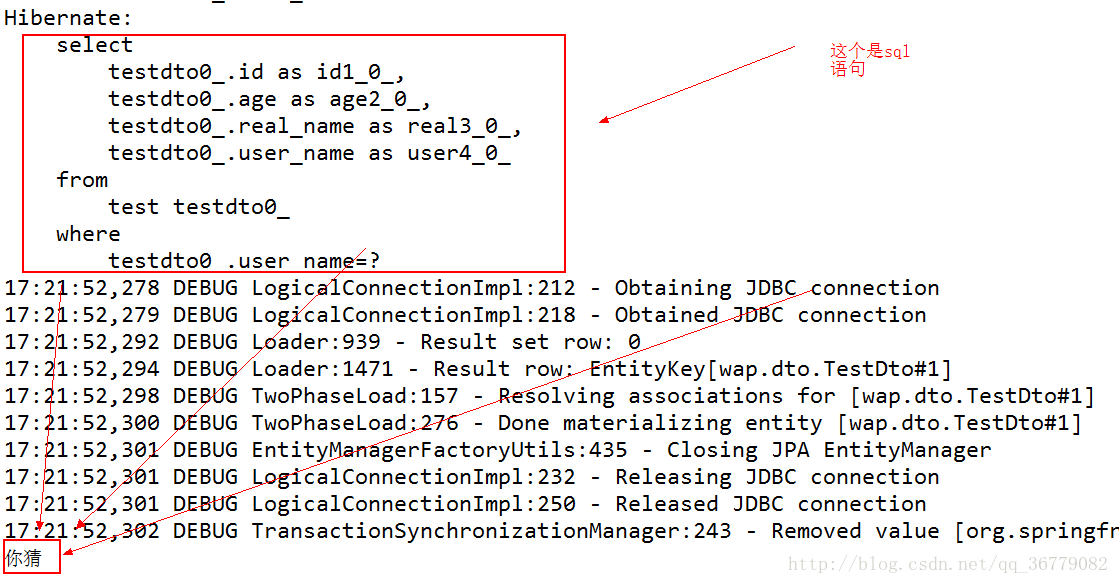
}一切准备就绪后,运行代码,即可看到如下结果:
完整项目可参考https://git.oschina.net/juong/spring_data_jpa/tree/spring_data_jpa/,sql文件在WebRoot/sql文件夹下。