自动配置
自动装配原理
自动配置原理流程图

=========================================================================
【全图放不下,此处引入别人已经整理好的图片】
原作者地址:https://www.processon.com/view/link/5fc0abf67d9c082f447ce49b
=========================================================================
源码的话就先从启动类开始入手:
@SpringBootApplication: Spring Boot应用标注在某个类上说明这个类是SpringBoot的主配置类,SpringBoot
需要运行这个类的main方法来启动SpringBoot应用;
SpringBootApplication
@Target(ElementType.TYPE)
@Retention(RetentionPolicy.RUNTIME)
@Documented
@Inherited
@SpringBootConfiguration
@EnableAutoConfiguration
@ComponentScan(excludeFilters = {


      @Filter(type = FilterType.CUSTOM, classes = TypeExcludeFilter.class),
      @Filter(type = FilterType.CUSTOM, classes = AutoConfigurationExcludeFilter.class) })
public @interface SpringBootApplication {
注解说明:
- @Target(ElementType.TYPE):设置当前注解可以标记在哪
- @Retention(RetentionPolicy.RUNTIME):注解标注的类编译以什么方式保留
- RetentionPolicy.RUNTIME:会被JVM加载
- @Documented:java doc会生成注解信息
- @Inherited:是否会被继承
- @SpringBootConfiguration:标注在某个类上,表示这是一个SpringBoot的配置类
- @Configuration:配置类上来标注这个注解
- @EnableAutoConfiguration:开启自动配置功能。
- @ComponentScan:扫描包,相当于在spring.xml 配置中
<context:comonent-scan>,但是没有指定basepackage,如果没有指定spring底层会自动扫描当前配置类所有在的包。 TypeExcludeFilter:SpringBoot对外提供的扩展类,可以供我们按照自己的方式进行排除AutoConfigurationExcludeFilter:排除所有配置类并且是自动配置类中里面的其中一个。
@EnableAutoConfiguration
这个注解里面,最主要的就是@EnableAutoConfiguration
@Target(ElementType.TYPE)
@Retention(RetentionPolicy.RUNTIME)
@Documented
@Inherited
@AutoConfigurationPackage
@Import(EnableAutoConfigurationImportSelector.class)
public @interface EnableAutoConfiguration {


    // 略
}
@AutoConfigurationPackage:将当前配置类所在包保存在BasePackages的Bean中。供Spring内部使用。
@AutoConfigurationPackage
@Import(AutoConfigurationPackages.Registrar.class)  // 保存扫描路径, 提供给spring-data-jpa 需要扫描 @Entity
public @interface AutoConfigurationPackage {
注册了一个保存当前配置类所在包的一个Bean
@Import(EnableAutoConfigurationImportSelector.class)
在@EnableAutoConfiguration 注解内使用到了@Import注解来完成导入配置的功能,而EnableAutoConfigurationImportSelector实现了DeferredImportSelectorSpring 内部在解析@Import注解时会调用getAutoConfigurationEntry 方法,这块属于Spring的源码。
getAutoConfigurationEntry方法进行扫描具有META-INF/spring.factories 文件的jar包。
protected AutoConfigurationEntry getAutoConfigurationEntry(AnnotationMetadata annotationMetadata) {


   if (!isEnabled(annotationMetadata)) {


      return EMPTY_ENTRY;
   }
   AnnotationAttributes attributes = getAttributes(annotationMetadata);
   // 从META-INF/spring.factories中获得候选的自动配置类
   List<String> configurations = getCandidateConfigurations(annotationMetadata, attributes);
   // 排重
   configurations = removeDuplicates(configurations);
   //根据EnableAutoConfiguration注解中属性,获取不需要自动装配的类名单
   Set<String> exclusions = getExclusions(annotationMetadata, attributes);
   // 根据:@EnableAutoConfiguration.exclude
   // @EnableAutoConfiguration.excludeName
   // spring.autoconfigure.exclude  进行排除
   checkExcludedClasses(configurations, exclusions);
   // exclusions 也排除
   configurations.removeAll(exclusions);
   // 通过读取spring.factories 中的OnBeanCondition\OnClassCondition\OnWebApplicationCondition进行过滤
   configurations = getConfigurationClassFilter().filter(configurations);
   // 这个方法是调用实现了AutoConfigurationImportListener  的bean..  分别把候选的配置名单,和排除的配置名单传进去做扩展
   fireAutoConfigurationImportEvents(configurations, exclusions);
   return new AutoConfigurationEntry(configurations, exclusions);
}
任何一个SpringBoot应用,都会引入spring-boot-autoconfigure,而spring.factories文件就在该包下面。
spring.factories文件是Key=Value形式,多个Value时使用,隔开,该文件中定义了关于初始化,监听器等信息,而真正使自动配置生效的key是org.springframework.boot.autoconfigure.EnableAutoConfiguration,如下所示:
等同于
@Import({


  # Auto Configure
org.springframework.boot.autoconfigure.EnableAutoConfiguration=\
org.springframework.boot.autoconfigure.admin.SpringApplicationAdminJmxAutoConfiguration,\
...省略
org.springframework.boot.autoconfigure.websocket.WebSocketMessagingAutoConfiguration,\
org.springframework.boot.autoconfigure.webservices.WebServicesAutoConfiguration
})
每一个这样的 xxxAutoConfiguration类都是容器中的一个组件,都加入到容器中;用他们来做自动配置;
@EnableAutoConfiguration注解通过@SpringBootApplication被间接的标记在了Spring Boot的启动类上。在SpringApplication.run(…)的内部就会执行selectImports()方法,找到所有JavaConfig自动配置类的全限定名对应的class,然后将所有自动配置类加载到Spring容器中。
HttpEncodingAutoConfiguration
以此类为例解释自动配置原理
@Configuration(proxyBeanMethods = false)
@EnableConfigurationProperties(ServerProperties.class)
@ConditionalOnWebApplication(type = ConditionalOnWebApplication.Type.SERVLET)
@ConditionalOnClass(CharacterEncodingFilter.class)
@ConditionalOnProperty(prefix = "server.servlet.encoding", value = "enabled", matchIfMissing = true)
public class HttpEncodingAutoConfiguration {


   private final Encoding properties;

   public HttpEncodingAutoConfiguration(ServerProperties properties) {


      this.properties = properties.getServlet().getEncoding();
   }

   @Bean
   @ConditionalOnMissingBean
   public CharacterEncodingFilter characterEncodingFilter() {


      CharacterEncodingFilter filter = new OrderedCharacterEncodingFilter();
      filter.setEncoding(this.properties.getCharset().name());
      filter.setForceRequestEncoding(this.properties.shouldForce(Encoding.Type.REQUEST));
      filter.setForceResponseEncoding(this.properties.shouldForce(Encoding.Type.RESPONSE));
      return filter;
   }
- @Configuration(proxyBeanMethods = false):标记了@Configuration,Spring底层会给配置创建cglib动态代理。作用就是防止每次调用本类的Bean方法而重新创建对象,Bean是默认单例的。
- @EnableConfigurationProperties(ServerProperties.class):启动可以在配置类设置的属性对应的类
- @xxxConditional 根据当前不同的条件判断,决定这个配置类是否生效。
@Conditional派生注解(Spring注解版原生的@Conditional作用)
作用:必须是@Conditional指定的条件成立,才给容器中添加组件,配置配里面的所有内容才生效;
| @Conditional扩展注解作用 | (判断是否满足当前指定条件) |
|---|---|
| @ConditionalOnJava | 系统的java版本是否符合要求 |
| @ConditionalOnBean | 容器中存在指定Bean; |
| @ConditionalOnMissingBean | 容器中不存在指定Bean; |
| @ConditionalOnExpression | 满足SpEL表达式指定 |
| @ConditionalOnClass | 系统中有指定的类 |
| @ConditionalOnMissingClass | 系统中没有指定的类 |
| @ConditionalOnSingleCandidate | 容器中只有一个指定的Bean,或者这个Bean是首选Bean |
| @ConditionalOnProperty | 系统中指定的属性是否有指定的值 |
| @ConditionalOnResource | 类路径下是否存在指定资源文件 |
| @ConditionalOnWebApplication | 当前是web环境 |
| @ConditionalOnNotWebApplication | 当前不是web环境 |
| @ConditionalOnJndi | JNDI存在指定项 |
怎么知道哪些自动配置类生效;
我们可以通过设置配置文件中:启用 debug=true属性;来让控制台打印自动配置报告,这样我们就可以很方便的知道哪些自动配置类生效;
 ============================
CONDITIONS EVALUATION REPORT
============================


Positive matches:---**表示自动配置类启用的**
-----------------
...省略...

Negative matches:---**没有匹配成功的自动配置类**
-----------------
...省略...
以**HttpEncodingAutoConfiguration(Http编码自动配置)**为例说明自动配置原理;

-
@Configuration:表示这是一个配置类,以前编写的配置文件一样,也可以给容器中添加组件。 -
@ConditionalOnWebApplication:Spring底层@Conditional注解(Spring注解版),根据不同的条件,如果满足指定的条件,整个配置类里面的配置就会生效; 判断当前应用是否是web应用,如果是,当前配置类生效。 -
@ConditionalOnClass:判断当前项目有没有这个类CharacterEncodingFilter;SpringMVC中进行乱码解决的过滤器。 -
@ConditionalOnProperty:判断配置文件中是否存在某个配置 spring.http.encoding.enabled;如果不存在,判断也是成立的。即使我们配置文件中不配置pring.http.encoding.enabled=true,也是默认生效的。 -
@EnableConfigurationProperties({ServerProperties.class}):将配置文件中对应的值和 ServerProperties绑定起来;并把 ServerProperties加入到 IOC 容器中。并注册ConfigurationPropertiesBindingPostProcessor用于将@ConfigurationProperties的类和配置进行绑定
ServerProperties

ServerProperties通过 @ConfigurationProperties 注解将配置文件与自身属性绑定。
对于@ConfigurationProperties注解,它的作用就是把全局配置文件中的值绑定到实体类JavaBean上面(将配置文件中的值与ServerProperites绑定起来),而@EnableConfigurationProperties主要是把以绑定值JavaBean加入到spring容器中。
在application.properties 声明spring.application.name 是通过@ConfigurationProperties注解,绑定到对应的XxxxProperties配置实体类上,然后再通过@EnableConfigurationProperties注解导入到Spring容器中.

自定义starter
简介
SpringBoot 最强大的功能就是把我们常用的场景抽取成了一个个starter(场景启动器),我们通过引入springboot 为我提供的这些场景启动器,我们再进行少量的配置就能使用相应的功能。即使是这样,springboot也不能囊括我们所有的使用场景,往往我们需要自定义starter,来简化我们对springboot的使用。
如何自定义starter
参照@WebMvcAutoConfiguration为例
@Configuration
@ConditionalOnWebApplication
@ConditionalOnClass({

    Servlet.class, DispatcherServlet.class, WebMvcConfigurerAdapter.class})
@ConditionalOnMissingBean({

    WebMvcConfigurationSupport.class})
@AutoConfigureOrder(-2147483638)
@AutoConfigureAfter({

    DispatcherServletAutoConfiguration.class, ValidationAutoConfiguration.class})
public class WebMvcAutoConfiguration {


    @Import({

    WebMvcAutoConfiguration.EnableWebMvcConfiguration.class})
    @EnableConfigurationProperties({

    WebMvcProperties.class, ResourceProperties.class})
    public static class WebMvcAutoConfigurationAdapter extends WebMvcConfigurerAdapter {


        @Bean
        @ConditionalOnBean({

    View.class})
        @ConditionalOnMissingBean
        public BeanNameViewResolver beanNameViewResolver() {


            BeanNameViewResolver resolver = new BeanNameViewResolver();
            resolver.setOrder(2147483637);
            return resolver;
        }
    }
}
我们可以抽取到我们自定义starter时同样需要的一些配置。
@Configuration  //指定这个类是一个配置类
@ConditionalOnXXX  //指定条件成立的情况下自动配置类生效
@AutoConfigureOrder  //指定自动配置类的顺序
@Bean  //向容器中添加组件
@ConfigurationProperties  //结合相关xxxProperties来绑定相关的配置
@EnableConfigurationProperties  //让xxxProperties生效加入到容器中

自动配置类要能加载需要将自动配置类,配置在META-INF/spring.factories中
org.springframework.boot.autoconfigure.EnableAutoConfiguration=\
org.springframework.boot.autoconfigure.admin.SpringApplicationAdminJmxAutoConfiguration,\
org.springframework.boot.autoconfigure.aop.AopAutoConfiguration,\
模式
参照 spring-boot-starter 我们发现其中没有代码:

我们在看它的pom中的依赖中有个 springboot-starter
<dependency>
    <groupId>org.springframework.boot</groupId>
    <artifactId>spring-boot-starter</artifactId>
</dependency>
spring-boot-starter 有个 spring-boot-autoconfigure
<dependency>
    <groupId>org.springframework.boot</groupId>
    <artifactId>spring-boot-autoconfigure</artifactId>
</dependency>
关于web的一些自动配置都写在了这里 ,总结:

- 启动器(starter)是一个空的jar文件,仅仅提供辅助性依赖管理,这些依赖可能用于自动装配或其他类库。
- 需要专门写一个类似spring-boot-autoconfigure的配置模块
- 用的时候只需要引入启动器starter,就可以使用自动配置了
命名规范
官方命名空间
- 前缀:spring-boot-starter-
- 模式:spring-boot-starter-模块名
- 举例:spring-boot-starter-web、spring-boot-starter-jdbc
自定义命名空间
- 后缀:-spring-boot-starter
- 模式:模块-spring-boot-starter
- 举例:mybatis-spring-boot-starter
自定义starter实例
先创建一个父maven项目:springboot_custome_starter
两个Module: xxxxx-spring-boot-starter 和 xxxxx-spring-boot-starter-autoconfigurer
springboot_custome_starter
pom.xml
<?xml version="1.0" encoding="UTF-8"?>
<project xmlns="http://maven.apache.org/POM/4.0.0" xmlns:xsi="http://www.w3.org/2001/XMLSchema-instance"
         xsi:schemaLocation="http://maven.apache.org/POM/4.0.0 https://maven.apache.org/xsd/maven-4.0.0.xsd">
    <modelVersion>4.0.0</modelVersion>
    <modules>
        <module>xxxxx-spring-boot-starter</module>
        <module>xxxxx-spring-boot-autoconfigure</module>
    </modules>
    <parent>
        <groupId>org.springframework.boot</groupId>
        <artifactId>spring-boot-starter-parent</artifactId>
        <version>2.3.6.RELEASE</version>
        <relativePath/> <!-- lookup parent from repository -->
    </parent>
    <packaging>pom</packaging>
    <groupId>com.xxxxx.springboot</groupId>
    <artifactId>springboot_custome_starter</artifactId>
    <version>0.0.1-SNAPSHOT</version>
    <name>springboot_custome_starter</name>
    <description>SpringBoot自定义starter</description>

    <properties>
        <java.version>1.8</java.version>
    </properties>

    <dependencies>
        <dependency>
            <groupId>org.springframework.boot</groupId>
            <artifactId>spring-boot-starter</artifactId>
        </dependency>
    </dependencies>

</project>
xxxxx-spring-boot-starter
pom.xml
<?xml version="1.0" encoding="UTF-8"?>
<project xmlns="http://maven.apache.org/POM/4.0.0"
         xmlns:xsi="http://www.w3.org/2001/XMLSchema-instance"
         xsi:schemaLocation="http://maven.apache.org/POM/4.0.0 http://maven.apache.org/xsd/maven-4.0.0.xsd">
    <parent>
        <artifactId>springboot_custome_starter</artifactId>
        <groupId>com.xxxxx.springboot</groupId>
        <version>0.0.1-SNAPSHOT</version>
    </parent>
    <modelVersion>4.0.0</modelVersion>
    <description>
        启动器(starter)是一个空的jar文件,
        仅仅提供辅助性依赖管理,
        这些依赖需要自动装配或其他类库。
    </description>

    <artifactId>xxxxx-spring-boot-starter</artifactId>

    <dependencies>
        <!--引入autoconfigure-->
        <dependency>
            <groupId>com.xxxxx.springboot</groupId>
            <artifactId>xxxxx-spring-boot-autoconfigure</artifactId>
            <version>0.0.1-SNAPSHOT</version>
        </dependency>

        <!--如果当前starter 还需要其他的类库就在这里引用-->
    </dependencies>

</project>
如果使用spring Initializr创建的需要删除 启动类、resources下的文件,test文件。
xxxx-spring-boot-starter-autoconfigurer
pom.xml
<?xml version="1.0" encoding="UTF-8"?>
<project xmlns="http://maven.apache.org/POM/4.0.0"
         xmlns:xsi="http://www.w3.org/2001/XMLSchema-instance"
         xsi:schemaLocation="http://maven.apache.org/POM/4.0.0 http://maven.apache.org/xsd/maven-4.0.0.xsd">
    <parent>
        <artifactId>springboot_custome_starter</artifactId>
        <groupId>com.xxxxx.springboot</groupId>
        <version>0.0.1-SNAPSHOT</version>
    </parent>
    <modelVersion>4.0.0</modelVersion>

    <artifactId>xxxxx-spring-boot-autoconfigure</artifactId>
    <dependencies>
        <dependency>
            <groupId>org.springframework.boot</groupId>
            <artifactId>spring-boot-starter-web</artifactId>
        </dependency>
        <!--‐导入配置文件处理器,配置文件进行绑定就会有提示-->
        <dependency>
            <groupId>org.springframework.boot</groupId>
            <artifactId>spring-boot-configuration-processor</artifactId>
            <optional>true</optional>
        </dependency>
    </dependencies>


</project>
HelloProperties
package com.starter.xxxxx;

import org.springframework.boot.context.properties.ConfigurationProperties;


@ConfigurationProperties("xx.hello")
public class HelloProperties {


    private String name;

    public String getName() {


        return name;
    }

    public void setName(String name) {


        this.name = name;
    }
}
IndexController
package com.starter.xxxxxx;

import org.springframework.beans.factory.annotation.Autowired;
import org.springframework.web.bind.annotation.RequestMapping;
import org.springframework.web.bind.annotation.RestController;


@RestController
public class IndexController {


    HelloProperties helloProperties;

    public IndexController(HelloProperties helloProperties) {


        this.helloProperties=helloProperties;
    }

    @RequestMapping("/")
    public String index(){


        return helloProperties.getName()+"欢迎您";
    }

}
HelloAutoConfitguration
ackage com.starter.xxxxxx;

import org.springframework.beans.factory.annotation.Autowired;
import org.springframework.boot.autoconfigure.condition.ConditionalOnProperty;
import org.springframework.boot.context.properties.EnableConfigurationProperties;
import org.springframework.context.annotation.Bean;
import org.springframework.context.annotation.Configuration;

/***
 *
 * 给web应用自动添加一个首页
 */
@Configuration
@ConditionalOnProperty(value = "xx.hello.name")
@EnableConfigurationProperties(HelloProperties.class)
public class HelloAutoConfitguration {


    @Autowired
    HelloProperties helloProperties;

    @Bean
    public IndexController indexController(){


        return new IndexController(helloProperties);
    }
}
spring.factories
在 resources 下创建文件夹 META-INF 并在 META-INF 下创建文件spring.factories,内容如下:
org.springframework.boot.autoconfigure.EnableAutoConfiguration=\
  com.starter.xxxxx.HelloAutoConfitguration
到这儿,配置自定义的starter就写完了 ,hello-spring-boot-starter-autoconfigurer、hello-spring-boot-starter安装成本地jar包。
测试自定义starter
pom.xml
<dependency>
    <groupId>com.xxxxx.springboot</groupId>
    <artifactId>xxxxx-spring-boot-starter</artifactId>
    <version>0.0.1-SNAPSHOT</version>
</dependency>
浏览
http://localhost:8080/
会报404
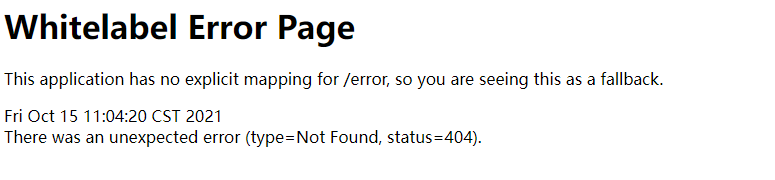
由于在自动配置上设置了
@ConditionalOnProperty(value = "xx.hello.name")
application.properties
xx.hello.name="爪哇小白2021"
再次访问:http://localhost:8080/
