首先新建一个主页面,把里面的模块全部单独拆分开做成子页面,并引入到主页面。
再把主页面的参数传递给子页面用来判断以及其他操作。
主页面(父页面)如下:
<style lang="less" scoped>
.p1 {
  font-family: "微软雅黑";
  font-size: 16px;
  font-weight: 500;
}
</style>

<template>
  <div>
    <Card><p class="p1"><Icon type="ios-list"></Icon>月度业绩上传</p></Card>
    <Card style="margin-top:10px;">
      <Tabs type="card" @on-click="clickTabs">
        <TabPane label="已上传" name="已上传">
          <haveAlreadyUploaded :status="status"></haveAlreadyUploaded>
        </TabPane>
        <TabPane label="已确认" name="已确认">
          <acknowledged :status="status"></acknowledged>
        </TabPane>
        <TabPane label="已审核" name="已审核">
          <audited :status="status"></audited>
        </TabPane>
        <TabPane label="已对账" name="已对账">
          <haveCheck :status="status"></haveCheck>
        </TabPane>
      </Tabs>
    </Card>
  </div>
</template>

<script>
import haveAlreadyUploaded from "./Tabs/haveAlreadyUploaded.vue" // 已上传 tab页
import acknowledged from "./Tabs/acknowledged.vue" // 已确认 tab页
import audited from "./Tabs/audited.vue" // 已审核 tab页
import haveCheck from "./Tabs/haveCheck.vue" // 已对账 tab页
export default {
  components:{
    haveAlreadyUploaded, // 已上传
    acknowledged, // 已确认
    audited, // 已审核
    haveCheck, // 已对账
  },
  data(){
    return {
      status:""
    }
  },
  methods:{
    clickTabs(name){
      this.status = name
    }
  }
}
</script>
页面文件分布,注意:被调用的一方叫做子组件,主调用的一方叫做父组件。
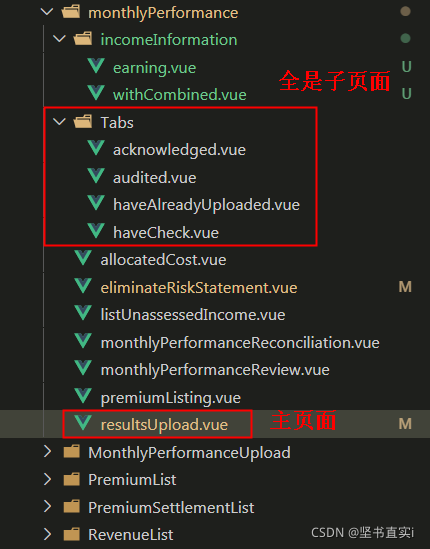
子页面如下:
<style lang="less" scoped>

</style>

<template>
  <div>
    <Form :label-width="150">
      <Row>
        <Col span="7">
          <FormItem label="产品名称 ">
            <Input v-model="productName" clearable></Input>
          </FormItem>
        </Col>
        <Col span="8">
          <FormItem label="统计年月 ">
            <DatePicker type="month" format="yyyyMM" v-model="statisticsMonthly"
            @on-change="forYears"></DatePicker>
          </FormItem>
        </Col>
      </Row>
      <Row>
        <Col style="float:right;">
          <Button type="primary" @click="inquire">查询</Button>
          <Button style="margin:0 10px;" type="primary" @click="reset">重置</Button>
          <Button type="primary">导出</Button>
        </Col>
      </Row>
      <Table style="margin-top:10px;" border :columns="header4" :data="listData"></Table>
      <Row style="margin-top:10px;">
        <Col style="float:right;">
          <Page :total="count" size="small" show-total show-elevator
          @on-change="paging"></Page>
        </Col>
      </Row>
    </Form>
  </div>
</template>

<script>
import Api from "@/api/personalInsurance/performance"
export default {
  name:"haveCheck",
  data(){
    return {
      productName:"",
      statisticsMonthly:"",

      count:0,
      page:1,
      pageSize:10,

      listData:[], // tab4 数据
      header4:[
        { title:"序号",type:"index",align:"center",width:70 },
        { title:"产品代码",key:"productCode",align:"center",width:150 },
        { title:"产品名称",key:"productName",align:"center",width:200 },
        {
          title:"中再结算模式",key:"remark1",align:"center",width:150,
          render:(h,params)=>{
            return h("span",this.fanyi(params.row.remark1))
          }
        },
        { title:"统计年月",key:"yearMonth",align:"center",width:150 },
        { title:"保单件数",key:"policyAmt",align:"center",width:150 },
        { title:"件均保费",key:"avgPremium",align:"center",width:150 },
        { title:"总保费",key:"totalPremium",align:"center",width:150 },
        {
          title:"状态",key:"premiumStatus",align:"center",width:150,
          render:(h,params)=>{
            return h("span",this.fanyi2(params.row.premiumStatus))
          }
        },
        { title:"上传人",key:"updateUser",align:"center",width:200 },
        { title:"创建时间",key:"createTime",align:"center",width:200 },
        { title:"更新时间",key:"updateTime",align:"center",width:200 },
        {
          title:"操作",align:"center",width:230,
          render:(h,params)=>{
            return h("div",[
              h("Button",{
                props:{ type: 'primary', size: 'small',},
                style:{ marginRight:'10px'},
                on:{
                  click:()=>{

                  }
                }
              },"详情")
            ])
          }
        }
      ],
    }
  },
  mounted(){
    this.getReconciledData()
  },
  props: ["status"],
  watch:{
    status(newvalue,oldvalue){
      if(newvalue == "已对账"){
        this.getReconciledData()
      }
    }
  },
  methods:{
    paging(page){
      this.page = page
      this.getReconciledData()
    },

    fanyi(query){
      if(query == 1){
        return "老模式"
      }else {
        return "新模式"
      }
    },

   fanyi2(query){
     if(query == 0){
       return "已上传"
     }else if(query == 1){
       return "重新上传"
     }else if(query == 2){
       return "已确认、待审核"
     }else if(query == 3 ){
       return "审核通过"
     }else if(query == 4 ){
       return "被退回"
     }else if(query == 5){
       return "已对账"
     }
   },

    reset(){
      this.productName = ""
      this.statisticsMonthly = ""
      this.page = 1
      this.count = 1
      this.getReconciledData()
    },

    inquire(){
      this.page = 1
      this.count = 1
      this.getReconciledData()
    },

  // 获取确认列表
    getReconciledData(){
      let data= {
        page:this.page,
        pageSize:this.pageSize,
        operateType:5, // 已对账
        productName:this.productName,
        yearDate:this.statisticsMonthly
      }
      new Promise((resolve,reject)=>{
        Api.getList(data).then(response=>{
          this.listData = response.result.results
          this.count = response.result.count
        }).catch(error=>{
          reject(error)
        })
      })
    }
  }
}
</script>
当子组件需要用到父组件里面的数据进行判断时,父组件直接给子组件的标签注册动态属性,然后属性直接绑定父组件里的数据即可,在子组件里通过props:[ '属性名' ] 来接受即可,便可以用来渲染页面了。
示例1: 父组件里的标签。
<haveCheck :status="status"></haveCheck>示例2:子组件接受数据。
  mounted(){
    this.getReconciledData()
  },
  props: ["status"],
  watch:{
    status(newvalue,oldvalue){
      if(newvalue == "已对账"){
        this.getReconciledData()
      }
    }
  },
扫描二维码关注公众号,回复:
13251449 查看本文章

总结:
1. 父传子:在子组件中使用父组件的数据,可通过props来实现。
2. 子传父:在父组件中使用子组件的数据,可通过自定义的事件来实现。
3. 只要父组件数据更新,子组件里的数据就会更新,反过来就不行。
4. 当父组件的值发生改变时,子组件中的props都将是最新的值。
5. 千万不要在子组件内部去修改props的值达到修改父组件的值,会报错。
6. 子组件要想去修改数据,就去修改父组件的值,让父组件带动子组件的数据变化。