1 springboot集成mybatis
1.引入相关依赖的代码如下:
<?xml version="1.0" encoding="UTF-8"?>
<project xmlns="http://maven.apache.org/POM/4.0.0" xmlns:xsi="http://www.w3.org/2001/XMLSchema-instance"
  xsi:schemaLocation="http://maven.apache.org/POM/4.0.0 http://maven.apache.org/xsd/maven-4.0.0.xsd">
  <modelVersion>4.0.0</modelVersion>
  <groupId>com.txw</groupId>
  <artifactId>springboot_02</artifactId>
  <version>1.0-SNAPSHOT</version>
  <packaging>war</packaging>
  <!--继承springboot的父项目-->
  <parent>
    <groupId>org.springframework.boot</groupId>
    <artifactId>spring-boot-starter-parent</artifactId>
    <version>2.2.5.RELEASE</version>
  </parent>
  <properties>
    <project.build.sourceEncoding>UTF-8</project.build.sourceEncoding>
    <maven.compiler.source>1.8</maven.compiler.source>
    <maven.compiler.target>1.8</maven.compiler.target>
  </properties>
  <dependencies>
      <!--引入springboot的web支持-->
      <dependency>
        <groupId>org.springframework.boot</groupId>
        <artifactId>spring-boot-starter-web</artifactId>
      </dependency>
    <!--springboot解析jsp相关依赖-->
    <dependency>
      <groupId>org.apache.tomcat.embed</groupId>
      <artifactId>tomcat-embed-jasper</artifactId>
    </dependency>
    <!--整合mybatis-->
    <dependency>
      <groupId>org.mybatis.spring.boot</groupId>
      <artifactId>mybatis-spring-boot-starter</artifactId>
      <version>2.1.2</version>
    </dependency>
    <dependency>
      <groupId>com.alibaba</groupId>
      <artifactId>druid</artifactId>
      <version>1.1.12</version>
    </dependency>
    <!--数据库驱动依赖-->
    <dependency>
      <groupId>mysql</groupId>
      <artifactId>mysql-connector-java</artifactId>
      <version>8.0.16</version>
    </dependency>
    <!--jstl依赖-->
    <dependency>
      <groupId>javax.servlet</groupId>
      <artifactId>jstl</artifactId>
      <version>1.2</version>
    </dependency>
  </dependencies>
  <build>
    <finalName>springboot_02</finalName>
  </build>
</project>
如图所示: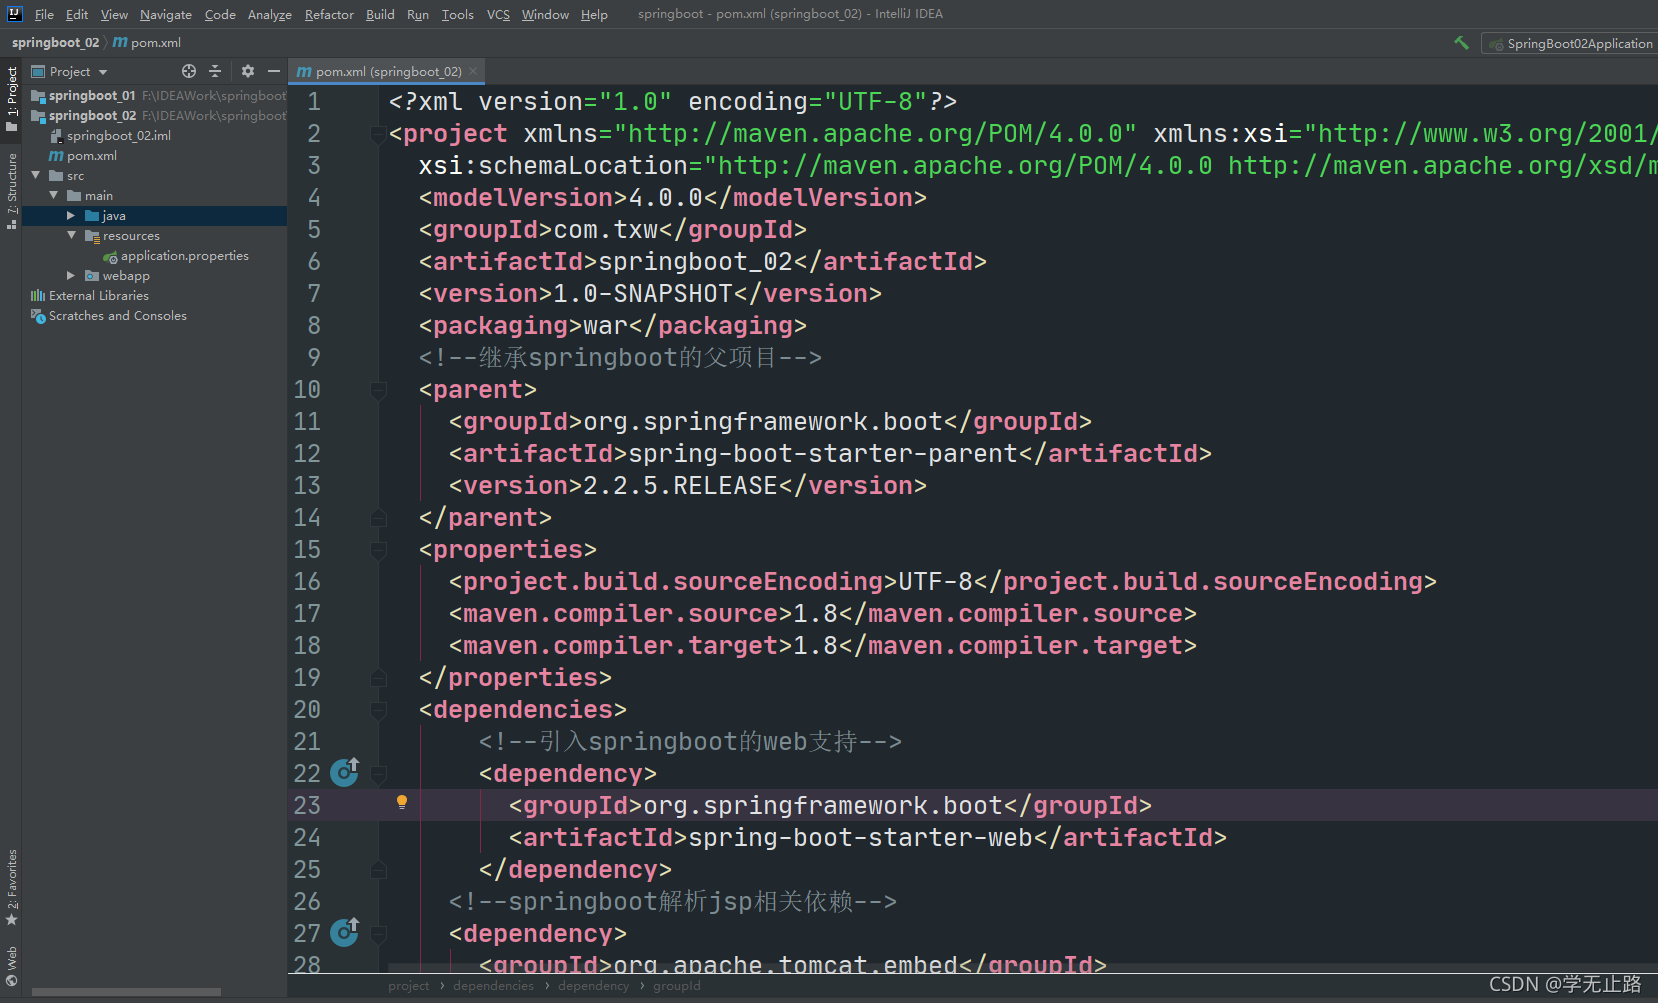
2.创建数据库以及表结构的SQL语句如下:
DROP TABLE IF EXISTS `t_user`;
CREATE TABLE `t_user`  (
  `id` varchar(40) CHARACTER SET utf8 COLLATE utf8_general_ci NOT NULL,
  `name` varchar(40) CHARACTER SET utf8 COLLATE utf8_general_ci NULL DEFAULT NULL,
  `age` int(3) NULL DEFAULT NULL,
  `birthday` timestamp(0) NULL DEFAULT NULL,
  PRIMARY KEY (`id`) USING BTREE
) ENGINE = InnoDB CHARACTER SET = utf8 COLLATE = utf8_general_ci ROW_FORMAT = Dynamic;

-- ----------------------------
-- Records of t_user
-- ----------------------------
INSERT INTO `t_user` VALUES ('1', 'Adair', 25, '2021-10-28 14:32:48');
INSERT INTO `t_user` VALUES ('2', 'txw', 24, '2021-11-05 14:43:16');

SET FOREIGN_KEY_CHECKS = 1;
如图所示: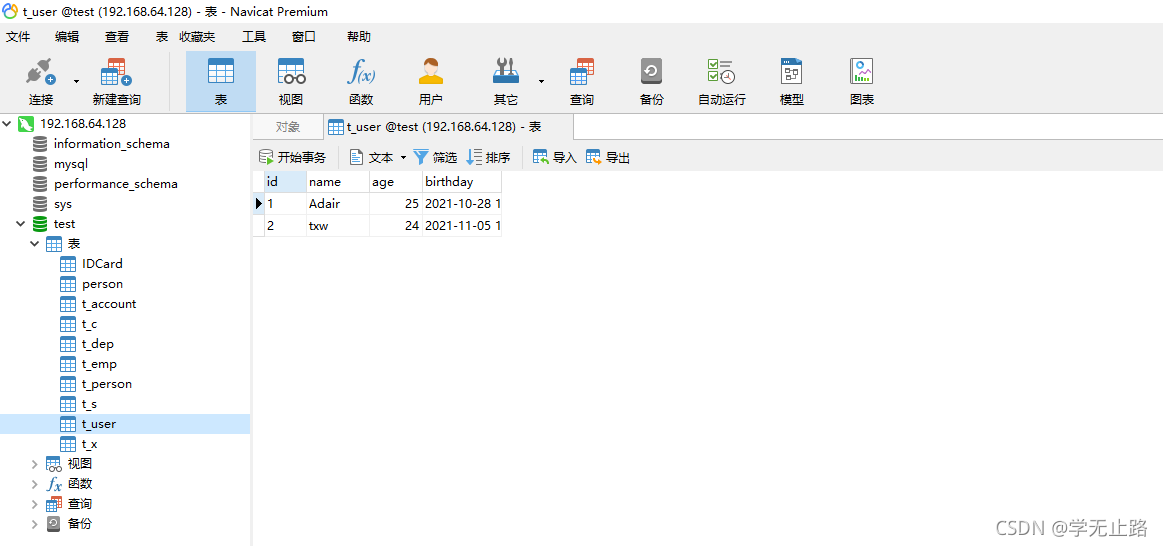
2.编写User的代码如下:
package com.txw.entity;

import java.util.Date;
/**
 * @author Adair
 * E-mail: [email protected]
 */
@SuppressWarnings("all")   // 注解警告信息
public class User {


    private int id;
    private String name;
    private int age;
    private Date birthday;

    public User() {


    }

    public User(int id, String name, int age, Date birthday) {


        this.id = id;
        this.name = name;
        this.age = age;
        this.birthday = birthday;
    }

    public int getId() {


        return id;
    }

    public void setId(int id) {


        this.id = id;
    }

    public String getName() {


        return name;
    }

    public void setName(String name) {


        this.name = name;
    }

    public int getAge() {


        return age;
    }

    public void setAge(int age) {


        this.age = age;
    }

    public Date getBirthday() {


        return birthday;
    }

    public void setBirthday(Date birthday) {


        this.birthday = birthday;
    }

    @Override
    public String toString() {


        return "User{" +
                "id=" + id +
                ", name='" + name + '\'' +
                ", age=" + age +
                ", birthday=" + birthday +
                '}';
    }
}
如图所示: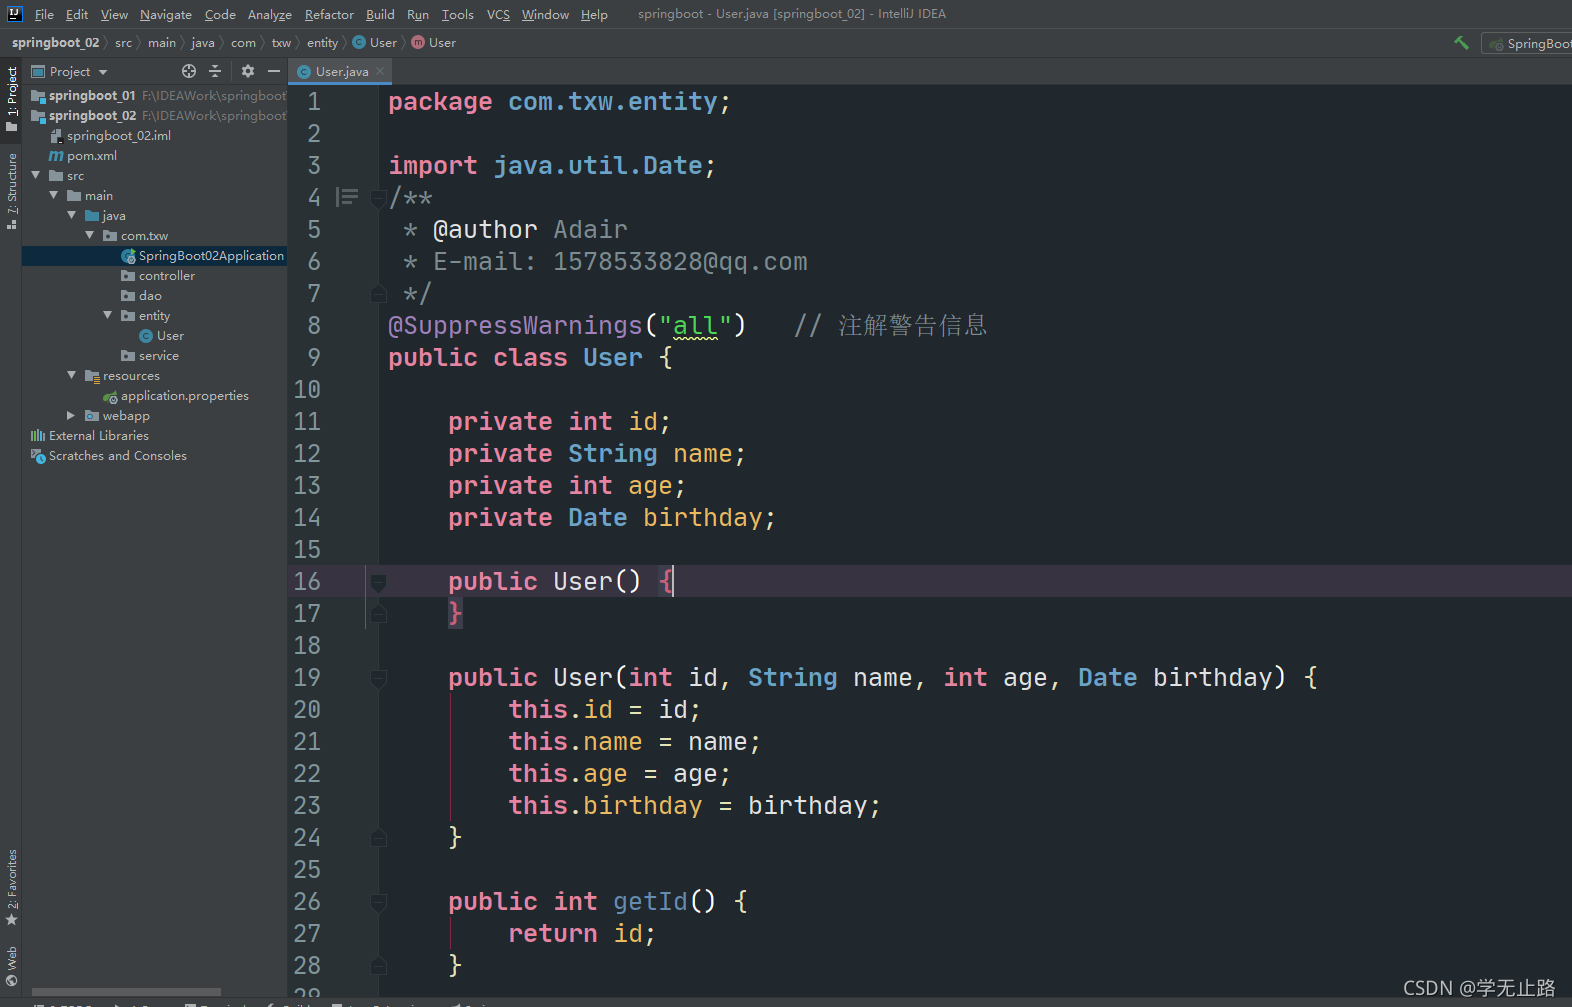
2.编写UserDao的代码如下:
package com.txw.dao;

import com.txw.entity.User;
import java.util.List;
/**
 * 用户持久层
 * @author Adair
 * E-mail: [email protected]
 */
@SuppressWarnings("all")   // 注解警告信息
public interface UserDao {


    /**
     * 查询所有用户
     * @return
     */
    public List<User> selectAll();
}
如图所示: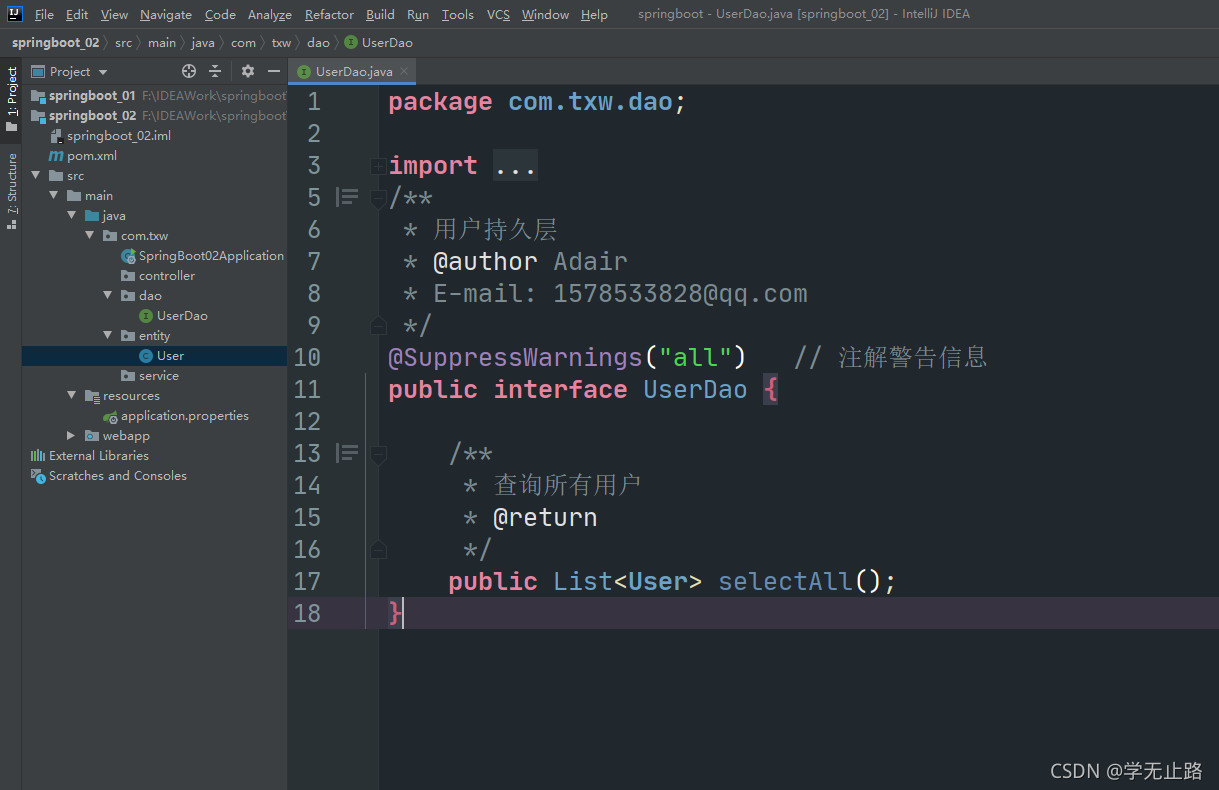
3.编写UserDao.xml的代码如下:
<?xml version="1.0" encoding="UTF-8" ?>
<!DOCTYPE mapper PUBLIC "-//mybatis.org//DTD Mapper 3.0//EN" "http://mybatis.org/dtd/mybatis-3-mapper.dtd">
<mapper namespace="com.txw.dao.UserDao">

    <!--查询查询所有用户-->
    <select id="selectAll" resultType="User">
        select * from t_user
    </select>
</mapper>
如图所示: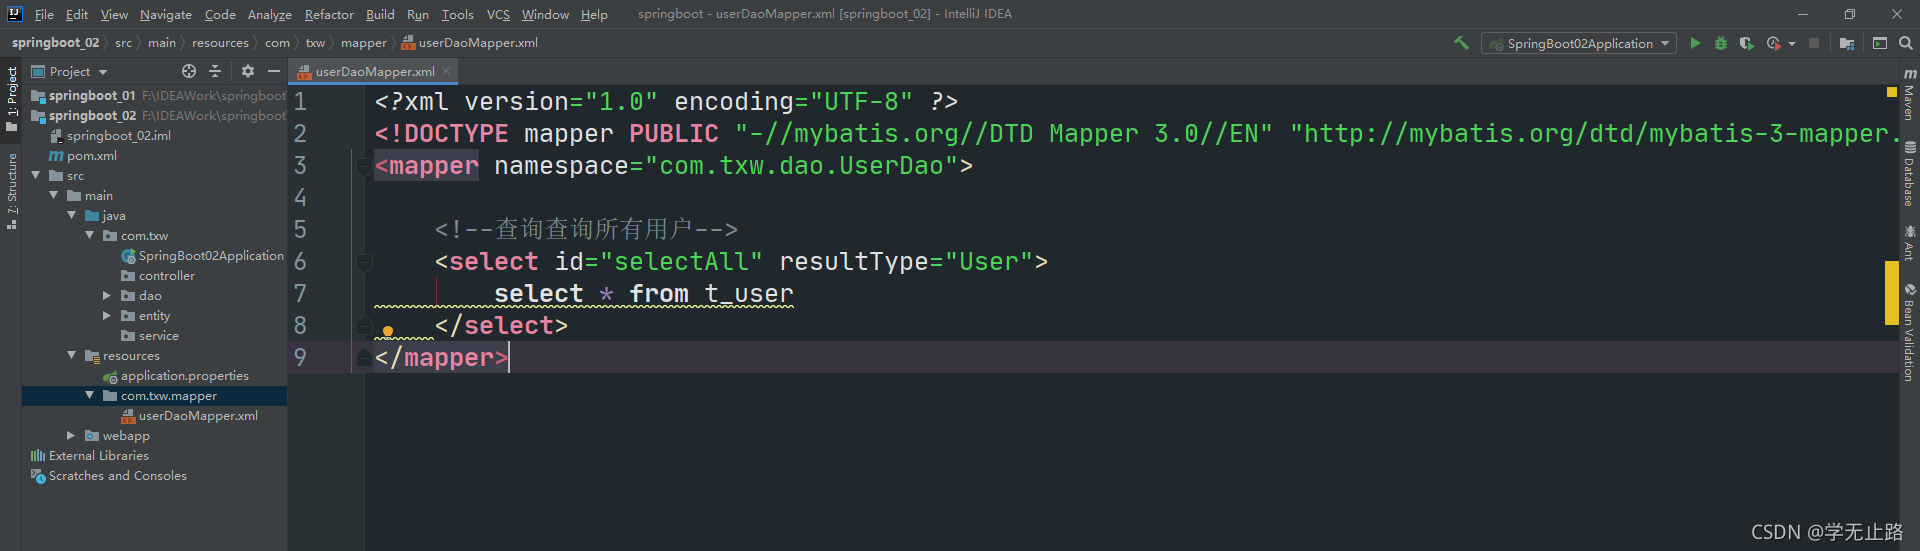
4.编写UserService的代码如下:
package com.txw.service;

import com.txw.entity.User;
import java.util.List;
/**
 * 用户业务层
 * @author Adair
 * E-mail: [email protected]
 */
@SuppressWarnings("all")   // 注解警告信息
public interface UserService {


    /**
     * 查询所有用户
     * @return
     */
    public List<User> queryAll();
}
如图所示: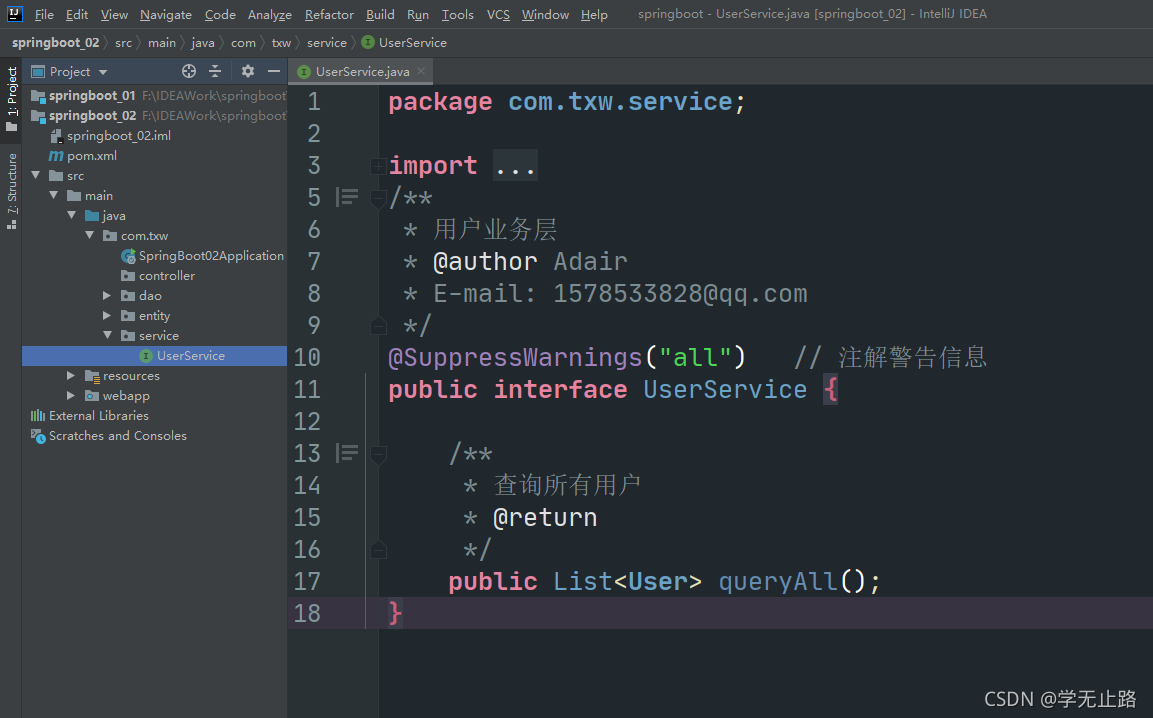
5.编写UserServiceImpl的代码如下:
package com.txw.service.impl;

import com.txw.dao.UserDao;
import com.txw.entity.User;
import com.txw.service.UserService;
import org.springframework.beans.factory.annotation.Autowired;
import org.springframework.stereotype.Service;
import org.springframework.transaction.annotation.Propagation;
import org.springframework.transaction.annotation.Transactional;

import java.util.List;
/**
 * 用户业务层
 * @author Adair
 * E-mail: [email protected]
 */
@Transactional
@Service
@SuppressWarnings("all")   // 注解警告信息
public class UserServiceImpl implements UserService {


    @Autowired
    private UserDao userDao;

    /**
     * 查询所有用户
     * @return
     */
    @Transactional(propagation = Propagation.SUPPORTS)
    @Override
    public List<User> queryAll() {


        return userDao.selectAll();
    }
}
如图所示: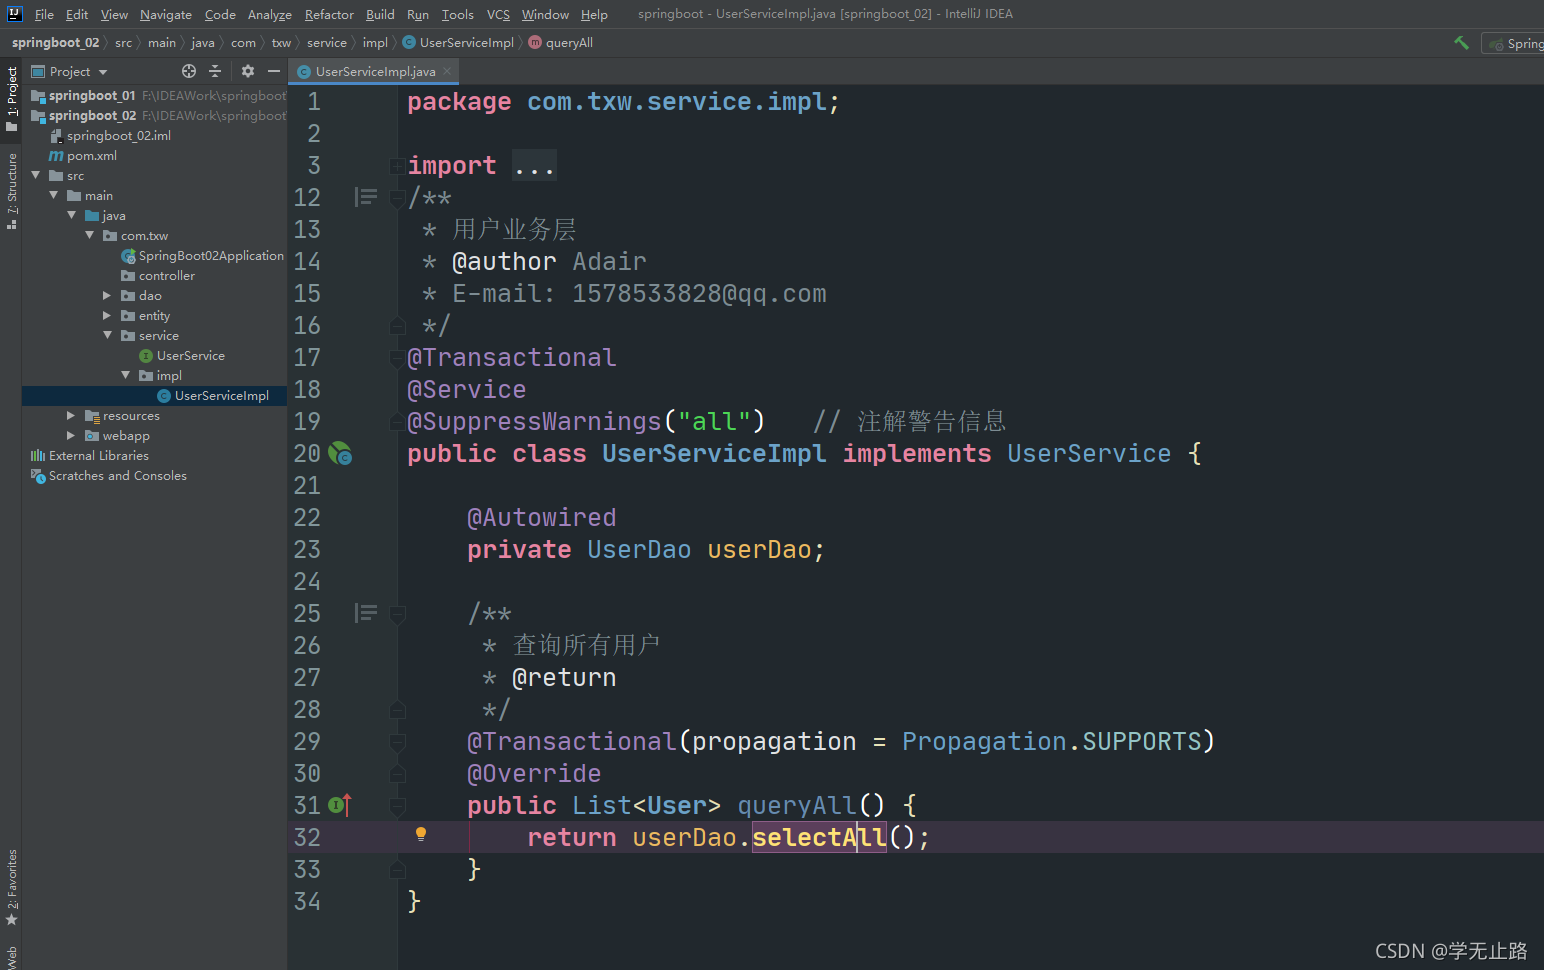
6.编写application.properties的代码如下:
server.port=8080
spring.mvc.view.prefix=/
spring.mvc.view.suffix=.jsp
#数据源
spring.datasource.type=com.alibaba.druid.pool.DruidDataSource
spring.datasource.driver-class-name=com.mysql.cj.jdbc.Driver
spring.datasource.url=jdbc:mysql://192.168.64.128:3306/test?useUnicode=true&characterEncoding=UTF-8&uesSSL=false&serverTimezone=Asia/Shanghai
spring.datasource.username=root
spring.datasource.password=123456
# 指定mapper配置文件位置
mybatis.mapper-locations=classpath:/com/txw/mapper/*Mapper.xml
#指定起别名来的类
mybatis.type-aliases-package=com.txw.entity
如图所示: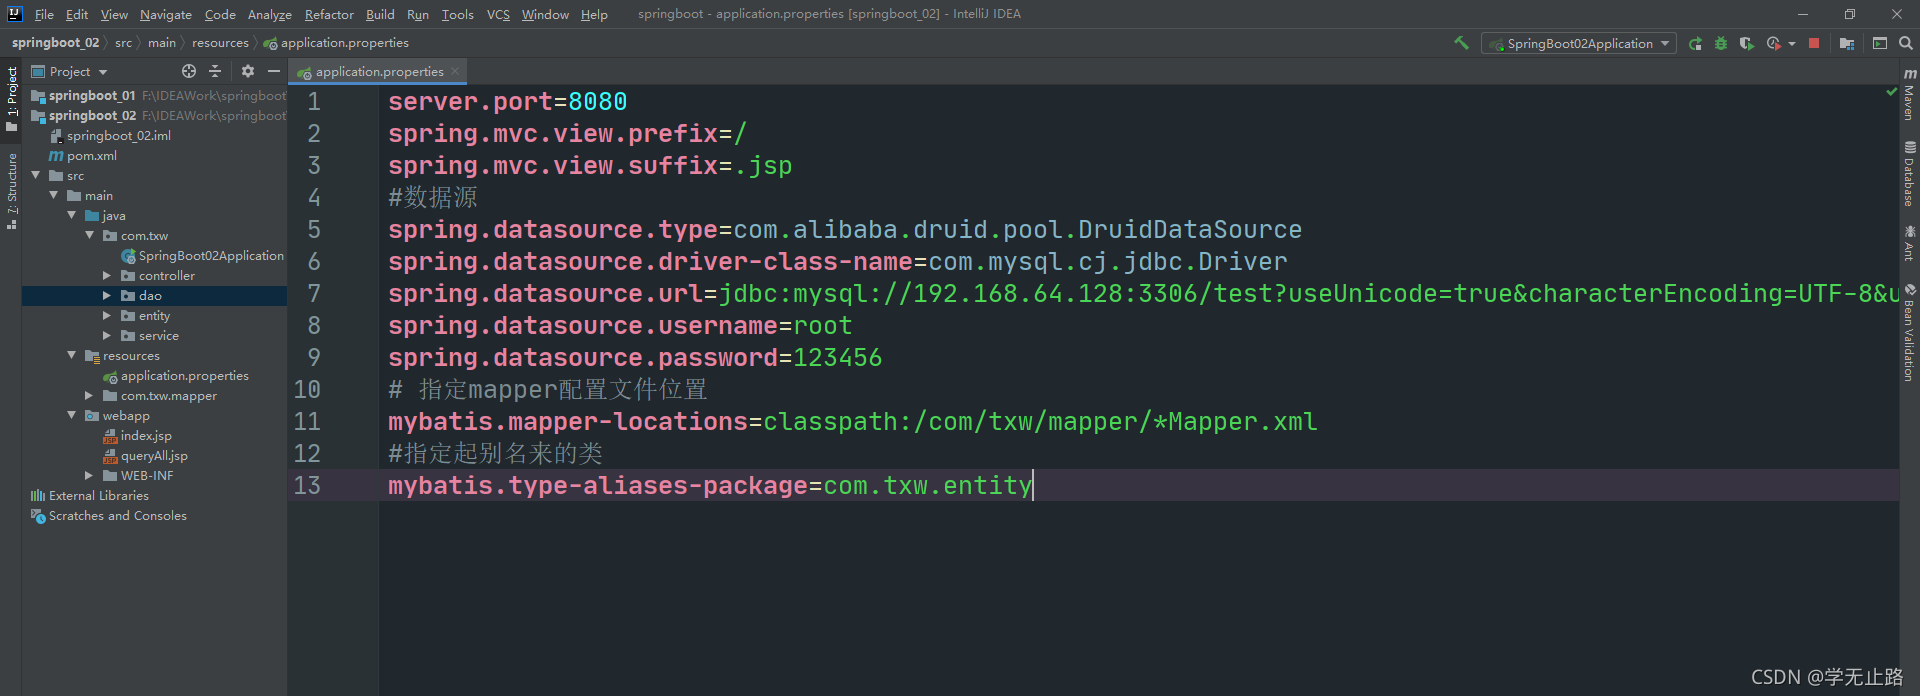
7.编写queryAll.jsp的代码如下:
<%@ taglib prefix="c" uri="http://java.sun.com/jsp/jstl/core" %>
<%@ page contentType="text/html;charset=UTF-8" pageEncoding="UTF-8" isELIgnored="false" %>

<html>
<head>
    <title>查询所有用户</title>
</head>
<body>
    <c:forEach var="users" items="${requestScope.users}">
        ${users.id}----
        ${users.name}----
        ${users.age}----
        ${users.birthday}<br/>
    </c:forEach>
</body>
</html>
如图所示: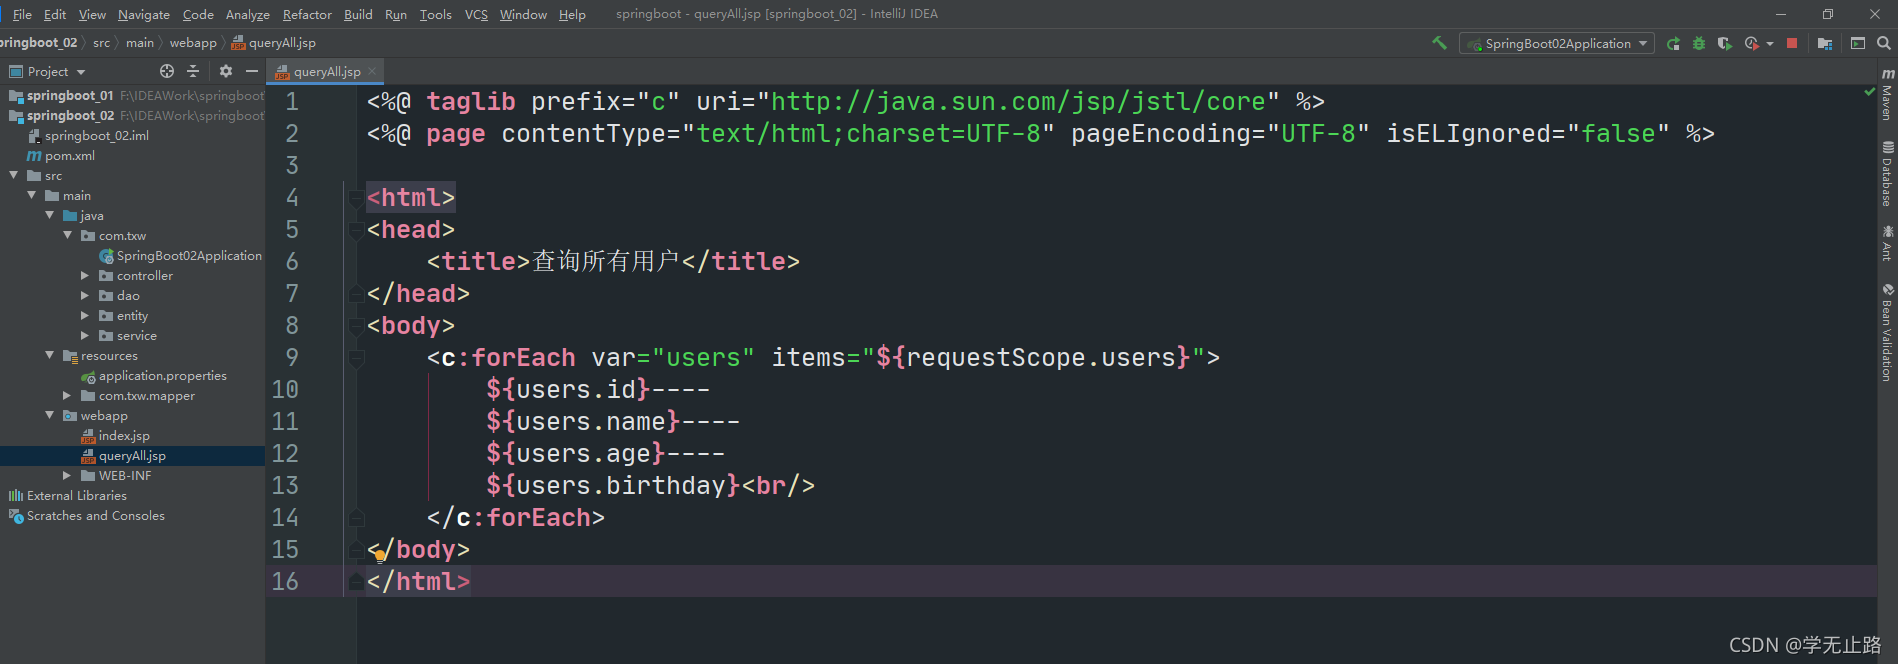
8.编写UserController的代码如下:
package com.txw.controller;

import com.txw.entity.User;
import com.txw.service.UserService;
import org.springframework.beans.factory.annotation.Autowired;
import org.springframework.stereotype.Controller;
import org.springframework.web.bind.annotation.RequestMapping;
import javax.servlet.http.HttpServletRequest;
import java.util.List;
/**
 * @author Adair
 * E-mail: [email protected]
 */
@SuppressWarnings("all")   // 注解警告信息
@Controller
@RequestMapping("user")
public class UserController {


    @Autowired
    private UserService userService;

    /**
     * 查询所有
     * @return
     */
    @RequestMapping("queryAll")
    public String queryAll(HttpServletRequest request){


        List<User> users = userService.queryAll();
        request.setAttribute("users",users);
        return "queryAll";
    }
}
如图所示: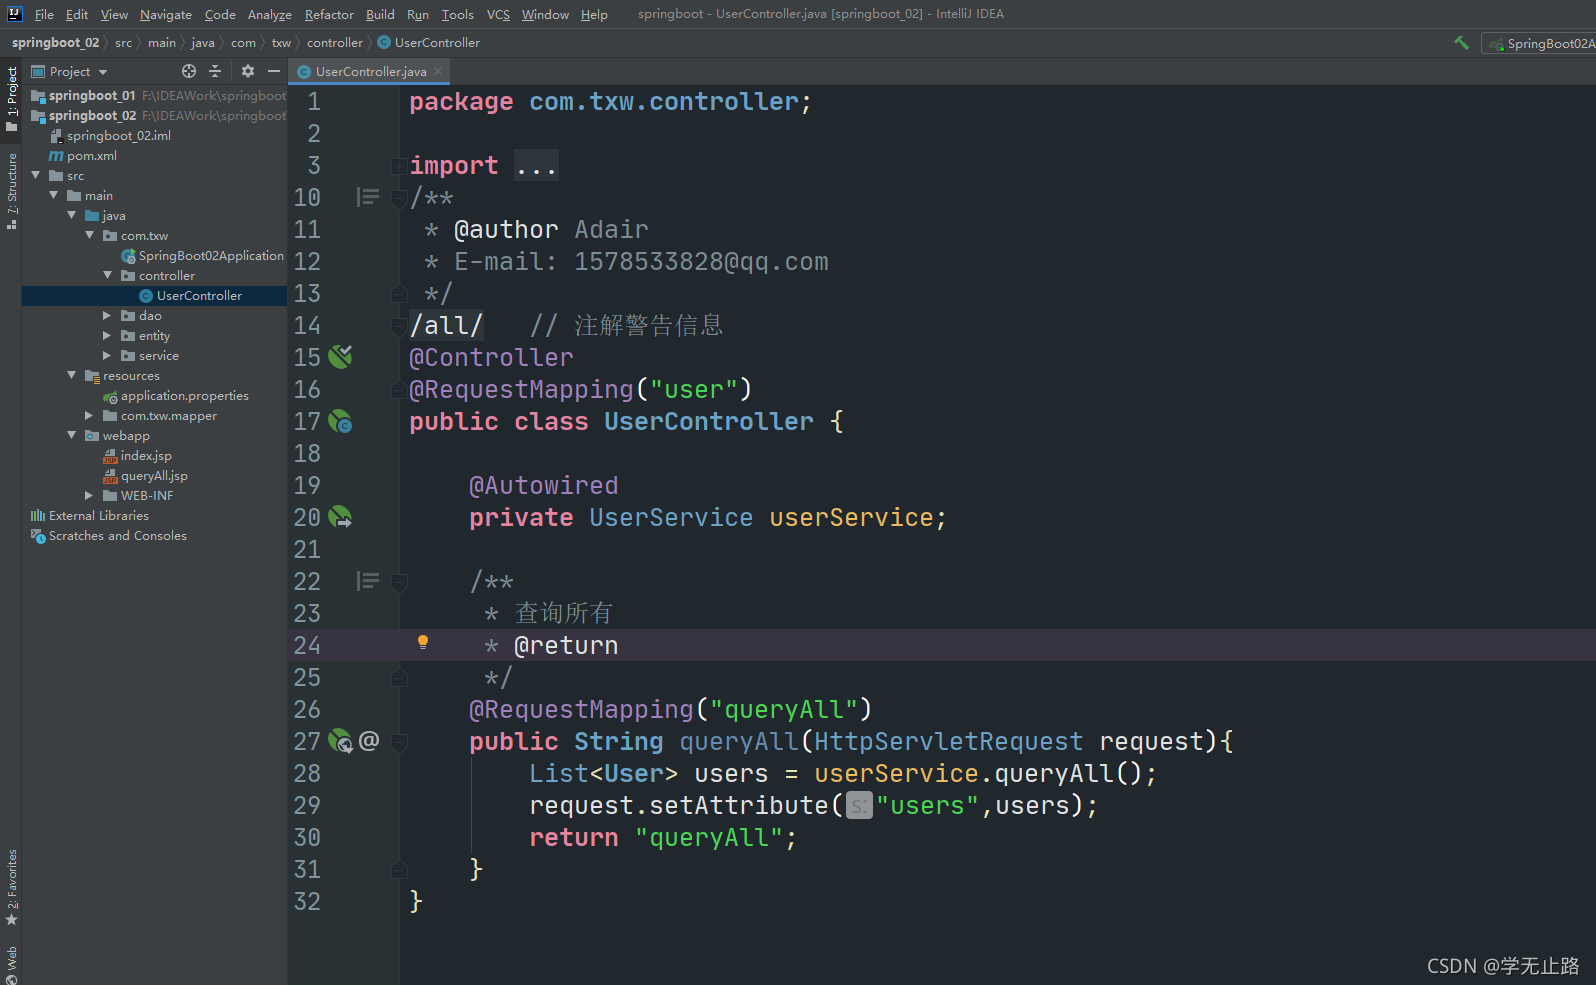
9.在主启动类加上如图所示的注解: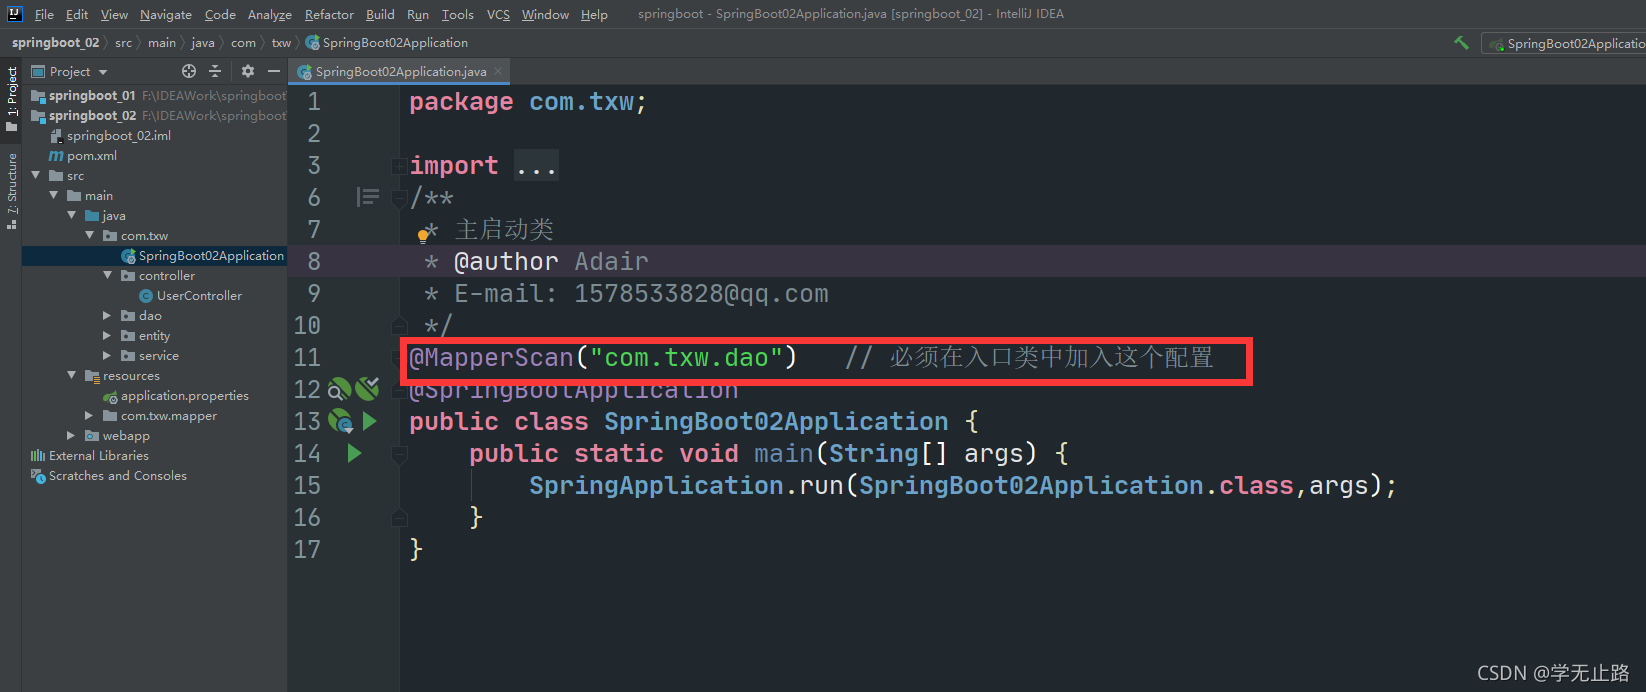
10,通过浏览器访问:http://localhost:8080/user/queryAll,如图所示。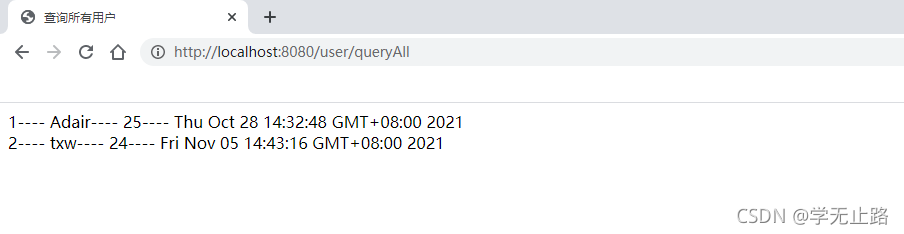
总结,如图所示:
2 spring集成Junit测试
1.引入依赖的代码如下:
 <!--Junit测试依赖-->
    <dependency>
      <groupId>org.springframework.boot</groupId>
      <artifactId>spring-boot-starter-test</artifactId>
      <scope>test</scope>
    </dependency>
如图所示:
2.编写TestUserService的代码如下:
package com.txw.test;

import com.txw.SpringBoot02Application;
import com.txw.entity.User;
import com.txw.service.UserService;
import org.junit.Test;
import org.junit.runner.RunWith;
import org.springframework.beans.factory.annotation.Autowired;
import org.springframework.boot.test.context.SpringBootTest;
import org.springframework.test.context.junit4.SpringRunner;
import java.util.List;
/**
 * 测试类
 * @author Adair
 * E-mail: [email protected]
 */
@RunWith(SpringRunner.class)   // 当前对象实例化同时启动springboot应用
@SpringBootTest(classes = SpringBoot02Application.class)  // 指定springboot入口类
public class TestUserService {


    @Autowired
    private UserService userService;

    /**
     * 测试查询所有用户
     */
    @Test
    public void testQueryAll(){


        List<User> users = userService.queryAll();
        for (User user : users) {


            System.out.println(user);
        }
    }
}
如图所示:
运行结果如图所示:
总结,如图所示:
3 切面编程
3.1 引言
springboot是对原有项目中spring框架和springmvc的进一步封装,因此在springboot中同样支持spring框架中AOP切面编程,不过在springboot中为了快速开发仅仅提供了注解方式的切面编程。
1.引入依赖的代码如下:
<!--aop依赖-->
    <dependency>
      <groupId>org.springframework.boot</groupId>
      <artifactId>spring-boot-starter-aop</artifactId>
    </dependency>
如图所示: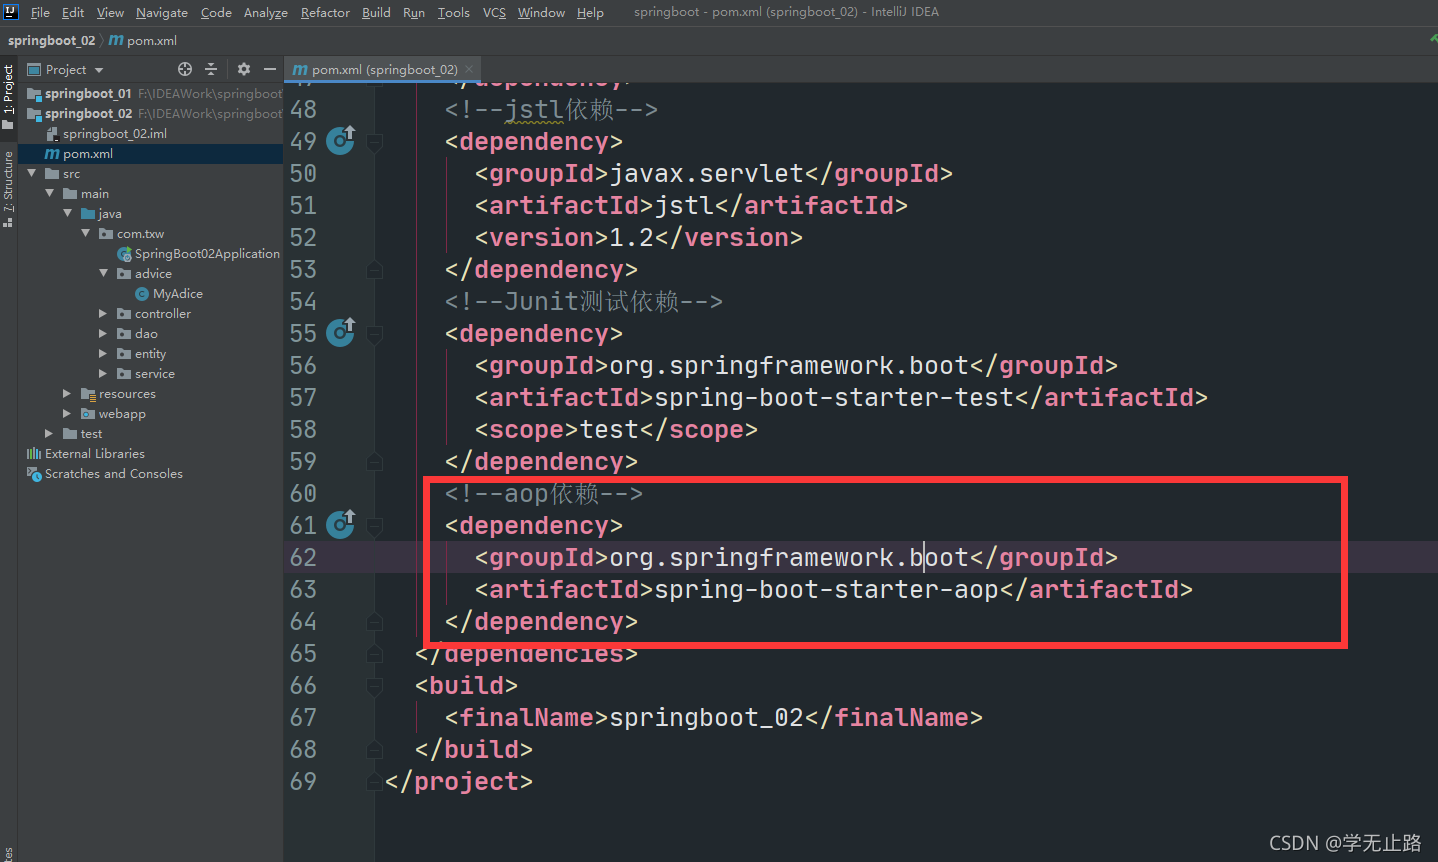
2.编写MyAdice的代码如下:
package com.txw.advice;

import org.aspectj.lang.JoinPoint;
import org.aspectj.lang.ProceedingJoinPoint;
import org.aspectj.lang.annotation.After;
import org.aspectj.lang.annotation.Around;
import org.aspectj.lang.annotation.Aspect;
import org.aspectj.lang.annotation.Before;
import org.springframework.stereotype.Component;
/**
 * 通知类
 * @author Adair
 * E-mail: [email protected]
 */
@SuppressWarnings("all")   // 注解警告信息
@Component  // 创建对象
@Aspect // 表示当前类是一个切面相关的配置类
public class MyAdice {


    /**
     * 前置通知
     */
    @Before("within(com.txw.service.impl.*)")
    public void before(JoinPoint joinPoint){


        System.out.println("-----------进入前置通知-------------");
        System.out.println("-----------执行前置内容-------------");
        System.out.println("-----------退出前置通知-------------");
        joinPoint.getTarget();              // 目标对象
        joinPoint.getSignature();           // 方法签名
        joinPoint.getArgs();                // 方法参数
    }

    /**
     * 后置通知
     * 注意: 前置通知和后置通知都没有返回值,方法参数都为joinpoint
     */
    @After("execution(* com.txw.service.impl.*.*(..))")
    public void after(JoinPoint joinPoint){


        System.out.println("-----------进入后置通知-------------");
        System.out.println("-----------执行后置内容-------------");
        System.out.println("-----------退出后置通知-------------");
        joinPoint.getTarget();              // 目标对象
        joinPoint.getSignature();           // 方法签名
        joinPoint.getArgs();                // 方法参数
    }

    /**
     *环绕切面
     * 注意: 环绕通知存在返回值,参数为ProceedingJoinPoint,如果执行放行,不会执行目标方法,一旦放行必须将目标方法的返回值返回,否则调用者无法接受返回数据
     */
    @Around("execution(* com.txw.service.impl.*.*(..))")
    public Object around(ProceedingJoinPoint proceedingJoinPoint) throws Throwable {


        System.out.println("进入环绕通知");
        proceedingJoinPoint.getTarget();                   // 目标对象
        proceedingJoinPoint.getSignature();                // 方法签名
        proceedingJoinPoint.getArgs();                     // 方法参数
        Object proceed = proceedingJoinPoint.proceed();   // 放行执行目标方法
        System.out.println("目标方法执行之后回到环绕通知");
        return proceed;     //  返回目标方法返回值
    }
}
如图所示: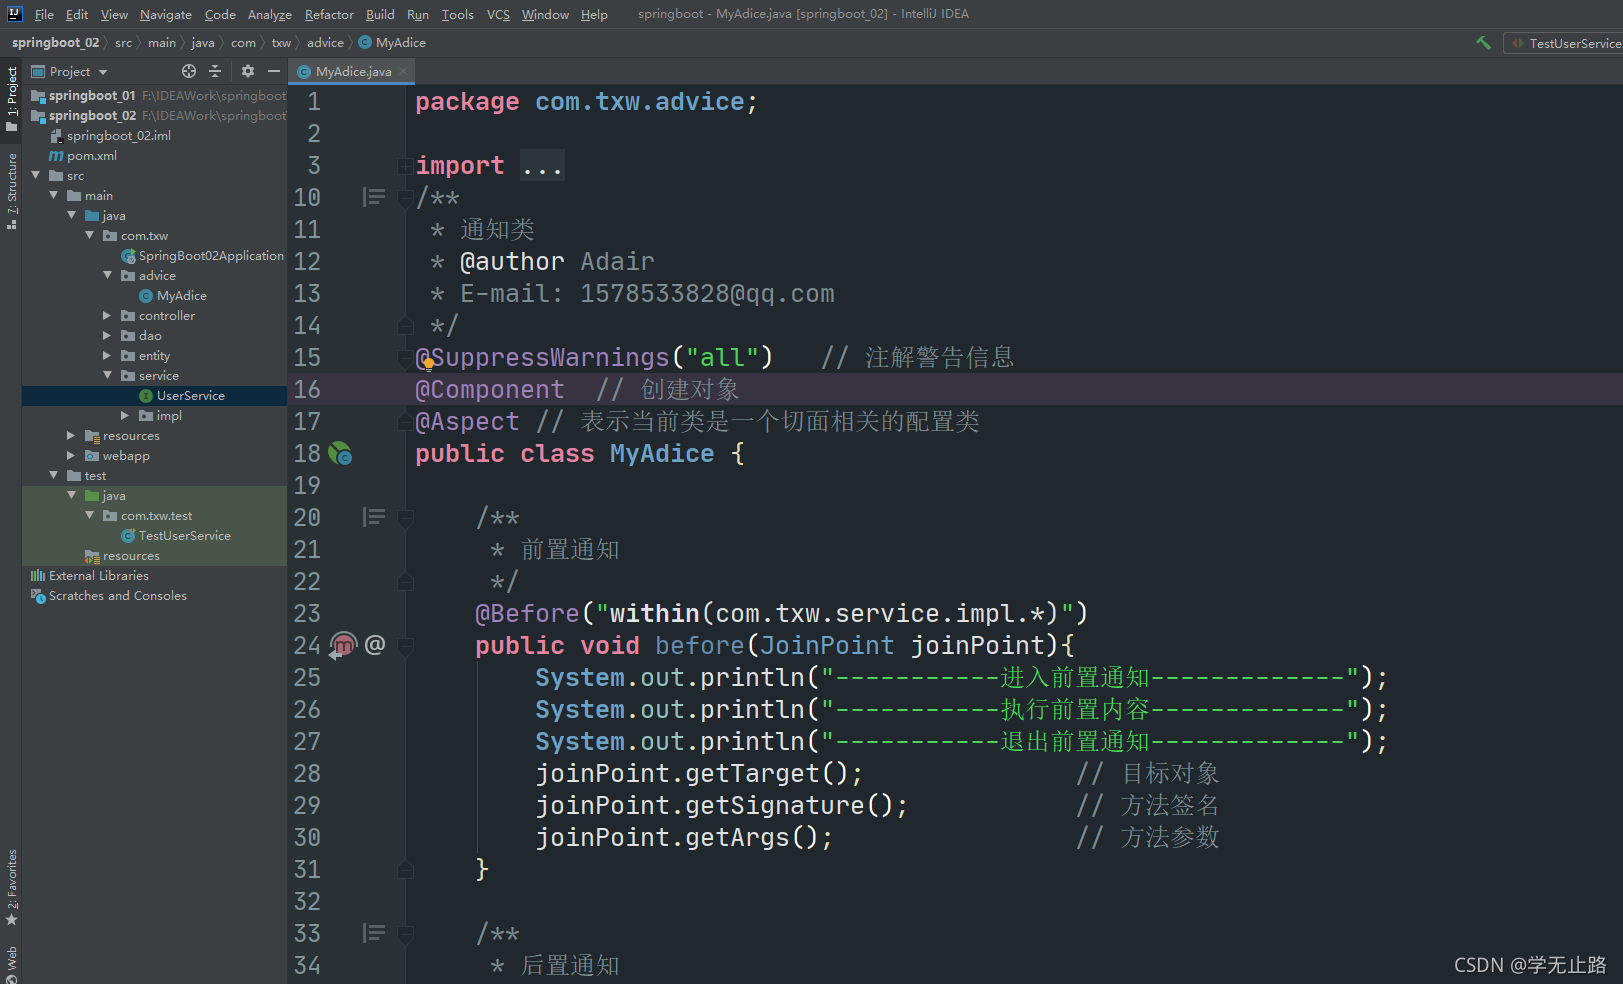
3.编写UserService的代码如下:
 /**
     * 测试
     */
    public void test();
如图所示: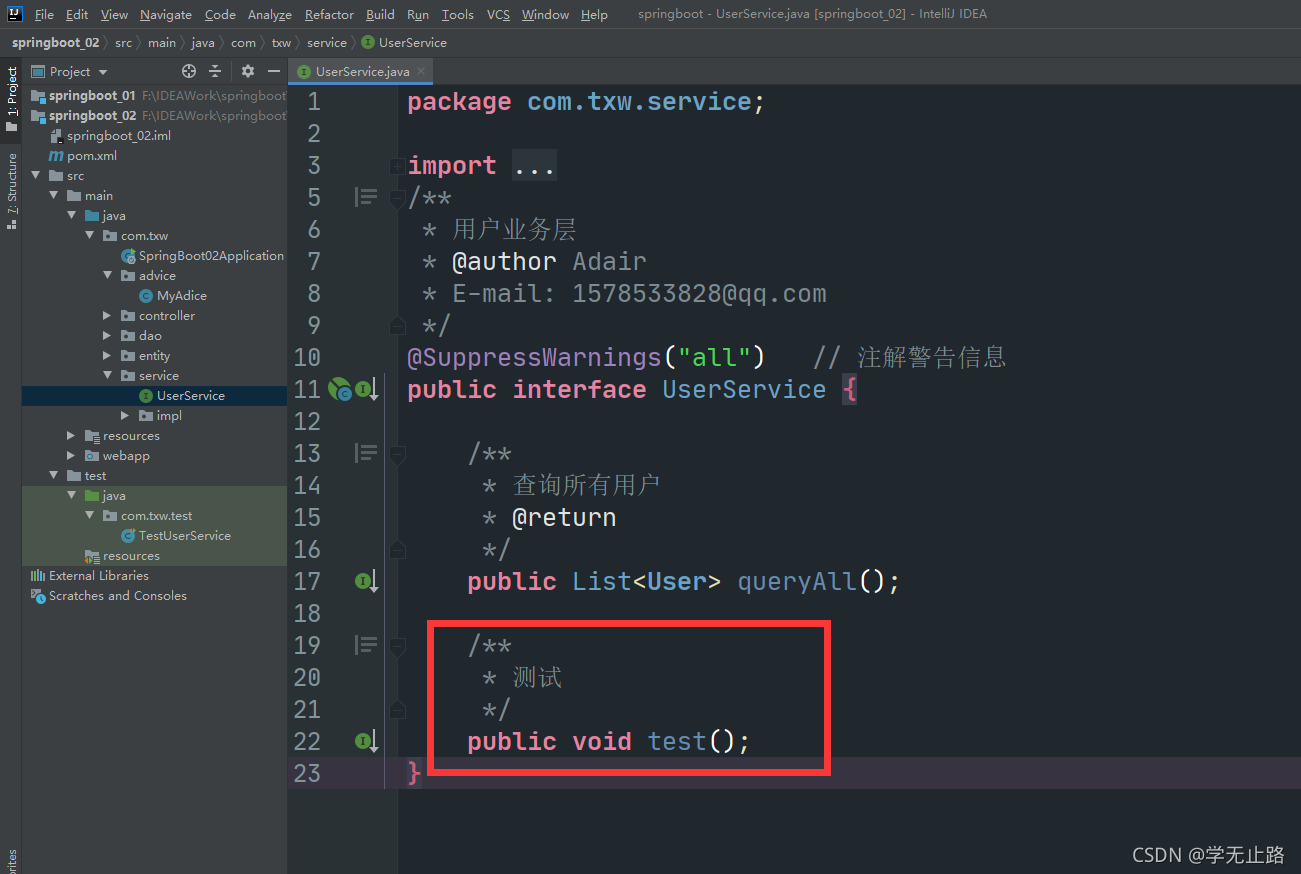
4.编写UserServiceImpl的代码如下:
 @Override
    public void test() {


        System.out.println("-----------核心业务--------------");
    }
如图所示: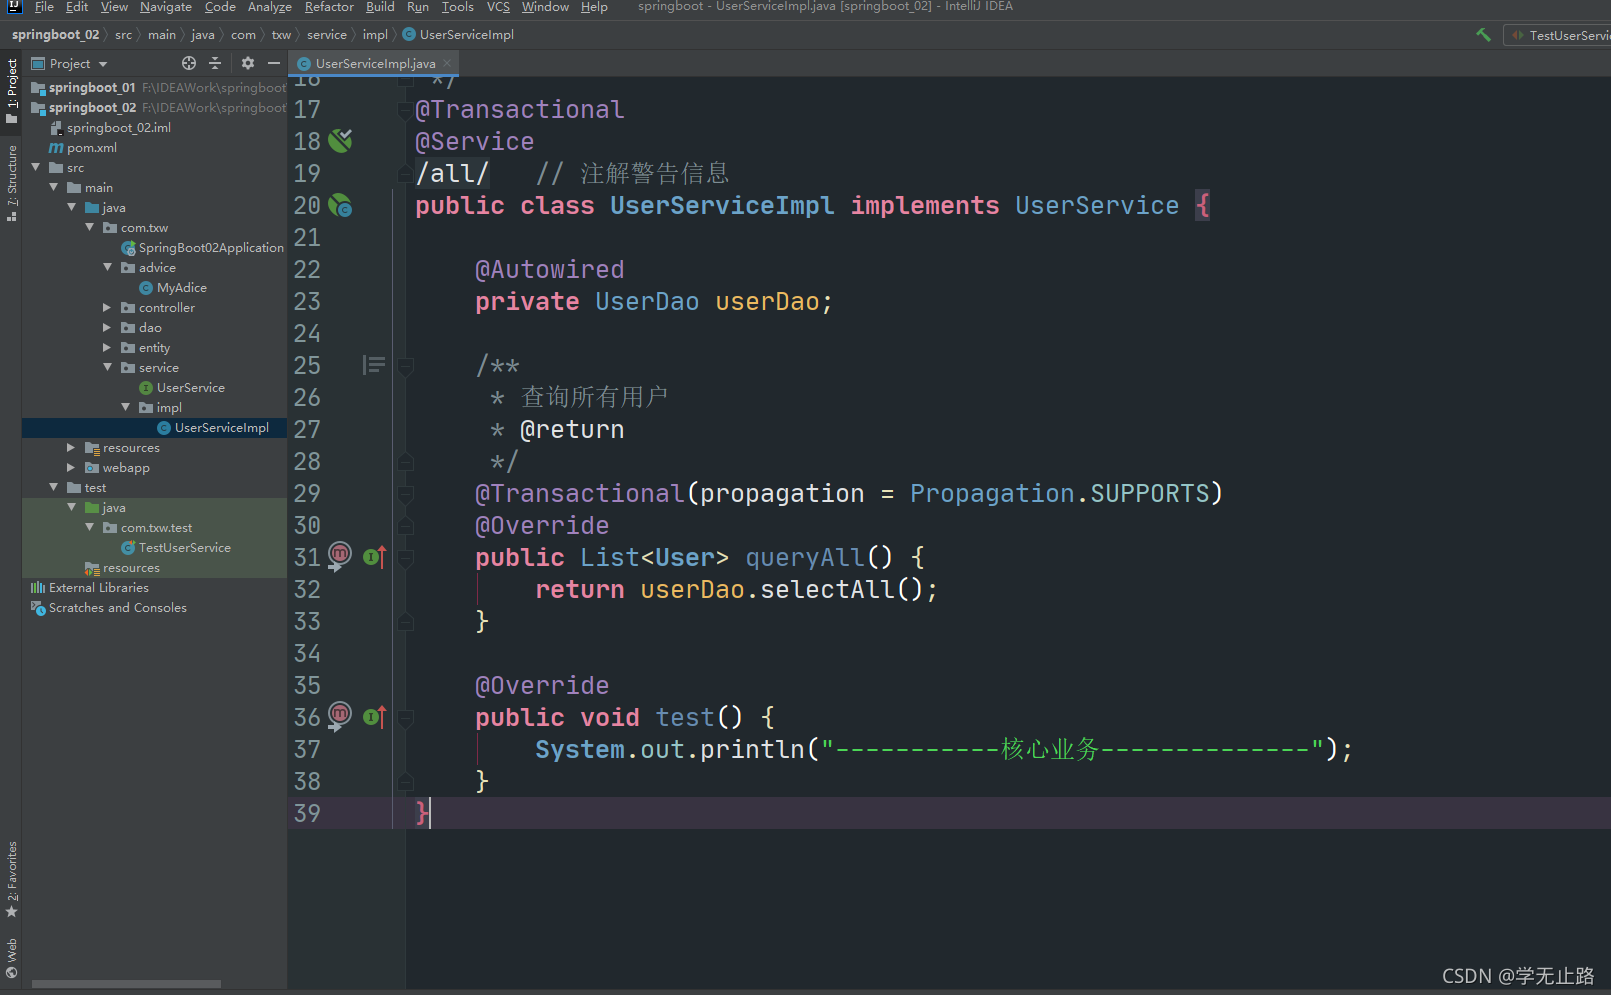
5.编写TestUserService的代码如下:
 @Test
    public void test1(){


        userService.test();
    }
如图所示: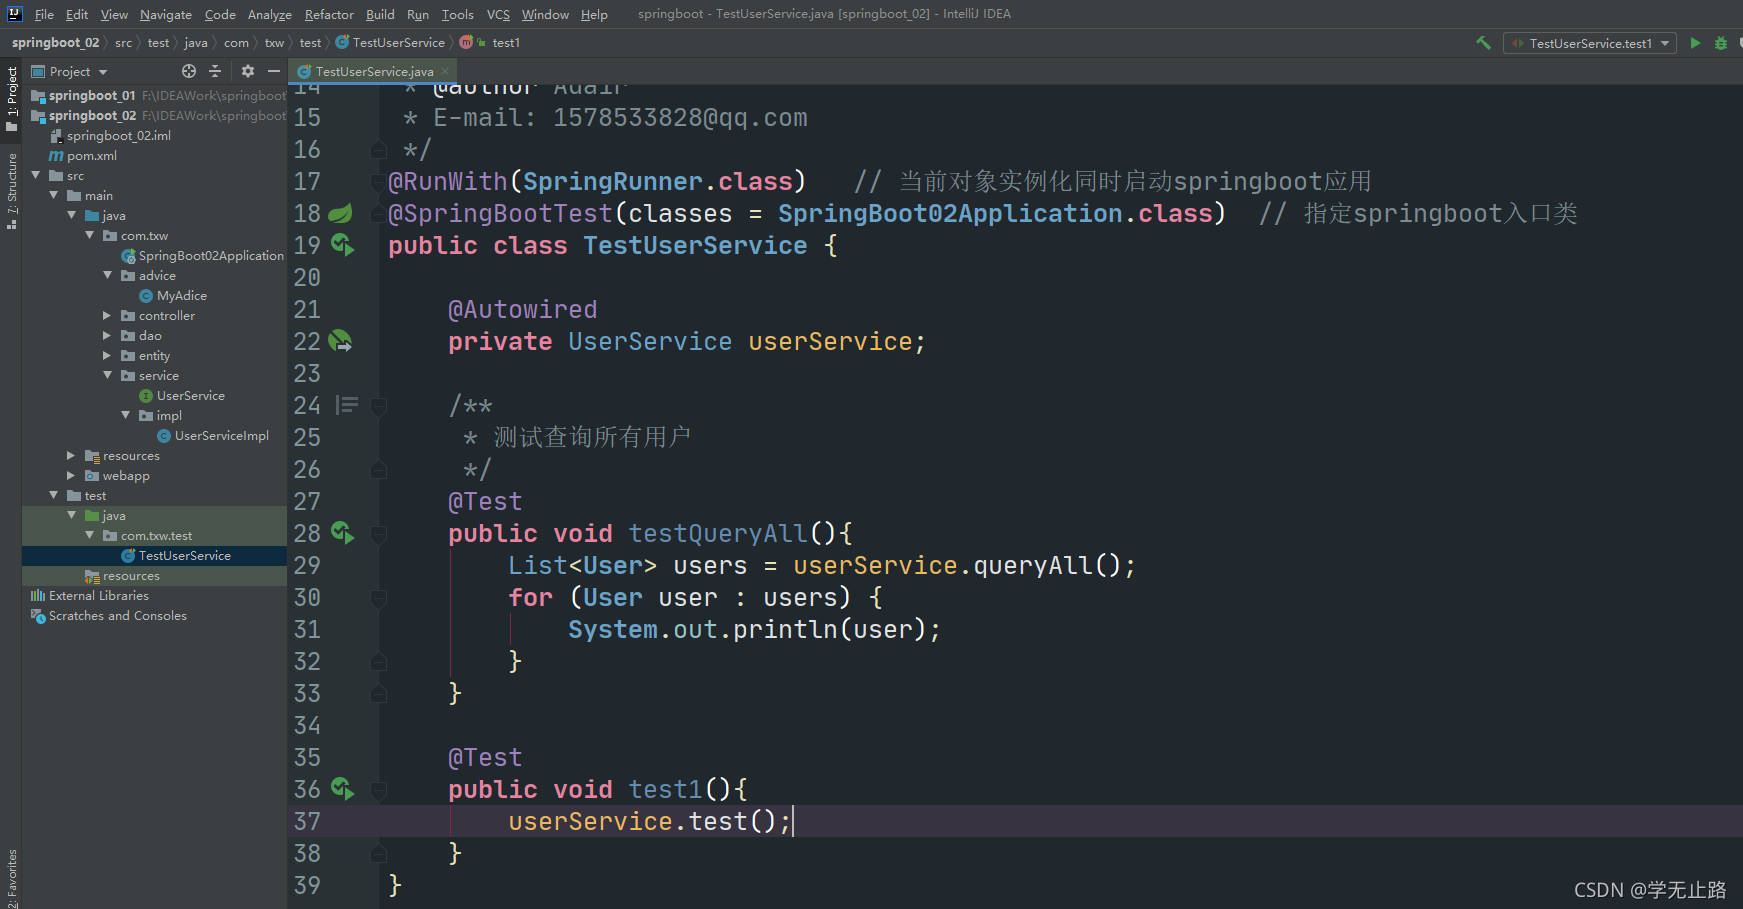
相关注解:
/**
    @Aspect 用来类上,代表这个类是一个切面
    @Before 用在方法上代表这个方法是一个前置通知方法
    @After 用在方法上代表这个方法是一个后置通知方法
    @Around 用在方法上代表这个方法是一个环绕的方法
**/
总结,如图所示: