(1)在mariadb上为neutron数据库和授权
mysql -u root -pCREATE DATABASE neutron;
进入数据库后,执行授权:
flush privileges;
GRANT ALL PRIVILEGES ON neutron.* TO 'neutron'@'localhost' IDENTIFIED BY 'NEUTRON_DBPASS';
GRANT ALL PRIVILEGES ON neutron.* TO 'neutron'@'%' IDENTIFIED BY 'NEUTRON_DBPASS';
(2)获取admin用户的环境变量
创建admin-openrc脚本,vim /root/admin-openrcexport OS_PROJECT_DOMAIN_NAME=Default
export OS_USER_DOMAIN_NAME=Default
export OS_PROJECT_NAME=admin
export OS_USERNAME=admin
export OS_PASSWORD=ADMIN_PASS
export OS_AUTH_URL=http://172.16.70.201:5000/v3
export OS_IDENTITY_API_VERSION=3
export OS_IMAGE_API_VERSION=2
source ~/admin-openrc
或者复制过来:[root@controller1 ~]# scp ~/admin-openrc [email protected]:~/admin-openrc
vim ~/.bash_profile
source ~/admin-openrc #在后面加上这一条
(3)在keystone上创建neutron服务
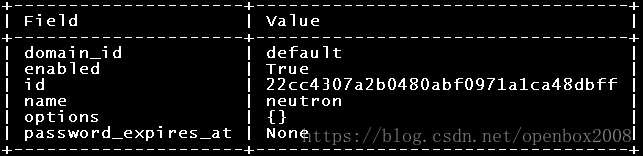
1)创建neutron用户[root@neutron1 ~]# openstack user create --domain default --password-prompt neutron
User Password: 123456
2)添加用户角色,给neutron用户添加admin权限
[root@neutron1 ~]#openstack role add --project service --user neutron admin
说明:此条命令执行成功后不返回参数
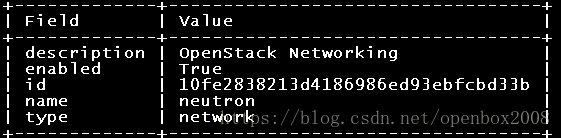
3)创建名称为neutron的网络服务
[root@neutron1 ~]#openstack service create --name neutron --description "OpenStack Networking" network
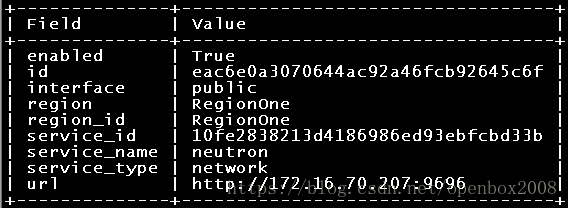
4)创建计算服务三个nova API服务端点public,internal,admin
1.public API端点
[root@neutron1 ~]# openstack endpoint create --region RegionOne network public http://172.16.70.207:9696
2.internal API端点
[root@neutron1 ~]#openstack endpoint create --region RegionOne network internal http://172.16.70.207:9696
3.admin API端点
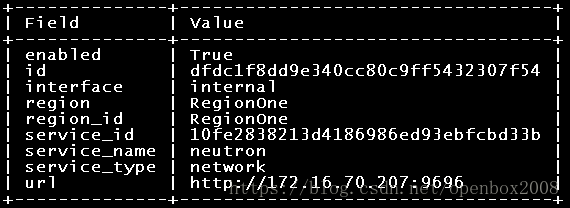
[root@neutron1 ~]#openstack endpoint create --region RegionOne network admin http://172.16.70.207:9696

(4)在neutron1控制节点服务器上安装并配置neutron
1)安装neutorn控制节点相关组件yum -y install openstack-neutron
yum -y install openstack-neutron-openvswitch
yum -y install ebtables #ebtables和iptables类似,都是Linux系统下网络数据包过滤的配置工具。ebtables来过滤数据链路层数据包即网桥信息。而iptables不能过滤桥接流量,只能做IP层的过滤
2)配置neutron服务组件,编辑 /etc/neutron/neutron.conf
[DEFAULT]
auth_strategy = keystone
core_plugin = ml2
service_plugins =router
state_path=/var/lib/neutron
dhcp_agent_notification= true
allow_overlapping_ips = true
transport_url = rabbit://openstack:[email protected]notify_nova_on_port_status_changes = true
notify_nova_on_port_data_changes = true
[database]
connection = mysql+pymysql://neutron:[email protected]/neutron
[keystone_authtoken]
auth_uri = http://172.16.70.201:5000
auth_url = http://172.16.70.201:35357
memcached_servers = 172.16.70.204:11211
auth_type = password
project_domain_name = default
user_domain_name = default
project_name = service
username = neutron
password = 123456
[nova]
auth_url = http://172.16.70.201:35357
auth_type = password
project_domain_name = default
user_domain_name = default
region_name = RegionOne
project_name = service
username = nova
password = 123456
[oslo_concurrency]
lock_path = /var/lib/neutron/tmp
*检查数据库连接:mysql -h 172.16.70.203 -uneutron -pNEUTRON_DBPASS -e "use neutron;show tables;"
3)配置二层网络插件
编辑/etc/neutron/plugins/ml2/ml2_conf.ini
[ml2]
type_drivers = flat,vlan,gre,vxlan
tenant_network_types =
mechanism_drivers = openvswitch,l2population
extension_drivers = port_security
[securitygroup]
enable_ipset = true
enable_security_group = true
firewall_driver = neutron.agent.linux.iptables_firewall.OVSHybridIptablesFirewallDriver
[ml2_type_flat]
flat_networks = physnet1 #这个名字自定义,后面的配置要和它一样
5)修改配置文件/etc/neutron/plugins/ml2/openvswitch_agent.ini
[ovs]
bridge_mappings = physnet1:br-eth1 #br-eth1该名称是在后面创建的网桥名
6)修改配置文件/etc/neutron/l3_agent.ini
[DEFAULT]
interface_driver = neutron.agent.linux.interface.OVSInterfaceDriver
7)配置DHCP服务脚本编辑 /etc/neutron/dhcp_agent.ini
[DEFAULT]
interface_driver = neutron.agent.linux.interface.OVSInterfaceDriver
dhcp_driver = neutron.agent.linux.dhcp.Dnsmasq
enable_isolated_metadata = true
8)配置metadata
编辑 /etc/neutron/metadata_agent.ini
[DEFAULT]
nova_metadata_host = 172.16.70.206 #8775 nova控制节点
metadata_proxy_shared_secret = 123456
[cache]
memcached_servers = 172.16.70.204:11211
(5)配置nova控制节点使用网络服务
编辑/etc/nova/nova.conf[DEFAULT]
use_neutron = true
linuxnet_interface_driver = nova.network.linux_net.LinuxOVSInterfaceDriver
firewall_driver = nova.virt.firewall.NoopFirewallDriver
[neutron]url = http://172.16.70.207:9696
auth_url = http://172.16.70.201:35357
auth_type = password
project_domain_name = default
user_domain_name = default
region_name = RegionOne
project_name = service
username = neutron
password = 123456
service_metadata_proxy = true
metadata_proxy_shared_secret = 123456
(6)完成并验证安装
1)创建服务软连接ln -s /etc/neutron/plugins/ml2/ml2_conf.ini /etc/neutron/plugin.ini
2)同步数据库
su -s /bin/sh -c "neutron-db-manage --config-file /etc/neutron/neutron.conf --config-file /etc/neutron/plugins/ml2/ml2_conf.ini upgrade head" neutron
3)重启compute API服务
systemctl restart openstack-nova-api.service #修改了nova1控制节点配置,需要重启
4)创建网桥
ovs-vsctl add-br br-int (#创建用于同一台物理之间的内部通信的网桥)
ovs-vsctl add-br br-eth1 (#创建用于不同物理机之间的通信的网桥)
ovs-vsctl add-port br-eth1 eth1 (将eth1物理网卡加入到业务网桥中)5)配置网络服务开机启动
systemctl enable neutron-serversystemctl enable neutron-metadata-agent
systemctl enable neutron-dhcp-agent
systemctl enable openvswitch
systemctl enable neutron-l3-agent
systemctl enable neutron-openvswitch-agent
systemctl start neutron-server.service
systemctl start neutron-metadata-agent.service
systemctl start neutron-dhcp-agent.service
systemctl start openvswitch
systemctl start neutron-l3-agent
systemctl start neutron-openvswitch-agent
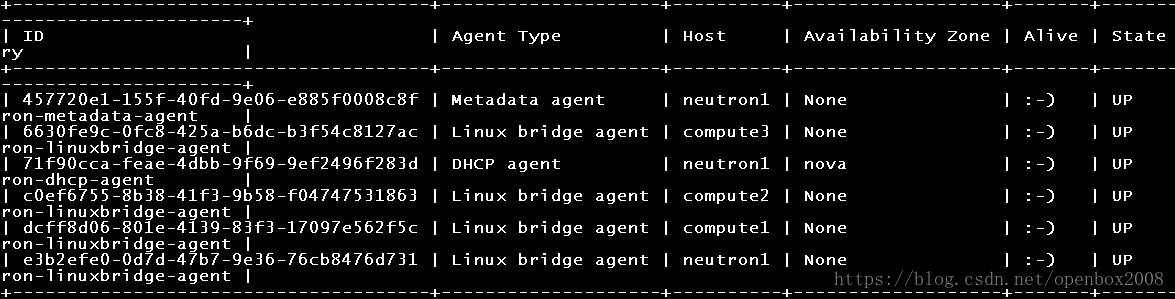
6)查看服务
[root@neutron1 neutron]# openstack network agent list