一、安装下载
下载地址:https://zookeeper.apache.org/releases.html
linux或是windows均可使用
二、配置文件
1.将conf目录下的zoo_sample.cfg文件,复制一份,重命名为zoo.cfg,zk默认加载zoo.cfg文件
2.修改zoo.cfg文件 我的是伪集群搭建
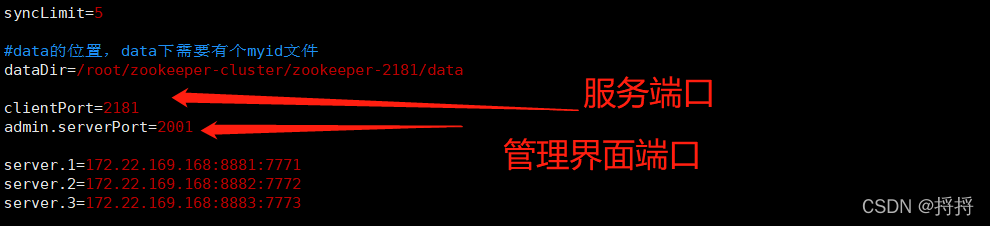 【server】的配置含义说明:
server.A=B:C:D
其中 A 是一个数字,表示这个是第几号服务器;
B 是这个服务器的 ip 地址;
C 表示的是这个服务器与集群中的 Leader 服务器交换信息的端口;
D 表示的是万一集群中的 Leader 服务器挂了,需要一个端口来重新进行选举,选出一个新的 Leader,而这个端口就是用来执行选举时服务器相互通信的端口
3.在data下新建一个myid文件夹,并且编辑内容为 1
touch myid
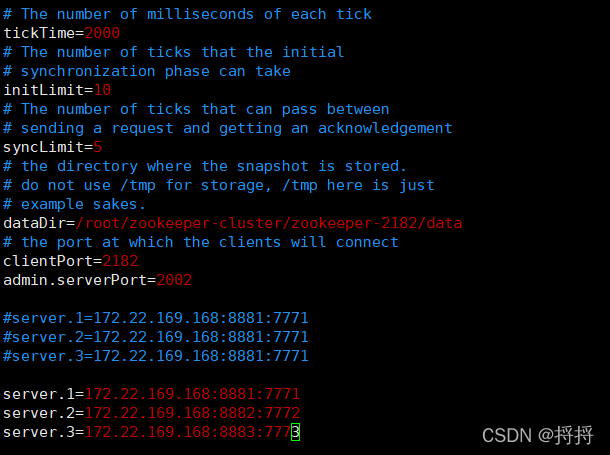
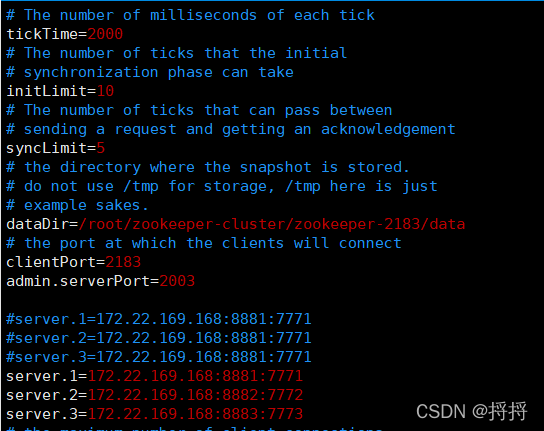
4.将该zk复制多两份,复制的两份修改conf目录下的zoo.cfg文件,文件内容只需要修改dataDir、clientPort、admin.serverPort即可。并且data下的myid内容需要修改,一个修改为2,一个修改为3
示例:
5.启动集群
./zookeeper-2181/bin/zkServer.sh start
./zookeeper-2182/bin/zkServer.sh start
./zookeeper-2183/bin/zkServer.sh start
这样就启动完成啦!
6.查看集群状态
./zookeeper-2181/bin/zkServer.sh status
./zookeeper-2182/bin/zkServer.sh status
./zookeeper-2183/bin/zkServer.sh status
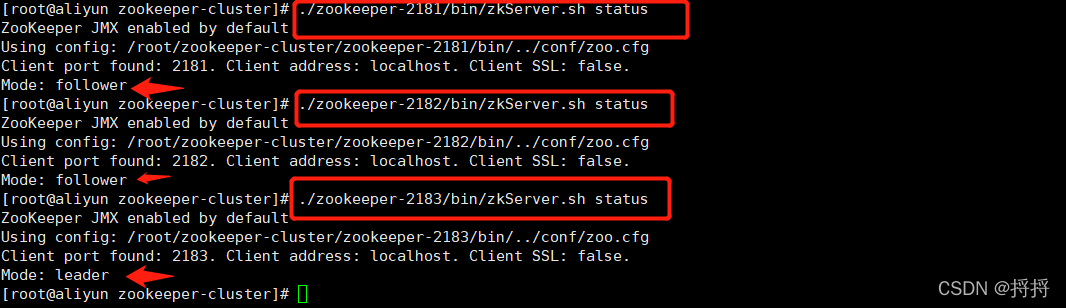 不难看出,2181和2182都是追随者,2183是领导者
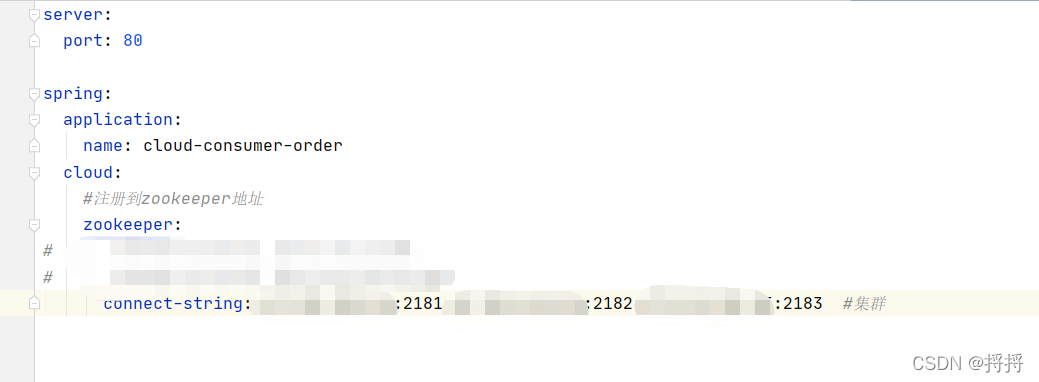
7.springboot的yml配置
<!-- SpringBoot整合zookeeper客户端 -->
        <dependency>
            <groupId>org.springframework.cloud</groupId>
            <artifactId>spring-cloud-starter-zookeeper-discovery</artifactId>
            <!--先排除自带的zookeeper3.5.3-->
            <exclusions>
                <exclusion>
                    <groupId>org.apache.zookeeper</groupId>
                    <artifactId>zookeeper</artifactId>
                </exclusion>
            </exclusions>
        </dependency>
        <!--添加zookeeper3.6.3版本-->
        <dependency>
            <groupId>org.apache.zookeeper</groupId>
            <artifactId>zookeeper</artifactId>
            <version>3.6.3</version>
        </dependency>
@SpringBootApplication
@EnableDiscoveryClient //该注解用于向使用consul或者zookeeper作为注册中心时注册服务
public class Payment8004 {
    public static void main(String[] args) {
        SpringApplication.run(Payment8004.class,args);
    }
}
这样就可以直接启动 大功告成啦!