分区的目的方便于数据恢复。
fdisk -l查看硬盘,表示真实存在的硬件信息:
vda表示第一个虚拟磁盘
vdb表示第二个虚拟磁盘
–IDE表示老式硬盘(并口硬盘)
/dev/sda表示第一块串口硬盘,a表示第一块
/dev/hd0串口硬盘
/dev/cdrom /dev/sr0表示光驱,cdrom为sro的快捷方式,cdrom可以不存在
cat /proc/partitions 查看系统识别的设备
blkid查看系统里面可以使用的设备
df查看系统正在使用的设备
查看设备大小的比较:
df <= blkid < cat /proc/partitions < fdisk -l
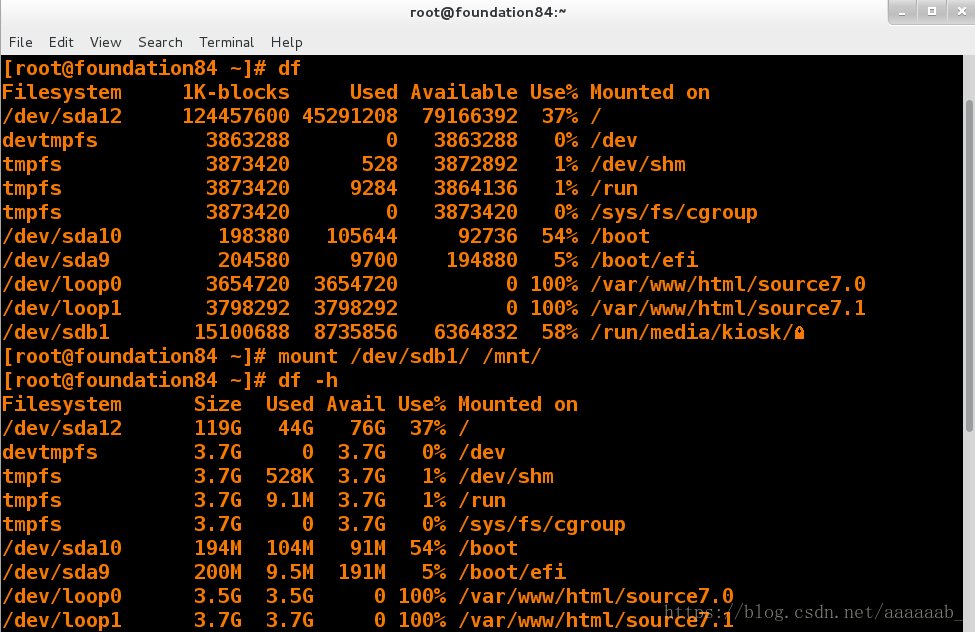
[root@foundation21 ~]# mount /dev/sdb1/ /mnt/ 表示挂载
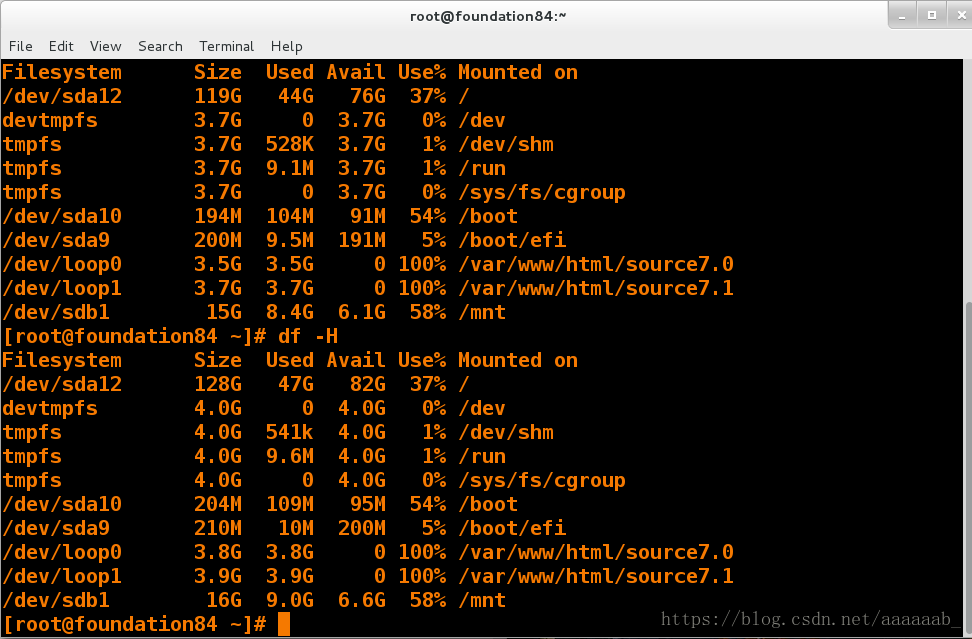
[root@foundation21 ~]# df -h 数小准确,代表2的n次方
Filesystem Size Used Avail Use% Mounted on
/dev/sda3 294G 30G 265G 10% /
devtmpfs 1.8G 0 1.8G 0% /dev
tmpfs 1.8G 188K 1.8G 1% /dev/shm
tmpfs 1.8G 8.9M 1.8G 1% /run
tmpfs 1.8G 0 1.8G 0% /sys/fs/cgroup
/dev/sda1 494M 146M 348M 30% /boot
/dev/loop0 3.5G 3.5G 0 100% /var/www/html/source7.0
/dev/loop1 3.8G 3.8G 0 100% /var/www/html/source7.2
tmpfs 368M 28K 368M 1% /run/user/1000
tmpfs 368M 0 368M 0% /run/user/0
/dev/sdb1 15G 8.4G 6.1G 58% /mnt
[root@foundation21 ~]# df -H 代表10的n次方
Filesystem Size Used Avail Use% Mounted on
/dev/sda3 316G 32G 284G 10% /
devtmpfs 2.0G 0 2.0G 0% /dev
tmpfs 2.0G 193k 2.0G 1% /dev/shm
tmpfs 2.0G 9.3M 2.0G 1% /run
tmpfs 2.0G 0 2.0G 0% /sys/fs/cgroup
/dev/sda1 518M 154M 365M 30% /boot
/dev/loop0 3.8G 3.8G 0 100% /var/www/html/source7.0
/dev/loop1 4.1G 4.1G 0 100% /var/www/html/source7.2
tmpfs 386M 29k 386M 1% /run/user/1000
tmpfs 386M 0 386M 0% /run/user/0
/dev/sdb1 16G 9.0G 6.6G 58% /mnt
切换到超级用户,挂载U盘,查看df -h和df -H的参数区别:
打开两个shell进行挂载实验:
A:
[kiosk@foundation21 Desktop]$ su -
Password:
Last login: Mon Apr 30 08:54:32 CST 2018 on tty1
[root@foundation21 ~]# df       查看系统正在使用的设备
Filesystem     1K-blocks     Used Available Use% Mounted on
/dev/sda3      307974224 29631012 278343212  10% /
devtmpfs         1868044        0   1868044   0% /dev
tmpfs            1881152      188   1880964   1% /dev/shm
tmpfs            1881152     9044   1872108   1% /run
tmpfs            1881152        0   1881152   0% /sys/fs/cgroup
/dev/sda1         505580   149472    356108  30% /boot
/dev/loop0       3654720  3654720         0 100% /var/www/html/source7.0
/dev/loop1       3947824  3947824         0 100% /var/www/html/source7.2
tmpfs             376232       28    376204   1% /run/user/1000
tmpfs             376232        0    376232   0% /run/user/0
/dev/sdb1       15100688  8722224   6378464  58% /run/media/kiosk/Ѧ     会出来U盘标识
[root@foundation21 ~]# umount /dev/sdb1        卸载
[root@foundation21 ~]# mount /dev/sdb1 /mnt/   挂载到/mnt/下,打开/mnt会看到U盘文件
[root@foundation21 ~]# cd /mnt/       占用后台,然后用另外一个shell来结束进程
[root@foundation21 mnt]# fdisk -l     查看真实存在的硬盘

Disk /dev/sda: 320.1 GB, 320072933376 bytes, 625142448 sectors
Units = sectors of 1 * 512 = 512 bytes
Sector size (logical/physical): 512 bytes / 4096 bytes
I/O size (minimum/optimal): 4096 bytes / 4096 bytes
Disk label type: dos
Disk identifier: 0x000b2282

   Device Boot      Start         End      Blocks   Id  System
/dev/sda1   *        2048     1026047      512000   83  Linux
/dev/sda2         1026048     8892415     3933184   82  Linux swap / Solaris
/dev/sda3         8892416   625141759   308124672   83  Linux

Disk /dev/sdb: 15.5 GB, 15472047104 bytes, 30218842 sectors
Units = sectors of 1 * 512 = 512 bytes
Sector size (logical/physical): 512 bytes / 512 bytes
I/O size (minimum/optimal): 512 bytes / 512 bytes
Disk label type: dos
Disk identifier: 0x55395ad1

   Device Boot      Start         End      Blocks   Id  System
/dev/sdb1   *          63    30217823    15108880+   c  W95 FAT32 (LBA)   U盘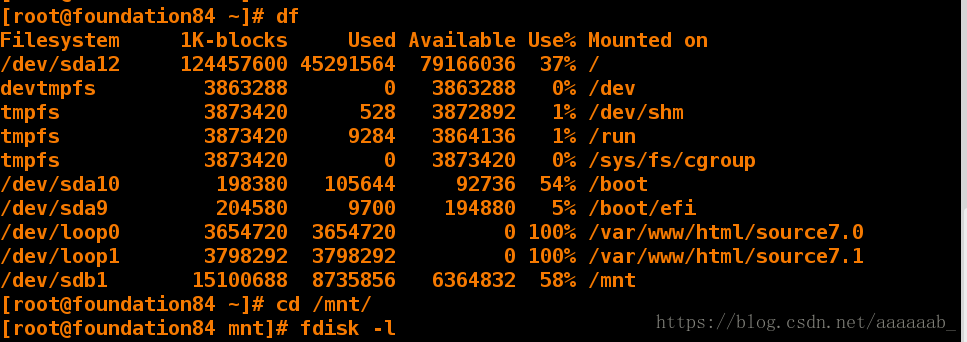

B:
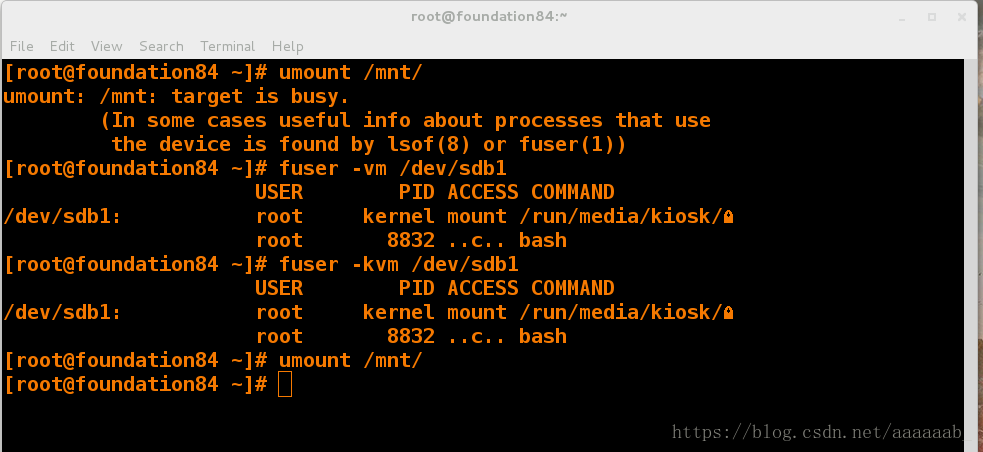
[root@foundation21 ~]# umount /mnt/    卸载
umount: /mnt: target is busy.
        (In some cases useful info about processes that use
         the device is found by lsof(8) or fuser(1))  两种查看方式
[root@foundation21 ~]# fuser -vm /dev/sdb1   查看占用后台的PID
                     USER        PID ACCESS COMMAND
/dev/sdb1:           root     kernel mount /mnt
                     root      14537 ..c.. bash
[root@foundation21 ~]# fuser -kvm /dev/sdb1   杀死后台
                     USER        PID ACCESS COMMAND
/dev/sdb1:           root     kernel mount /mnt
                     root      14537 ..c.. bash
[root@foundation21 ~]# umount /mnt/卸载成功
lsof查看占用后台的PID就可以结合kill -9强制杀死
mount -o添加参数进行挂载。
[root@foundation21 ~]# mount -o ro /dev/sdb1 /mnt/
[root@foundation21 ~]# df
Filesystem     1K-blocks     Used Available Use% Mounted on
/dev/sda3      307974224 29625448 278348776  10% /
devtmpfs         1868044        0   1868044   0% /dev
tmpfs            1881152      188   1880964   1% /dev/shm
tmpfs            1881152     9036   1872116   1% /run
tmpfs            1881152        0   1881152   0% /sys/fs/cgroup
/dev/sda1         505580   149472    356108  30% /boot
/dev/loop0       3654720  3654720         0 100% /var/www/html/source7.0
/dev/loop1       3947824  3947824         0 100% /var/www/html/source7.2
tmpfs             376232       36    376196   1% /run/user/1000
tmpfs             376232        0    376232   0% /run/user/0
/dev/sdb1       15100688  8722224   6378464  58% /mnt
[root@foundation21 ~]# touch /mnt/file1
touch: cannot touch ‘/mnt/file1’: Read-only file system
用mount查看为ro不能建立文件只读
[root@foundation21 ~]# umount /dev/sdb1
[root@foundation21 ~]# mount -o rw /dev/sdb1 /mnt/
用mount查看为rw可以建立文件可写
[root@foundation21 ~]# touch /mnt/file1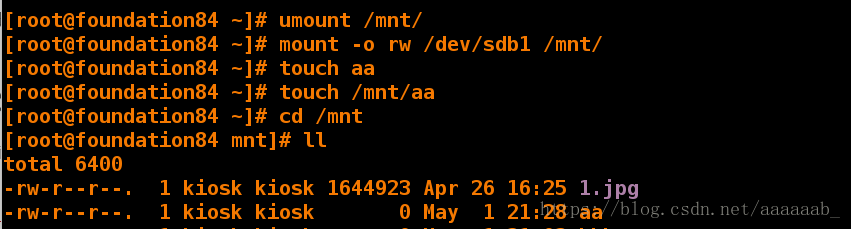
MBR分区的意思是“主引导记录”,它有自己的启动器,也就是启动代码,一旦启动代码被破坏,系统就没法启动,只有通过修复才能启动系统。最大支持2TB容量,在容量方面存在着极大的瓶颈,那么GPT在今后的发展就会越来越占优势。
GPT意为GUID分区表,这是一个正逐渐取代MBR的新标准,它由UEFI辅住而形成的,这样就有了UEFI用于取代老旧的BIOS,而GPT则取代老旧的MBR。这个标准没有MBR的那些限制。磁盘驱动器容量可以大得多,大到操作系统和文件系统都没法支持。它同时还支持几乎无限个分区数量,限制只在于操作系统,Windows支持最多128个GPT分区。通过UEFI,所有的64位的win0,win8,win7和Vista,以及所对应的服务器都能从GPT启动。
接下来操作在虚拟机中进行划分分区:
mbr分区方式,主分区,剩下的放在容器中叫做扩展分区,容器里面的东西为逻辑分区,在linux中最多放16个,每个不超过2t。mbr方式只可以创建四个主分区,所以我门可以将第四个改为拓展分区,然后就可以建立多个分区。
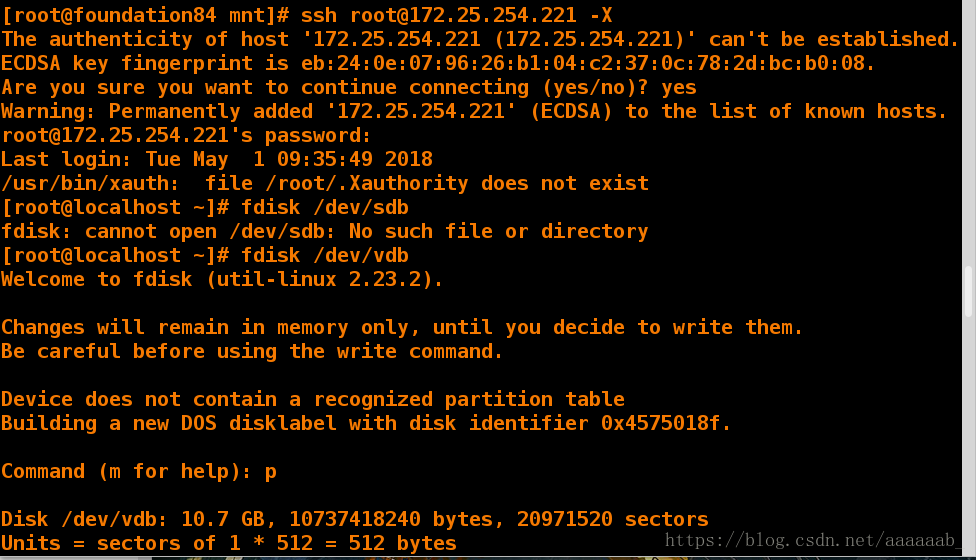
[root@localhost ~]# fdisk /dev/vdb打开分区列表
Welcome to fdisk (util-linux 2.23.2).
Changes will remain in memory only, until you decide to write them.
Be careful before using the write command.
Device does not contain a recognized partition table
Building a new DOS disklabel with disk identifier 0x07782492.
Command (m for help): n 创建分区
Partition type: 创建分区类型
p primary (0 primary, 0 extended, 4 free)
e extended
Select (default p): p 主分区
Partition number (1-4, default 1): 1 指定主分区id
First sector (2048-20971519, default 2048): 分区起始块位置,用默认
Using default value 2048
Last sector, +sectors or +size{K,M,G} (2048-20971519, default 20971519): +100M 分配100M内存,分区结束位置,用+大小的方式指定
Partition 1 of type Linux and of size 100 MiB is set
Command (m for help): p查看分区
Disk /dev/vdb: 10.7 GB, 10737418240 bytes, 20971520 sectors
Units = sectors of 1 * 512 = 512 bytes
Sector size (logical/physical): 512 bytes / 512 bytes
I/O size (minimum/optimal): 512 bytes / 512 bytes
Disk label type: dos
Disk identifier: 0x07782492
Device Boot Start End Blocks Id System
/dev/vdb1 2048 206847 102400 83 Linux
Command (m for help): n
Partition type:
p primary (1 primary, 0 extended, 3 free)
e extended
Select (default p): p
Partition number (2-4, default 2): 2
First sector (206848-20971519, default 206848):
Using default value 206848
Last sector, +sectors or +size{K,M,G} (206848-20971519, default 20971519): +100M
Partition 2 of type Linux and of size 100 MiB is set
Command (m for help): p
Disk /dev/vdb: 10.7 GB, 10737418240 bytes, 20971520 sectors
Units = sectors of 1 * 512 = 512 bytes
Sector size (logical/physical): 512 bytes / 512 bytes
I/O size (minimum/optimal): 512 bytes / 512 bytes
Disk label type: dos
Disk identifier: 0x07782492
Device Boot Start End Blocks Id System
/dev/vdb1 2048 206847 102400 83 Linux
/dev/vdb2 206848 411647 102400 83 Linux
Command (m for help): n
Partition type:
p primary (2 primary, 0 extended, 2 free)
e extended
Select (default p): p
Partition number (3,4, default 3): 3
First sector (411648-20971519, default 411648):
Using default value 411648
Last sector, +sectors or +size{K,M,G} (411648-20971519, default 20971519): +100M
Partition 3 of type Linux and of size 100 MiB is set
Command (m for help): n
Partition type:
p primary (3 primary, 0 extended, 1 free)
e extended
Select (default e): p
Selected partition 4
First sector (616448-20971519, default 616448):
Using default value 616448
Last sector, +sectors or +size{K,M,G} (616448-20971519, default 20971519): +100M
Partition 4 of type Linux and of size 100 MiB is set
Command (m for help): p
Disk /dev/vdb: 10.7 GB, 10737418240 bytes, 20971520 sectors
Units = sectors of 1 * 512 = 512 bytes
Sector size (logical/physical): 512 bytes / 512 bytes
I/O size (minimum/optimal): 512 bytes / 512 bytes
Disk label type: dos
Disk identifier: 0x07782492
Device Boot Start End Blocks Id System
/dev/vdb1 2048 206847 102400 83 Linux
/dev/vdb2 206848 411647 102400 83 Linux
/dev/vdb3 411648 616447 102400 83 Linux
/dev/vdb4 616448 821247 102400 83 Linux
Command (m for help): d
Partition number (1-4, default 4): 4
Partition 4 is deleted
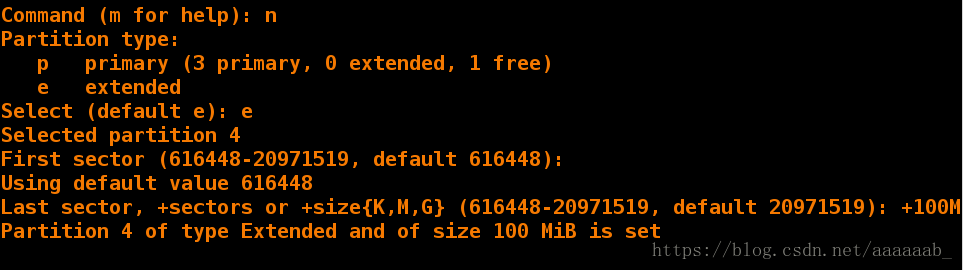
Command (m for help): n
Partition type:
p primary (3 primary, 0 extended, 1 free)
e extended
Select (default e): e
Selected partition 4
First sector (616448-20971519, default 616448):
Using default value 616448
Last sector, +sectors or +size{K,M,G} (616448-20971519, default 20971519):
Using default value 20971519
Partition 4 of type Extended and of size 9.7 GiB is set
Command (m for help): n
All primary partitions are in use
Adding logical partition 5
First sector (618496-20971519, default 618496):
Using default value 618496
Last sector, +sectors or +size{K,M,G} (618496-20971519, default 20971519): +100M
Partition 5 of type Linux and of size 100 MiB is set
Command (m for help): p
Disk /dev/vdb: 10.7 GB, 10737418240 bytes, 20971520 sectors
Units = sectors of 1 * 512 = 512 bytes
Sector size (logical/physical): 512 bytes / 512 bytes
I/O size (minimum/optimal): 512 bytes / 512 bytes
Disk label type: dos
Disk identifier: 0x07782492
Device Boot Start End Blocks Id System
/dev/vdb1 2048 206847 102400 83 Linux
/dev/vdb2 206848 411647 102400 83 Linux
/dev/vdb3 411648 616447 102400 83 Linux
/dev/vdb4 616448 20971519 10177536 5 Extended
/dev/vdb5 618496 823295 102400 83 Linux
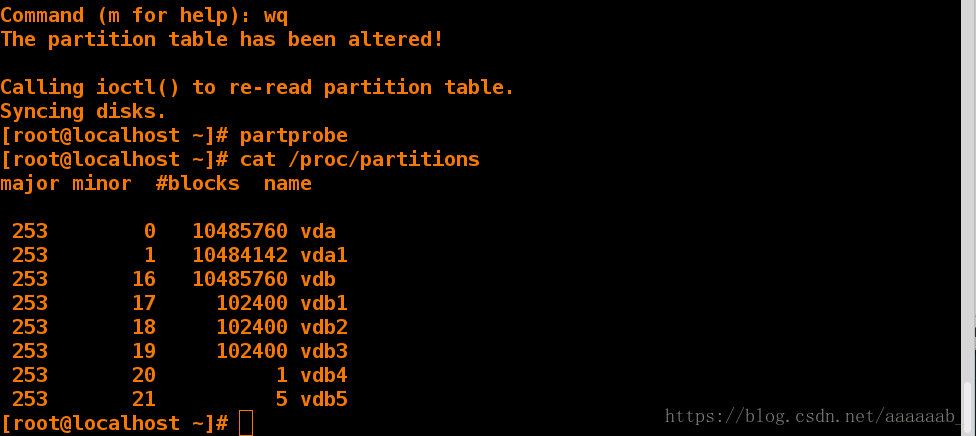
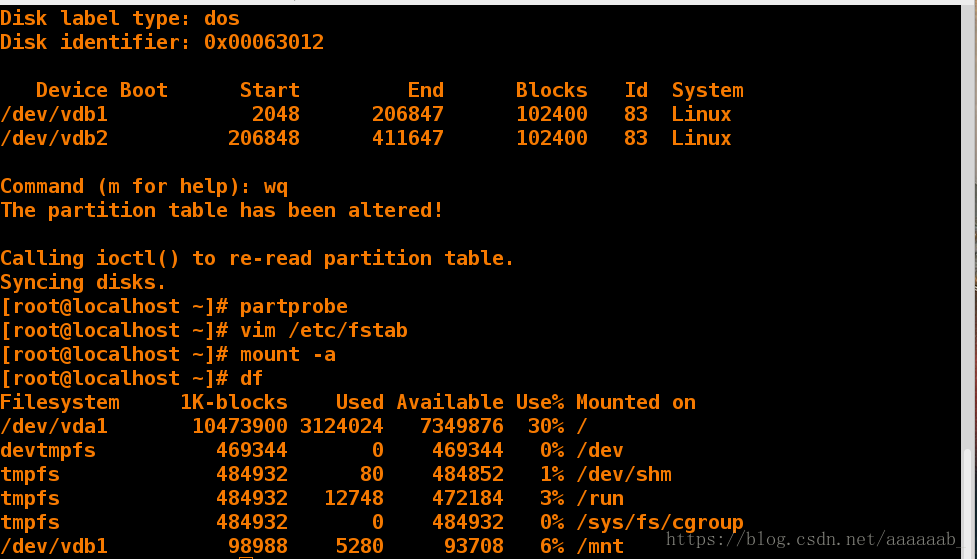
Command (m for help): wq 保存分区策略并退出fdisk界面
The partition table has been altered!
Calling ioctl() to re-read partition table.
Syncing disks.
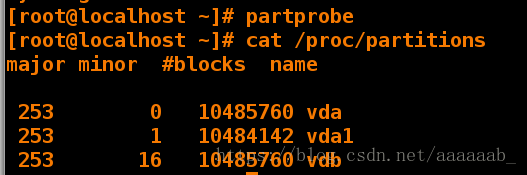
[root@localhost ~]# partprobe 同步分区信息
[root@localhost ~]# cat /proc/partitions 查看设备是否被系统识别
major minor #blocks name
253 0 10485760 vda
253 1 10484142 vda1
253 16 10485760 vdb
253 17 102400 vdb1
253 18 102400 vdb2
253 19 102400 vdb3
253 20 1 vdb4
253 21 102400 vdb5
[root@localhost ~]# fdisk /dev/vdb
Welcome to fdisk (util-linux 2.23.2).
Changes will remain in memory only, until you decide to write them.
Be careful before using the write command.
Command (m for help): m 获得帮助
Command action
a toggle a bootable flag
b edit bsd disklabel
c toggle the dos compatibility flag
d delete a partition 删除分区
g create a new empty GPT partition table
G create an IRIX (SGI) partition table
l list known partition types
m print this menu
n add a new partition 新建分区
o create a new empty DOS partition table
p print the partition table 显示分区信息
q quit without saving changes退出
s create a new empty Sun disklabel
t change a partition's system id 修改分区id
u change display/entry units
v verify the partition table
w write table to disk and exit将当前操作写入硬盘分区表
x extra functionality (experts only)以上对帮助指令中的信息进行了详细的解读,底下给大家配部分图片方便查看。
实验在server虚拟机中完成。
演示创建拓展分区:
同步查看分区列表:
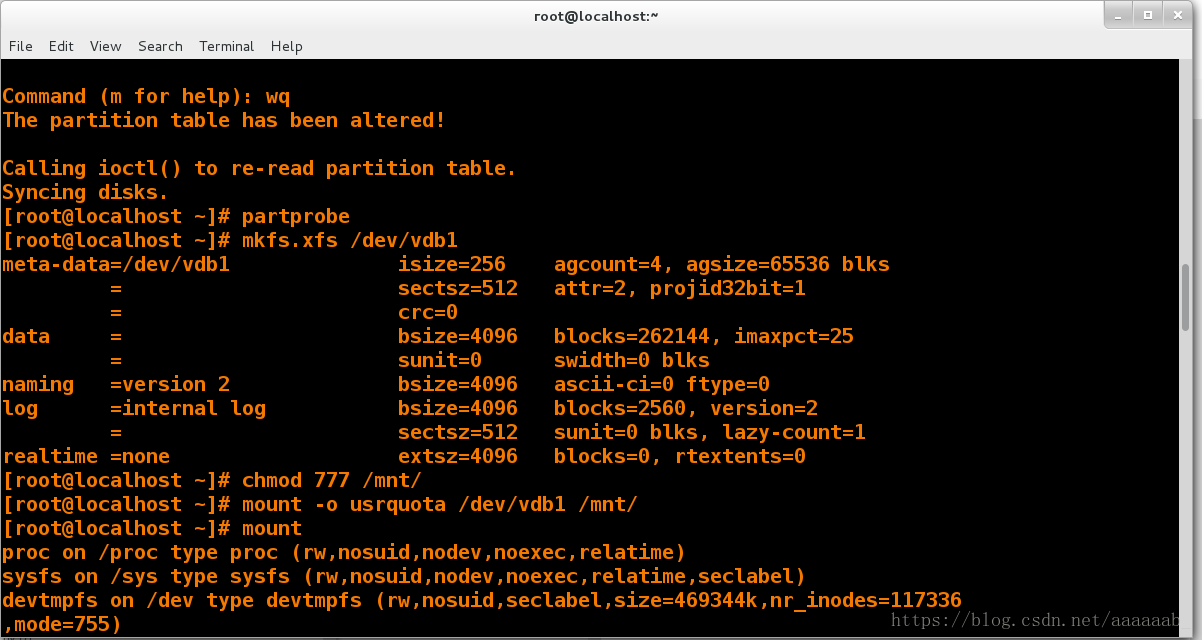
文件系统:
mkfs.xfs /dev/vdb1 格式化设备,在设备上安装文件系统xfs
blkid 查看可用设备,可以看到被格式化好的 /dev/vdb1
mkfs.xfs /dev/vdb1 格式化设备,在设备上安装文件系统xfs
blkid 查看可用设备,可以看到被格式化好的 /dev/vdb1
[root@localhost ~]# mount /dev/vdb5 /mnt/ 无法挂载
mount: /dev/vdb5 is write-protected, mounting read-only
mount: unknown filesystem type '(null)'
[root@localhost ~]# mkfs.xfs /dev/vdb5 格式化设备
meta-data=/dev/vdb5 isize=256 agcount=4, agsize=6400 blks
= sectsz=512 attr=2, projid32bit=1
= crc=0
data = bsize=4096 blocks=25600, imaxpct=25
= sunit=0 swidth=0 blks
naming =version 2 bsize=4096 ascii-ci=0 ftype=0
log =internal log bsize=4096 blocks=853, version=2
= sectsz=512 sunit=0 blks, lazy-count=1
realtime =none extsz=4096 blocks=0, rtextents=0
[root@localhost ~]# blkid 查看可用设备
/dev/vda1: UUID="9bf6b9f7-92ad-441b-848e-0257cbb883d1" TYPE="xfs"
/dev/vdb5: UUID="c26f6c71-59b7-42e3-aab9-295d369ceb30" TYPE="xfs"
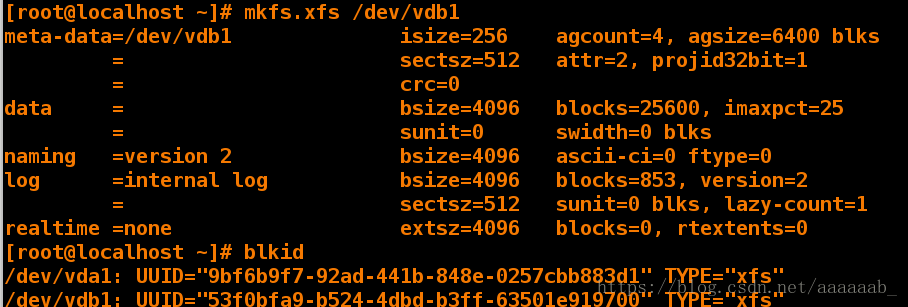
[root@localhost ~]# mkfs.xfs /dev/vdb1 格式化vdb1
meta-data=/dev/vdb1 isize=256 agcount=4, agsize=6400 blks
= sectsz=512 attr=2, projid32bit=1
= crc=0
data = bsize=4096 blocks=25600, imaxpct=25
= sunit=0 swidth=0 blks
naming =version 2 bsize=4096 ascii-ci=0 ftype=0
log =internal log bsize=4096 blocks=853, version=2
= sectsz=512 sunit=0 blks, lazy-count=1
realtime =none extsz=4096 blocks=0, rtextents=0
[root@localhost ~]# blkid 查看可用设备
/dev/vda1: UUID="9bf6b9f7-92ad-441b-848e-0257cbb883d1" TYPE="xfs"
/dev/vdb5: UUID="c26f6c71-59b7-42e3-aab9-295d369ceb30" TYPE="xfs"
/dev/vdb1: UUID="b6e4f9cf-1e3e-437f-ae4e-fefb9fad45a5" TYPE="xfs"
[root@localhost ~]# mount /dev/vdb5 /mnt/ 挂载成功
[root@localhost ~]# df 查看时挂载成功
Filesystem 1K-blocks Used Available Use% Mounted on
/dev/vda1 10473900 3764108 6709792 36% /
devtmpfs 469344 0 469344 0% /dev
tmpfs 484932 84 484848 1% /dev/shm
tmpfs 484932 12820 472112 3% /run
tmpfs 484932 0 484932 0% /sys/fs/cgroup
/dev/vdb5 98988 5280 93708 6% /mnt
进行图片演示:
格式化vdb1:
解决挂载问题,格式化之后可以挂载。

GPT分区方式:解决一个分区不能超过2tb。
[root@localhost ~]# fdisk /dev/vdb j进入分区删除
Welcome to fdisk (util-linux 2.23.2).
Changes will remain in memory only, until you decide to write them.
Be careful before using the write command.
Command (m for help): d
Partition number (1-5, default 5): 1
Partition 1 is deleted
不挨个演示删除分区,命令格式都是相同的。
[root@localhost ~]# umount /mnt/ 解除挂载,不然会有报错
[root@localhost ~]# parted /dev/vdb
GNU Parted 3.1
Using /dev/vdb
Welcome to GNU Parted! Type 'help' to view a list of commands.
(parted) mklabel
New disk label type?
New disk label type? gpt
Warning: The existing disk label on /dev/vdb will be destroyed and all data on
this disk will be lost. Do you want to continue?
Yes/No? yes
(parted) quit
Information: You may need to update /etc/fstab.
[root@localhost ~]# fdisk -l 出来gpt说明更改分区方式成功
Disk label type: gpt
# Start End Size Type Name
[root@localhost ~]# fdisk /dev/vdb
WARNING: fdisk GPT support is currently new, and therefore in an experimental phase. Use at your own discretion.
Welcome to fdisk (util-linux 2.23.2).
Changes will remain in memory only, until you decide to write them.
Be careful before using the write command.
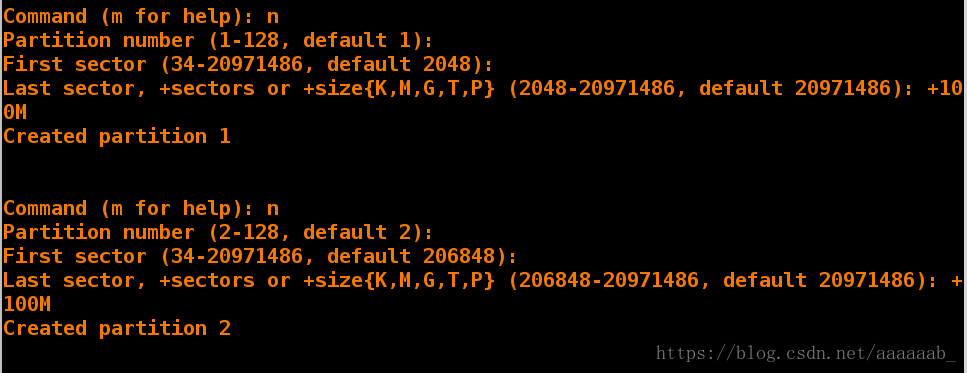
Command (m for help): n
Partition number (1-128, default 1): 1
First sector (34-20971486, default 2048):
Last sector, +sectors or +size{K,M,G,T,P} (2048-20971486, default 20971486): +100M
Created partition 1
Command (m for help): n
Partition number (2-128, default 2): 2
First sector (34-20971486, default 206848):
Last sector, +sectors or +size{K,M,G,T,P} (206848-20971486, default 20971486): +100M
Created partition 2
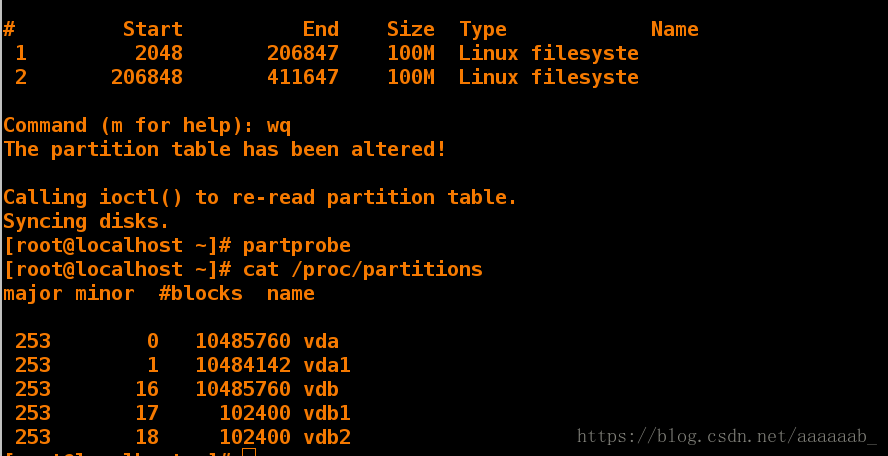
Command (m for help): p
Disk /dev/vdb: 10.7 GB, 10737418240 bytes, 20971520 sectors
Units = sectors of 1 * 512 = 512 bytes
Sector size (logical/physical): 512 bytes / 512 bytes
I/O size (minimum/optimal): 512 bytes / 512 bytes
Disk label type: gpt 已经变为gpt分区
# Start End Size Type Name
1 2048 206847 100M Linux filesyste
2 206848 411647 100M Linux filesyste
Command (m for help): wq
The partition table has been altered!
Calling ioctl() to re-read partition table.
Syncing disks.
[root@localhost ~]# partprobe
[root@localhost ~]# cat /proc/partitions
major minor #blocks name
253 0 10485760 vda
253 1 10484142 vda1
253 16 10485760 vdb
253 17 102400 vdb1
253 18 102400 vdb2
更改分区类型为gpt类型。

查看硬盘信息时分区已经变成了gpt分区。
同步查看:
gpt分区中可以建立1-128个分区。
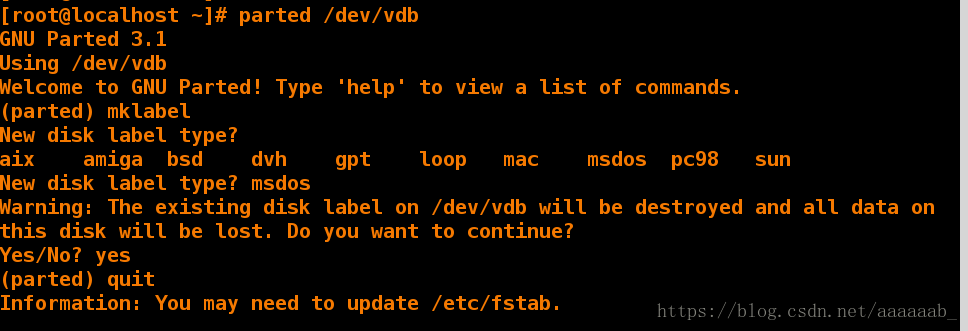
变更分区方式,将gpt分区方式变回来为mbr分区。
[root@localhost ~]# parted /dev/vdb
GNU Parted 3.1
Using /dev/vdb
Welcome to GNU Parted! Type 'help' to view a list of commands.
(parted) mklabel
New disk label type?
aix amiga bsd dvh gpt loop mac msdos pc98 sun
New disk label type? mados
parted: invalid token: mados
New disk label type? msdos
Warning: The existing disk label on /dev/vdb will be destroyed and all data on
this disk will be lost. Do you want to continue?
Yes/No? yes
(parted) quit
Information: You may need to update /etc/fstab.
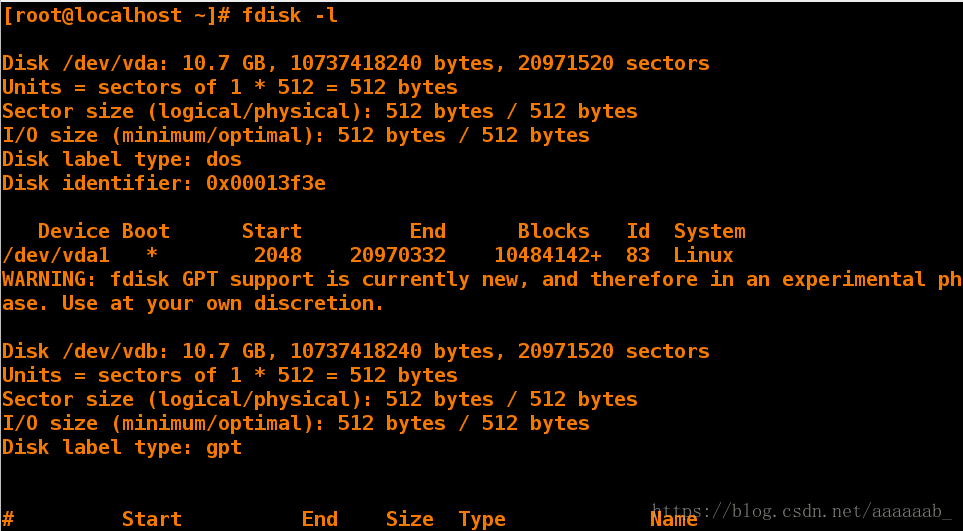
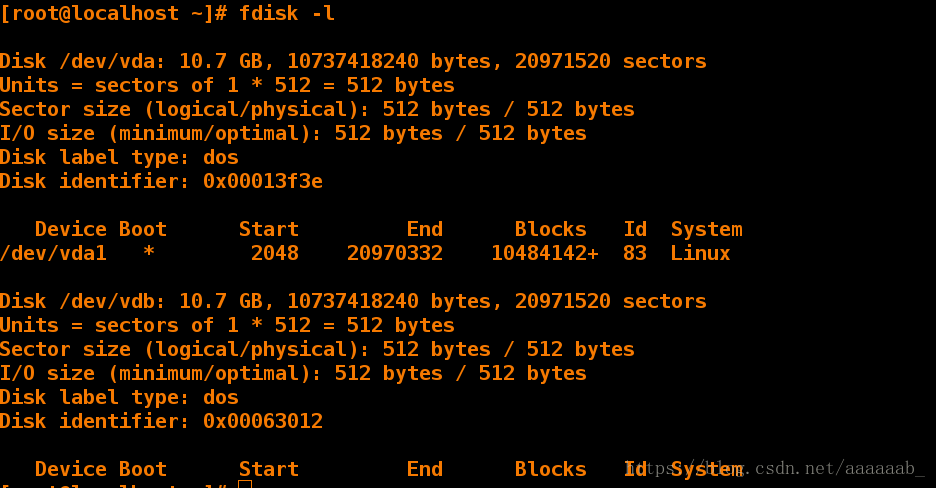
[root@localhost ~]# fdisk -l
Disk /dev/vda: 10.7 GB, 10737418240 bytes, 20971520 sectors
Units = sectors of 1 * 512 = 512 bytes
Sector size (logical/physical): 512 bytes / 512 bytes
I/O size (minimum/optimal): 512 bytes / 512 bytes
Disk label type: dos
Disk identifier: 0x00013f3e
Device Boot Start End Blocks Id System
/dev/vda1 * 2048 20970332 10484142+ 83 Linux
Disk /dev/vdb: 10.7 GB, 10737418240 bytes, 20971520 sectors
Units = sectors of 1 * 512 = 512 bytes
Sector size (logical/physical): 512 bytes / 512 bytes
I/O size (minimum/optimal): 512 bytes / 512 bytes
Disk label type: dos 变成dos表示变更成功
Disk identifier: 0x000ee51e
Device Boot Start End Blocks Id System
给大家演示在虚拟机中变更分区。
第一步,变更分区退出
查看现在的分区信息
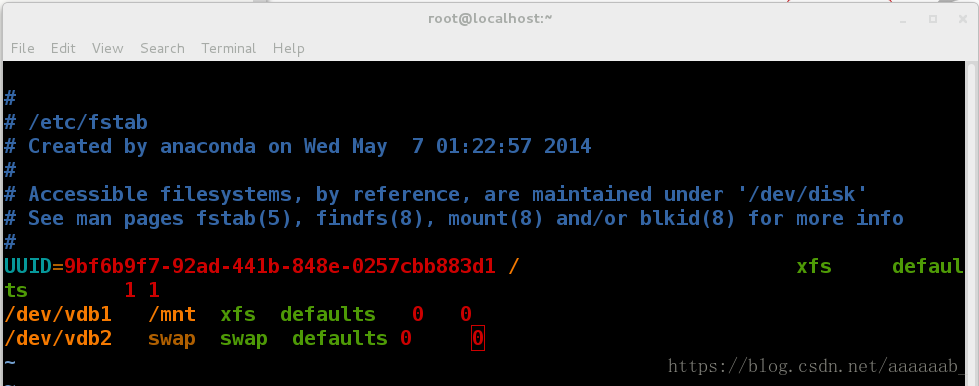
永久挂载:
/dev/vdb1 /mnt xfs文件类型 defaults(挂载参数) 0(是否备份) 0(是否检测)
[root@localhost ~]# df 查看挂载
Filesystem 1K-blocks Used Available Use% Mounted on
/dev/vda1 10473900 3764228 6709672 36% /
devtmpfs 469344 0 469344 0% /dev
tmpfs 484932 84 484848 1% /dev/shm
tmpfs 484932 12772 472160 3% /run
tmpfs 484932 0 484932 0% /sys/fs/cgroup
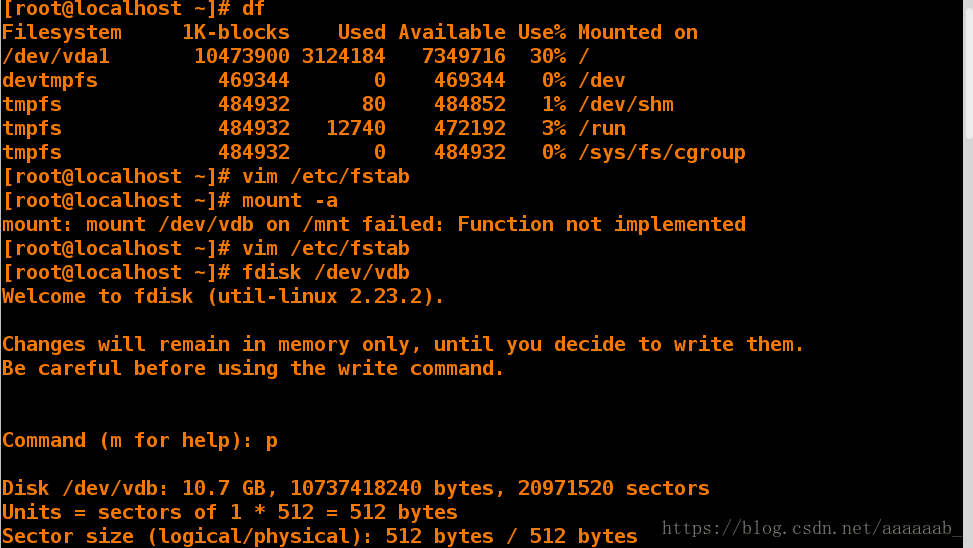
[root@localhost ~]# vim /etc/fstab 编辑文件
[root@localhost ~]# mount -a 重新读入
mount: special device /dev/vdb1 does not exist 报错是由于没有建立
[root@localhost ~]# fdisk /dev/vdb 进入建立
Welcome to fdisk (util-linux 2.23.2).
Changes will remain in memory only, until you decide to write them.
Be careful before using the write command.
Command (m for help): n
Partition type:
p primary (0 primary, 0 extended, 4 free)
e extended
Select (default p): p
Partition number (1-4, default 1): 1
First sector (2048-20971519, default 2048):
Using default value 2048
Last sector, +sectors or +size{K,M,G} (2048-20971519, default 20971519): +100M
Partition 1 of type Linux and of size 100 MiB is set
Command (m for help): n
Partition type:
p primary (1 primary, 0 extended, 3 free)
e extended
Select (default p): p
Partition number (2-4, default 2): 2
First sector (206848-20971519, default 206848):
Using default value 206848
Last sector, +sectors or +size{K,M,G} (206848-20971519, default 20971519): +100M
Partition 2 of type Linux and of size 100 MiB is set
Command (m for help): p
Disk /dev/vdb: 10.7 GB, 10737418240 bytes, 20971520 sectors
Units = sectors of 1 * 512 = 512 bytes
Sector size (logical/physical): 512 bytes / 512 bytes
I/O size (minimum/optimal): 512 bytes / 512 bytes
Disk label type: dos
Disk identifier: 0x000ee51e
Device Boot Start End Blocks Id System
/dev/vdb1 2048 206847 102400 83 Linux
/dev/vdb2 206848 411647 102400 83 Linux
Command (m for help): wq
The partition table has been altered!
Calling ioctl() to re-read partition table.
Syncing disks.
[root@localhost ~]# vim /etc/fstab 编辑文件
[root@localhost ~]# mount -a
[root@localhost ~]# df
Filesystem 1K-blocks Used Available Use% Mounted on
/dev/vda1 10473900 3764256 6709644 36% /
devtmpfs 469344 0 469344 0% /dev
tmpfs 484932 84 484848 1% /dev/shm
tmpfs 484932 12788 472144 3% /run
tmpfs 484932 0 484932 0% /sys/fs/cgroup
/dev/vdb1 98988 5280 93708 6% /mnt写入文件内容:首先需要注意的是文件里面的/dev/vdb1分区需要我们一开始划分好。
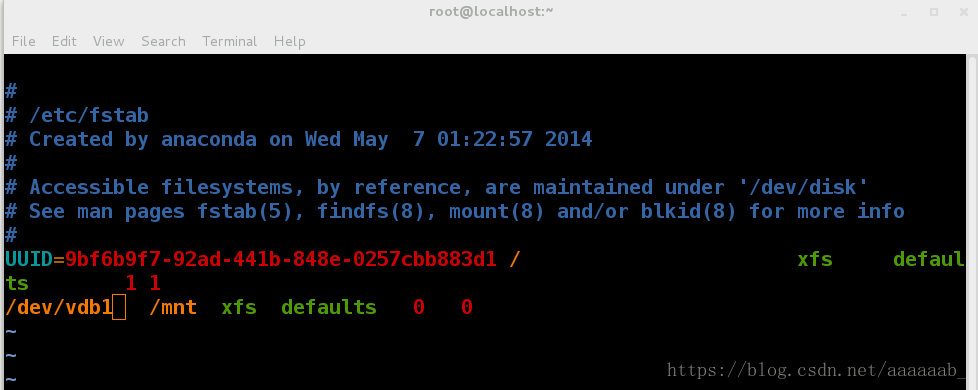
这里用mount -a重新读入时就是脚本中误写成了/dev/vdb,还有就是分区都没有划分。
重新编辑同步查看挂载时已经挂载成功。
swap分区更改,前面讲解虚拟机的建立的时候就进行了分区当时我们分为三个区/boot,swap,/,Swap分区在系统的物理内存不够用的时候,把物理内存中的一部分空间释放出来,以供当前运行的程序使用。那些被释放的空间可能来自一些很长时间没有什么操作的程序,这些被释放的空间被临时保存到Swap分区中,等到那些程序要运行时,再从Swap分区中恢复保存的数据到内存中。
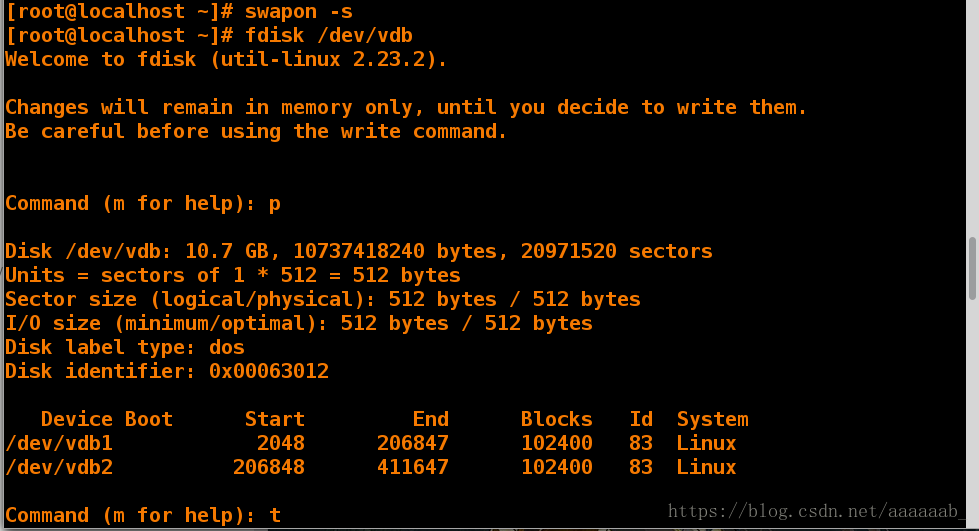
[root@localhost ~]# swapon -s 重新读入
[root@localhost ~]# fdisk /dev/vdb 划分分区
Welcome to fdisk (util-linux 2.23.2).
Changes will remain in memory only, until you decide to write them.
Be careful before using the write command.
Command (m for help): t 修改为swap分区
Partition number (1-5, default 5): 2
Hex code (type L to list all codes): 82 这里的82就是类型,不知道的可以按两下Tab键会出来所有类型,在其中找到swap对应的分区即可。
Changed type of partition 'Linux' to 'Linux swap / Solaris'
Command (m for help): wq
The partition table has been altered!
Calling ioctl() to re-read partition table.
WARNING: Re-reading the partition table failed with error 16: Device or resource busy.
The kernel still uses the old table. The new table will be used at
the next reboot or after you run partprobe(8) or kpartx(8)
Syncing disks.
[root@localhost ~]# partprobe 同步
[root@localhost ~]# mkswap /dev/vdb2 格式化
Setting up swapspace version 1, size = 102396 KiB
no label, UUID=2a80d5b3-7245-494e-8d39-8972985abb7e
[root@localhost ~]# swapon -a /dev/vdb2 重新读入
[root@localhost ~]# swapon -s 查看
Filename Type Size Used Priority
/dev/vdb2 partition 102396 0 -1
[root@localhost ~]# vim /etc/fstab 永久更改swap
[root@localhost ~]# swapon -a
[root@localhost ~]# fdisk -l
Disk /dev/vda: 10.7 GB, 10737418240 bytes, 20971520 sectors
Units = sectors of 1 * 512 = 512 bytes
Sector size (logical/physical): 512 bytes / 512 bytes
I/O size (minimum/optimal): 512 bytes / 512 bytes
Disk label type: dos
Disk identifier: 0x00013f3e
Device Boot Start End Blocks Id System
/dev/vda1 * 2048 20970332 10484142+ 83 Linux
Disk /dev/vdb: 10.7 GB, 10737418240 bytes, 20971520 sectors
Units = sectors of 1 * 512 = 512 bytes
Sector size (logical/physical): 512 bytes / 512 bytes
I/O size (minimum/optimal): 512 bytes / 512 bytes
Disk label type: dos
Disk identifier: 0x000ee51e
Device Boot Start End Blocks Id System
/dev/vdb1 2048 206847 102400 83 Linux
/dev/vdb2 206848 411647 102400 82 Linux swap / Solaris 已经修改好
/dev/vdb3 411648 616447 102400 83 Linux
/dev/vdb4 616448 20971519 10177536 5 Extended
/dev/vdb5 618496 823295 102400 83 Linux
/dev/vdb2 swap swap defaults 0 0
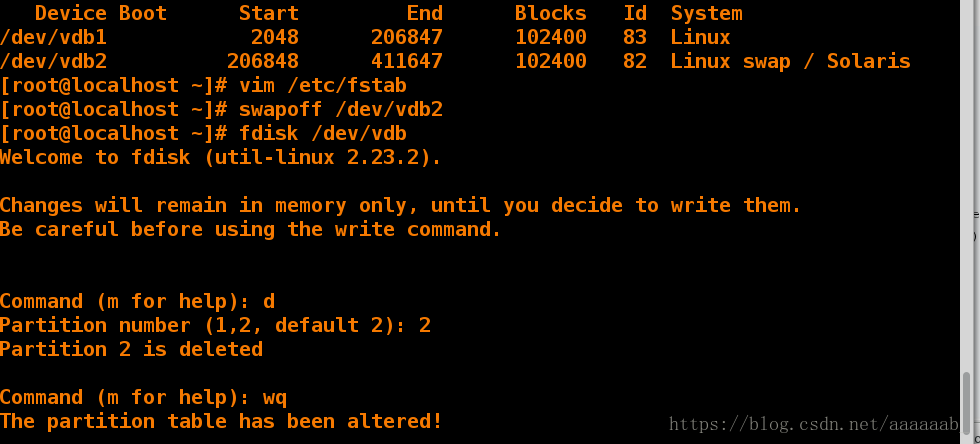
[root@localhost ~]# vim /etc/fstab 删除永久挂载,恢复环境
[root@localhost ~]# swapoff /dev/vdb2
[root@localhost ~]# fdisk /dev/vdb
Welcome to fdisk (util-linux 2.23.2).
Changes will remain in memory only, until you decide to write them.
Be careful before using the write command.
Command (m for help): d 删除swap分区
Partition number (1-5, default 5): 2
Partition 2 is deleted
Command (m for help): wq
The partition table has been altered!
Calling ioctl() to re-read partition table.
WARNING: Re-reading the partition table failed with error 16: Device or resource busy.
The kernel still uses the old table. The new table will be used at
the next reboot or after you run partprobe(8) or kpartx(8)
Syncing disks.
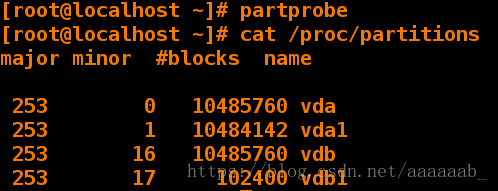
[root@localhost ~]# partprobe 同步
[root@localhost ~]# cat /proc/partitions
major minor #blocks name
253 0 10485760 vda
253 1 10484142 vda1
253 16 10485760 vdb
253 17 102400 vdb1
253 19 102400 vdb3
253 20 1 vdb4
253 21 102400 vdb5vim /etc/fstab永久挂载的文件内容:
第一个swap表示系统不需要挂载。
第二个swap表示系统配置类型。
修改为swap分区类型:
同步格式化查看是否更改成功。
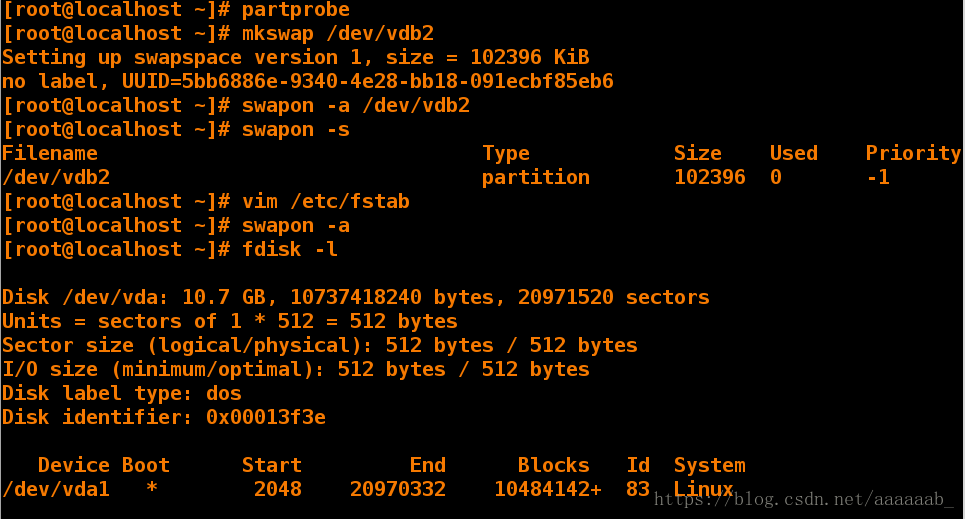
已经更改为Linux swap / Solaris类型
删除swap分区同步进行查看。
磁盘加密保护:
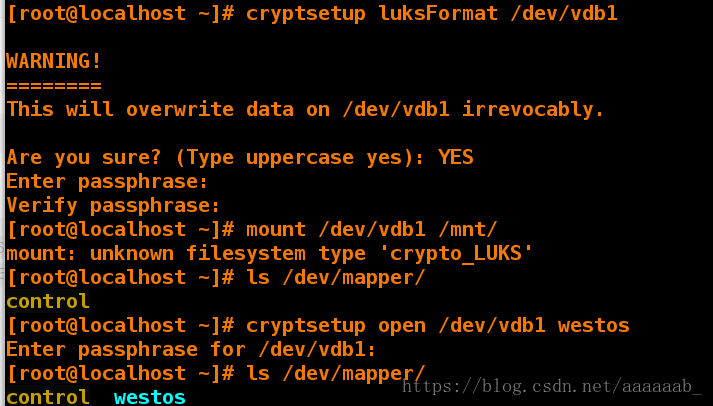
首先用fdisk /dev/vdb命令划分一个1000M的vdb1分区进行实验操作。
[root@localhost ~]# partprobe 同步
[root@localhost ~]# cryptsetup luksFormat /dev/vdb1 设置加密
WARNING!
========
This will overwrite data on /dev/vdb1 irrevocably.
Are you sure? (Type uppercase yes): YES 必须输入大写,
Enter passphrase: 密码为2018westos
Verify passphrase:
[root@localhost ~]# mount /dev/vdb1 /mnt/ 挂载
mount: unknown filesystem type 'crypto_LUKS' LUKS被加密
[root@localhost ~]# ls /dev/mapper/
control
[root@localhost ~]# cryptsetup open /dev/vdb1 westos 生成解密形态
Enter passphrase for /dev/vdb1: 要求输入密码。
[root@localhost ~]# ls /dev/mapper/ 解密形态保存到westos
control westos
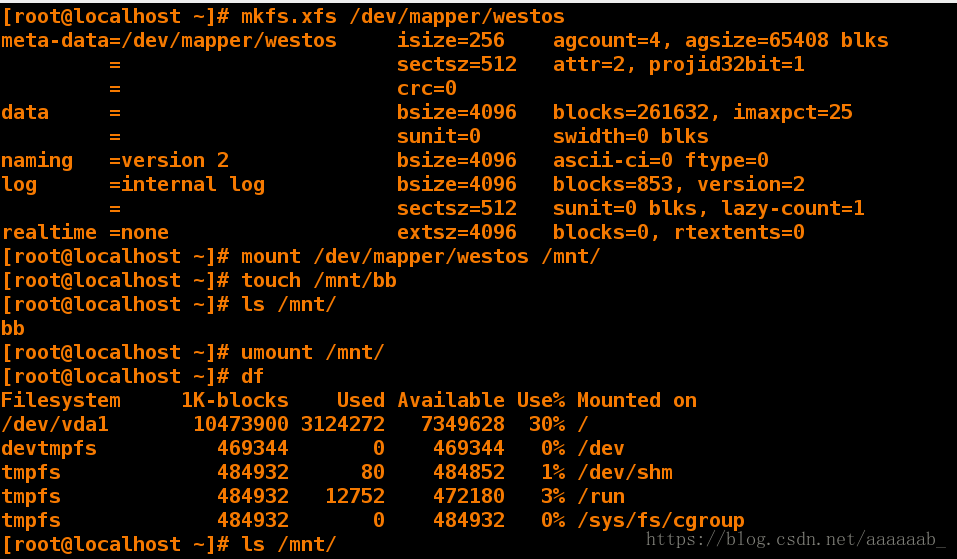
[root@localhost ~]# mkfs.xfs /dev/mapper/westos 格式化
meta-data=/dev/mapper/westos isize=256 agcount=4, agsize=63872 blks
= sectsz=512 attr=2, projid32bit=1
= crc=0
data = bsize=4096 blocks=255488, imaxpct=25
= sunit=0 swidth=0 blks
naming =version 2 bsize=4096 ascii-ci=0 ftype=0
log =internal log bsize=4096 blocks=853, version=2
= sectsz=512 sunit=0 blks, lazy-count=1
realtime =none extsz=4096 blocks=0, rtextents=0
[root@localhost ~]# mount /dev/mapper/westos /mnt/ 用解密形态挂载成功
[root@localhost ~]# touch /mnt/file{1..10} 建立文件成功
[root@localhost ~]# ls /mnt/
file1 file10 file2 file3 file4 file5 file6 file7 file8 file9
[root@localhost ~]# umount /mnt/ 解除挂载
[root@localhost ~]# df
Filesystem 1K-blocks Used Available Use% Mounted on
/dev/vda1 10473900 3764284 6709616 36% /
devtmpfs 469344 0 469344 0% /dev
tmpfs 484932 84 484848 1% /dev/shm
tmpfs 484932 12808 472124 3% /run
tmpfs 484932 0 484932 0% /sys/fs/cgroup
[root@localhost ~]# ls /mnt/
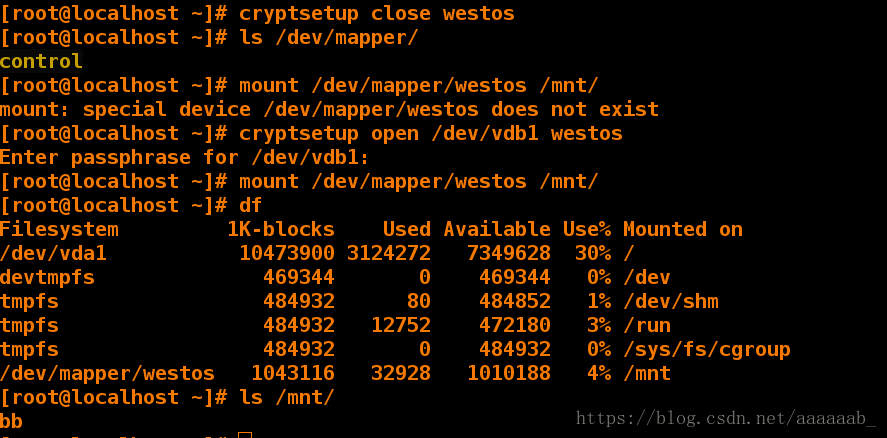
[root@localhost ~]# cryptsetup close westos 关闭解密形态
[root@localhost ~]# ls /dev/mapper/
control
[root@localhost ~]# mount /dev/mapper/westos /mnt/ 挂载不上
mount: special device /dev/mapper/westos does not exist
[root@localhost ~]# mount /dev/vdb1 /mnt/ 挂载不成功
mount: unknown filesystem type 'crypto_LUKS'
[root@localhost ~]# cryptsetup open /dev/vdb1 westos 打开保存解密到
westos
Enter passphrase for /dev/vdb1:
[root@localhost ~]# mount /dev/vdb1 /mnt/ 用原来文件无法挂载
mount: unknown filesystem type 'crypto_LUKS'
[root@localhost ~]# mount /dev/mapper/westos /mnt/ 用形态挂载成功
[root@localhost ~]# df
Filesystem 1K-blocks Used Available Use% Mounted on
/dev/vda1 10473900 3764284 6709616 36% /
devtmpfs 469344 0 469344 0% /dev
tmpfs 484932 84 484848 1% /dev/shm
tmpfs 484932 12808 472124 3% /run
tmpfs 484932 0 484932 0% /sys/fs/cgroup
/dev/mapper/westos 1018540 32928 985612 4% /mnt 挂载成功
[root@localhost ~]# ls /mnt/ 文件可以查看
file1 file10 file2 file3 file4 file5 file6 file7 file8 file9
初学者的通病就是不清楚自己到底操作了什么,所以我们必须学会看报错,排错是最容易的一种进步方式。接下来给大家看下同步时候报错的解决:这是由于我们上一个实验最后挂载没有解除的原因,解除挂载之后就可以正常同步了。

生成加密,直接挂载不上,所以我们需要解密到一个文件,名字自取。
格式化之后就可以正常挂载,还可以建立文件。
重复操作,不进行打开加密是无法挂载的
开机自动挂载就是解除这种加密方式之后解密的繁琐。
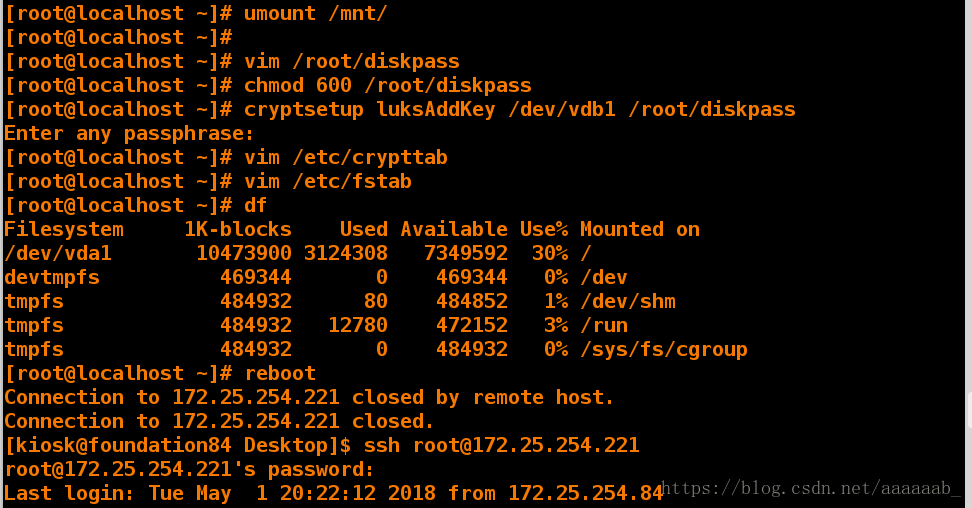
建立实验环境首先将上个实验挂载的解除 umount /mnt/
[root@localhost ~]# vim /root/diskpass 随便建立一个密码文件放入你自己的密码
[root@localhost ~]# cat /root/diskpass
2018westos
[root@localhost ~]# chmod 600 /root/diskpass 赋予权限
[root@localhost ~]# cryptsetup luksAddKey /dev/vdb1 /root/diskpass A,K大写,添加加密
Enter any passphrase: 2018westos
[root@localhost ~]# vim /etc/crypttab 编辑文件使其自动读入密码
[root@localhost ~]# cat /etc/crypttab
westos /dev/vdb1 /root/diskpass
[root@localhost ~]# vim /etc/fstab 将解密形态挂载
[root@localhost ~]# cat /etc/fstab
只演示添加行。
/dev/mapper/westos /mnt xfs defaults 0 0
[root@localhost ~]# df 查看时候没有挂载
Filesystem 1K-blocks Used Available Use% Mounted on
/dev/vda1 10473900 3764688 6709212 36% /
devtmpfs 469344 0 469344 0% /dev
tmpfs 484932 84 484848 1% /dev/shm
tmpfs 484932 12780 472152 3% /run
tmpfs 484932 0 484932 0% /sys/fs/cgroup
[root@localhost ~]# reboot 重启
Connection to 172.25.254.221 closed by remote host.
Connection to 172.25.254.221 closed.
[kiosk@foundation21 Desktop]$ rht-vmctl view server
[kiosk@foundation21 Desktop]$ ssh root@172.25.254.221
root@172.25.254.221's password:
Last login: Sun Apr 29 23:31:34 2018 from 172.25.254.21
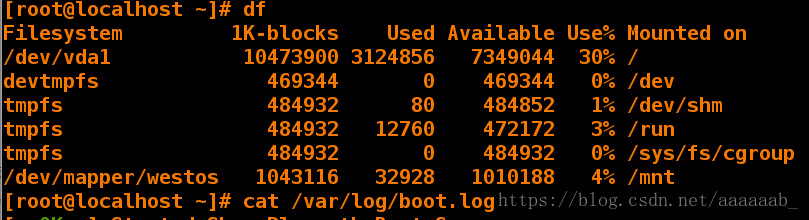
[root@localhost ~]# df 开机自动挂载
Filesystem 1K-blocks Used Available Use% Mounted on
/dev/vda1 10473900 3763632 6710268 36% /
devtmpfs 469344 0 469344 0% /dev
tmpfs 484932 80 484852 1% /dev/shm
tmpfs 484932 12760 472172 3% /run
tmpfs 484932 0 484932 0% /sys/fs/cgroup
/dev/mapper/westos 1018540 32928 985612 4% /mnt
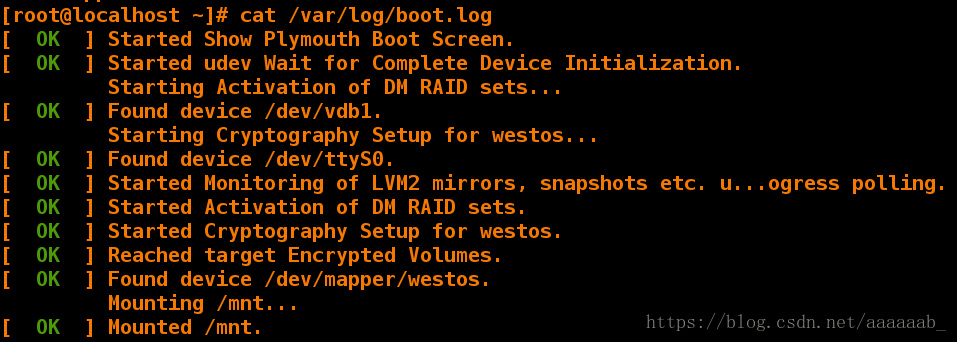
[root@localhost ~]# cat /var/log/boot.log 查看开机启动日志
[ OK ] Found device /dev/mapper/westos. 自动读取密码的日志
Mounting /mnt...
[ OK ] Mounted /mnt.编辑加密文件使得开机自动挂载:
重启用df查看挂载显示已经挂载成功。
查找登陆日志挂载成功:
将开机自动挂载解除,还有关闭luks加密还原环境。
[root@localhost ~]# vim /etc/fstab  删除编辑内容
[root@localhost ~]# vim /etc/crypttab  删除编辑内容
[root@localhost ~]# rm -fr /root/diskpass  删除密码文件
[root@localhost ~]# df
Filesystem         1K-blocks    Used Available Use% Mounted on
/dev/vda1           10473900 3763764   6710136  36% /
devtmpfs              469344       0    469344   0% /dev
tmpfs                 484932      80    484852   1% /dev/shm
tmpfs                 484932   12760    472172   3% /run
tmpfs                 484932       0    484932   0% /sys/fs/cgroup
/dev/mapper/westos   1018540   32928    985612   4% /mnt
[root@localhost ~]# umount /mnt/  解除挂载
[root@localhost ~]# cryptsetup close westos  关闭luks加密
[root@localhost ~]# mkfs.xfs /dev/vdb1       格式化
mkfs.xfs: /dev/vdb1 appears to contain an existing filesystem (crypto_LUKS).
mkfs.xfs: Use the -f option to force overwrite.
[root@localhost ~]# mkfs.xfs /dev/vdb1 -f    强制格式化
meta-data=/dev/vdb1              isize=256    agcount=4, agsize=64000 blks
         =                       sectsz=512   attr=2, projid32bit=1
         =                       crc=0
data     =                       bsize=4096   blocks=256000, imaxpct=25
         =                       sunit=0      swidth=0 blks
naming   =version 2              bsize=4096   ascii-ci=0 ftype=0
log      =internal log           bsize=4096   blocks=853, version=2
         =                       sectsz=512   sunit=0 blks, lazy-count=1
realtime =none                   extsz=4096   blocks=0, rtextents=0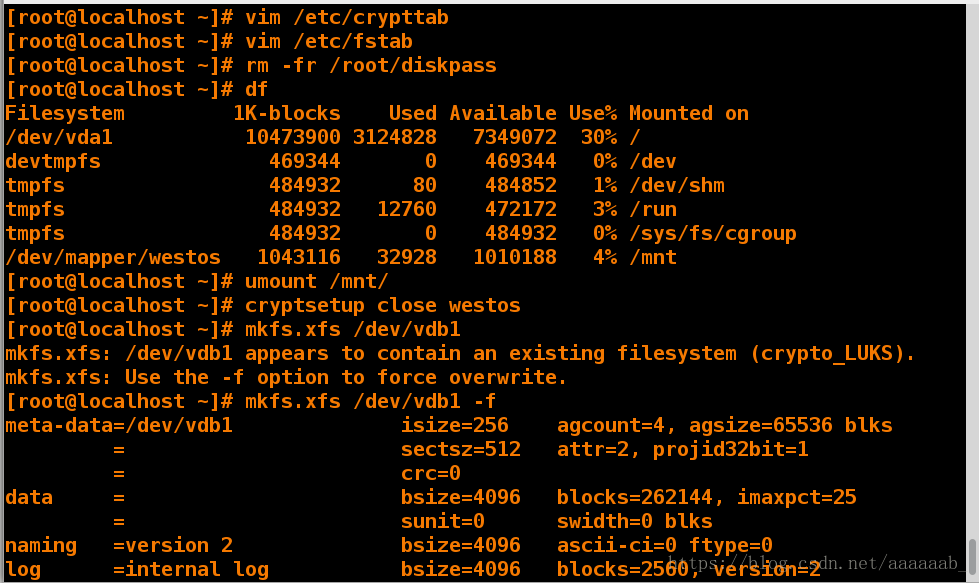
raid磁盘阵列:
磁盘阵列(Redundant Arrays of Independent Disks,RAID),有“独立磁盘构成的具有冗余能力的阵列”之意。
磁盘阵列是由很多价格较便宜的磁盘,组合成一个容量巨大的磁盘组,利用个别磁盘提供数据所产生加成效果提升整个磁盘系统效能。利用这项技术,将数据切割成许多区段,分别存放在各个硬盘上。
磁盘阵列还能利用同位检查(Parity Check)的观念,在数组中任意一个硬盘故障时,仍可读出数据,在数据重构时,将数据经计算后重新置入新硬盘中。
raid磁盘阵列的详细解释
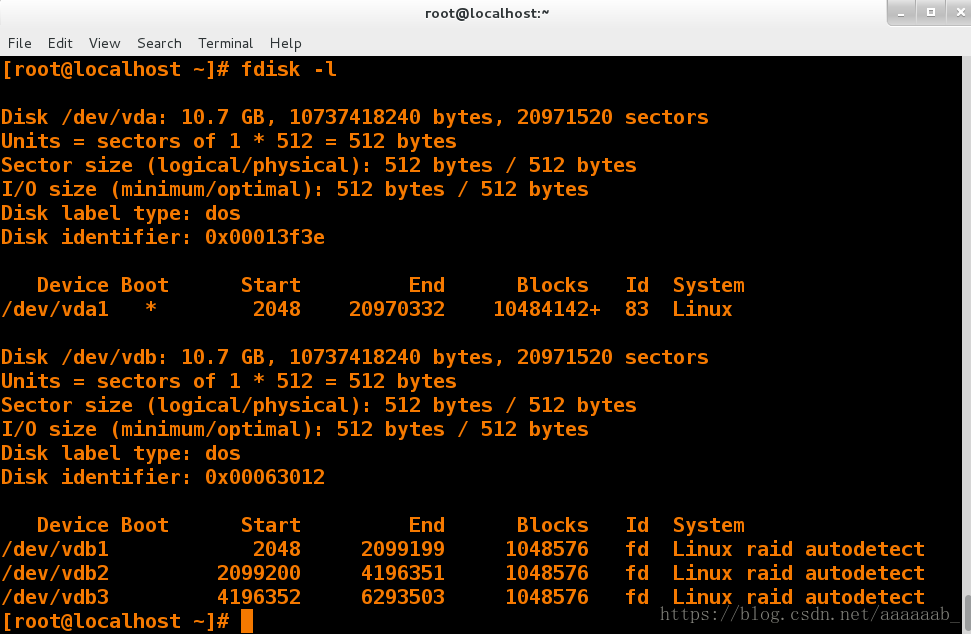
首先用一开始的分区方式建立三个1G的分区并用t更改fd类型。建立分区部分不再详细解释。
[root@localhost ~]# fdisk -l

Disk /dev/vda: 10.7 GB, 10737418240 bytes, 20971520 sectors
Units = sectors of 1 * 512 = 512 bytes
Sector size (logical/physical): 512 bytes / 512 bytes
I/O size (minimum/optimal): 512 bytes / 512 bytes
Disk label type: dos
Disk identifier: 0x00013f3e

   Device Boot      Start         End      Blocks   Id  System
/dev/vda1   *        2048    20970332    10484142+  83  Linux

Disk /dev/vdb: 10.7 GB, 10737418240 bytes, 20971520 sectors
Units = sectors of 1 * 512 = 512 bytes
Sector size (logical/physical): 512 bytes / 512 bytes
I/O size (minimum/optimal): 512 bytes / 512 bytes
Disk label type: dos
Disk identifier: 0x000ee51e

   Device Boot      Start         End      Blocks   Id  System
/dev/vdb1            2048     2099199     1048576   fd  Linux raid autodetect
/dev/vdb2         2099200     4196351     1048576   fd  Linux raid autodetect
/dev/vdb3         4196352     6293503     1048576   fd  Linux raid autodetect
已经建立成功三个1G的RAID
接下来打开两个shell同时连接虚拟机进行监控查看建立raid的效果。
一些参数解释:
-C表示创建
-a表示设备没有自动创建
-l 1 表示级别
-n 2 表示有两块设备
-x 1 表示读的快
-D 查看状态
-f 损坏
-r 卸载掉
A:
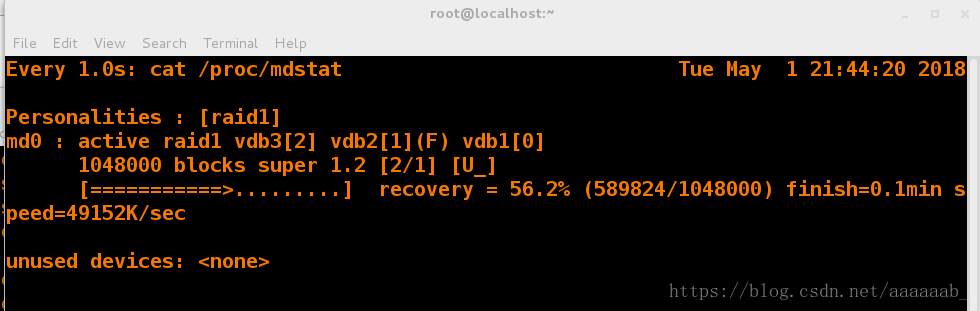
watch -n 1 cat /proc/mdstat 开启监控
B:
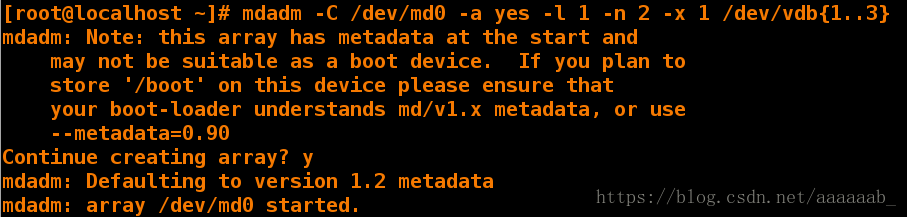
[root@localhost ~]# mdadm -C /dev/md0 -a yes -l 1 -n 2 -x 1 /dev/vdb{1..3}
mdadm: Note: this array has metadata at the start and
may not be suitable as a boot device. If you plan to
store '/boot' on this device please ensure that
your boot-loader understands md/v1.x metadata, or use
--metadata=0.90
Continue creating array? y
mdadm: Defaulting to version 1.2 metadata
mdadm: array /dev/md0 started.
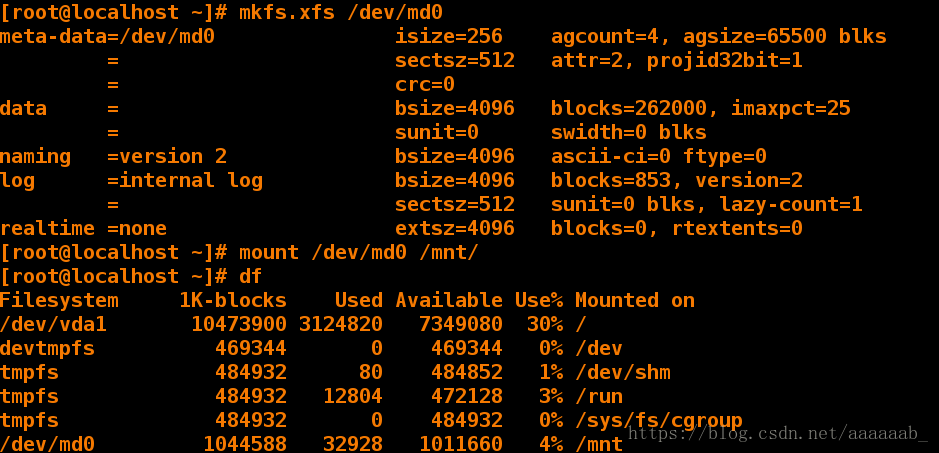
[root@localhost ~]# mkfs.xfs /dev/md0 格式化
meta-data=/dev/md0 isize=256 agcount=4, agsize=65500 blks
= sectsz=512 attr=2, projid32bit=1
= crc=0
data = bsize=4096 blocks=262000, imaxpct=25
= sunit=0 swidth=0 blks
naming =version 2 bsize=4096 ascii-ci=0 ftype=0
log =internal log bsize=4096 blocks=853, version=2
= sectsz=512 sunit=0 blks, lazy-count=1
realtime =none extsz=4096 blocks=0, rtextents=0
[root@localhost ~]# mount /dev/md0 /mnt/可以挂载
[root@localhost ~]# df 查看挂载
Filesystem 1K-blocks Used Available Use% Mounted on
/dev/vda1 10473900 3763612 6710288 36% /
devtmpfs 469344 0 469344 0% /dev
tmpfs 484932 80 484852 1% /dev/shm
tmpfs 484932 12804 472128 3% /run
tmpfs 484932 0 484932 0% /sys/fs/cgroup
/dev/md0 1044588 32928 1011660 4% /mntA:
打开监控在B操作查看效果:
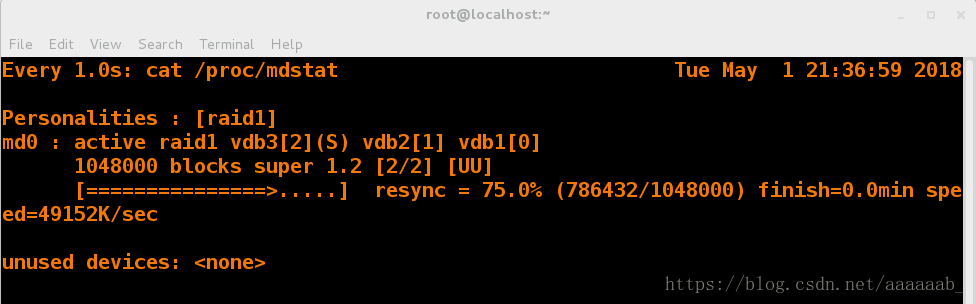
B:
建立raid:
格式化挂载:
设备的管理:用madam命令加参数进行管理设备,同样用监控窗口可以呈现效果:
-C表示创建
-a表示设备没有自动创建
-D 查看状态
-f 损坏
-r 卸载掉
-S停止
mdadm是linux下用于创建和管理软件RAID的命令,是一个模式化命令。但由于现在服务器一般都带有RAID阵列卡,并且RAID阵列卡也很廉价,且由于软件RAID的自身缺陷(不能用作启动分区、使用CPU实现,降低CPU利用率),因此在生产环境下并不适用。
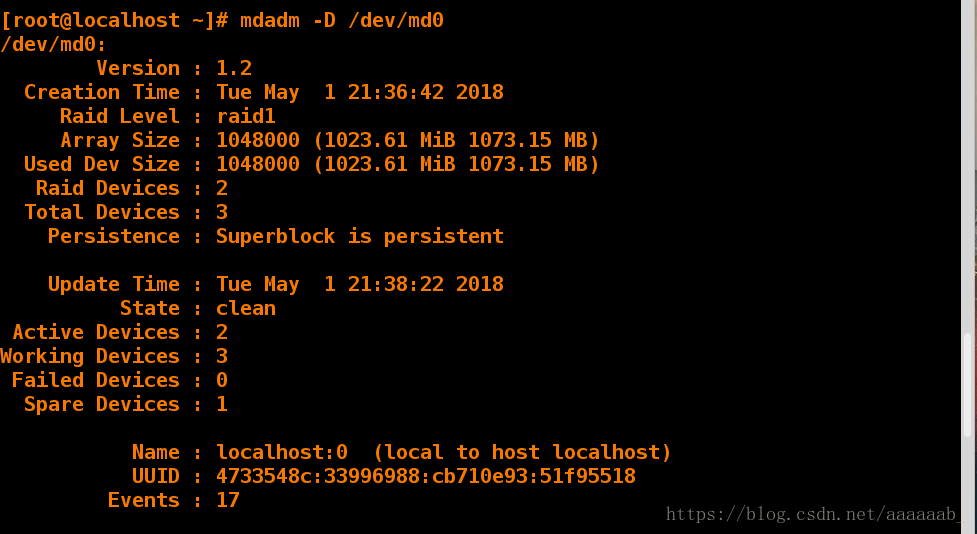
[root@localhost ~]# mdadm -D /dev/md0 查看raid状态
/dev/md0:
Version : 1.2
Creation Time : Mon Apr 30 04:46:09 2018
Raid Level : raid1
Array Size : 1048000 (1023.61 MiB 1073.15 MB)
Used Dev Size : 1048000 (1023.61 MiB 1073.15 MB)
Raid Devices : 2
Total Devices : 3
Persistence : Superblock is persistent
Update Time : Mon Apr 30 04:47:47 2018
State : clean
Active Devices : 2
Working Devices : 3
Failed Devices : 0
Spare Devices : 1
Name : localhost:0 (local to host localhost)
UUID : cba7d76d:d01d7925:dcc6829e:1b4f394a
Events : 17
Number Major Minor RaidDevice State
0 253 17 0 active sync /dev/vdb1
1 253 18 1 active sync /dev/vdb2
2 253 19 - spare /dev/vdb3
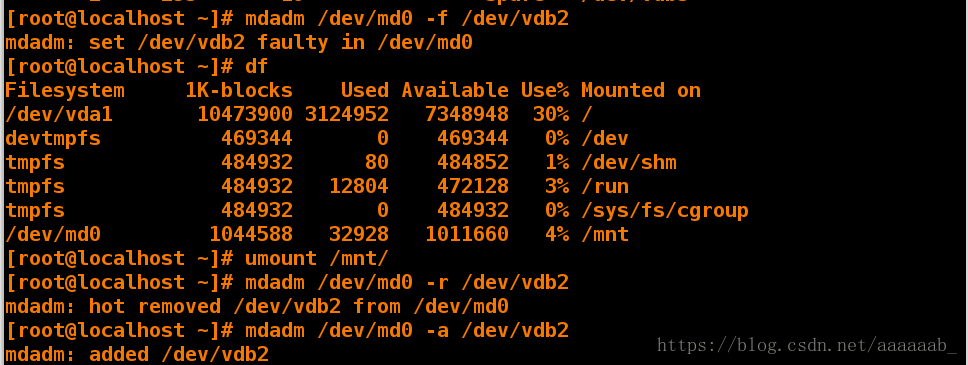
[root@localhost ~]# mdadm /dev/md0 -f /dev/vdb2 损坏raid时,vdb3这块硬盘会来顶替vdb2的位置,这就是一开始建立一块闲置硬盘的作用。
mdadm: set /dev/vdb2 faulty in /dev/md0
[root@localhost ~]# df
Filesystem 1K-blocks Used Available Use% Mounted on
/dev/vda1 10473900 3763628 6710272 36% /
devtmpfs 469344 0 469344 0% /dev
tmpfs 484932 80 484852 1% /dev/shm
tmpfs 484932 12804 472128 3% /run
tmpfs 484932 0 484932 0% /sys/fs/cgroup
/dev/md0 1044588 32928 1011660 4% /mnt
[root@localhost ~]# umount /mnt/
[root@localhost ~]# mdadm /dev/md0 -r /dev/vdb2 删除raid
mdadm: hot removed /dev/vdb2 from /dev/md0
[root@localhost ~]# mdadm /dev/md0 -a /dev/vdb2 添加raid
mdadm: added /dev/vdb2查看状态
用-f命令损坏时,vdb3会出来顶替vdb2的工作,在现实中,两块磁盘同时损坏并不常见,所以这样就很好的起到了管理磁盘的作用。
参数的呈现:
设备的删除:
还原分区,解除挂载,停止阵列。
[root@localhost ~]# df  查看挂载
Filesystem     1K-blocks    Used Available Use% Mounted on
/dev/vda1       10473900 3763532   6710368  36% /
devtmpfs          469344       0    469344   0% /dev
tmpfs             484932      80    484852   1% /dev/shm
tmpfs             484932   12804    472128   3% /run
tmpfs             484932       0    484932   0% /sys/fs/cgroup
[root@localhost ~]# mdadm -S /dev/md0   停止
mdadm: stopped /dev/md0
[root@localhost ~]# fdisk /dev/vdb   删除三个分区
Welcome to fdisk (util-linux 2.23.2).

Changes will remain in memory only, until you decide to write them.
Be careful before using the write command.


Command (m for help): d
Partition number (1-3, default 3):
Partition 3 is deleted

[root@localhost ~]# partprobe   同步
[root@localhost ~]# cat /proc/partitions   查看
major minor  #blocks  name

 253        0   10485760 vda
 253        1   10484142 vda1
 253       16   10485760 vdb
停止阵列删除分区:
同步查看:
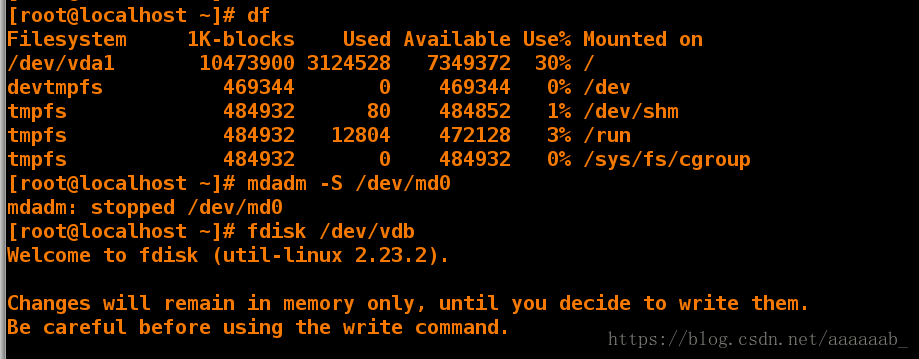
磁盘配额:
[root@localhost ~]# fdisk /dev/vdb建立一个1G分区
[root@localhost ~]# partprobe 同步
[root@localhost ~]# mkfs.xfs /dev/vdb1 格式化
[root@localhost ~]# chmod 777 /mnt/ 赋予权限
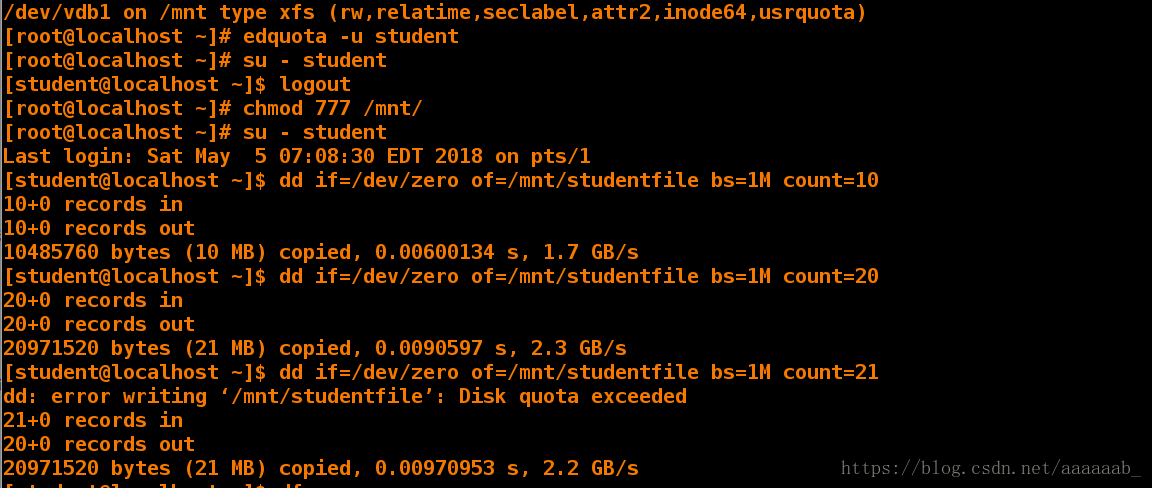
[root@localhost ~]# mount -o usrquota /dev/vdb1 /mnt/ 挂载,激活配额参数 (错误在于需要先挂载再赋予权限,)
[root@localhost ~]# mount 查看配额参数
hugetlbfs on /dev/hugepages type hugetlbfs (rw,relatime,seclabel)
/dev/vdb1 on /mnt type xfs (rw,relatime,seclabel,attr2,inode64,usrquota) 显示已经激活
[root@localhost ~]# edquota -u student 设置配额参数
表格内容:
Disk quotas for user student (uid 1000):
Filesystem blocks soft hard inodes soft hard
/dev/vdb1 20480 0 20480 1 0 0
[root@localhost ~]# su -student 切换到student用户
[student@localhost ~]$ dd if=/dev/zero of=/mnt/studentfile bs=1M count=10 测试时候没有权限
dd: failed to open ‘/mnt/studentfile’: Permission denied
[student@localhost ~]$ logout
[root@localhost ~]# chmod 777 /mnt/ 用超级用户赋予权限
[root@localhost ~]# su -student
su: failed to execute tudent: No such file or directory
[root@localhost ~]# su - student
Last login: Fri May 4 21:42:31 EDT 2018 on pts/1
[student@localhost ~]$ dd if=/dev/zero of=/mnt/studentfile bs=1M count=10 测试成功
10+0 records in
10+0 records out
10485760 bytes (10 MB) copied, 0.00731995 s, 1.4 GB/s
[student@localhost ~]$ dd if=/dev/zero of=/mnt/studentfile bs=1M count=20
20+0 records in
20+0 records out
20971520 bytes (21 MB) copied, 0.0322096 s, 651 MB/s
[student@localhost ~]$ dd if=/dev/zero of=/mnt/studentfile bs=1M count=21 报错,超出范围。
dd: error writing ‘/mnt/studentfile’: Disk quota exceeded
21+0 records in
20+0 records out
20971520 bytes (21 MB) copied, 0.022377 s, 937 MB/s
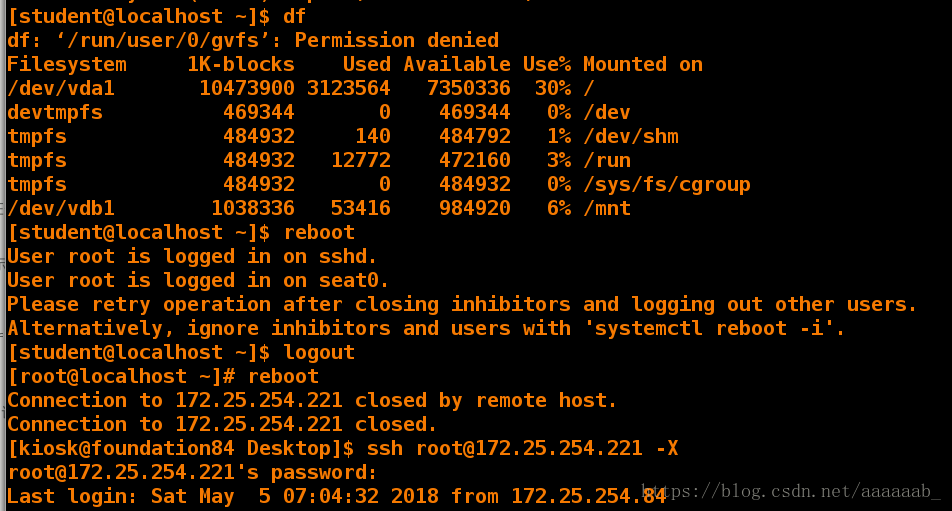
[root@localhost ~]# df 查看挂载
Filesystem 1K-blocks Used Available Use% Mounted on
/dev/vda1 10473900 3805232 6668668 37% /
devtmpfs 469344 0 469344 0% /dev
tmpfs 484932 84 484848 1% /dev/shm
tmpfs 484932 12768 472164 3% /run
tmpfs 484932 0 484932 0% /sys/fs/cgroup
/dev/vdb1 1038336 53416 984920 6% /mnt
[root@localhost ~]# reboot 重启
Connection to 172.25.254.221 closed by remote host.
Connection to 172.25.254.221 closed.
[kiosk@foundation21 Desktop]$ ssh root@172.25.254.221 -X
root@172.25.254.221's password:
Warning: untrusted X11 forwarding setup failed: xauth key data not generated
Warning: No xauth data; using fake authentication data for X11 forwarding.
Last login: Fri May 4 21:52:53 2018
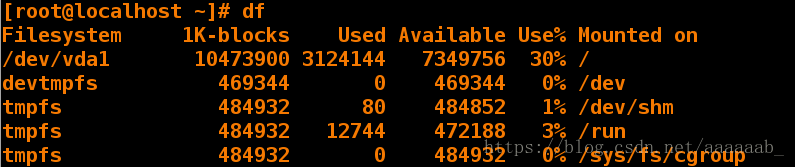
[root@localhost ~]# df 挂载失效
Filesystem 1K-blocks Used Available Use% Mounted on
/dev/vda1 10473900 3804264 6669636 37% /
devtmpfs 469344 0 469344 0% /dev
tmpfs 484932 80 484852 1% /dev/shm
tmpfs 484932 12744 472188 3% /run
tmpfs 484932 0 484932 0% /sys/fs/cgroup首先解读文件内容,各个参数如下:
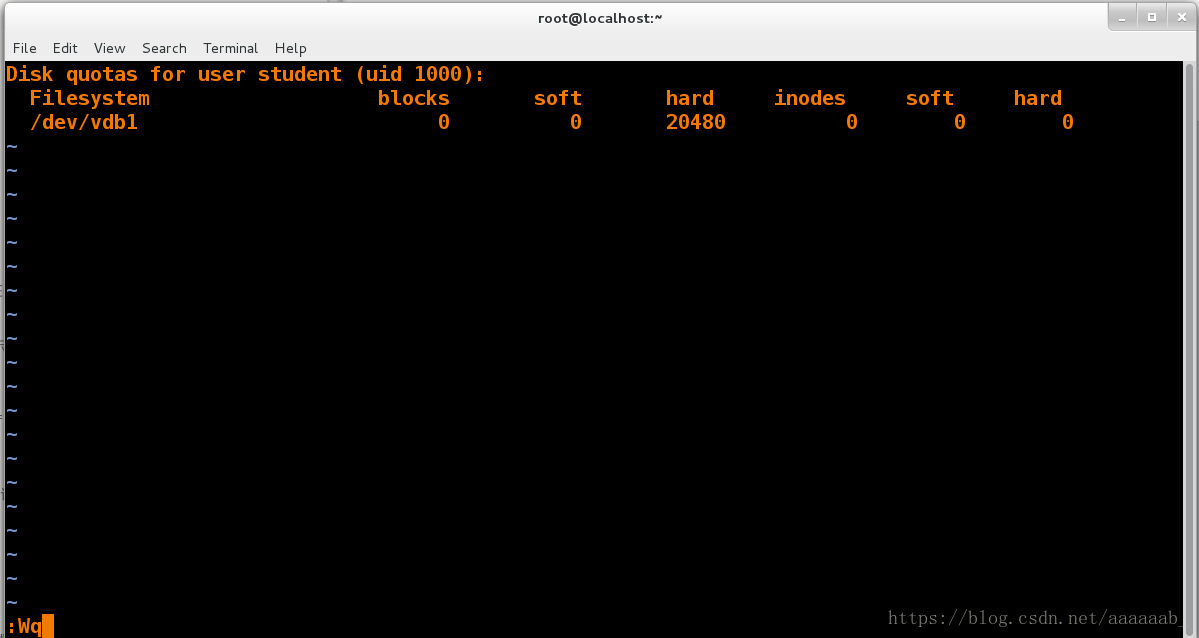
blocks表示student用户已经有多大数据,容量。
soft表示软件
hard表示硬件,
inodes已经有多少文件,个数
soft表示用来几次会有警告
hard表示文件个数的最大上限
挂载激活配额参数:
赋予权限切换到student用户进行测试。
zero表示无限零字节,of表示输出设备,整句话意思就是表示从无限零设备中复制文件到/mnt/studentfile里面,dd截取命令
bs代表大小。count代表石块
查看挂载成功,重启系统进而查看。
挂载丢失
这配额是一次性的重启失效,需要自动自动挂载:
[root@localhost ~]# df  没有挂载
Filesystem     1K-blocks    Used Available Use% Mounted on
/dev/vda1       10473900 3804264   6669636  37% /
devtmpfs          469344       0    469344   0% /dev
tmpfs             484932      80    484852   1% /dev/shm
tmpfs             484932   12744    472188   3% /run
tmpfs             484932       0    484932   0% /sys/fs/cgroup
[root@localhost ~]# vim /etc/fstab  编辑文件
[root@localhost ~]# cat /etc/fstab

/dev/vdb1    /mnt  xfs  defaults,usrquota  0    0

[root@localhost ~]# reboot 重启
[kiosk@foundation21 Desktop]$ ssh root@172.25.254.221 -X
root@172.25.254.221's password:
Warning: untrusted X11 forwarding setup failed: xauth key data not generated
Warning: No xauth data; using fake authentication data for X11 forwarding.
Last login: Fri May  4 22:01:53 2018 from 172.25.254.21
[root@localhost ~]# df   开机自动挂载
Filesystem     1K-blocks    Used Available Use% Mounted on
/dev/vda1       10473900 3804460   6669440  37% /
devtmpfs          469344       0    469344   0% /dev
tmpfs             484932      80    484852   1% /dev/shm
tmpfs             484932   12748    472184   3% /run
tmpfs             484932       0    484932   0% /sys/fs/cgroup
/dev/vdb1        1038336   53416    984920   6% /mnt
文件内容:
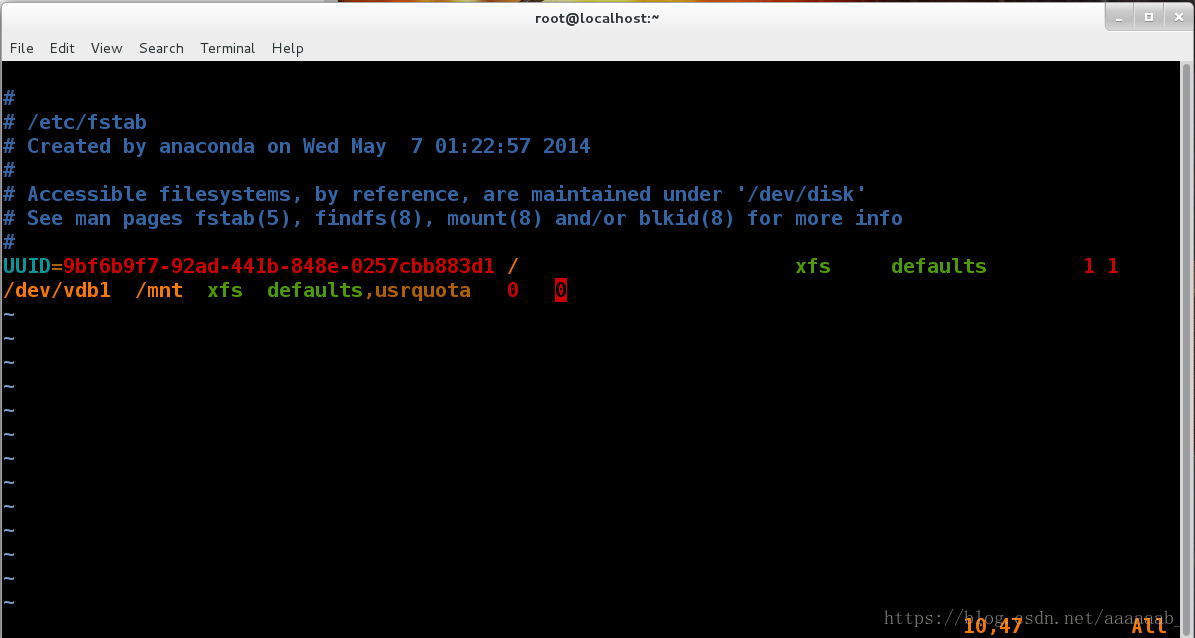
自动挂载成功:
