1. Spring 更简单的存储对象
在Spring 中 想要更简单的读取和存储对象的核心就是使用注解.
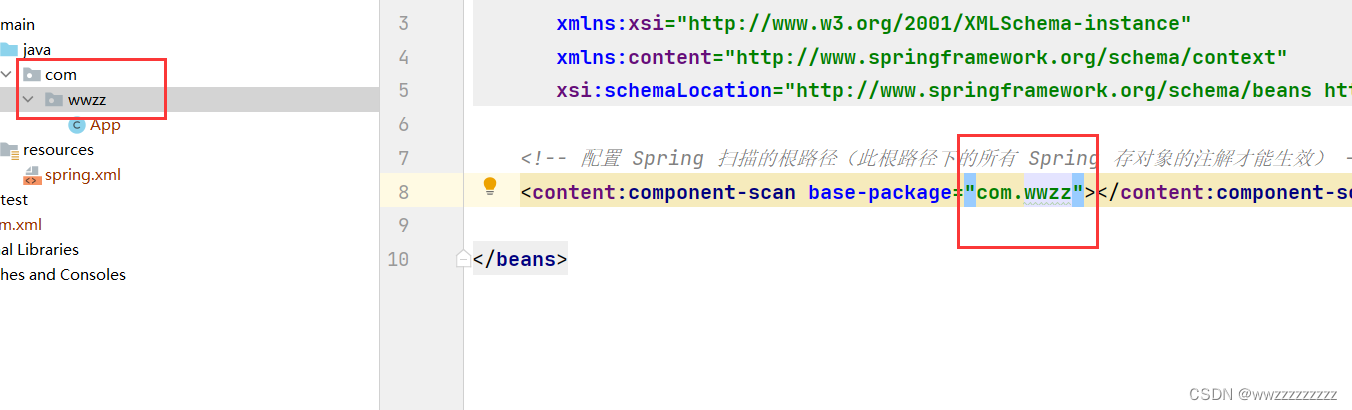
1.1 配置 spring.xml 设置 spring 存入对象的根路径
<?xml version="1.0" encoding="UTF-8"?>
<beans xmlns="http://www.springframework.org/schema/beans"
xmlns:xsi="http://www.w3.org/2001/XMLSchema-instance"
xmlns:content="http://www.springframework.org/schema/context"
xsi:schemaLocation="http://www.springframework.org/schema/beans http://www.springframework.org/schema/beans/spring-beans.xsd http://www.springframework.org/schema/context https://www.springframework.org/schema/context/spring-context.xsd">
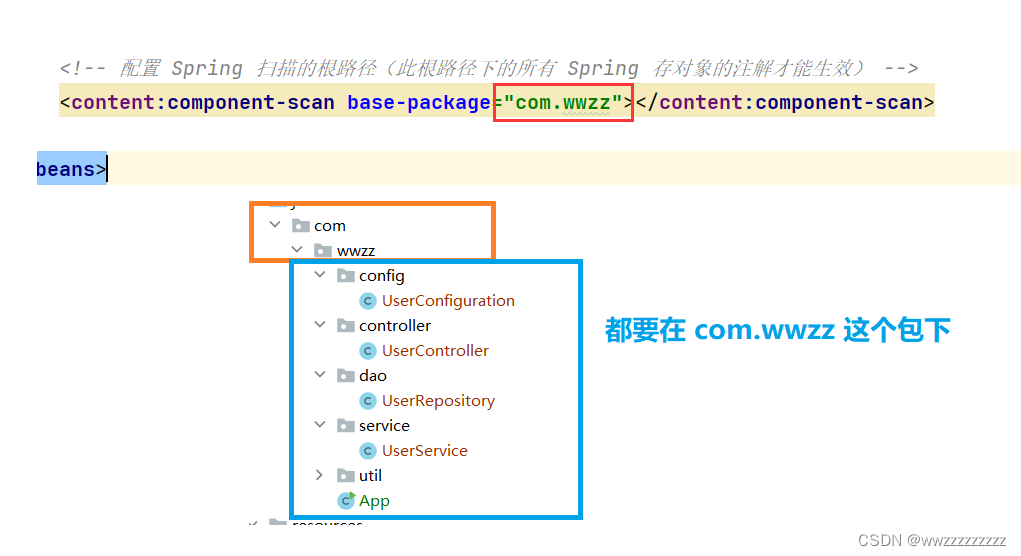
<!-- 配置 Spring 扫描的根路径(此根路径下的所有 Spring 存对象的注解才能生效) -->
<content:component-scan base-package="com.wwzz"></content:component-scan>
</beans>
注意这两个地方要匹配.
1.2 使用注解将 Bean 对象存储到 spring 中
想要将 Bean 对象存储在 Spring 中, 有两种注解类型可以实现:
- 类注解 :
@Controller@Service@Repository@Component@Configuration - 方法注解 :
@Bean
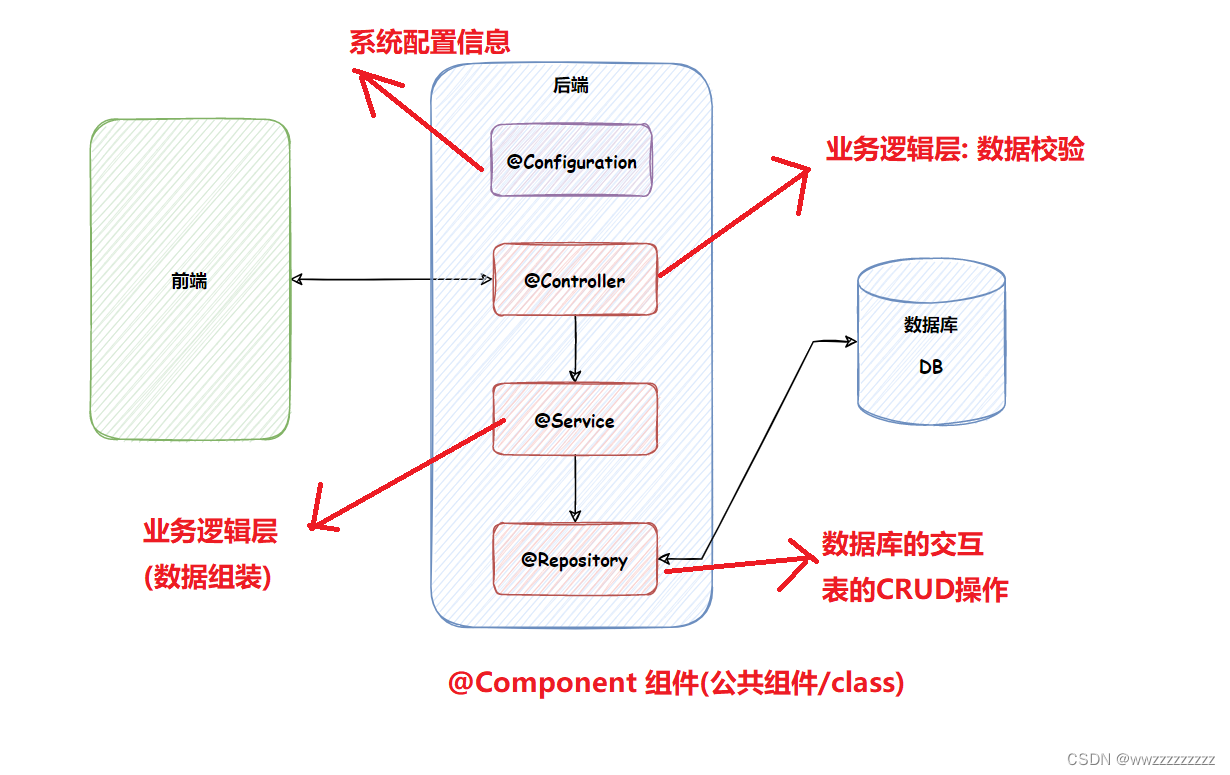
1.3 类注解
① @Controller 控制器(对象的存储)
package com.wwzz.controller;
import org.springframework.stereotype.Controller;
@Controller
public class UserController {


    /**
     * 这个方法只是用来测试的
     * @param name
     */
    public void SayHello(String name){


        System.out.println("Hello! " + name);
    }
}
② @Service 服务存储
package com.wwzz.service;
import org.springframework.stereotype.Service;

@Service
public class UserService {


    public void SayHello(String name){


        System.out.println("Hello! " + name);
    }
}
③ @Repository (仓库存储)
package com.wwzz.dao;

import org.springframework.stereotype.Repository;

@Repository
public class UserRepository {


    public void SayHello(String name){


        System.out.println("Hello! " + name);
    }
}
④ @Component (组件存储)
package com.wwzz.util;

import org.springframework.stereotype.Component;

@Component
public class UserComponent {


    public void SayHello(String name){


        System.out.println("Hello! " + name);
    }
}
⑤ @Configuration (配置存储)
package com.wwzz.config;

import org.springframework.context.annotation.Configuration;

@Configuration
public class UserConfiguration {


    public void SayHello(String name){


        System.out.println("Hello! " + name);
    }
}
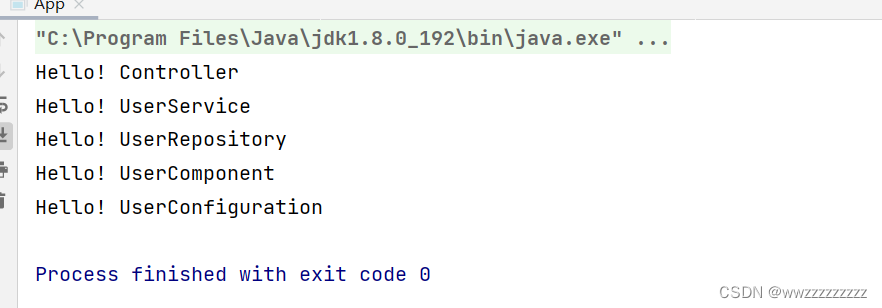
测试这五个注解读取bean的代码
package com.wwzz;
import com.wwzz.config.UserConfiguration;
import com.wwzz.controller.UserController;
import com.wwzz.dao.UserRepository;
import com.wwzz.service.UserService;
import com.wwzz.util.UserComponent;
import org.springframework.context.ApplicationContext;
import org.springframework.context.support.ClassPathXmlApplicationContext;
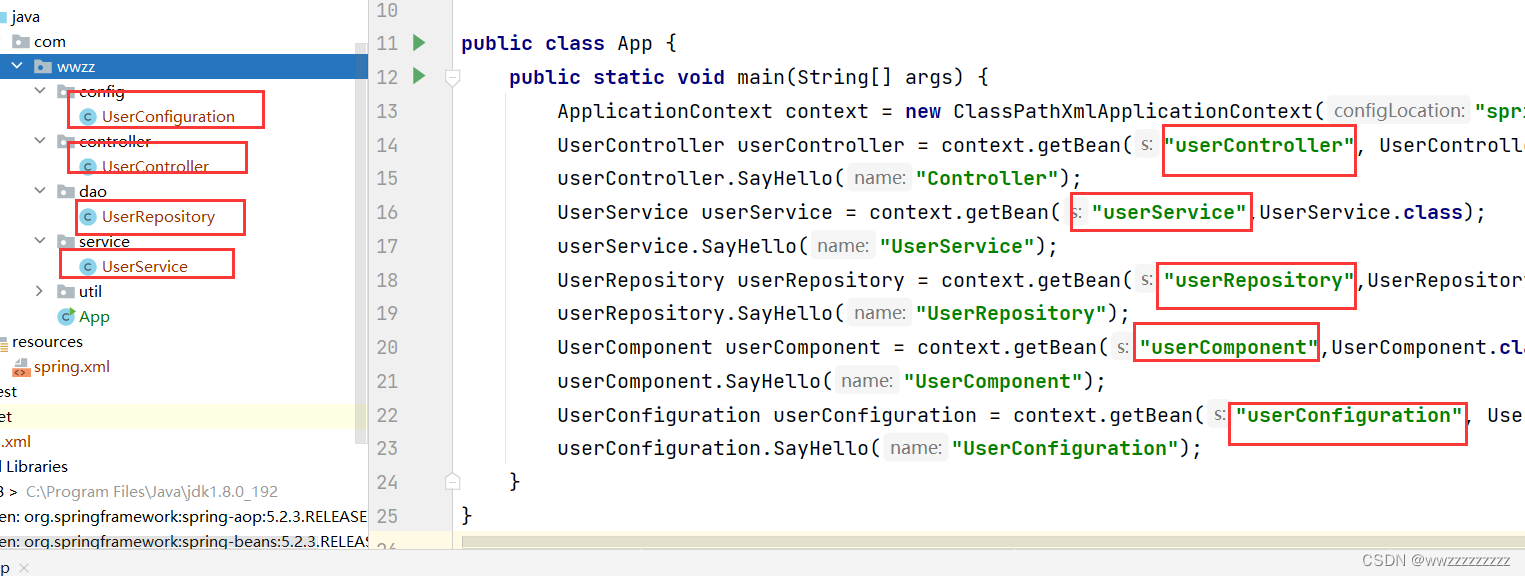
public class App {
public static void main(String[] args) {
ApplicationContext context = new ClassPathXmlApplicationContext("spring.xml");
UserController userController = context.getBean("userController", UserController.class);
userController.SayHello("Controller");
UserService userService = context.getBean("userService",UserService.class);
userService.SayHello("UserService");
UserRepository userRepository = context.getBean("userRepository",UserRepository.class);
userRepository.SayHello("UserRepository");
UserComponent userComponent = context.getBean("userComponent",UserComponent.class);
userComponent.SayHello("UserComponent");
UserConfiguration userConfiguration = context.getBean("userConfiguration", UserConfiguration.class);
userConfiguration.SayHello("UserConfiguration");
}
}
注意事项
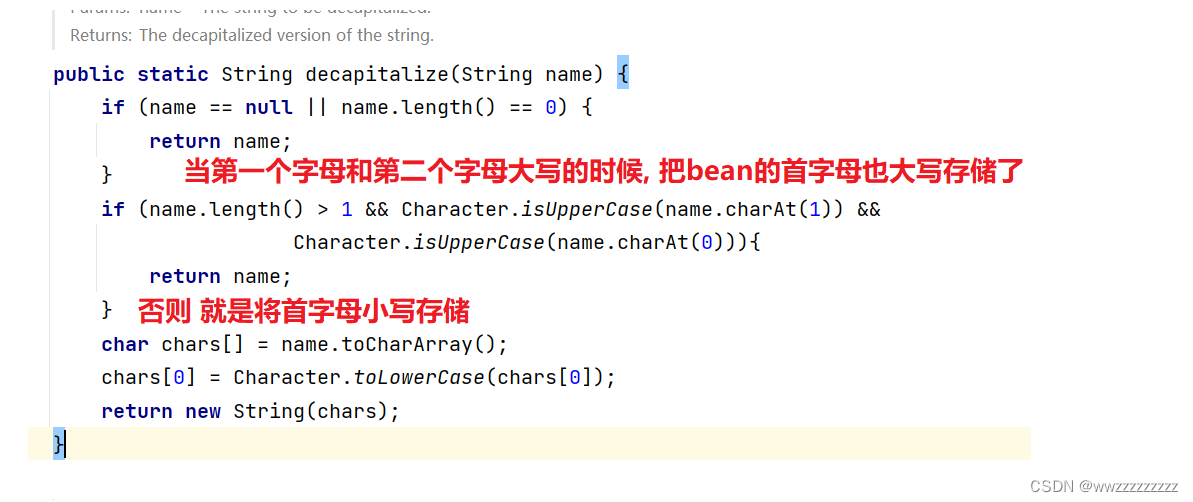
- 读取存入对象的id 默认情况首字母要小写
- 当第一个字母和第二个字母都是大写的时候, 就不能正常读了
观察源码
所以正确的是使用UComponent- 对于存储目录. 必须要是之前约定好的, xml下里面的包目录下.

1.4 类注解直接的关系
查看 @Controller/@Service/@Repository/@Configuration等注解的源码发现
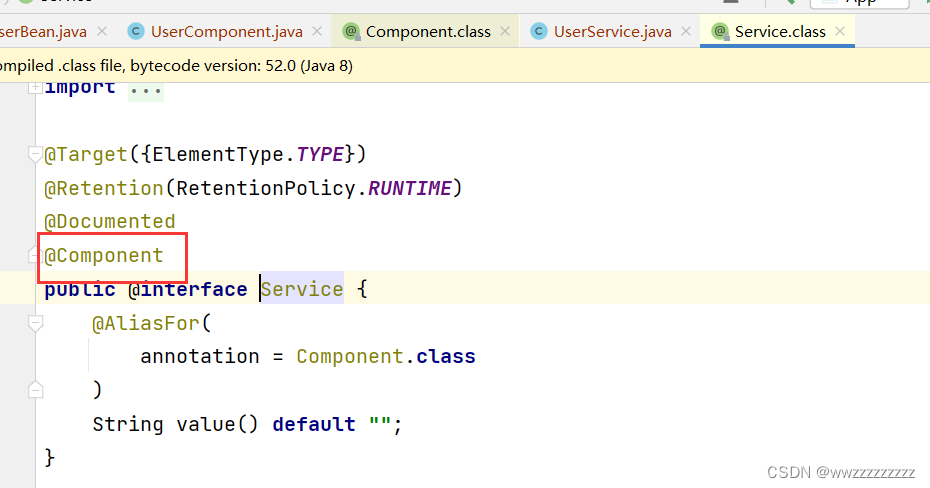
这几个注解都有一个注解 @Component. 说明他们都是@Component的子类
1.5 方法注解
① @Bean
首先创建一个类User
public class User {


    public int id;
    public String name;
    public int age;
	// ... 一堆 getter和setter
}
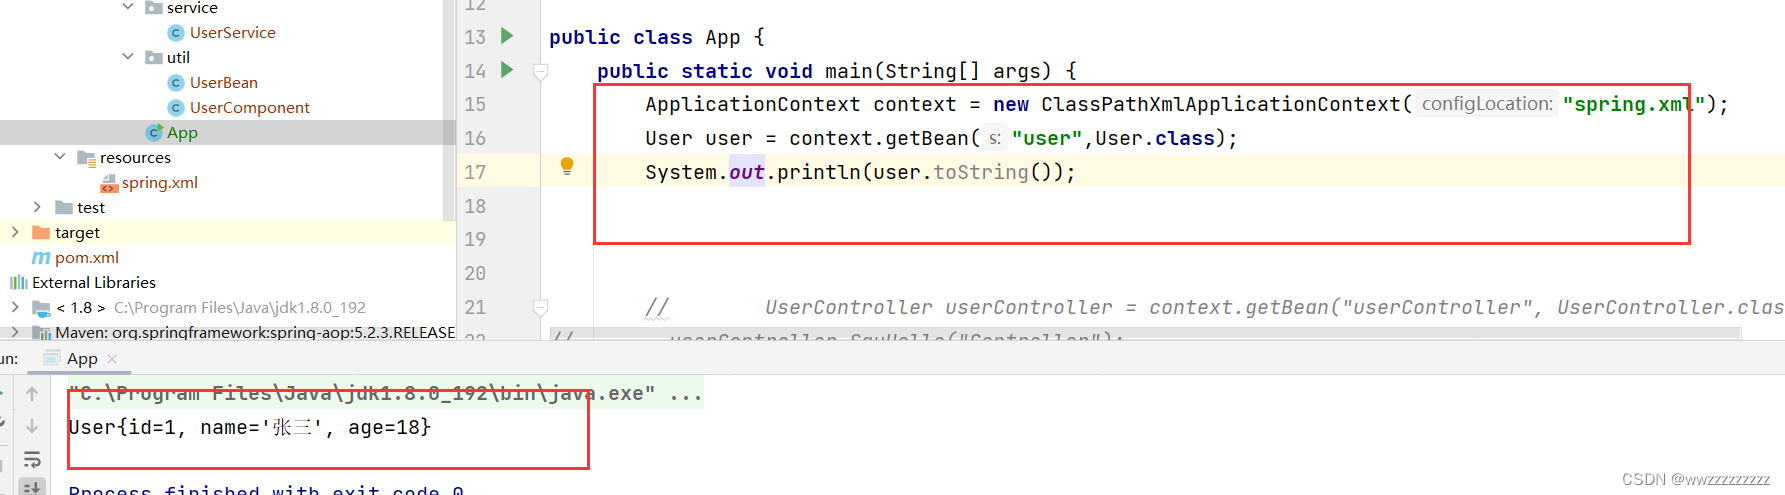
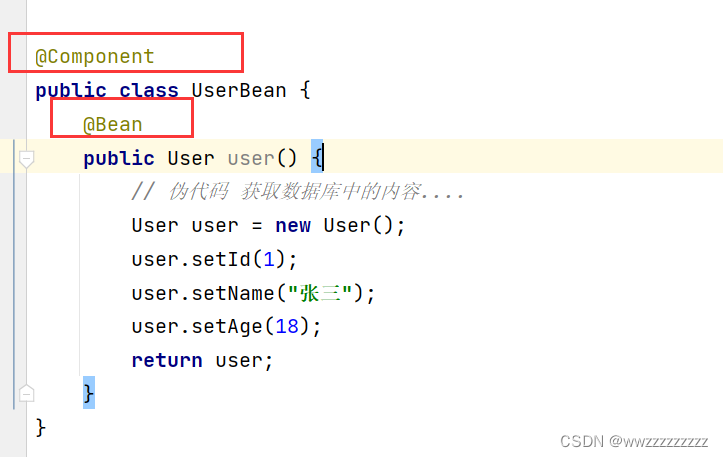
创建一个UserBean
package com.wwzz.util;

import com.wwzz.model.User;
import org.springframework.context.annotation.Bean;
import org.springframework.stereotype.Component;

@Component
public class UserBean {


    @Bean
    public User user() {


        // 伪代码 获取数据库中的内容....
        User user = new User();
        user.setId(1);
        user.setName("张三");
        user.setAge(18);
        return user;
    }
}
测试这个注解读取到bean的代码
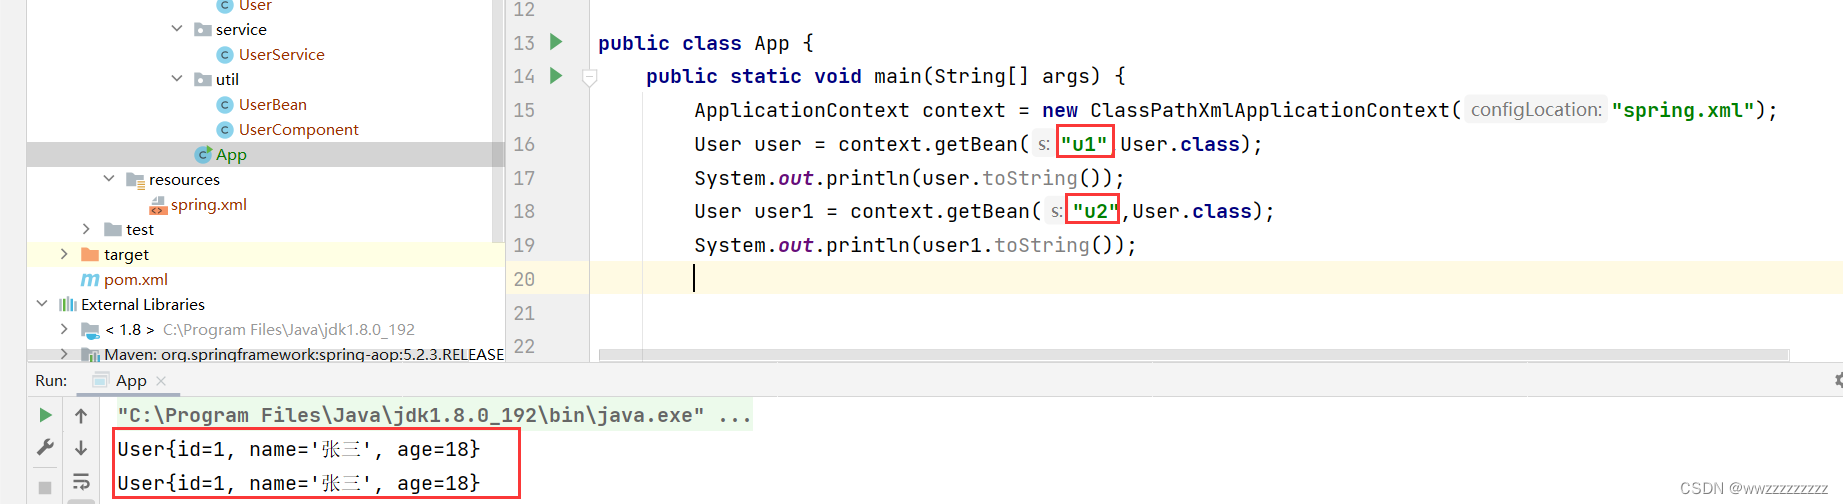
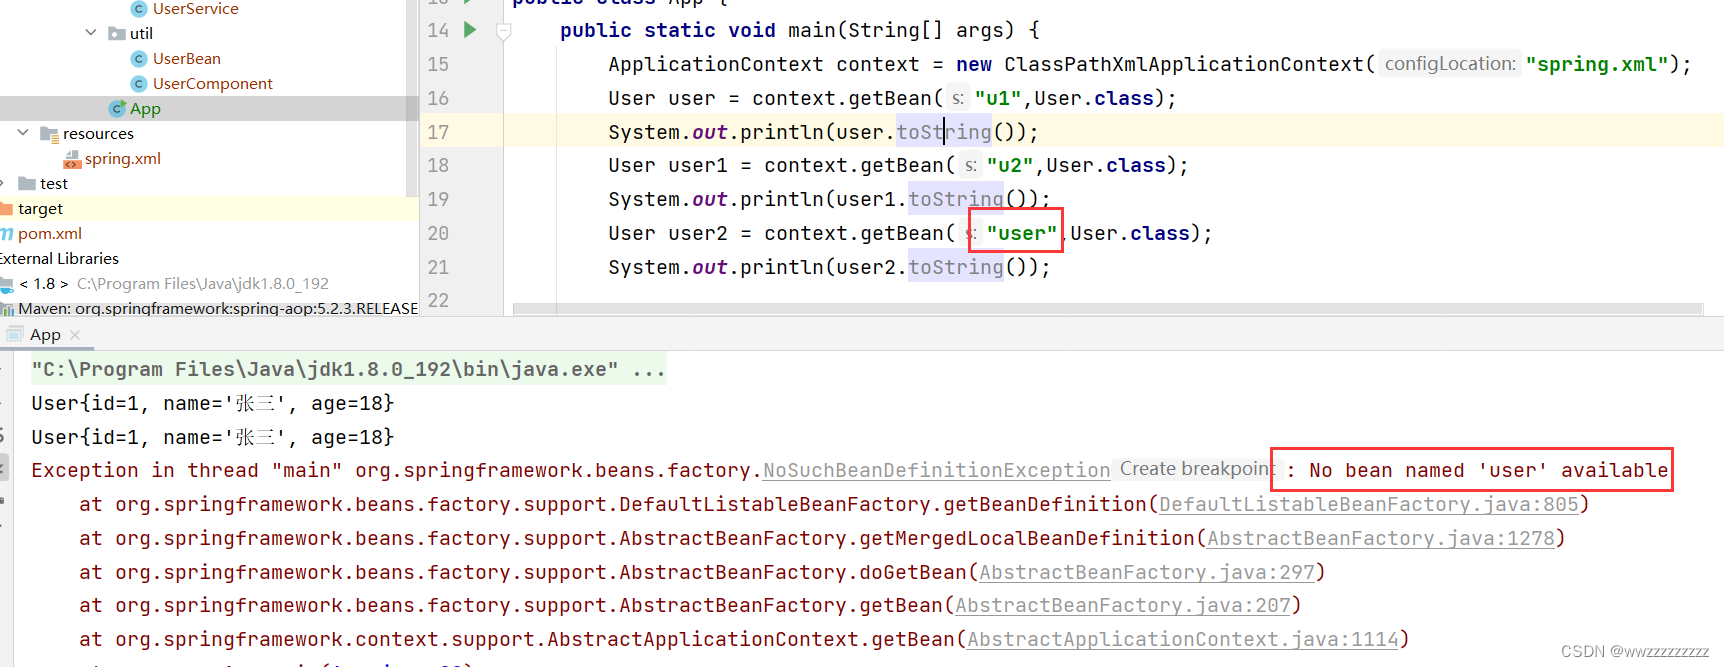
方法注解 重命名 Bean
import com.wwzz.model.User;
import org.springframework.context.annotation.Bean;
import org.springframework.stereotype.Component;

@Component
public class UserBean {


    @Bean(name = {

    "u1","u2"})
    public User user() {


        // 伪代码 获取数据库中的内容....
        User user = new User();
        user.setId(1);
        user.setName("张三");
        user.setAge(18);
        return user;
    }
}
测试这个重命名.
注意事项
- Spring 默认是类扫描, 要想使用 方法注解 @Bean 就需要配合类注解(@Component)一起使用, 才能将方法返回对象顺利存储到 Spring 中
- 重命名之后, 方法名就无法使用了
2. Spring 更简单的获取对象
获取 Bean 对象也叫做对象装配, 是把对象取出来放到某个类中, 有时候也叫对象注入
对象装配(对象注入)的实现方法以下3种:
- 属性注入
- 构造方法注入
- Setter注入
下面例子是将 Service 类 注入到 Controller 类种
Service类中的代码
package com.wwzz.service;
import com.wwzz.model.User;
import org.springframework.stereotype.Service;

@Service
public class UserService {


    /**
     * 根据用户id获取用户对象
     * @param id
     * @return
     */
    public User findUserById(int id){


        // 伪代码 返回用户对象
        User user = new User();
        if (id == 1){


            user.setId(1);
            user.setName("张三");
            user.setAge(18);
        }else {


            user.setId(2);
            user.setName("李四");
            user.setAge(20);
        }
        return user;
    }
}
2.1 属性注入
代码示例
package com.wwzz.controller;
import com.wwzz.model.User;
import com.wwzz.service.UserService;
import org.springframework.beans.factory.annotation.Autowired;
import org.springframework.stereotype.Controller;
@Controller
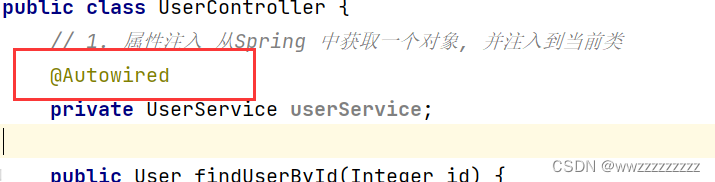
public class UserController {
// 1. 属性注入 从Spring 中获取一个对象, 并注入到当前类
@Autowired
private UserService userService;
public User findUserById(Integer id) {
if (id == null){
return new User();
}
return userService.findUserById(id);
}
}
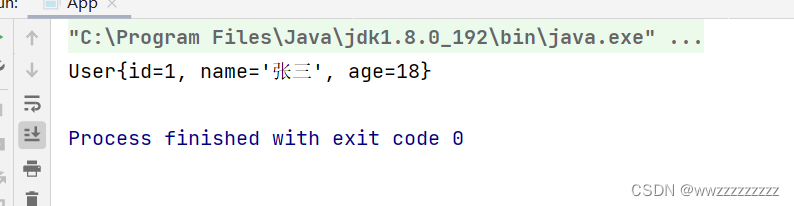
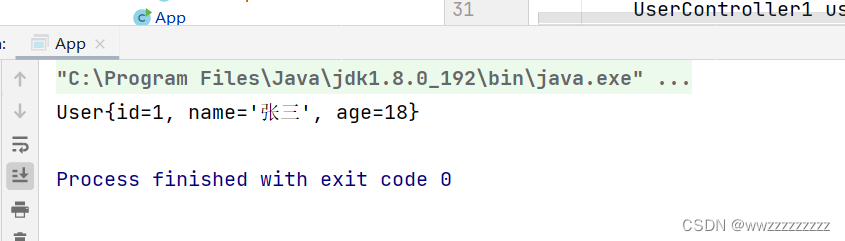
运行测试:
    public static void main(String[] args) {


        ApplicationContext context = new ClassPathXmlApplicationContext("spring.xml");
        UserController controller = context.getBean("userController",UserController.class);
        User user = controller.findUserById(1);
        System.out.println(user);
    }
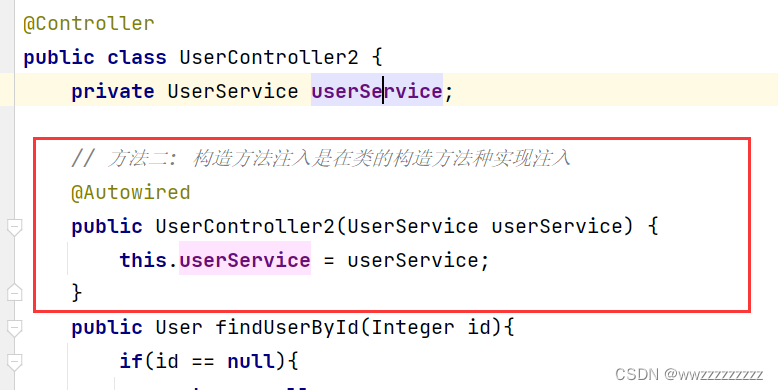
2.2 构造方法注入
代码示例
package com.wwzz.controller;

import com.wwzz.model.User;
import com.wwzz.service.UserService;
import org.springframework.beans.factory.annotation.Autowired;
import org.springframework.stereotype.Controller;

@Controller
public class UserController2 {


    private UserService userService;

    // 方法二: 构造方法注入是在类的构造方法种实现注入
    @Autowired
    public UserController2(UserService userService) {


        this.userService = userService;
    }
    public User findUserById(Integer id){


        if(id == null){


            return  null;
        }
        return userService.findUserById(id);
    }
}
运行测试:
    public static void main(String[] args) {


        ApplicationContext context = new ClassPathXmlApplicationContext("spring.xml");
        UserController2 userController2 = context.getBean("userController2",UserController2.class);
        User user = userController2.findUserById(1);
        System.out.println(user);
    }
注意事项
如果当前类里构造方法只有一个, 那么@Autowired是可以被省略的
2.3 Setter 注入
代码示例
package com.wwzz.controller;
import com.wwzz.model.User;
import com.wwzz.service.UserService;
import org.springframework.beans.factory.annotation.Autowired;
import org.springframework.stereotype.Controller;
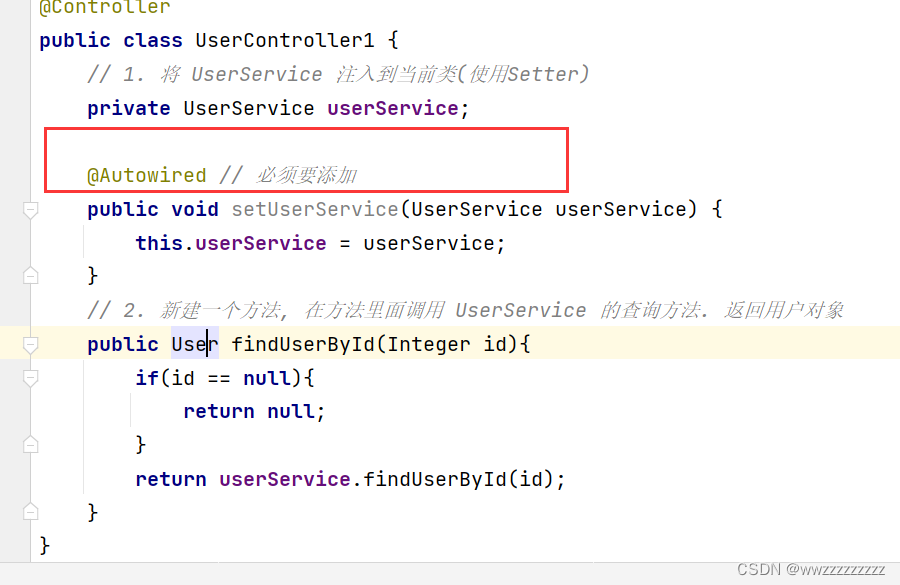
@Controller
public class UserController1 {
// 1. 将 UserService 注入到当前类(使用Setter)
private UserService userService;
@Autowired // 必须要添加
public void setUserService(UserService userService) {
this.userService = userService;
}
// 2. 新建一个方法, 在方法里面调用 UserService 的查询方法. 返回用户对象
public User findUserById(Integer id){
if(id == null){
return null;
}
return userService.findUserById(id);
}
}
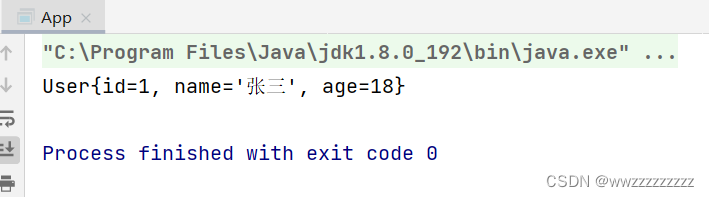
运行测试:
    public static void main(String[] args) {


        ApplicationContext context = new ClassPathXmlApplicationContext("spring.xml");
        UserController1 userController1 = context.getBean("userController1",UserController1.class);
        User user = userController1.findUserById(1);
        System.out.println(user);
    }
2.4 三种注入方式的优缺点
属性注入 :
优点: 简洁, 使用方便
缺点: 只能用于 IoC 容器, 如果是非 IoC 容器不可用, 并且只有在使用的时候才会出现 NPE (空指针异常)
构造方法注入 : Spring官方推荐的注入方式
优点: 通用性, 在使用之前一定能保证注入的类不为空
缺点: 如果有多个注入会显得比较臃肿
Setter 注入 : 通用性不如构造方法
2.5 @Resource 另一种注入方式
在进行注入的时候, 除了可以使用 @Autowired 关键字之外, 我们还可以使用 @Resource 进行注入.但是 @Resource 无法进行构造方法注入
2.5.1 属性注入
package com.wwzz.controller;

import com.wwzz.model.User;
import com.wwzz.service.UserService;
import org.springframework.stereotype.Controller;

import javax.annotation.Resource;

@Controller
public class UserController {


    @Resource
    private UserService userService;

    public User findUserById(Integer id) {


        if (id == null){


            return new User();
        }
        return userService.findUserById(id);
    }
}
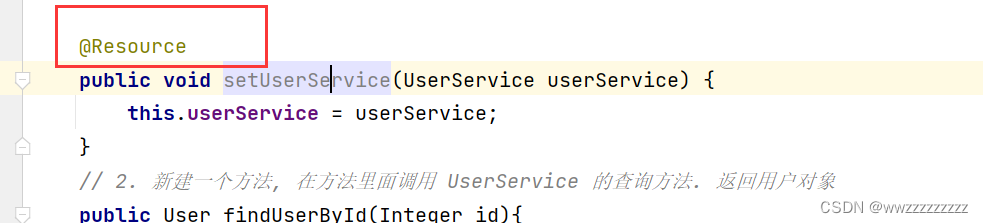
2.5.2 Setter 注入
package com.wwzz.controller;

import com.wwzz.model.User;
import com.wwzz.service.UserService;
import org.springframework.stereotype.Controller;

import javax.annotation.Resource;

@Controller
public class UserController1 {


    // 1. 将 UserService 注入到当前类(使用Setter)
    private UserService userService;

    @Resource
    public void setUserService(UserService userService) {


        this.userService = userService;
    }
    // 2. 新建一个方法, 在方法里面调用 UserService 的查询方法. 返回用户对象
    public User findUserById(Integer id){


        if(id == null){


            return null;
        }
        return userService.findUserById(id);
    }
}
2.6 @Autowired 和 @Resource的区别
- 出生不同:
@Autowired来自 Spring 框架,@Resource来自 JDK- 作用范围不同:
@Autowired可以进行属性注入, 构造方法注入, Setter 注入.@Resource可以进行 属性注入, Setter注入, 不能使用构造方法注入.- 功能不同: 相比于
@Autowired,@Resource支持更多的参数设置, 例如 name设置, 根据名称获取 Bean
2.7 同一类型多个@Bean报错
有如下一段代码
package com.wwzz.util;

import com.wwzz.model.User;
import org.springframework.context.annotation.Bean;
import org.springframework.stereotype.Component;

@Component
public class UserBean {


    @Bean
    public User user1() {


        // 伪代码 获取数据库中的内容....
        User user = new User();
        user.setId(1);
        user.setName("张三");
        user.setAge(18);
        return user;
    }
    @Bean
    public User user2() {


        User user = new User();
        user.setId(2);
        user.setName("李四");
        user.setAge(20);
        return user;
    }
}
在另一个类中获取 User对象, 如下代码:
package com.wwzz.controller;

import com.wwzz.model.User;
import org.springframework.stereotype.Controller;

import javax.annotation.Resource;

@Controller
public class UserController5 {


    @Resource
    private User user;

    public User getUser() {


        return user;
    }
}
    public static void main(String[] args) {


        ApplicationContext context = new ClassPathXmlApplicationContext("spring.xml");
        UserController5 userController5 = context.getBean("userController5",UserController5.class);
        User user = userController5.getUser();
        System.out.println(user);
    }
运行结果:

原因:
获取Bean对象的方法, 比如他们首先从名称获取, 如果获取不到, 就会从类型获取.
上面的代码, 从名称获取不到, 类型又有多个,就会注入失败.
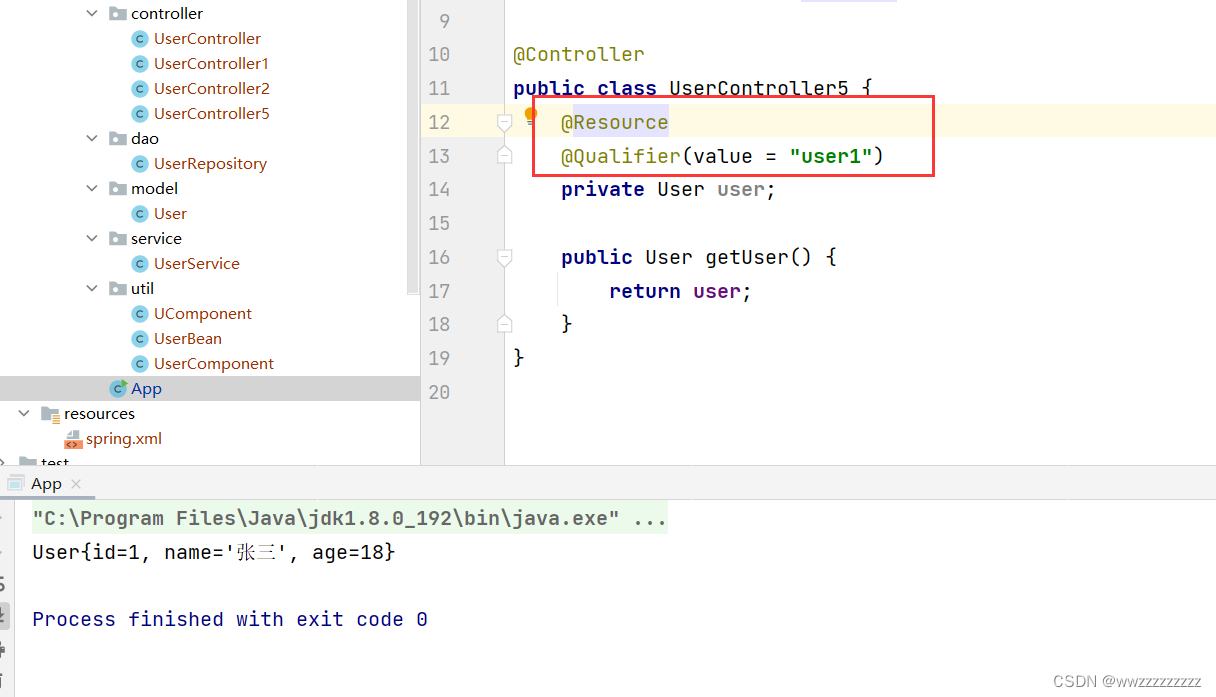
解决办法1: 使用 @Resource(name=‘别名’)
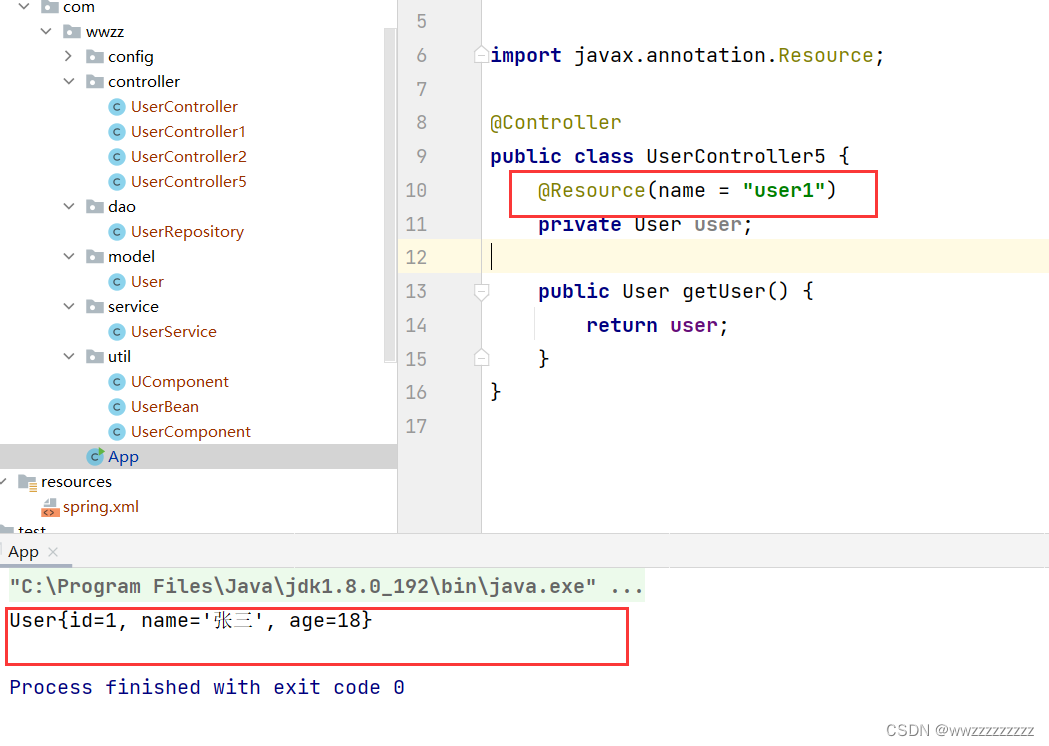
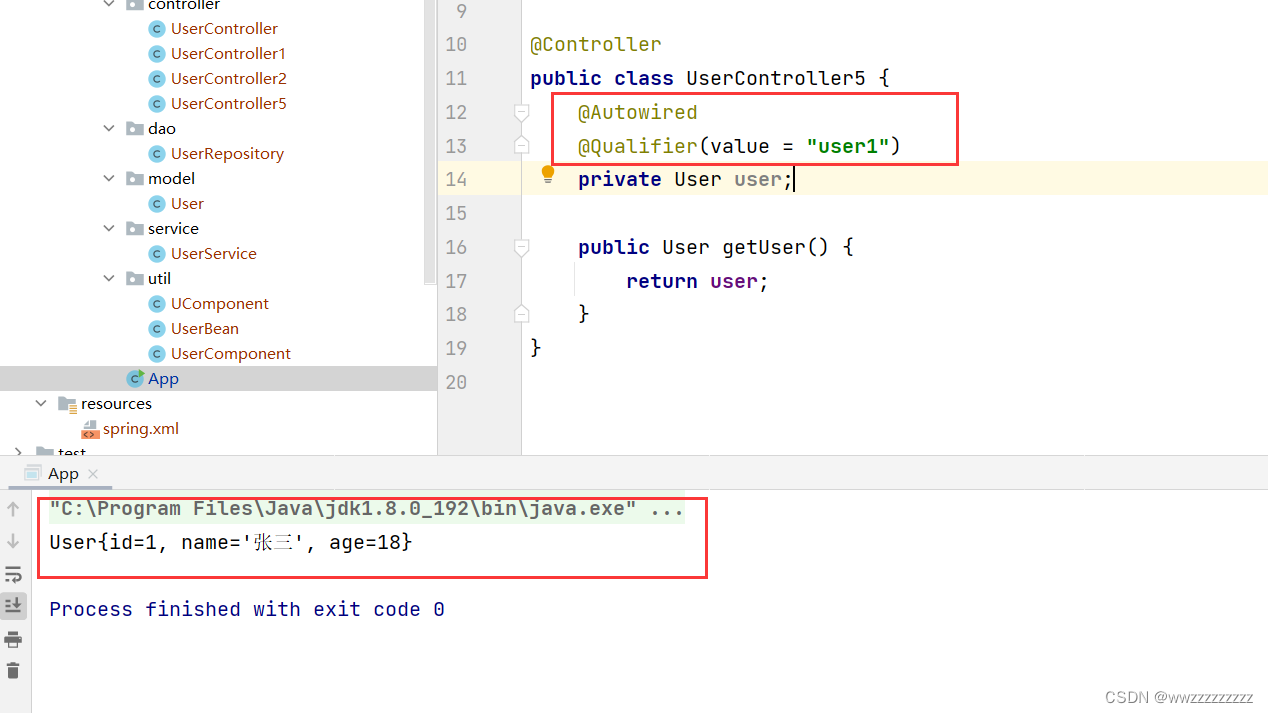
解决办法2: 使用 @Qualifier 注解定义名称
这里配合@Autowired 和 @Resource 都可以