前言
对于特征提取算法的理论学习以及代码实现有很多,本文主要对自己用到的部分进行总结。主要包括特征点的提取,以及图像匹配和融合。
- 这里将特征提取单独拿出来,是为了想更清楚的学习如果实现特征提取,同时统计特征点的数量。
- 另外总结基于SIFT、ORB的特征匹配的实现方式。
- 针对误匹配对的情况,用RANSAC算法进行剔除。
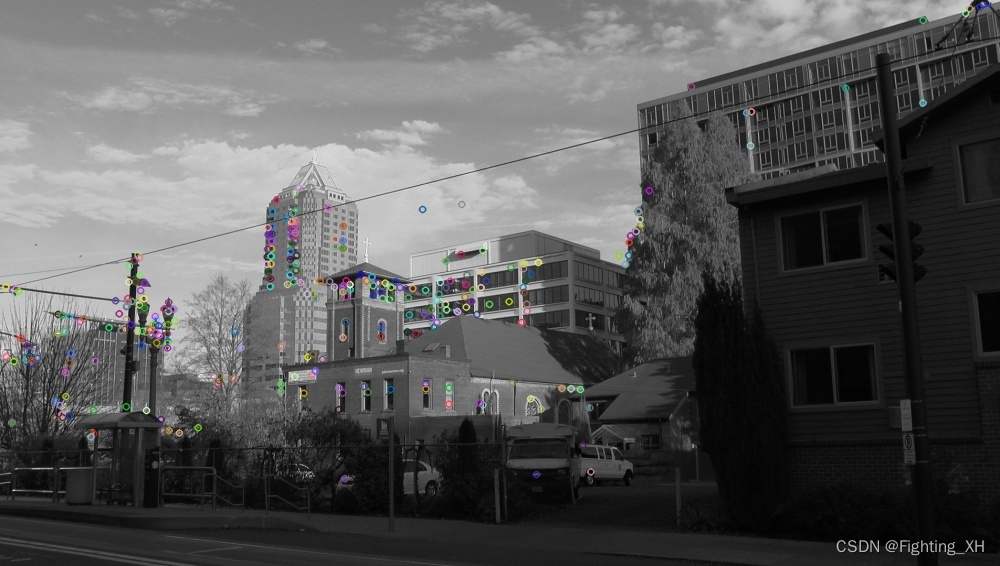
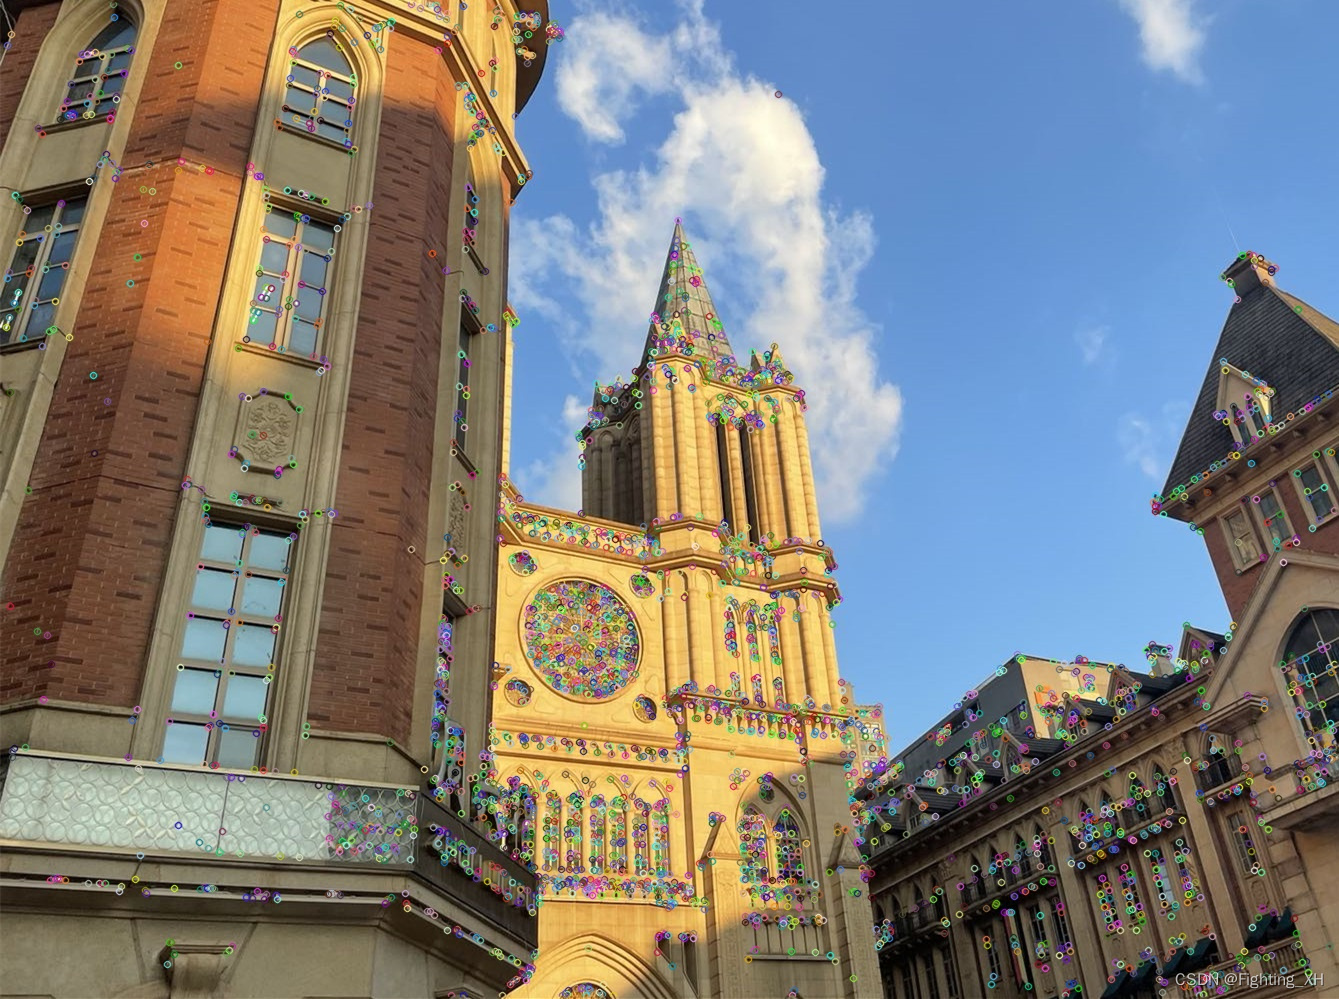
SIFT特征点提取
- 该部分我们可以选择在彩色图或者灰度图的基础上进行特征点提取。
- 也可以选择具体特征点数目或者自动生成特征点个数
- KeyPoint是SIFT算法里面的关键点,包含了各种特点:坐标、 特征点领域直径、特征点的方向、特征点的强度、特征点所在的图像金字塔的组、用于聚类的id
vector<KeyPoint>keypoints;
- src图像中检测到的SIFT特征点存储到keypoints中。
detector->detect(src, keypoints, Mat());
整体代码:
#include<opencv2/opencv.hpp>
#include<iostream>
#include<opencv2/xfeatures2d.hpp>
#include <opencv2/highgui/highgui_c.h>
#include<opencv2/xfeatures2d/nonfree.hpp>
#include<vector>

using namespace cv;
using namespace std;
using namespace cv::xfeatures2d;

Mat src;
int main(int argc, char** argv)
{


	src = imread("./data2/101.png", IMREAD_GRAYSCALE); //加载灰度图像
	//src = imread("./data2/101.png"); //加载图像
	if (!src.data)
	{


		cout << "图片加载失败" << endl;
		return -1;
	}
	//namedWindow("加载的灰度图像", CV_WINDOW_NORMAL); //可任意改变窗口大小
	imshow("加载的灰度图像", src);
	int numfeature = 400;  //特征点数目
	Ptr<SIFT>detector = SIFT::create(numfeature);
	//auto detector = SIFT::create(); //自动生成特征点的个数
	vector<KeyPoint>keypoints;
	detector->detect(src, keypoints, Mat());
	printf("所有的特征点个数:%d", keypoints.size());
	Mat resultImg;
	drawKeypoints(src, keypoints, resultImg, Scalar::all(-1), DrawMatchesFlags::DEFAULT); //特征点颜色随机
	imshow("SIFT特征点提取", resultImg);
	imwrite("./效果图/SIFT特征点提取.jpg", resultImg);
	waitKey(0);
	return 0;

}
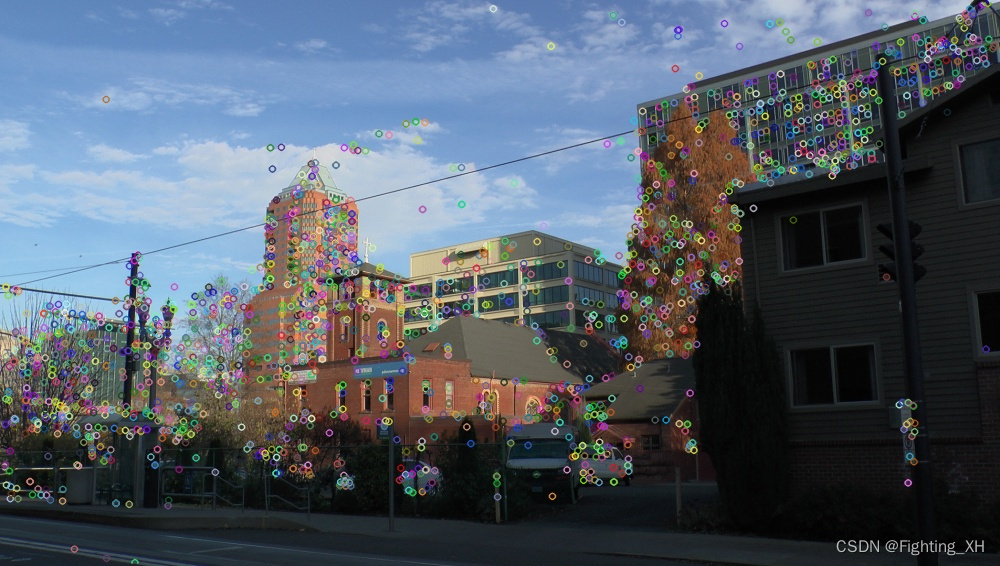
ORB特征点提取
#include<opencv2/opencv.hpp>
#include<iostream>
#include<opencv2/xfeatures2d.hpp>
#include <opencv2/highgui/highgui_c.h>
#include<opencv2/xfeatures2d/nonfree.hpp>
#include<vector>

using namespace cv;
using namespace std;
using namespace cv::xfeatures2d;

Mat src;
int main(int argc, char** argv)
{


	src = imread("./data2/101.png", IMREAD_GRAYSCALE); //加载灰度图像
	//src = imread("./data2/101.png"); //加载图像
	if (!src.data)
	{


		cout << "图片加载失败" << endl;
		return -1;
	}
	namedWindow("加载的灰度图像", CV_WINDOW_NORMAL); //可任意改变窗口大小
	imshow("加载的灰度图像", src);
	int numfeature = 400;  //特征点数目
	Ptr<ORB>detector = ORB::create(numfeature);
	//auto detector = ORB::create(); //自动生成特征点的个数
	vector<KeyPoint>keypoints;
	detector->detect(src, keypoints, Mat());
	printf("所有的特征点个数:%d", keypoints.size());
	Mat resultImg;
	drawKeypoints(src, keypoints, resultImg, Scalar::all(-1), DrawMatchesFlags::DEFAULT); //特征点颜色随机
	imshow("特征点提取", resultImg);
	imwrite("./效果图/特征点提取.jpg", resultImg);
	waitKey(0);
	return 0;

}
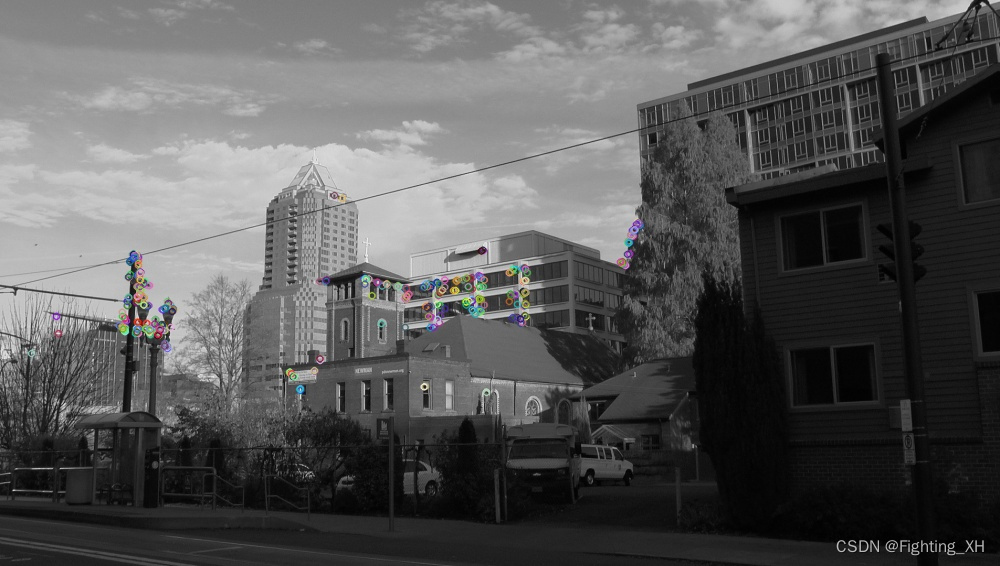
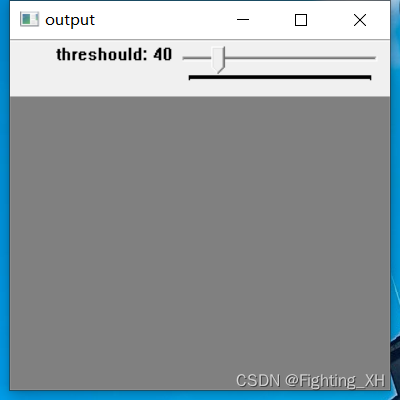
FAST角点检测且阈值可调节
- 阈值可自动调节,首先给予一个初值为40的阈值。
- 将特征点个数以及阈值打印出来。
#include<opencv2/opencv.hpp>
#include<iostream>
#include<opencv2/xfeatures2d.hpp>
#include <opencv2/highgui/highgui_c.h>
#include<opencv2/xfeatures2d/nonfree.hpp>
#include<vector>

//FAST角点检测
using namespace std;
using namespace cv;
int thre = 40;
Mat src;
void trackBar(int, void*);

int main(int argc, char** argv)
{


	//src = imread("./data2/88.jpg");
	src = imread("./data2/88.jpg", IMREAD_GRAYSCALE); //加载灰度图像
	if (src.empty())
	{


		printf("无图像加载 \n");
		return -1;
	}
	namedWindow("input", WINDOW_NORMAL);
	imshow("input", src);

	namedWindow("output", WINDOW_NORMAL);
	createTrackbar("threshould", "output", &thre, 255, trackBar);
	waitKey(0);
	return 0;
}

void trackBar(int, void*)
{


	std::vector<KeyPoint> keypoints;
	Mat dst = src.clone();
	Ptr<FastFeatureDetector> detector = FastFeatureDetector::create(thre);
	printf("阈值:%d", thre); //打印检测到的特征点个数,随阈值变化
	detector->detect(src, keypoints);
	printf("检测到的所有的特征点个数:%d", keypoints.size()); //打印检测到的特征点个数,随阈值变化
	drawKeypoints(dst, keypoints, dst, Scalar::all(-1), DrawMatchesFlags::DRAW_OVER_OUTIMG); //随机颜色画出
	imshow("角点检测图", dst);
	imwrite("./效果图/角点检测图.jpg", dst);

}
如下是设置阈值为40的角点检测图:
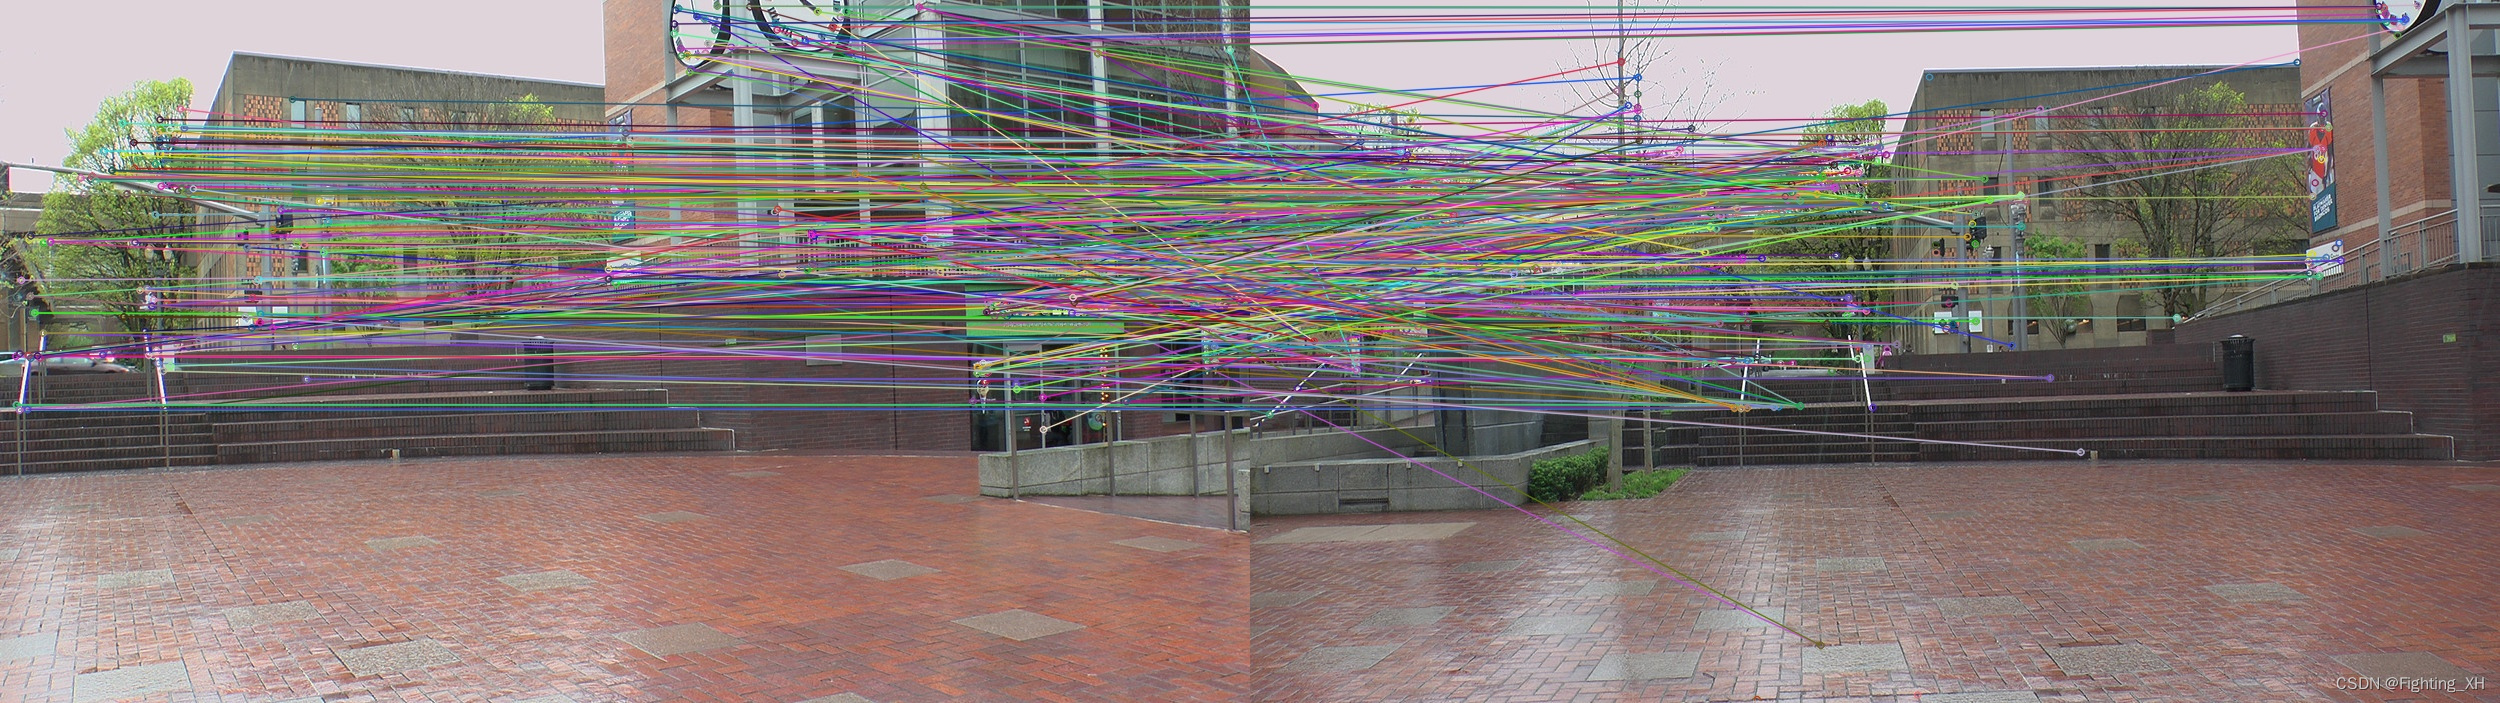
SIFT特征匹配
- 该代码可打印检测到的特征点的数量,对于数量采用两种方式来设置,一是设置具体的特征点个数,二是自动统计特征点的个数,可根据自己的实验情况来选择。
#include<opencv2/opencv.hpp>
#include<iostream>
#include<opencv2/xfeatures2d.hpp>
#include <opencv2/highgui/highgui_c.h>
#include<opencv2/xfeatures2d/nonfree.hpp>
#include<vector>

using namespace cv;
using namespace std;
using namespace cv::xfeatures2d;

//SIFT的方式

using namespace std;
using namespace cv;

int main(int* argv, int** argc)
{


	Mat imgRight = imread("./data/2.jpg"); //右图
	Mat imgLeft = imread("./data/1.jpg"); //左图

	int numfeature = 400; //设置特征点个数
	Ptr<SIFT>Detector = SIFT::create(numfeature);//取400个特征点
	//auto Detector = SIFT::create(); //自动生成特征点的个数

	vector<KeyPoint> kpCat, kpSmallCat;
	Mat descriptorCat, descriptorSmallCat;

	Detector->detectAndCompute(imgRight, Mat(), kpCat, descriptorCat);
	printf("检测到的左图所有的特征点个数:%d", kpCat.size()); //打印检测到的特征点个数
	Detector->detectAndCompute(imgLeft, Mat(), kpSmallCat, descriptorSmallCat);
	printf("检测到的右图所有的特征点个数:%d", kpCat.size()); //打印检测到的特征点个数
	Ptr<DescriptorMatcher> matcher = DescriptorMatcher::create(DescriptorMatcher::BRUTEFORCE);
	std::vector<DMatch> matchers;
	matcher->match(descriptorCat, descriptorSmallCat, matchers);

	Mat imgMatches;
	drawMatches(imgRight, kpCat, imgLeft, kpSmallCat, matchers, imgMatches); //将右图和左图的特征点匹配并画出。
	//drawMatches(imgRight, kpCat, imgLeft, kpSmallCat, matchers, imgMatches, Scalar(0, 255, 0));//将右图和左图的特征点匹配并指定用绿色线画出。
	//imshow("左图", imgRight);
	//imshow("右图", imgLeft);
	namedWindow("特征点匹配图", CV_WINDOW_NORMAL); //可任意改变窗口大小
	imshow("特征点匹配图", imgMatches);
	imwrite("./效果图/特征点匹配图.jpg", imgMatches);
	waitKey(0);
	return true;
}
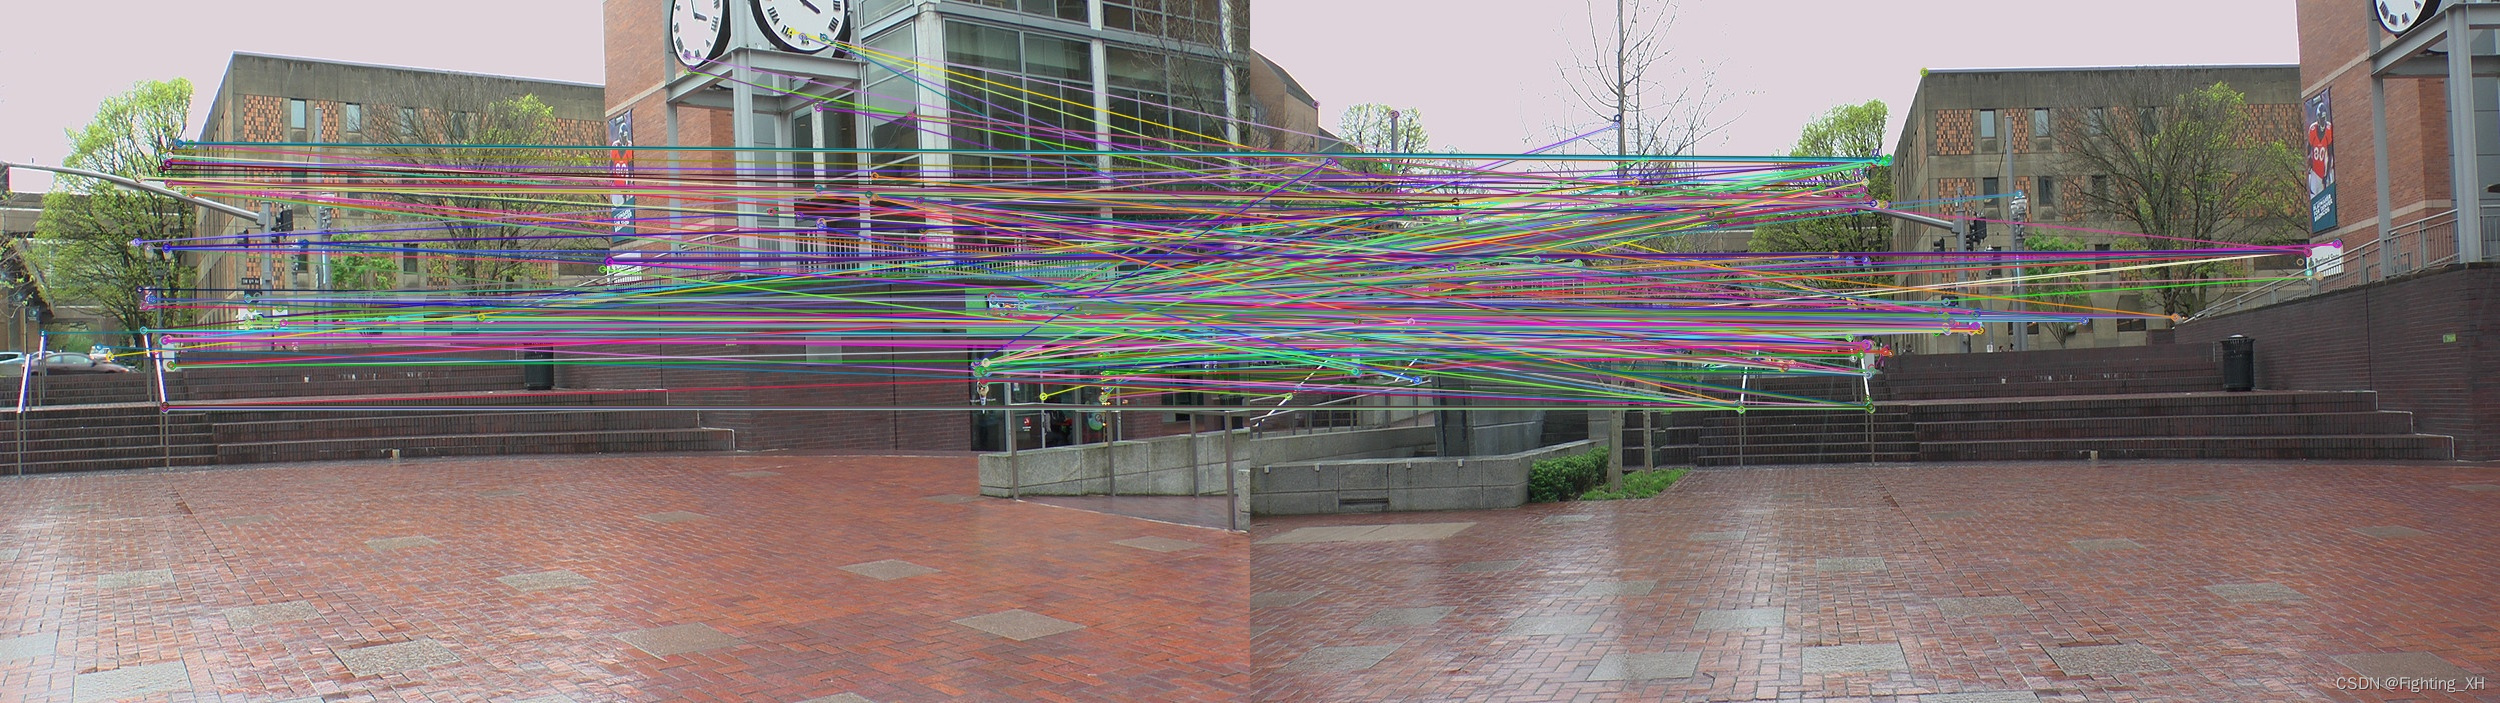
ORB特征匹配
#include<opencv2/opencv.hpp>
#include<iostream>
#include<opencv2/xfeatures2d.hpp>
#include <opencv2/highgui/highgui_c.h>
#include<opencv2/xfeatures2d/nonfree.hpp>
#include<vector>

using namespace cv;
using namespace std;
using namespace cv::xfeatures2d;

//ORB的方式
using namespace std;
using namespace cv;

int main(int* argv, int** argc)
{


	Mat imgRight = imread("./data/2.jpg"); //右图
	Mat imgLeft = imread("./data/1.jpg"); //左图

	int numfeature = 400; //设置特征点个数
	Ptr<ORB>Detector = ORB::create(numfeature);//取400个特征点
	//auto Detector = ORB::create(); //自动生成特征点的个数

	vector<KeyPoint> kpCat, kpSmallCat;
	Mat descriptorCat, descriptorSmallCat;

	Detector->detectAndCompute(imgRight, Mat(), kpCat, descriptorCat);
	printf("检测到的左图所有的特征点个数:%d", kpCat.size()); //打印检测到的特征点个数
	Detector->detectAndCompute(imgLeft, Mat(), kpSmallCat, descriptorSmallCat);
	printf("检测到的右图所有的特征点个数:%d", kpCat.size()); //打印检测到的特征点个数
	Ptr<DescriptorMatcher> matcher = DescriptorMatcher::create(DescriptorMatcher::BRUTEFORCE);
	std::vector<DMatch> matchers;
	matcher->match(descriptorCat, descriptorSmallCat, matchers);

	Mat imgMatches;
	drawMatches(imgRight, kpCat, imgLeft, kpSmallCat, matchers, imgMatches); //将右图和左图的特征点匹配并画出。
	//drawMatches(imgRight, kpCat, imgLeft, kpSmallCat, matchers, imgMatches, Scalar(0, 255, 0));//将右图和左图的特征点匹配并指定用绿色线画出。
	//imshow("左图", imgRight);
	//imshow("右图", imgLeft);
	namedWindow("特征点匹配图", CV_WINDOW_NORMAL); //可任意改变窗口大小
	imshow("特征点匹配图", imgMatches);
	imwrite("./效果图/特征点匹配图.jpg", imgMatches);
	waitKey(0);
	return true;
}
SURF图像匹配并进行加权平均融合
几个重要的步骤:
- 特征点数目:手动设置和自动生成
surf = SURF::create(500);
auto surf = SURF::create(); //自动生成特征点的个数
- 计算特征点间距离,并进行排序,便于后续误匹配对剔除
sort(matches.begin(), matches.end()); //根据match里面特征对的距离从小到大排序
- 图像配准,用homo变换矩阵对右图进行变换
warpPerspective(a, imageTransform1, homo, Size(MAX(corners.right_top.x, corners.right_bottom.x), b.rows));
- 图像融合,采用加权平均融合方式,重点在于权值的计算
alpha = (processWidth - (j - start)) / processWidth;
完整代码:
可以根据需要来选择不同的特征提取方法
#include <iostream>
#include <stdio.h>
#include <string>
#include "opencv2/core.hpp"
#include "opencv2/core/utility.hpp"
#include "opencv2/core/ocl.hpp"
#include "opencv2/imgcodecs.hpp"
#include "opencv2/highgui.hpp"
#include "opencv2/features2d.hpp"
#include "opencv2/calib3d.hpp"
#include "opencv2/imgproc.hpp"
#include"opencv2/flann.hpp"
#include"opencv2/xfeatures2d.hpp"
#include"opencv2/ml.hpp"
//
using namespace cv;
using namespace std;
using namespace cv::xfeatures2d;
using namespace cv::ml;

//SURF算法
void OptimizeSeam(Mat& img1, Mat& trans, Mat& dst);

typedef struct
{


	Point2f left_top;
	Point2f left_bottom;
	Point2f right_top;
	Point2f right_bottom;
}four_corners_t;

four_corners_t corners;

void CalcCorners(const Mat& H, const Mat& src)
{


	double v2[] = {

     0, 0, 1 };//左上角
	double v1[3];//变换后的坐标值
	Mat V2 = Mat(3, 1, CV_64FC1, v2);  //列向量
	Mat V1 = Mat(3, 1, CV_64FC1, v1);  //列向量

	V1 = H * V2;
	//左上角(0,0,1)
	cout << "V2: " << V2 << endl;
	cout << "V1: " << V1 << endl;
	corners.left_top.x = v1[0] / v1[2];
	corners.left_top.y = v1[1] / v1[2];

	//左下角(0,src.rows,1)
	v2[0] = 0;
	v2[1] = src.rows;
	v2[2] = 1;
	V2 = Mat(3, 1, CV_64FC1, v2);  //列向量
	V1 = Mat(3, 1, CV_64FC1, v1);  //列向量
	V1 = H * V2;
	corners.left_bottom.x = v1[0] / v1[2];
	corners.left_bottom.y = v1[1] / v1[2];

	//右上角(src.cols,0,1)
	v2[0] = src.cols;
	v2[1] = 0;
	v2[2] = 1;
	V2 = Mat(3, 1, CV_64FC1, v2);  //列向量
	V1 = Mat(3, 1, CV_64FC1, v1);  //列向量
	V1 = H * V2;
	corners.right_top.x = v1[0] / v1[2];
	corners.right_top.y = v1[1] / v1[2];

	//右下角(src.cols,src.rows,1)
	v2[0] = src.cols;
	v2[1] = src.rows;
	v2[2] = 1;
	V2 = Mat(3, 1, CV_64FC1, v2);  //列向量
	V1 = Mat(3, 1, CV_64FC1, v1);  //列向量
	V1 = H * V2;
	corners.right_bottom.x = v1[0] / v1[2];
	corners.right_bottom.y = v1[1] / v1[2];

}

int main()
{


	Mat a = imread("./data2/n.png", 1);//右图
	Mat b = imread("./data2/m.png", 1);//左图
	namedWindow("右图a", WINDOW_NORMAL);
	namedWindow("左图b", WINDOW_NORMAL);
	imshow("右图a", a);
	imshow("左图b", b);


	Ptr<SURF> surf;            //创建方式和OpenCV2中的不一样,并且要加上命名空间xfreatures2d,否则配置好了还是显示SURF为未声明的标识符
	//两种方式:手动设置特征点数目,自动生成特征点数目
	surf = SURF::create(500);
	//auto surf = SURF::create(); //自动生成特征点的个数
	//KeyPoint是SIFT算法里面的关键点,包含了各种特点:坐标、 特征点领域直径、特征点的方向、特征点的强度、特征点所在的图像金字塔的组、用于聚类的id
    vector<KeyPoint>keypoints;
    //将a图像中检测到的SIFT特征点存储到keypoints中。
    surf->detect(a, keypoints, Mat());
	printf("a图中所有的特征点个数:%d\n", keypoints.size());
	//将b图像中检测到的SIFT特征点存储到keypoints中。
	surf->detect(b, keypoints, Mat());
	printf("b图中所有的特征点个数:%d\n", keypoints.size());

	BFMatcher matcher;         //实例化一个暴力匹配器
	Mat c, d;
	vector<KeyPoint>key1, key2;
	vector<DMatch> matches;    //DMatch是用来描述匹配好的一对特征点的类,包含这两个点之间的相关信息
	//比如左图有个特征m,它和右图的特征点n最匹配,此时DMatch就记录它俩最匹配,并且还记录m和n的特征向量的距离和其他信息,根据这个距离可进行误匹配对剔除

	surf->detectAndCompute(a, Mat(), key1, c);//输入图像,输入掩码,输入特征点,输出Mat,存放所有特征点的描述向量
	surf->detectAndCompute(b, Mat(), key2, d);//这个Mat行数为特征点的个数,列数为每个特征向量的尺寸,SURF是64维

	matcher.match(d, c, matches);             //匹配,数据来源是特征向量,结果存放在DMatch类型里面
//sort函数对数据进行升序排列,便于根据距离进行相似度的判断,从而筛选匹配点
	sort(matches.begin(), matches.end());     //筛选匹配点,根据match里面特征对的距离从小到大排序
	vector< DMatch > good_matches;
	int ptsPairs = std::min(100, (int)(matches.size() * 0.5));
	cout << "匹配点对:" << ptsPairs << endl;
	for (int i = 0; i < ptsPairs; i++)
	{


		good_matches.push_back(matches[i]);//距离最小的50个压入新的DMatch
	}
	Mat outimg;                                //采用drawMatches函数直接绘画,将特征点匹配的图像摆在一起画出
	drawMatches(b, key2, a, key1, good_matches, outimg, Scalar::all(-1), Scalar::all(-1), vector<char>(), DrawMatchesFlags::NOT_DRAW_SINGLE_POINTS);  //绘制匹配点

	namedWindow("特征点匹配", WINDOW_NORMAL);
	imshow("特征点匹配", outimg);
	imwrite("特征点匹配.jpg", outimg);

	///图像配准及融合
	vector<Point2f> imagePoints1, imagePoints2;

	for (int i = 0; i < good_matches.size(); i++)
	{


		imagePoints2.push_back(key2[good_matches[i].queryIdx].pt);
		imagePoints1.push_back(key1[good_matches[i].trainIdx].pt);
	}

	//获取图像1到图像2的投影映射矩阵 尺寸为3*3 ,同时采用了RANSAC算法进行误匹配对剔除。
	Mat homo = findHomography(imagePoints1, imagePoints2, RANSAC);
	cout << "采用了RANSAC算法后的homo变换矩阵为:\n" << homo << endl << endl; //输出映射矩阵

	//计算配准图的四个顶点坐标
	CalcCorners(homo, a);
	cout << "输出配准图的左上左下以及右上右下角四个顶点的坐标\n"<< endl;
	cout << "left_top:" << corners.left_top << endl;
	cout << "left_bottom:" << corners.left_bottom << endl;
	cout << "right_top:" << corners.right_top << endl;
	cout << "right_bottom:" << corners.right_bottom << endl;

	//图像配准,用homo变换矩阵对右图进行变换
	Mat imageTransform1, imageTransform2;
	warpPerspective(a, imageTransform1, homo, Size(MAX(corners.right_top.x, corners.right_bottom.x), b.rows));
	//warpPerspective(a, imageTransform2, adjustMat*homo, Size(b.cols*1.3, b.rows*1.8));
	namedWindow("右图经过透视矩阵变换图", WINDOW_NORMAL);
	imshow("右图经过透视矩阵变换图", imageTransform1);
	imwrite("右图经过透视矩阵变换图.jpg", imageTransform1);

	//创建拼接后的图,需提前计算图的大小
	int dst_width = imageTransform1.cols;  //取最右点的长度为拼接图的长度
	int dst_height = b.rows;

	Mat dst(dst_height, dst_width, CV_8UC3);
	dst.setTo(0);

	imageTransform1.copyTo(dst(Rect(0, 0, imageTransform1.cols, imageTransform1.rows)));
	b.copyTo(dst(Rect(0, 0, b.cols, b.rows)));

	namedWindow("融合后的拼接图", WINDOW_NORMAL);
	imshow("融合后的拼接图", dst);
	imwrite("融合后的拼接图.jpg", dst);


	OptimizeSeam(b, imageTransform1, dst);

	namedWindow("未融合拼接图片", WINDOW_NORMAL);
	imshow("未融合拼接图片", dst);
	imwrite("未融合拼接图片.jpg", dst);

	waitKey();
	return 0;
}
//图像融合 优化两图的连接处,使得拼接自然——加权平均融合法
void OptimizeSeam(Mat& img1, Mat& trans, Mat& dst)
{


	int start = MIN(corners.left_top.x, corners.left_bottom.x);//开始位置,即重叠区域的左边界

	cout << "重合区域的左边界:" << start << endl << endl; //输出重合区域左边界位置

	double processWidth = img1.cols - start;//重叠区域的宽度
	cout << "重合区域的宽度:" << processWidth << endl << endl; //输出重合区域左边界位置
	int rows = dst.rows;
	int cols = img1.cols; //注意,是列数*通道数
	double alpha = 1;//img1中像素的权重
	for (int i = 0; i < rows; i++)
	{


		uchar* p = img1.ptr<uchar>(i);  //获取第i行的首地址
		uchar* t = trans.ptr<uchar>(i);
		uchar* d = dst.ptr<uchar>(i);
		for (int j = start; j < cols; j++)
		{


			//如果遇到透视变换图像中无像素黑点的部分,则完全拷贝img1中的数据
			if (t[j * 3] == 0 && t[j * 3 + 1] == 0 && t[j * 3 + 2] == 0)
			{


				alpha = 1;
			}
			else
			{


				//img1中像素的权重,与当前处理点距重叠区域左边界的距离成正比,实验证明,这种方法确实好
				alpha = (processWidth - (j - start)) / processWidth;
			}
			//不建议输出,若输出会逐像素的将权重输出,耗时太久,因此直接进行融合图像的显示即可。
			//cout << "img1中像素的权重:" << alpha << endl << endl;
			//cout << "img2中像素的权重:" << 1-alpha << endl << endl;

			d[j * 3] = p[j * 3] * alpha + t[j * 3] * (1 - alpha);
			d[j * 3 + 1] = p[j * 3 + 1] * alpha + t[j * 3 + 1] * (1 - alpha);
			d[j * 3 + 2] = p[j * 3 + 2] * alpha + t[j * 3 + 2] * (1 - alpha);

		}
	}

}
补充:后续我们要进行软硬件分别实现算法并进行时间的对比,因此下面提供运行时间的获取方法
获取运行时间
用clock()函数,得到系统启动以后的毫秒级时间,然后除以CLOCKS_PER_SEC,就可以换成“秒”,标准c函数。
clock_t clock ( void );

#include <time.h>
clock_t t = clock();
long sec = t / CLOCKS_PER_SEC;
记录时钟周期
融入代码中必须加入头文件 #include<ctime>
#include<iostream>
#include<ctime>
using  namespace std;
int main()
{


    time_t begin,end;
    double ret;
    begin=clock();

    //这里加上你的代码
    end=clock();
    ret=double(end-begin)/CLOCKS_PER_SEC;
    cout<<"runtime:   "<<ret<<endl;
}
例如:对sift特征点检测的时间获取
#include<opencv2/opencv.hpp>
#include<iostream>
#include<opencv2/xfeatures2d.hpp>
#include <opencv2/highgui/highgui_c.h>
#include<opencv2/xfeatures2d/nonfree.hpp>
#include<vector>
#include<ctime>

using namespace cv;
using namespace std;
using namespace cv::xfeatures2d;

Mat src;
int main(int argc, char** argv)
{


	time_t begin, end;
	double ret;
	begin = clock();
	//src = imread("./data2/101.png", IMREAD_GRAYSCALE); //加载灰度图像
	src = imread("./data2/101.png"); //加载图像
	if (!src.data)
	{


		cout << "图片加载失败" << endl;
		return -1;
	}
	namedWindow("加载的灰度图像", CV_WINDOW_NORMAL); //可任意改变窗口大小
	imshow("加载的灰度图像", src);
	int numfeature = 400;  //特征点数目
	Ptr<SIFT>detector = SIFT::create(numfeature);
	//auto detector = SIFT::create(); //自动生成特征点的个数
	//KeyPoint是SIFT算法里面的关键点,包含了各种特点:坐标、 特征点领域直径、特征点的方向、特征点的强度、特征点所在的图像金字塔的组、用于聚类的id
	vector<KeyPoint>keypoints;
	//将src图像中检测到的SIFT特征点存储到keypoints中。
	detector->detect(src, keypoints, Mat());
	printf("所有的特征点个数:%zd\n", keypoints.size());
	Mat resultImg;
	drawKeypoints(src, keypoints, resultImg, Scalar::all(-1), DrawMatchesFlags::DEFAULT); //特征点颜色随机
	imshow("SIFT特征点提取", resultImg);
	imwrite("./效果图/SIFT特征点提取.jpg", resultImg);

	end = clock();
	ret = double(end - begin) / CLOCKS_PER_SEC;
	cout << "runtime:\n " << ret << endl;

	waitKey(0);
	return 0;

}
因此对分辨率为1000*566图像进行SIFT特征提取,提取数量为400,耗时0.667s