使用解压版的redis这样修改配置文件后启动,这时候发现还是以前的配置文件,无论你怎么修改都不会起作用,这里就要用别的方法启动了:
按住 Shift键+鼠标右键
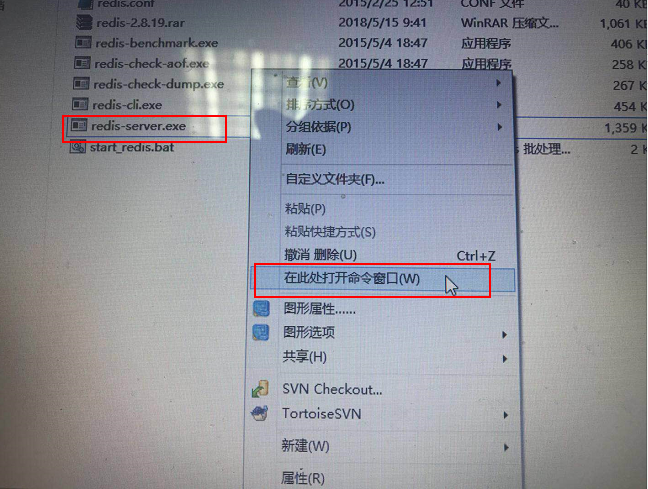
然后在窗口中输入 redis-server.exe redis.conf这样你发现端口号已经改变;
接下来处理redis-cli.exe同样的方法打开窗口输入:redis-cli.exe -h 127.0.0.1 -p 端口号(这里你设置端口号多少你就填写多少),回车后也正常;
接下来看一下配置文件:

这是master服务器的地址和密码,需要要自己去修改
1) config set requirepass 123这是设置密码的命令
2)auth 123 修改密码后确认身份
3)config get requirepass 获取密码
扫描二维码关注公众号,回复:
1433833 查看本文章

这样redis主从配置基本结束,在master输入,另一台就可以获取了;
接下来写个配置文件:
 <!-- jedis 配置 -->
 <bean id="poolConfig" class="redis.clients.jedis.JedisPoolConfig" >
      <property name="maxIdle" value="100" />
      <property name="maxWaitMillis" value="1000" />
      <property name="testOnBorrow" value="true" />
</bean >
<bean id="masterJedisPool" class="redis.clients.jedis.JedisPool">
        <constructor-arg index="0" ref="poolConfig"/>
        <constructor-arg index="1" value="127.0.0.1" type="java.lang.String"/>
        <constructor-arg index="2" value="6379" type="int"/>
    </bean>
    <bean id="slaveJedisPool" class="redis.clients.jedis.JedisPool">
        <constructor-arg index="0" ref="poolConfig"/>
        <!-- 此处Host配置成ELB地址 -->
        <constructor-arg index="1" value="127.0.0.1" type="java.lang.String"/>
        <constructor-arg index="2" value="6380" type="int"/>
    </bean>
    <bean id="redisUtils" class="com.st.common.RedisNewUtil">
        <property name="masterJedisPool" ref="masterJedisPool"/>
        <property name="slaveJedisPool" ref="slaveJedisPool"/>
    </bean>
然后写个Util类:
public class RedisNewUtil {
	 	private JedisPool masterJedisPool;
	    private JedisPool slaveJedisPool;
	    public void setMasterJedisPool(JedisPool masterJedisPool) {
	        this.masterJedisPool = masterJedisPool;
	    }
	    public void setSlaveJedisPool(JedisPool slaveJedisPool) {
	        this.slaveJedisPool = slaveJedisPool;
	    }
	    public String setString(final String key, final String value) {
	        String ret = masterJedisPool.getResource().set(key, value);
	        return ret;
	    }
	    public String get(final String key) {
	        String ret = slaveJedisPool.getResource().get(key);
	        return ret;
	    }
}
这样一个主从分离的测试已经写完了,可以自己写代码去测试一下了,这里使用的是默认密码,不需要修改redis的密码;