一、codec简介
处理器如果既想“听到”外界的声音,又想向外界传达自己的“心声”,那么就需要同时用到 DAC 和 ADC 这两款芯片。那是不是买两颗 DAC 和 ADC 芯片就行了呢?答案肯定是可以的,但是音频不单单是能出声、能听到就行。我们往往需要听到的声音动听、录进去的语音贴近真实、可以调节音效、对声音能够进行一些处理(需要 DSP 单元)、拥有统一的标准接口,方便开发等等。将这些针对声音的各种要求全部叠加到 DAC 和 ADC 芯片上,那么就会得到一个专门用于音频的芯片,也就是音频编解码芯片,英文名字就是 Audio CODEC,所以我们在手机或者电脑的介绍中看到“CODEC”这个词语,一般说的都是音频编解码。
音频 CODEC 的本质是 ADC 和 DAC
二、codec的作用
在移动设备中,Codec的作用可以归结为4种,分别是:
- 对PCM等信号进行DIA转换,把数字的音频信号转换为模拟信号–播放
- 对Mic、Linein或者其他输入源的模拟信号进行A/D转换,把模拟的声音信号转变CPU能够处理的数字信号–录音
- 对音频通路进行控制,比如播放音乐,收听调频收音机,又或者接听电话时,音频信号在codec内的流通路线是不一样的;
- 对音频信号做出相应的处理,例如音量控制,功率放大,EQ控制等等
ASoC对Codec的这些功能都定义好了一系列相应的接口,以方便地对Codec进行控制。ASoC对Codec驱动的一个基本要求是:驱动程序的代码必须要做到平台无关性,以方便同一个Codec的代码不经修改即可用在不同的平台上。
Linux内核版本:4.1.15
主芯片:IMX6ULL
codec芯片:WM8960
三、codec相关结构体简介
描述Codec的最主要的4个数据结构分别是: snd_soc_codec,snd_soc_codec_driver,snd_soc_dai,snd_soc_dai_driver,其中的snd_soc_dai和snd_soc_dai_driver在ASoC的Platform驱动中也会使用到,Platform和Codec的DAl通过snd_soc_dai_link结构,在Machine驱动中进行绑定连接。下面我们先看看这几个结构的定义,在本文中codec的设备是使用设备树描述的,在这里就不多多说,主要是codec driver,这里我只贴出我要关注的字段。
3.1、snd_soc_codec_driver
代码路径:\include\sound\soc.h
只贴出我要关注的字段
/* codec driver */
struct snd_soc_codec_driver {


	/* driver ops */
	int (*probe)(struct snd_soc_codec *);
	int (*remove)(struct snd_soc_codec *);
	int (*suspend)(struct snd_soc_codec *);		/*电源管理*/

	/* Default control and setup, added after probe() is run */
	const struct snd_kcontrol_new *controls;   /*音频控件指针*/
	const struct snd_soc_dapm_widget *dapm_widgets;    /*dapm部件指针*/
	const struct snd_soc_dapm_route *dapm_routes;		 /*dapm路由指针*/

	/* codec wide operations */
	int (*set_sysclk)(struct snd_soc_codec *codec,
			  int clk_id, int source, unsigned int freq, int dir);    /*时钟配置函数*/
	int (*set_pll)(struct snd_soc_codec *codec, int pll_id, int source,
		unsigned int freq_in, unsigned int freq_out);       			/*锁相环配置函数*/

	/* codec IO */
	unsigned int (*read)(struct snd_soc_codec *, unsigned int);     /*读取codec寄存器函数*/
	int (*write)(struct snd_soc_codec *, unsigned int, unsigned int);	/*写入codec寄存器函数*/

	/* codec bias level */
	int (*set_bias_level)(struct snd_soc_codec *,
			      enum snd_soc_bias_level level);     /*偏置电压配置函数*/
	bool ignore_pmdown_time;  /* Doesn't benefit from pmdown delay */
};
3.2、snd_soc_dai_driver
代码路径:\include\sound\soc-dai.h
重要函数做了些注释。
struct snd_soc_dai_driver {


	/* DAI description */
	const char *name;  /*dai驱动的名字*/

	/* DAI driver callbacks */
	int (*probe)(struct snd_soc_dai *dai);  /*dai驱动的probe函数,由snd_soc_instantiate_card回调*/
	int (*remove)(struct snd_soc_dai *dai);
	int (*suspend)(struct snd_soc_dai *dai);   /*电源管理*/
	int (*resume)(struct snd_soc_dai *dai);
	/* compress dai */
	bool compress_dai;
	/* DAI is also used for the control bus */
	bool bus_control;

	/* ops */
	const struct snd_soc_dai_ops *ops;  /*指向本dai的snd_soc_dai_ops结构*/

	/* DAI capabilities */
	struct snd_soc_pcm_stream capture;    /*描述capture的能力*/
	struct snd_soc_pcm_stream playback;		/*描述playback的能力*/

	/* probe ordering - for components with runtime dependencies */
	int probe_order;
	int remove_order;
};
3.3、struct snd_soc_dai_ops
snd_soc_dai_ops用于实现该dai的控制和配置参数:
代码路径:include\sound\soc-dai.h
struct snd_soc_dai_ops {


	/*
	 * DAI clocking configuration, all optional.
	 * Called by soc_card drivers, normally in their hw_params.
	 */
	int (*set_sysclk)(struct snd_soc_dai *dai,
		int clk_id, unsigned int freq, int dir);   /*设置dai的主时钟;*/
	int (*set_pll)(struct snd_soc_dai *dai, int pll_id, int source,
		unsigned int freq_in, unsigned int freq_out);  /*设置PLL参数;*/
	int (*set_clkdiv)(struct snd_soc_dai *dai, int div_id, int div);  /*设置分频系数;*/
	int (*set_bclk_ratio)(struct snd_soc_dai *dai, unsigned int ratio);

	/*
	 * DAI format configuration
	 * Called by soc_card drivers, normally in their hw_params.
	 */
	int (*set_fmt)(struct snd_soc_dai *dai, unsigned int fmt);  /*设置dai的格式;*/
	int (*xlate_tdm_slot_mask)(unsigned int slots,
		unsigned int *tx_mask, unsigned int *rx_mask);
	int (*set_tdm_slot)(struct snd_soc_dai *dai,
		unsigned int tx_mask, unsigned int rx_mask,
		int slots, int slot_width);             /*如果dai支持时分复用,用于设置时分复用的slot*/
	int (*set_channel_map)(struct snd_soc_dai *dai,
		unsigned int tx_num, unsigned int *tx_slot,
		unsigned int rx_num, unsigned int *rx_slot);   /*声道的时分复用映射设置*/
	int (*set_tristate)(struct snd_soc_dai *dai, int tristate);/*设置dai引脚的状态,当与其他dai并联使用同一引脚时需要使用该回调*/

	/*
	 * DAI digital mute - optional.
	 * Called by soc-core to minimise any pops.
	 */
	int (*digital_mute)(struct snd_soc_dai *dai, int mute);
	int (*mute_stream)(struct snd_soc_dai *dai, int mute, int stream);

	/*
	 * ALSA PCM audio operations - all optional.
	 * Called by soc-core during audio PCM operations.
	 */
	int (*startup)(struct snd_pcm_substream *,
		struct snd_soc_dai *);   /*打开设备,设备开始工作的时候回调*/
	void (*shutdown)(struct snd_pcm_substream *,
		struct snd_soc_dai *);   /*关闭设备前调用*/
	int (*hw_params)(struct snd_pcm_substream *,
		struct snd_pcm_hw_params *, struct snd_soc_dai *); /*设置硬件的相关参数*/
	int (*hw_free)(struct snd_pcm_substream *,
		struct snd_soc_dai *);
	int (*prepare)(struct snd_pcm_substream *,
		struct snd_soc_dai *);
	/*
	 * NOTE: Commands passed to the trigger function are not necessarily
	 * compatible with the current state of the dai. For example this
	 * sequence of commands is possible: START STOP STOP.
	 * So do not unconditionally use refcounting functions in the trigger
	 * function, e.g. clk_enable/disable.
	 */
	int (*trigger)(struct snd_pcm_substream *, int,
		struct snd_soc_dai *);    /*结束传输,暂停传世,恢复传输的时候被回调*/
	int (*bespoke_trigger)(struct snd_pcm_substream *, int,
		struct snd_soc_dai *);
	/*
	 * For hardware based FIFO caused delay reporting.
	 * Optional.
	 */
	snd_pcm_sframes_t (*delay)(struct snd_pcm_substream *,
		struct snd_soc_dai *);
};
四、codec的注册
因为Codec驱动的代码要做到平台无关性,要使得Machine驱动能够使用该Codec,Codec驱动的首要任务就是确定snd_soc_codec和snd_soc_dai的实例,并把它们注册到系统中,注册后的codec和 dai才能为Machine驱动所用。以WM8960为例,对应的代码位置:/sound/soc/codecs/wm8960.c,模块的入口函数注册了一个i2c_driver :
static const struct of_device_id wm8960_of_match[] = {


       {

     .compatible = "wlf,wm8960", },
       {

     }
};
MODULE_DEVICE_TABLE(of, wm8960_of_match);

static struct i2c_driver wm8960_i2c_driver = {


	.driver = {


		.name = "wm8960",
		.owner = THIS_MODULE,
		.of_match_table = wm8960_of_match,
	},
	.probe =    wm8960_i2c_probe,
	.remove =   wm8960_i2c_remove,
	.id_table = wm8960_i2c_id,
};
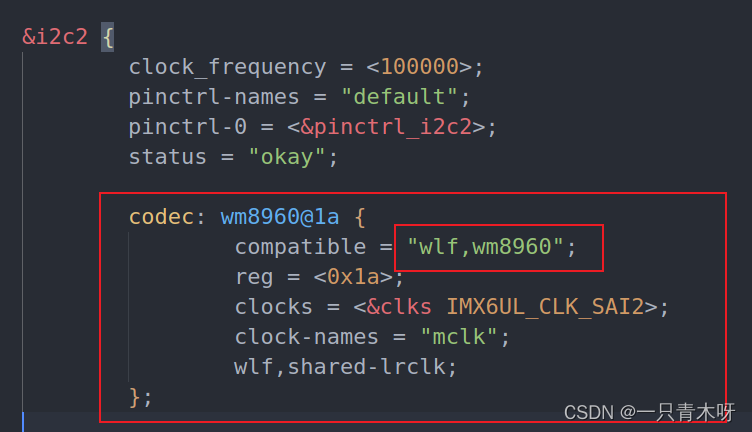
这指定了其compatible 属性,与设备树中的compatible 属性就可以调用其probe函数;
设备树中codec实例如下:
之后就会进入probe函数的流程:
static int wm8960_i2c_probe(struct i2c_client *i2c,
			    const struct i2c_device_id *id)
{


	ret = snd_soc_register_codec(&i2c->dev,
			&soc_codec_dev_wm8960, &wm8960_dai, 1);
}
在这里会注册snd_soc_codec_driver与snd_soc_dai_driver,其实例也在同一个文件中:
snd_soc_codec_driver:
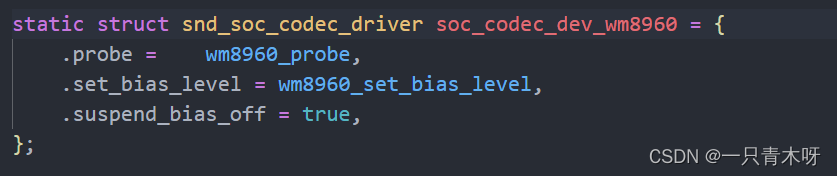
snd_soc_dai_driver:
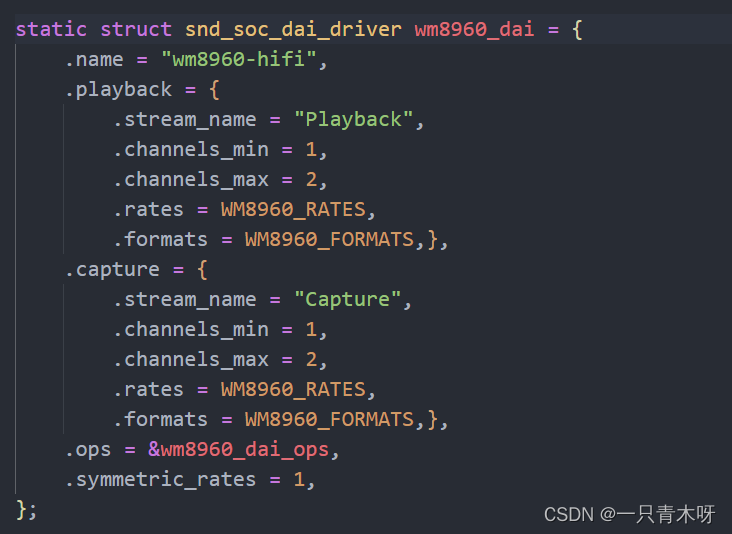
可见,Codec驱动的第一个步骤就是定义snd_soc_codec_driver和snd_soc_dai_driver的实例,然后调用snd_soc_register_codec函数对Codec进行注册。进入snd_soc_register_codec函数看看:
int snd_soc_register_codec(struct device *dev,
			   const struct snd_soc_codec_driver *codec_drv,
			   struct snd_soc_dai_driver *dai_drv,
			   int num_dai)
{


	struct snd_soc_codec *codec;
	struct snd_soc_dai *dai;
	int ret, i;

	dev_dbg(dev, "codec register %s\n", dev_name(dev));


	codec = kzalloc(sizeof(struct snd_soc_codec), GFP_KERNEL);
	if (codec == NULL)
		return -ENOMEM;

	codec->component.dapm_ptr = &codec->dapm;
	codec->component.codec = codec;

	ret = snd_soc_component_initialize(&codec->component,
			&codec_drv->component_driver, dev);
	if (ret)
		goto err_free;

	if (codec_drv->controls) {


		codec->component.controls = codec_drv->controls;
		codec->component.num_controls = codec_drv->num_controls;
	}
	if (codec_drv->dapm_widgets) {


		codec->component.dapm_widgets = codec_drv->dapm_widgets;
		codec->component.num_dapm_widgets = codec_drv->num_dapm_widgets;
	}
	if (codec_drv->dapm_routes) {


		codec->component.dapm_routes = codec_drv->dapm_routes;
		codec->component.num_dapm_routes = codec_drv->num_dapm_routes;
	}

	if (codec_drv->probe)
		codec->component.probe = snd_soc_codec_drv_probe;
	if (codec_drv->remove)
		codec->component.remove = snd_soc_codec_drv_remove;
	if (codec_drv->write)
		codec->component.write = snd_soc_codec_drv_write;
	if (codec_drv->read)
		codec->component.read = snd_soc_codec_drv_read;
	codec->component.ignore_pmdown_time = codec_drv->ignore_pmdown_time;
	codec->dapm.idle_bias_off = codec_drv->idle_bias_off;
	codec->dapm.suspend_bias_off = codec_drv->suspend_bias_off;
	if (codec_drv->seq_notifier)
		codec->dapm.seq_notifier = codec_drv->seq_notifier;
	if (codec_drv->set_bias_level)
		codec->dapm.set_bias_level = snd_soc_codec_set_bias_level;
	codec->dev = dev;
	codec->driver = codec_drv;
	codec->component.val_bytes = codec_drv->reg_word_size;

#ifdef CONFIG_DEBUG_FS
	codec->component.init_debugfs = soc_init_codec_debugfs;
	codec->component.debugfs_prefix = "codec";
#endif

	if (codec_drv->get_regmap)
		codec->component.regmap = codec_drv->get_regmap(dev);

	for (i = 0; i < num_dai; i++) {


		fixup_codec_formats(&dai_drv[i].playback);
		fixup_codec_formats(&dai_drv[i].capture);
	}

	ret = snd_soc_register_dais(&codec->component, dai_drv, num_dai, false);
	if (ret < 0) {


		dev_err(dev, "ASoC: Failed to register DAIs: %d\n", ret);
		goto err_cleanup;
	}

	list_for_each_entry(dai, &codec->component.dai_list, list)
		dai->codec = codec;

	mutex_lock(&client_mutex);
	snd_soc_component_add_unlocked(&codec->component);
	list_add(&codec->list, &codec_list);
	mutex_unlock(&client_mutex);

	dev_dbg(codec->dev, "ASoC: Registered codec '%s'\n",
		codec->component.name);
	return 0;

err_cleanup:
	snd_soc_component_cleanup(&codec->component);
err_free:
	kfree(codec);
	return ret;
}
首先申请snd_soc_codec实例:

随后确定codec的名字,这个名字很重要,Machine驱动定义的snd_soc_dai_link中会指定每个link 的codec和 dai的名字,进行匹配绑定时就是通过和这里的名字比较,从而找到该Codec的!

此函数在snd_soc_component_initialize中调用的。
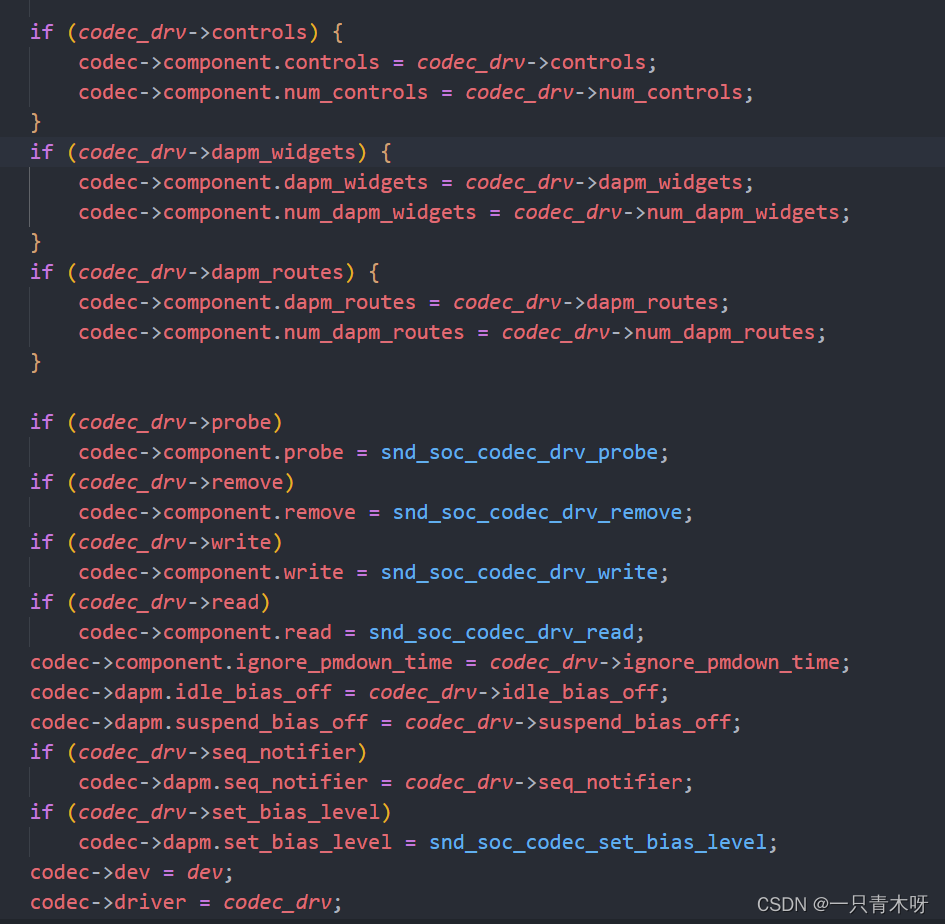
然后初始化它的各个字段,多数字段的值来自上面定义的snd_soc_codec_driver的实例。
随后通过snd_soc_register_dais函数对本Codec的dai进行注册:

把dai_driver添加到component->dai_list中去。
最后把codec驱动添加到codec_list中去,至此完成codec的注册。

五、codec的初始化
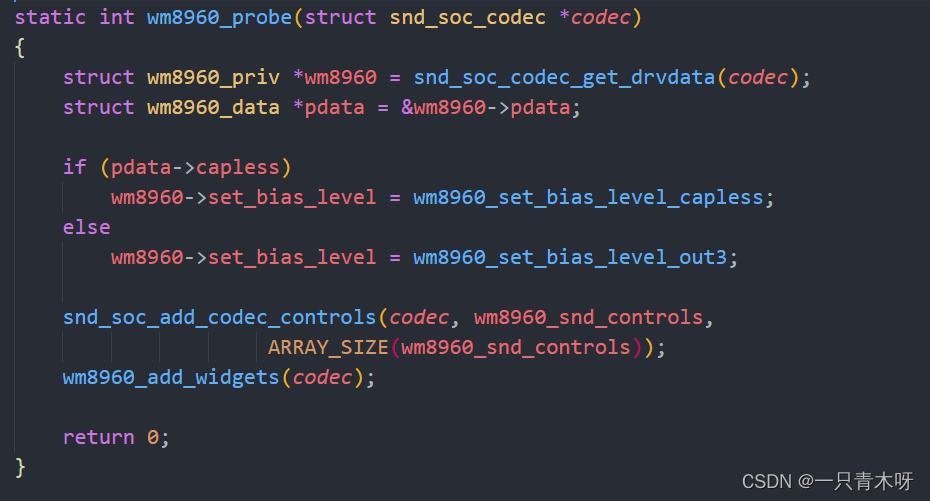
Machine驱动的初始化(请参考alsa-machine驱动部分),codec和 dai的注册,都会调用snd_soc_instantiate_cards()进行一次声卡和codec,dai,platform的匹配绑定过程,这里所说的绑定,正如Machine驱动一文中所描述,就是通过3个全局链表,按名字进行匹配,把匹配的codec,dai和platform实例赋值给声卡每对dai的snd_soc_pcm_runtime变量中。一旦绑定成功,将会使得codec和dai驱动的probe回调被调用,codec的初始化工作就在该回调中完成。对于WM8960,该回调就是wm8960_probe函数:
wm8960_probe实例如下: