前言
前篇确定了技术选型,门户使用Vue前端开发,此篇文章主要记录本人自学Vue以及实操搭建前端框架的过程和遇到的前端知识点和技术瓶颈难题(ps对大佬这都不是难题)。
一、Vue基础学习
从零学习(前提有jquery,js等开发经验)Vue,选择先通过视频学习,跟着老师实际上手操作。
所看视频来自狂神bilibili的视频:【狂神说Java】Vue最新快速上手教程通俗易懂_哔哩哔哩_bilibili
老师讲解比较风趣,到位,从零讲起,学习了Vue的框架,Vue的基础语法v-bind,v-if,v-for及事件click等使用,Vue的双向绑定,Vue组件化开发,Vue异步通信等。
二、开始使用
1.安装Node.js
下载Node.js 下载 | Node.js 中文网
下载后双击安装next到最后即可。
安装后测试是否安装成功
cmd最好使用管理员模式

//显示安装的nodejs版本
node -v

//显示安装的npm版本
npm -v
2.安装淘宝npm
安装国内淘宝的镜像,因为npm相关的资源国外节点可能会失败。
cmd管理员模式

npm install cnpm
3.安装vue-cli
//-g代表全局使用
npm install vue-cli -g

vue list

//npm未安装成功时使用
cnpm install vue-cli -g
4.安装webpack
npm install webpack -g
webpack -v
npm install webpack-cli -g
webpack-cli -v

//打包
webpack
//可实现监听文件发生变化自动打包
webpack--watch
4.创建一个Vue项目
打包方式webpack
cd d:
vue init webpack myvue
//确认项目名称后,后续选择否即可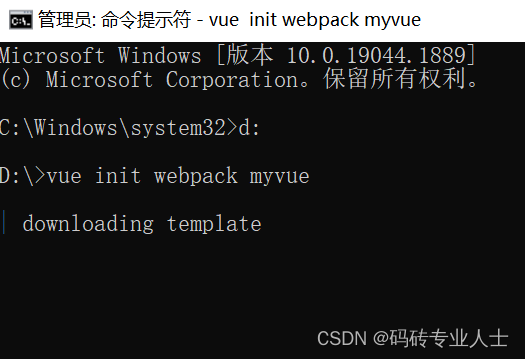
这里可以直接选择安装上Vue-router路由,也可以直接N,进入项目后手动安装。

最后选择自己执行npm install即可。

6.idea打开项目
目录结构应该是这样的

重要的文件有package.json,包含了所有安装的依赖及包的版本;
config里面主要是打包相关的参数,访问地址设置以及后续可能使用到的浏览器跨域问题在config/index.js文件中参数配置。
7.安装依赖环境
使用idea终端操作即可
npm install
//运行
npm run dev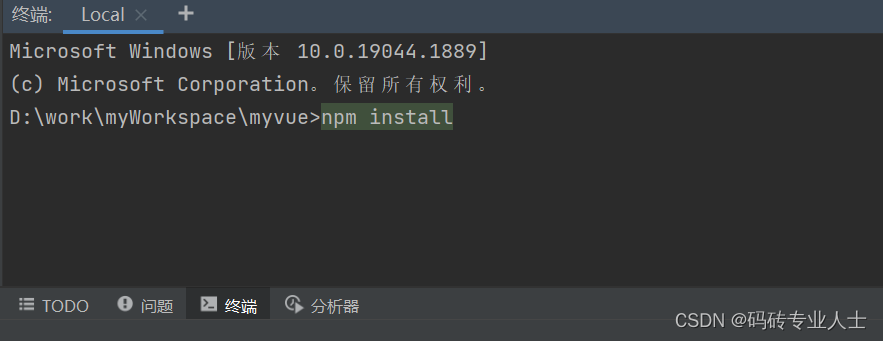
可能遇到的问题:
1.npm不是内部或外部命令。
解决File-> Settings -> Tools -> Terminal -> Shell path中内容由cmd.exe修改为C:\Windows\System32\cmd.exe全路径。
再不行时,桌面idea工具图标右键->属性->兼容性->以管理员身份运行此程序,重新idea。
2.npm install失败,检查是否提示了package.json中组件版本过高或者过低问题;试试cnpm install
8.安装其他
//安装vue-router,--save也可以写--S,指在本项目中安装
npm install vue-router --save

//安装axios
npm install axios

//安装element-ui
npm i element-ui -S

//安装vuex,vuex-persistedstate,后续会介绍使用此组件
cnpm install [email protected] vuex-persistedstate --save

//安装vue-i18n国际化
npm install [email protected]
9.安装后启动
npm run dev三、Vue部分组件使用
1.Vue全局加载
main.js中全局加载组件
//main.js中全局加载

import Vue from 'vue'
import App from '@/App'
import router from '@/router'
import store from '@/store/index';
import ElementUI from 'element-ui';
import 'element-ui/lib/theme-chalk/index.css';
import VueI18n from 'vue-i18n';
import { getMonthFirstDay,getFormatDate,getMonthLastDay,addNotBlankRule,parseTime, resetForm, addDateRange, selectDictLabel, selectDictLabels, handleTree } from "@/utils/yufu/commonUtils";

// 全局方法挂载
Vue.prototype.parseTime = parseTime
Vue.prototype.resetForm = resetForm
Vue.prototype.addDateRange = addDateRange
Vue.prototype.selectDictLabel = selectDictLabel
Vue.prototype.selectDictLabels = selectDictLabels
Vue.prototype.handleTree = handleTree
Vue.prototype.addNotBlankRule = addNotBlankRule
Vue.prototype.getMonthLastDay = getMonthLastDay
Vue.prototype.getFormatDate = getFormatDate
Vue.prototype.getMonthFirstDay = getMonthFirstDay

Vue.prototype.msgSuccess = function (msg) {
  this.$message({ showClose: true, message: msg, type: "success" });
}

Vue.prototype.msgError = function (msg) {
  this.$message({ showClose: true, message: msg, type: "error" });
}

Vue.prototype.msgInfo = function (msg) {
  this.$message.info(msg);
}
Vue.prototype.myConfirm = function(msg,f1,f2){
  this.$confirm(msg,"Warning", {
    confirmButtonText: "Yes",
    cancelButtonText: "No",
    type: "warning"
  }).then(f1).then(f2).catch(()=>{
    //this.msgInfo("已取消");
  });
}
Vue.prototype.myConfirm2 = function(msg,title){
  return this.$confirm(msg,title||"操作信息", {
    confirmButtonText: "确定",
    cancelButtonText: "取消",
    type: "warning"
  }).catch(()=>{
    this.msgInfo("已取消");
  });
}
//设置全局缓存常量
window.cacheData = {}

/*---------挂载全局使用-----------*/
Vue.use(ElementUI);
Vue.use(VueI18n);

const i18n = new VueI18n({
  locale: 'en', //切换语言
  messages: {
    zh: require('@/language/zh.js'),
    en: require('@/language/en.js'),
  },
});

new Vue({
  el: '#app',
  router,
  store,
  i18n,
  render: h => h(App),
  components: { App },
  template: '<App/>'
})
2.vue-router
创建index.js:vue的路由组件,router目录下创建index.js
//项目目录下创建router目录,router目录下创建index.js

//index.js
//导入依赖
import Vue from 'vue'
import Router from 'vue-router'
//页面组件
import TransferAccounts from '@/views/TransferAccounts'

//Vue加载使用
Vue.use(Router);


//解决因版本问题多次点击后前端console报错问题
const originalPush = Router.prototype.push
Router.prototype.push = function push (location) {
  return originalPush.call(this, location).catch(err => err)
}


export default new Router({
  mode: 'history', // 去掉url中的#
  routes: [
    {
        path:'/transferAccounts',//指定路由路径
        name:"transferAccounts",//起个别名,可忽略
        component: TransferAccounts//这个是路由的组件,就是需要跳转到的组件页面
    }
  ]
})
其他地方使用,使用前需要main.js全局挂载,见3.1Vue全局加载
//js代码调用时
this.$router.push('/login')

//template中使用
//import先引入组件,然后template中使用router-link  to路由路径。
//必须加上<router-view></router-view>

<div id="app">
  <h1>Hello App!</h1>
  <p>
    <!-- use the router-link component for navigation. -->
    <!-- specify the link by passing the `to` prop. -->
    <!-- `<router-link>` will render an `<a>` tag with the correct `href` attribute -->
    <router-link to="/">Go to Home</router-link>
    <router-link to="/about">Go to About</router-link>
  </p>
  <!-- route outlet -->
  <!-- component matched by the route will render here -->
  <router-view></router-view>
</div>
3.element-ui组件
文档路径:Element - The world's most popular Vue UI framework
import Vue from 'vue';
import ElementUI from 'element-ui';
import 'element-ui/lib/theme-chalk/index.css';
import App from './App.vue';

Vue.use(ElementUI);

new Vue({
  el: '#app',
  render: h => h(App)
});
4.vue-i18n组件
import Vue from 'vue'
import VueI18n from 'vue-i18n'

Vue.use(VueI18n)

const i18n = new VueI18n({
  locale: 'en', //切换语言
  messages: {
    zh: require('@/language/zh.js'),
    en: require('@/language/en.js'),
  },
});

new Vue({
  el: '#app',
  router,
  store,
  i18n,
  render: h => h(App),
  components: { App },
  template: '<App/>'
})
国际化js文件示例
zh.js
//zh.js

export const lang = {
  swap1: '转账',
  swap2: '充值',

};
en.js
//en.js

export const lang = {
  swap1: 'Transfer',
  swap2: 'Recharge',

};
使用场景示例
1.标签中
<h1>{

    { $t('lang.swap1') }}</h1>

2.script中
this.$message.error(this.$t('lang.swap5')+'');

3.标签上,使用`:`绑定使用
<el-input :placeholder="$t('lang.swap58')" show-word-limit v-model="ruleForm.to"></el-input>

<el-dialog :title="$t('lang.swap74')" :visible.sync="dialogVisible" width="30%">
   <AddBindAcctDialog :visible.sync="dialogVisible" @getList="getList"/>
</el-dialog>
5.vuex组件
Vuex 是一个专为 Vue.js 应用程序开发的状态管理模式 + 库,采用集中式存储管理应用的所有组件的状态,解决多组件数据通信。Vuex 是什么? | Vuex
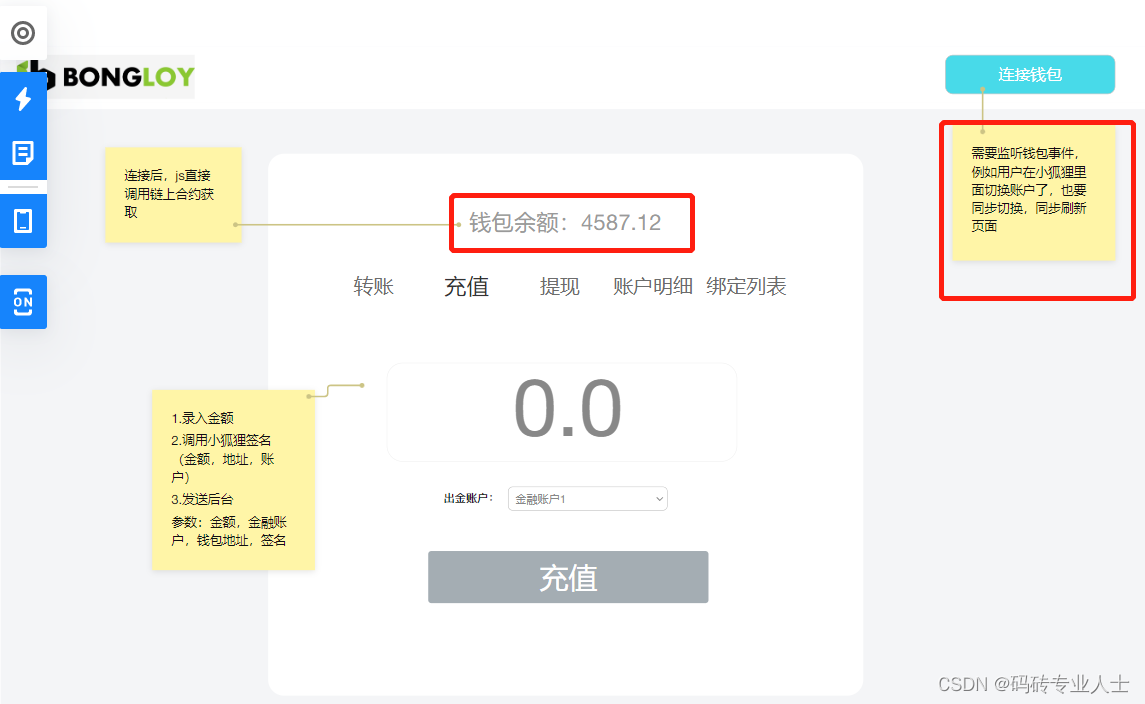
为什么我要使用,我做的这个钱包门户设计小狐狸钱包多个账户地址的切换,实时监听切换并刷新展示页面数据。因为store可以存储数据状态,发生改变时只需管理数据的实际状态就可以达到所有组件中数据的唯一性,实时性。
官方提供的最简单的store
import { createApp } from 'vue'
import { createStore } from 'vuex'

// 创建一个新的 store 实例
const store = createStore({
  state () {
    return {
      count: 0
    }
  },
  mutations: {
    increment (state) {
      state.count++
    }
  }
})

const app = createApp({ /* 根组件 */ })

// 将 store 实例作为插件安装
app.use(store)
模块化
├── index.html
├── main.js
├── api
│   └── ... # 抽取出API请求
├── components
│   ├── App.vue
│   └── ...
└── store
    ├── index.js          # 我们组装模块并导出 store 的地方
    ├── actions.js        # 根级别的 action
    ├── mutations.js      # 根级别的 mutation
    └── modules
        ├── cart.js       # 购物车模块
        └── products.js   # 产品模块
本人项目中的模块化结构
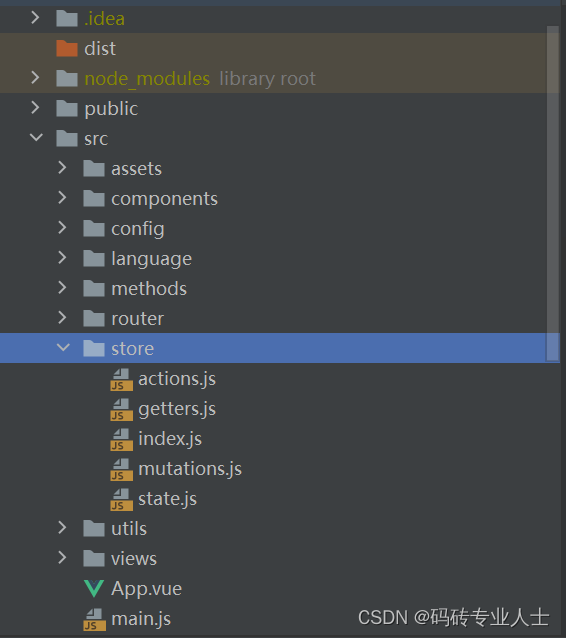
实际代码
index.js
//index.js

import Vue from 'vue';
import Vuex from 'vuex';
import state from '@/store/state';
import * as actions from '@/store/actions';
import * as mutations from '@/store/mutations';
import * as getters from '@/store/getters';
import createPersistedState from 'vuex-persistedstate';

Vue.use(Vuex);

const store = new Vuex.Store({
  state,
  actions,
  mutations,
  getters,
  plugins: [
    createPersistedState({
      paths: ['isConnectWallet', 'account'],
    }),
  ],
});

export default store
state.js
export default {
  //provider对象
  provider: {},
  //合约对象
  contracts: {},
  //签名对象
  signer: {},
  //小狐狸钱包的账户address
  account: '',
  net: 0,
  //gas费,后续可能要用
  gasPrice: 0,
  //钱包余额
  balance: '0.0',
  //作为是否链接登录到小狐狸钱包的标志
  isConnectWallet: false,
  //绑卡列表数据,用于下拉框
  accountList: [],
  //交易计数,用于发生交易时同步刷新交易记录列表
  tradeCounter: 0,
};
mutations.js
  export const saveProviderStore = (state, provider) => {
    state.provider = provider;
  };

  export const saveContractsStore = (state, contracts) => {
    state.contracts = contracts;
  };

  export const  saveAccountStore = (state, account) => {
    state.account = account;
  };

  export const  saveBalanceStore = (state, balance) => {
    state.balance = balance;
  };

  export const  saveNetStore = (state, net) => {
    state.net = net;
  };

  export const  saveGasPriceStore = (state, gasPrice) =>  {
    state.gasPrice = gasPrice;
  };
  export const  saveIsConnectWallet = (state, isConnectWallet) =>  {
    state.isConnectWallet = isConnectWallet;
  };
  export const  saveSigner = (state, signer) =>  {
    state.signer = signer;
  };
  export const  saveAccountList = (state, accountList) =>  {
    state.accountList = accountList;
  };
  export const  saveTradeCounter = (state, tradeCounter) =>  {
    state.tradeCounter = tradeCounter;
  };
getter.js
// 获取最终的状态信息
export const provider = state => state.provider;
export const contracts = state => state.contracts;
export const signer = state => state.signer;
export const account = state => state.account;
export const net = state => state.net;
export const gasPrice = state => state.gasPrice;
export const balance = state => state.balance;
export const isConnectWallet = state => state.isConnectWallet;
export const accountList = state => state.accountList;
export const tradeCounter = state => state.tradeCounter;
action.js
// 触发保存方法
export const SET_PROVIDER = ({ commit }, payload) => {
  commit('saveProviderStore', payload);
};
export const SET_CONTRACTS = ({ commit }, payload) => {
  commit('saveContractsStore', payload);
};
export const SET_ACCOUNT = ({ commit }, payload) => {
  commit('saveAccountStore', payload);
};
export const SET_BALANCE = ({ commit }, payload) => {
  commit('saveBalanceStore', payload);
};
export const SET_NET = ({ commit }, payload) => {
  commit('saveNetStore', payload);
};
export const SET_GAS_PRICE = ({ commit }, payload) => {
  commit('saveGasPriceStore', payload);
};

export const SET_IS_CONNECT_WALLET = ({ commit }, payload) => {
  commit('saveIsConnectWallet', payload);
};

export const SET_SIGNER = ({ commit }, payload) => {
  commit('saveSigner', payload);
};

export const SET_ACCOUNT_LIST = ({ commit }, payload) => {
  commit('saveAccountList', payload);
};
export const SET_TRADE_COUNTER = ({ commit }, payload) => {
  commit('saveTradeCounter', payload);
};


.........其他代码

export const setProvider = ({commit},address) => {
  let web3Provider;
  if (window.ethereum) {
    web3Provider = window.ethereum;

    .....获取web3钱包中的一些熟悉,地址,provider,合约对象等

    //commit('saveAccountStore', address);//另外一种方式
    SET_ACCOUNT({commit},address);
    SET_PROVIDER({commit},provider);
    SET_CONTRACTS({commit},daiContract);
    SET_IS_CONNECT_WALLET({commit},true);
    SET_SIGNER({commit},signer);

  }
};
store的使用
1.action.js中要改变数据状态时

//commit('saveAccountStore', address);//另外一种方式
SET_ACCOUNT({commit},address);

2.组件中,使用语法糖获取值

import {mapState} from "vuex";

export default {
  computed: {
    ...mapState(['account']),
    getAccount() {
      if (this.account) {
        return '0x...' + this.account.substring(this.account.length - 4,                 this.account.length);
      } else {
        return '';
      }
    },
  },
}

3.组件中,不使用语法糖获取值

this.$store.getter.account;

4.组件中使用语法糖调用方法
methods: {
    handleLogin() {
      this.$store.dispatch('connectWallet');
    },
  }

5.组件中改变store数据状态
let balanceStr = '0.0';
this.$store.dispatch('SET_BALANCE', balanceStr);
效果
6.ethers.js
1.install安装
2.js文件中引入即可使用

import * as ethers from 'ethers';

获取钱包余额

const balance = await daiContract.balanceOf(address);
let balanceStr = ethers.utils.formatUnits(balance, 18);
总结
主要学习使用Vue的基础语法,然后跟随老师实际操作,最后自己搭建Vue前端的整体框架。安装依赖组件,并学习各个组件的用法。接下来文章介绍Vue框架使用中遇到的问题及解决方法。打脸待续