SpringBoot开发之SpringBoot入门
- 一、Spring Boot概述
- 二、第一个Spring Boot应用
-
- 1、创建Spring Boot项目--方法一
- 2、创建Spring Boot项目--方法二
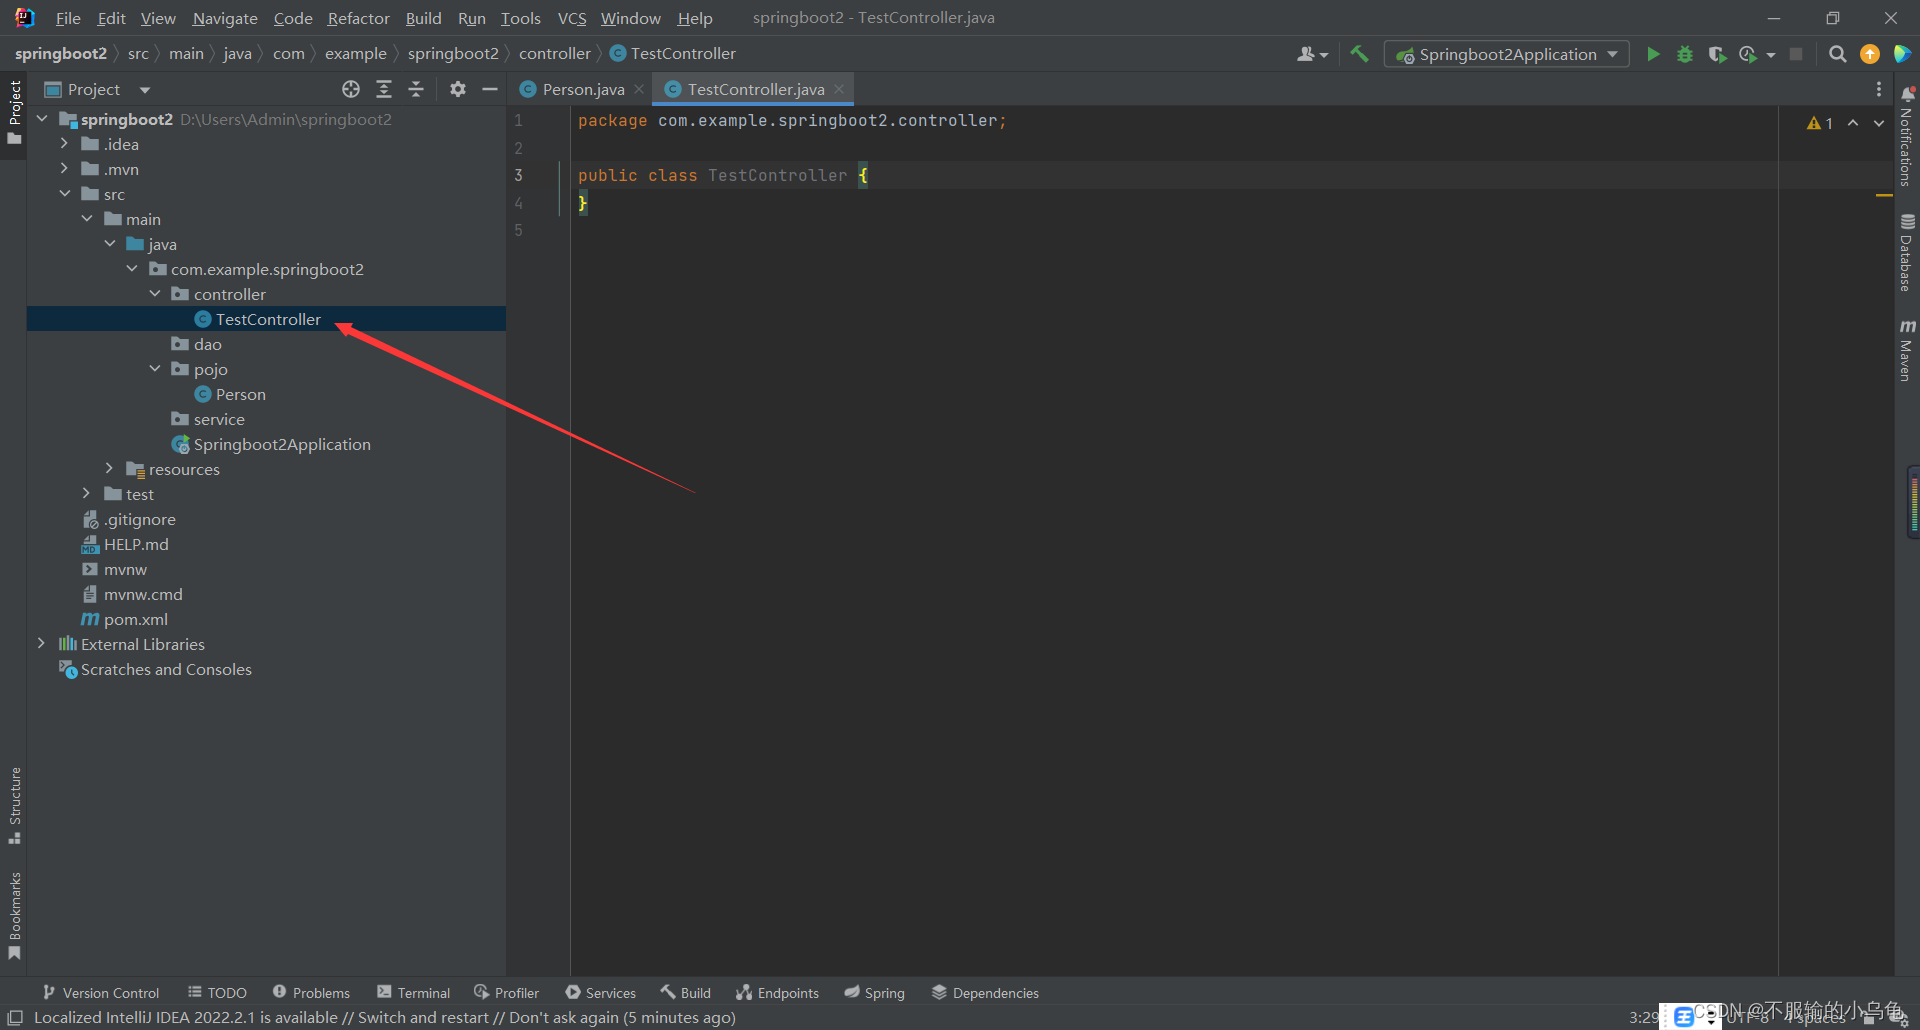
- 3、新建controller、dao、pojo、service文件夹,并在pojo文件夹下新建Person实体类
- 4、在controller文件夹下新建TestController类
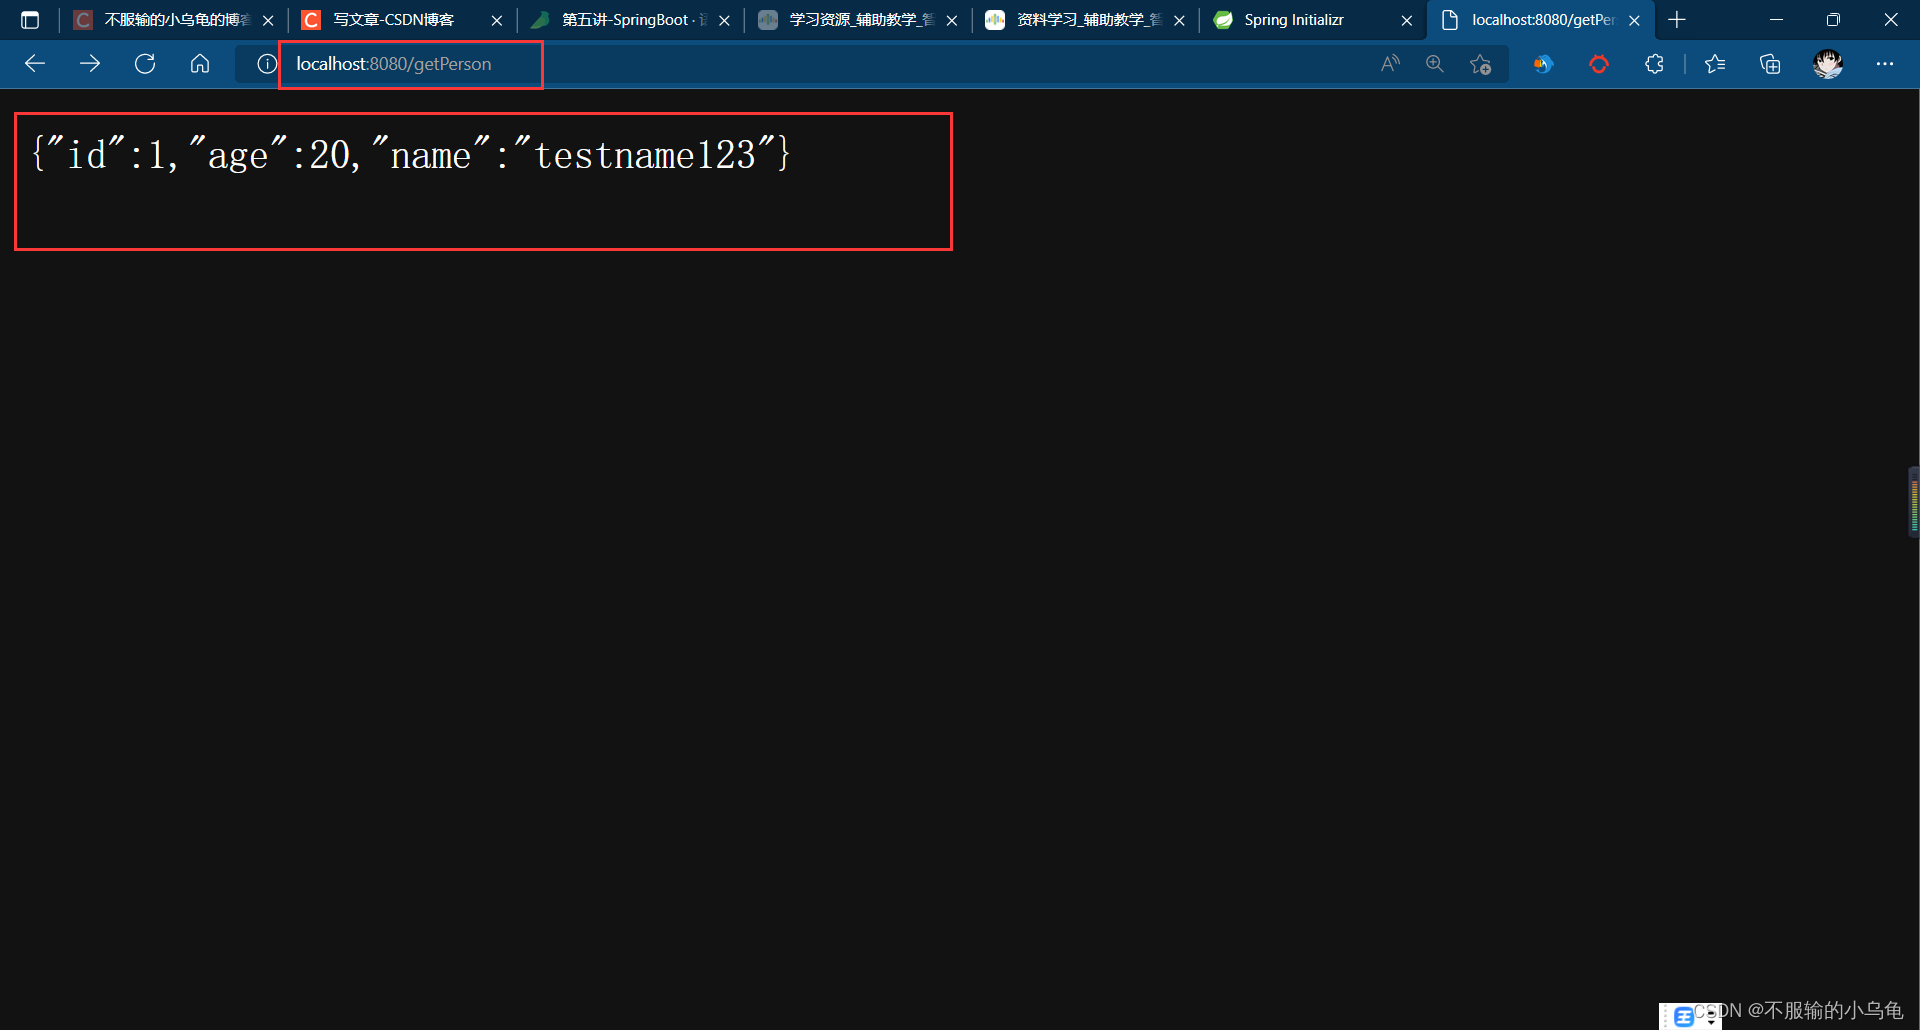
- 5、点击慢方法运行,也可以点击右上角绿色三角形图标直接运行,而不再需要使用Tomcat运行;Spring Boot默认使用8080端口号,所以我们在浏览器输入localhost:8080/getPerson就可以访问到数据啦
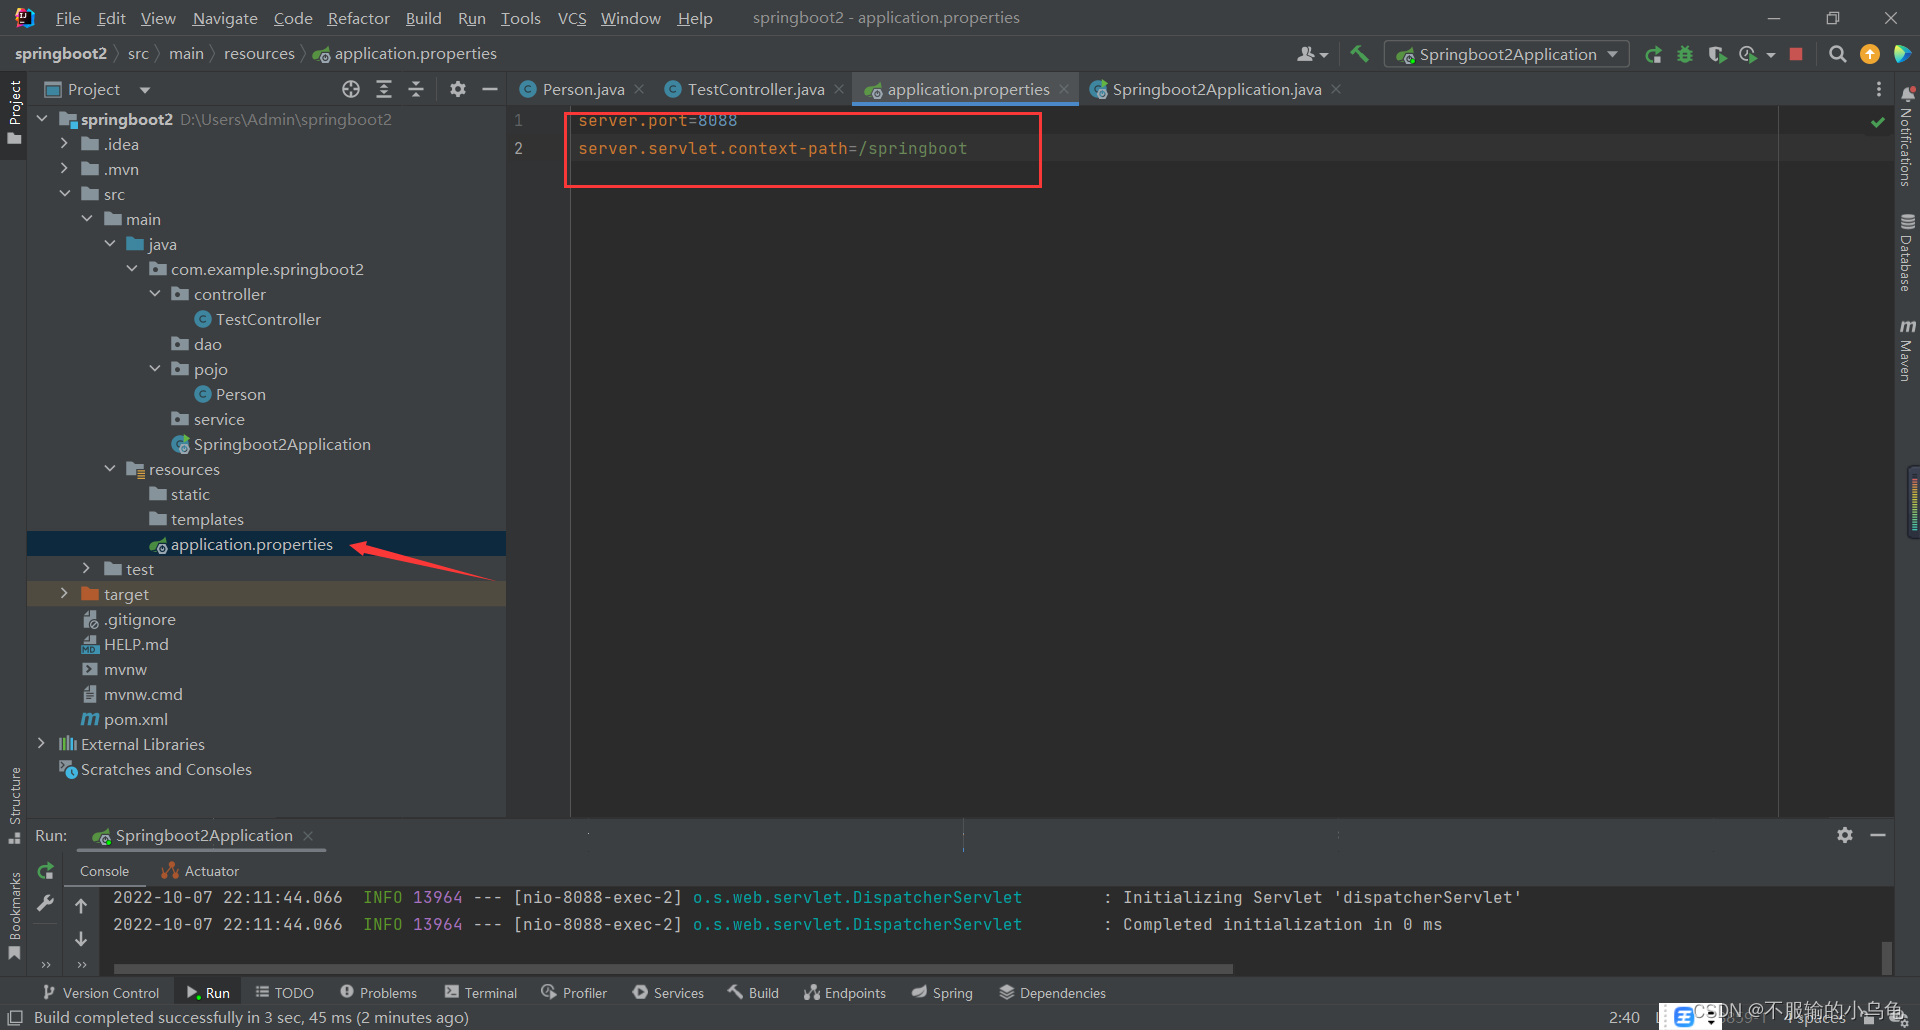
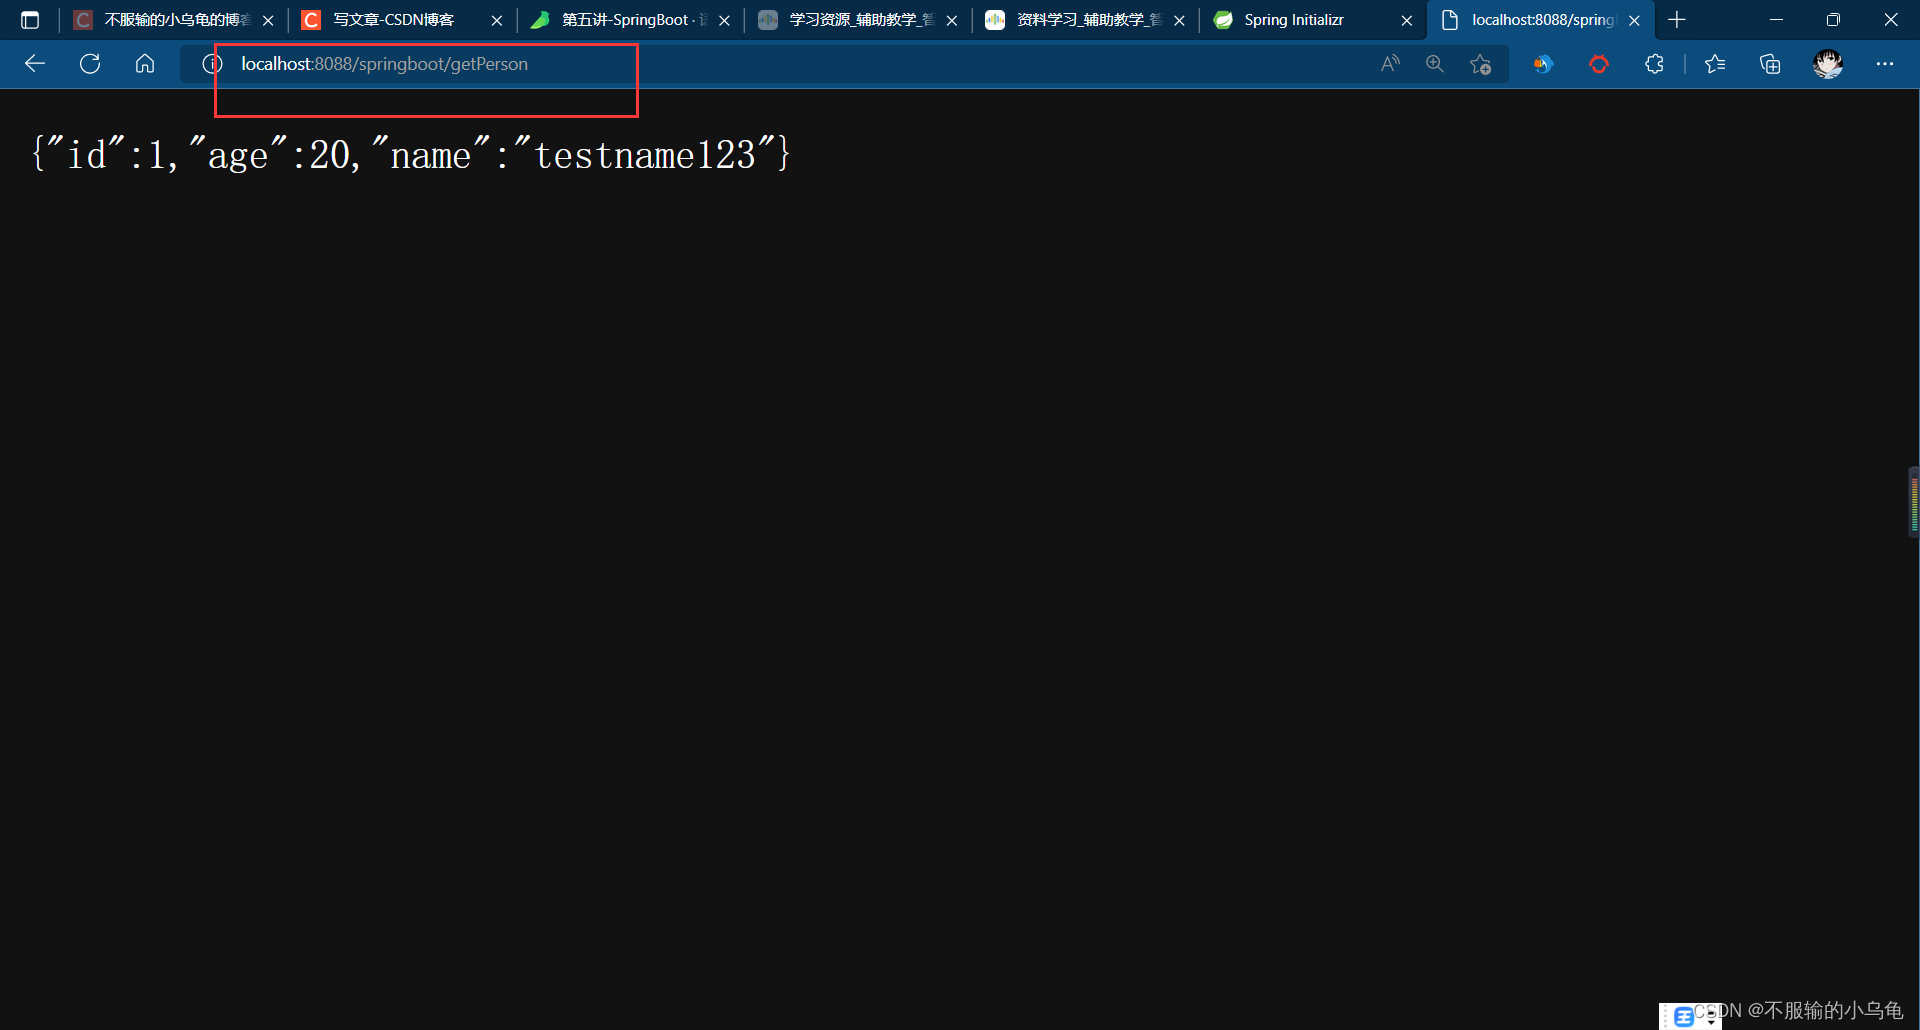
- 6、我们也可以修改端口号以及一些配置,所有的配置修改都在application.properties文件中进行修改,比如可以将端口号修改为8088,并修改访问路径为localhost:8088/springboot/getPerson
- 三、热更新
-
- 1、点击File,点击Settings,找到Compiler,勾选Build project automatically,点击Apply,点击OK
- 2、点击右上角,选择Edit Configurations
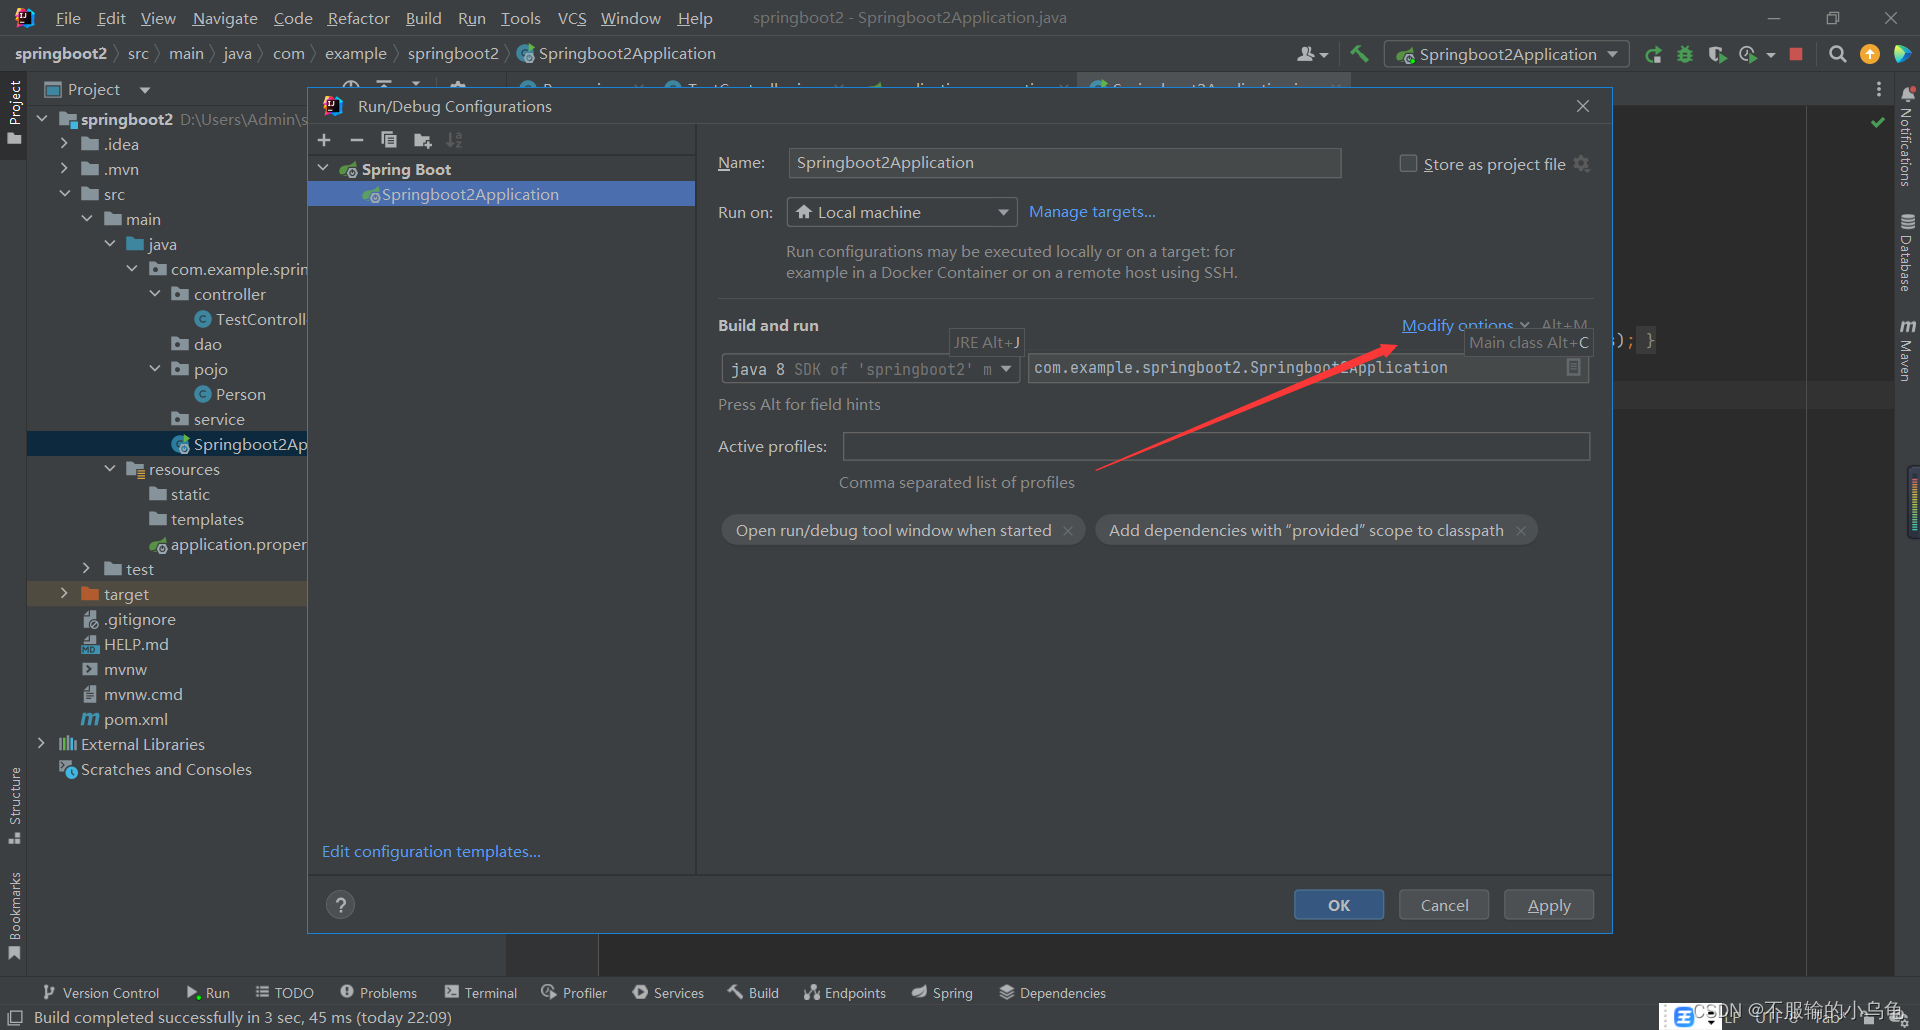
- 3、点击Modify options
- 4、点击On 'Update' action,选择Update classes and resources
- 5、点击Modify options,点击On frame deactivation,选择Update classes and resources
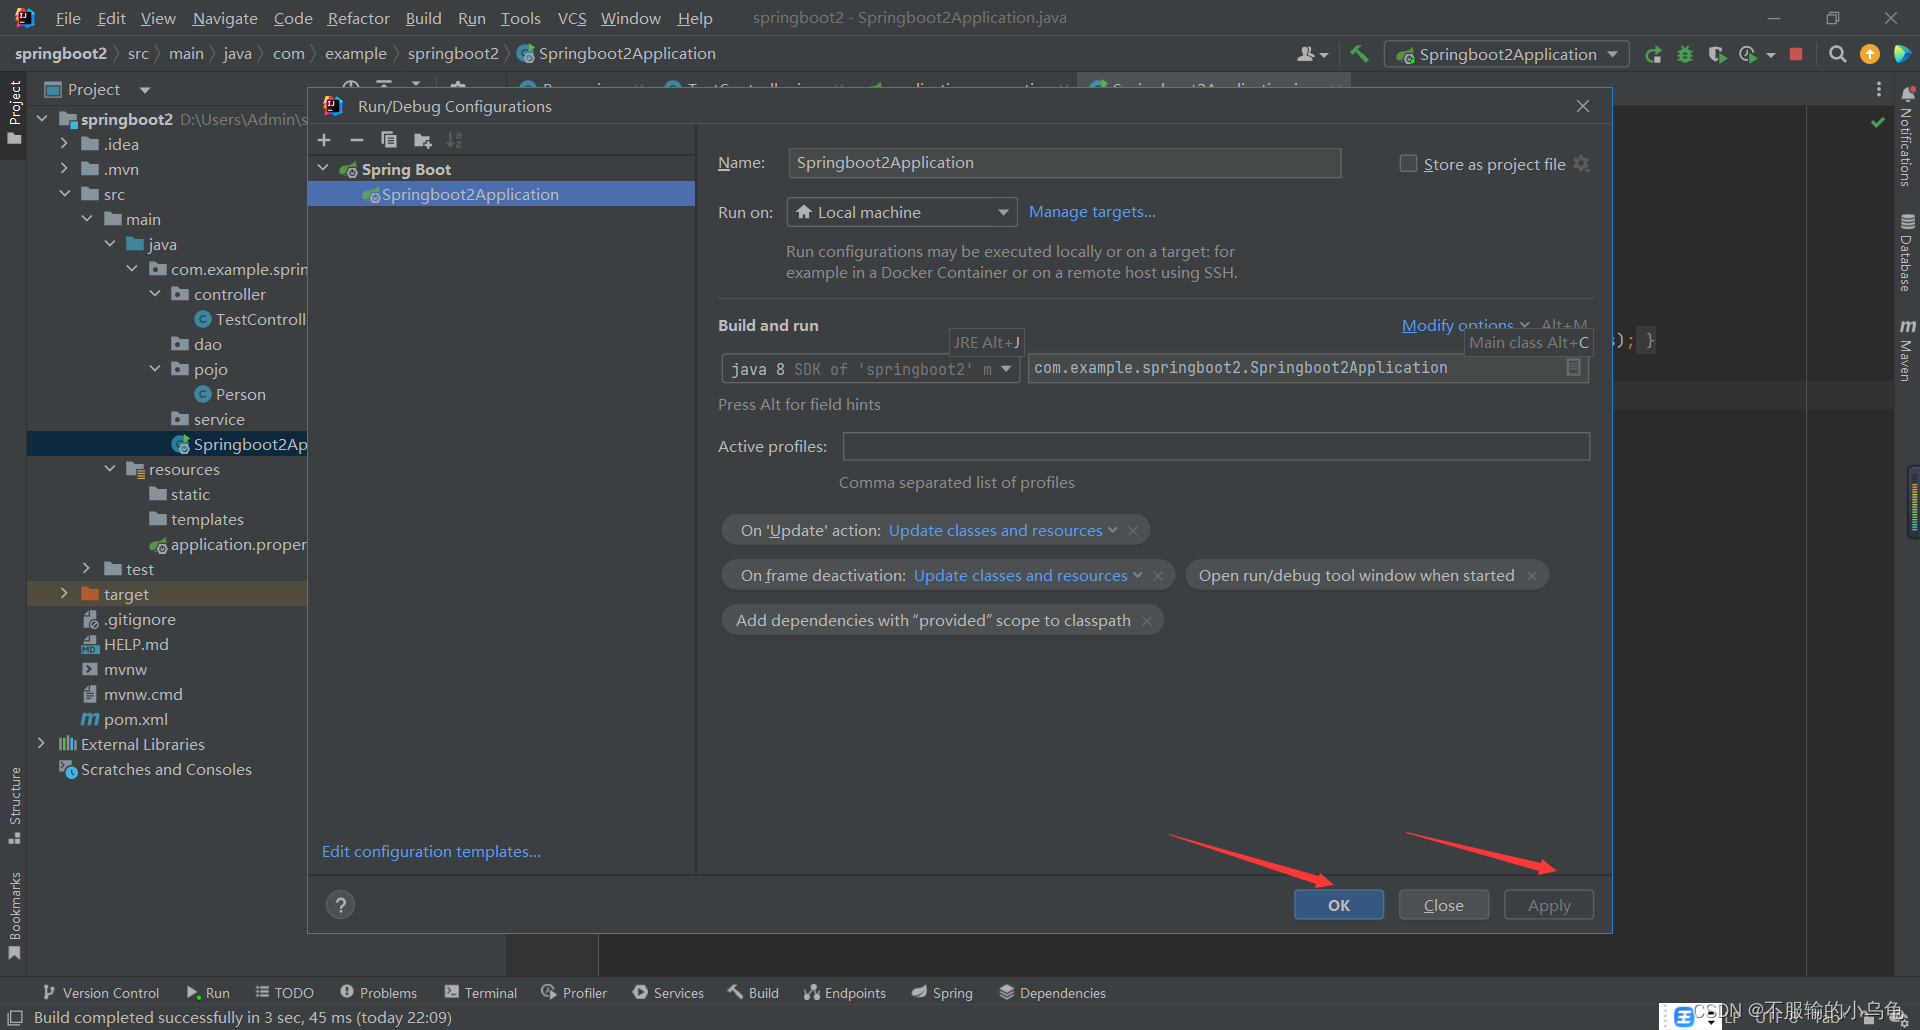
- 6、点击Apply,然后点击OK,然后重启项目
- 7、现在我们测试一下效果,在java文件中修改代码,然后不需要重启项目,而在浏览器直接刷新页面会跟着变化,这就是热更新的好处
- 四、文件访问
- 五、用转发的方式进行图片、视频及音频访问
- 六、用转发的方式进行jsp访问
- 七、用转发的方式进行文本访问
- 八、用转发的方式进行HTML文件访问
- 九、thymeleaf
- 十、列表标签
- 十一、链接表达式
- 十二、表单请求
- 十三、统一异常拦截
- 十四、资源下载
从前面的学习可知,Spring框架非常优秀,但问题在于"配置过多",造成开发效率低、部署流程复杂以及集成难度大等问题。为解决上述问题,Spring Boot应运而生。
一、Spring Boot概述
1、什么是Spring Boot
Spring Boot是由Pivotal团队提供的全新框架,其设计目的是用来简化新Spring应用的初始搭建以及开发过程。该框架使用了特定的方式来进行配置,从而使开发人员不再需要定义样板化的配置。通过这种方式,Spring Boot致力于在蓬勃发展的快速应用开发领域(rapid application development)成为领导者。
SpringBoot框架中还有两个非常重要的策略:开箱即用和约定优于配置。开箱即用,Outofbox,是指在开发过程中,通过在MAVEN项目的pom文件中添加相关依赖包,然后使用对应注解来代替繁琐的XML配置文件以管理对象的生命周期。这个特点使得开发人员摆脱了复杂的配置工作以及依赖的管理工作,更加专注于业务逻辑。约定优于配置,Convention over configuration,是一种由SpringBoot本身来配置目标结构,由开发者在结构中添加信息的软件设计范式。这一特点虽降低了部分灵活性,增加了BUG定位的复杂性,但减少了开发人员需要做出决定的数量,同时减少了大量的XML配置,并且可以将代码编译、测试和打包等工作自动化。
SpringBoot应用系统开发模板的基本架构设计从前端到后台进行说明:前端常使用模板引擎,主要有FreeMarker和Thymeleaf,它们都是用Java语言编写的,渲染模板并输出相应文本,使得界面的设计与应用的逻辑分离,同时前端开发还会使用到Bootstrap、AngularJS、JQuery等;在浏览器的数据传输格式上采用Json,非xml,同时提供RESTfulAPI;SpringMVC框架用于数据到达服务器后处理请求;到数据访问层主要有Hibernate、MyBatis、JPA等持久层框架;数据库常用MySQL;开发工具推荐IntelliJIDEA。
2、Spring Boot的优点
SpringBoot基于Spring4.0设计,不仅继承了Spring框架原有的优秀特性,而且还通过简化配置来进一步简化了Spring应用的整个搭建和开发过程。另外SpringBoot通过集成大量的框架使得依赖包的版本冲突,以及引用的不稳定性等问题得到了很好的解决。
SpringBoot所具备的特征有:
1、可以创建独立的Spring应用程序,并且基于其Maven或Gradle插件,可以创建可执行的JARs和WARs;
2、内嵌Tomcat或Jetty等Servlet容器;
3、提供自动配置的“starter”项目对象模型(POMS)以简化Maven配置;
4、尽可能自动配置Spring容器;
5、提供准备好的特性,如指标、健康检查和外部化配置;
6、绝对没有代码生成,不需要XML配置。
二、第一个Spring Boot应用
1、创建Spring Boot项目–方法一
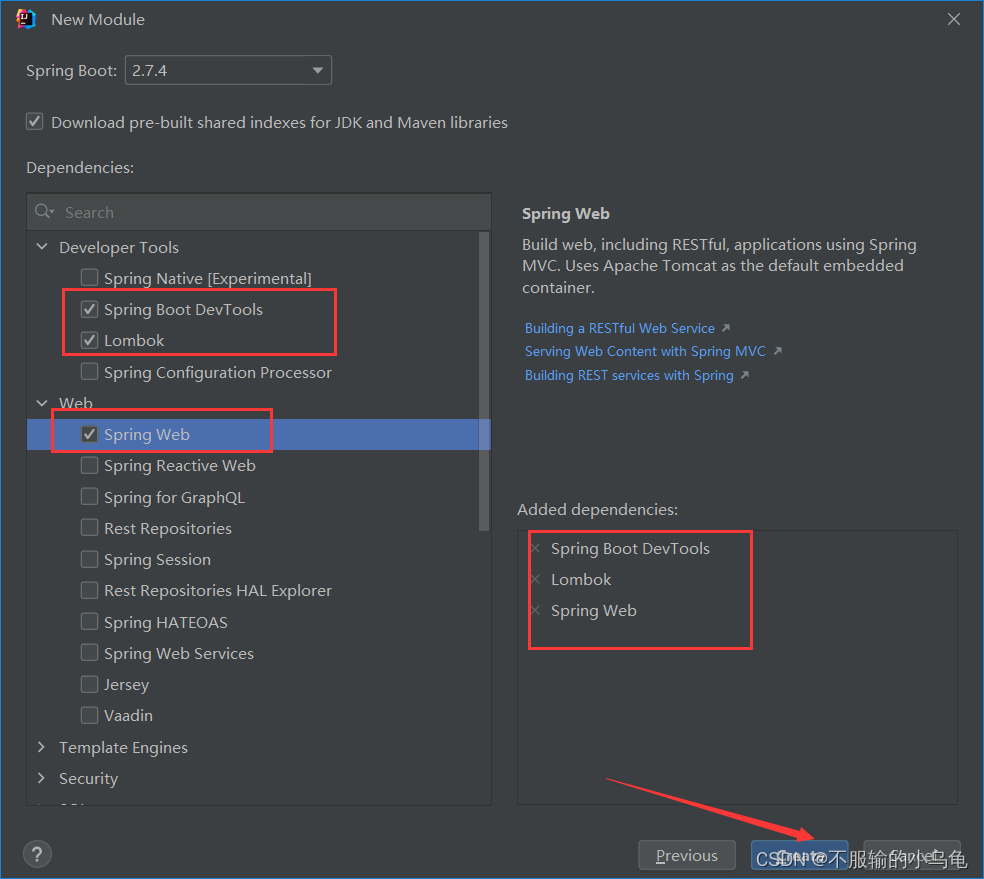
(1)点击File,点击new,点击Module,选择Spring Initializr

(2)填写名称,选择存放路径,Language为Java,Type为Maven,Java选择8,然后点击Next
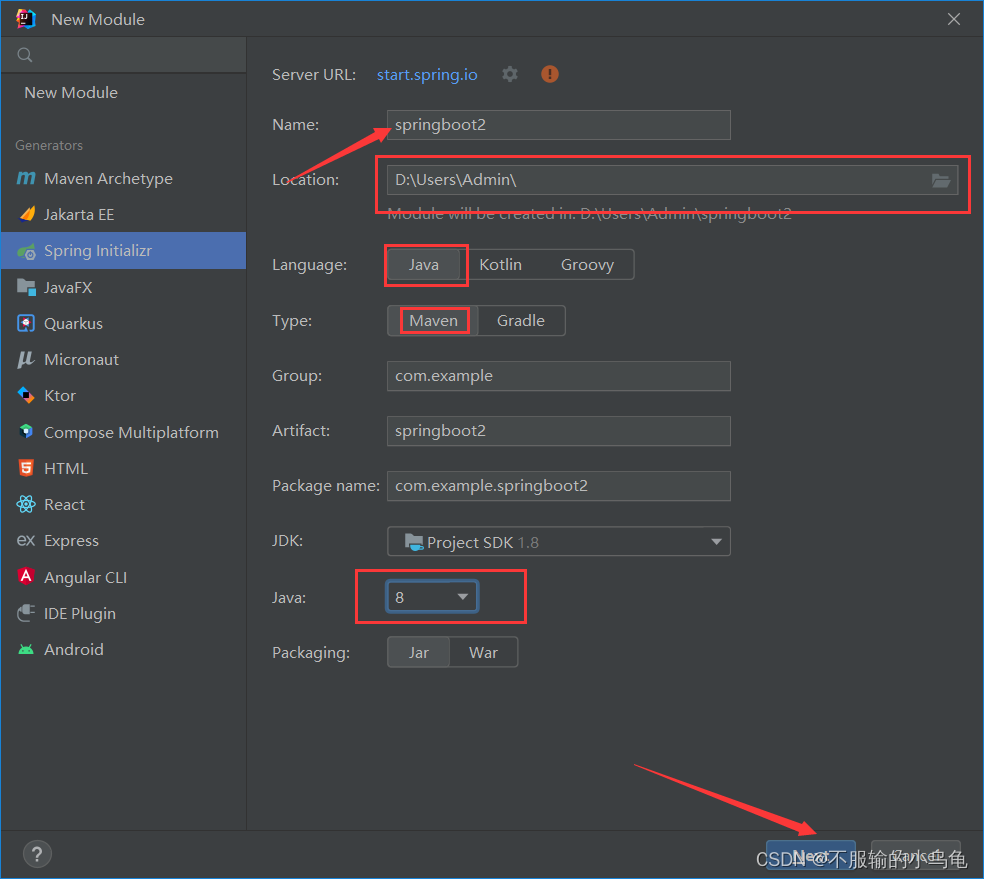
(3)选择Spring Boot DevTools、Lombok和Spring Web,大家也可以选择其他的,今天的学习只需要这三个即可,然后点击Create
2、创建Spring Boot项目–方法二
(1)我们可以直接去Spring官网下载Spring Boot初始化包
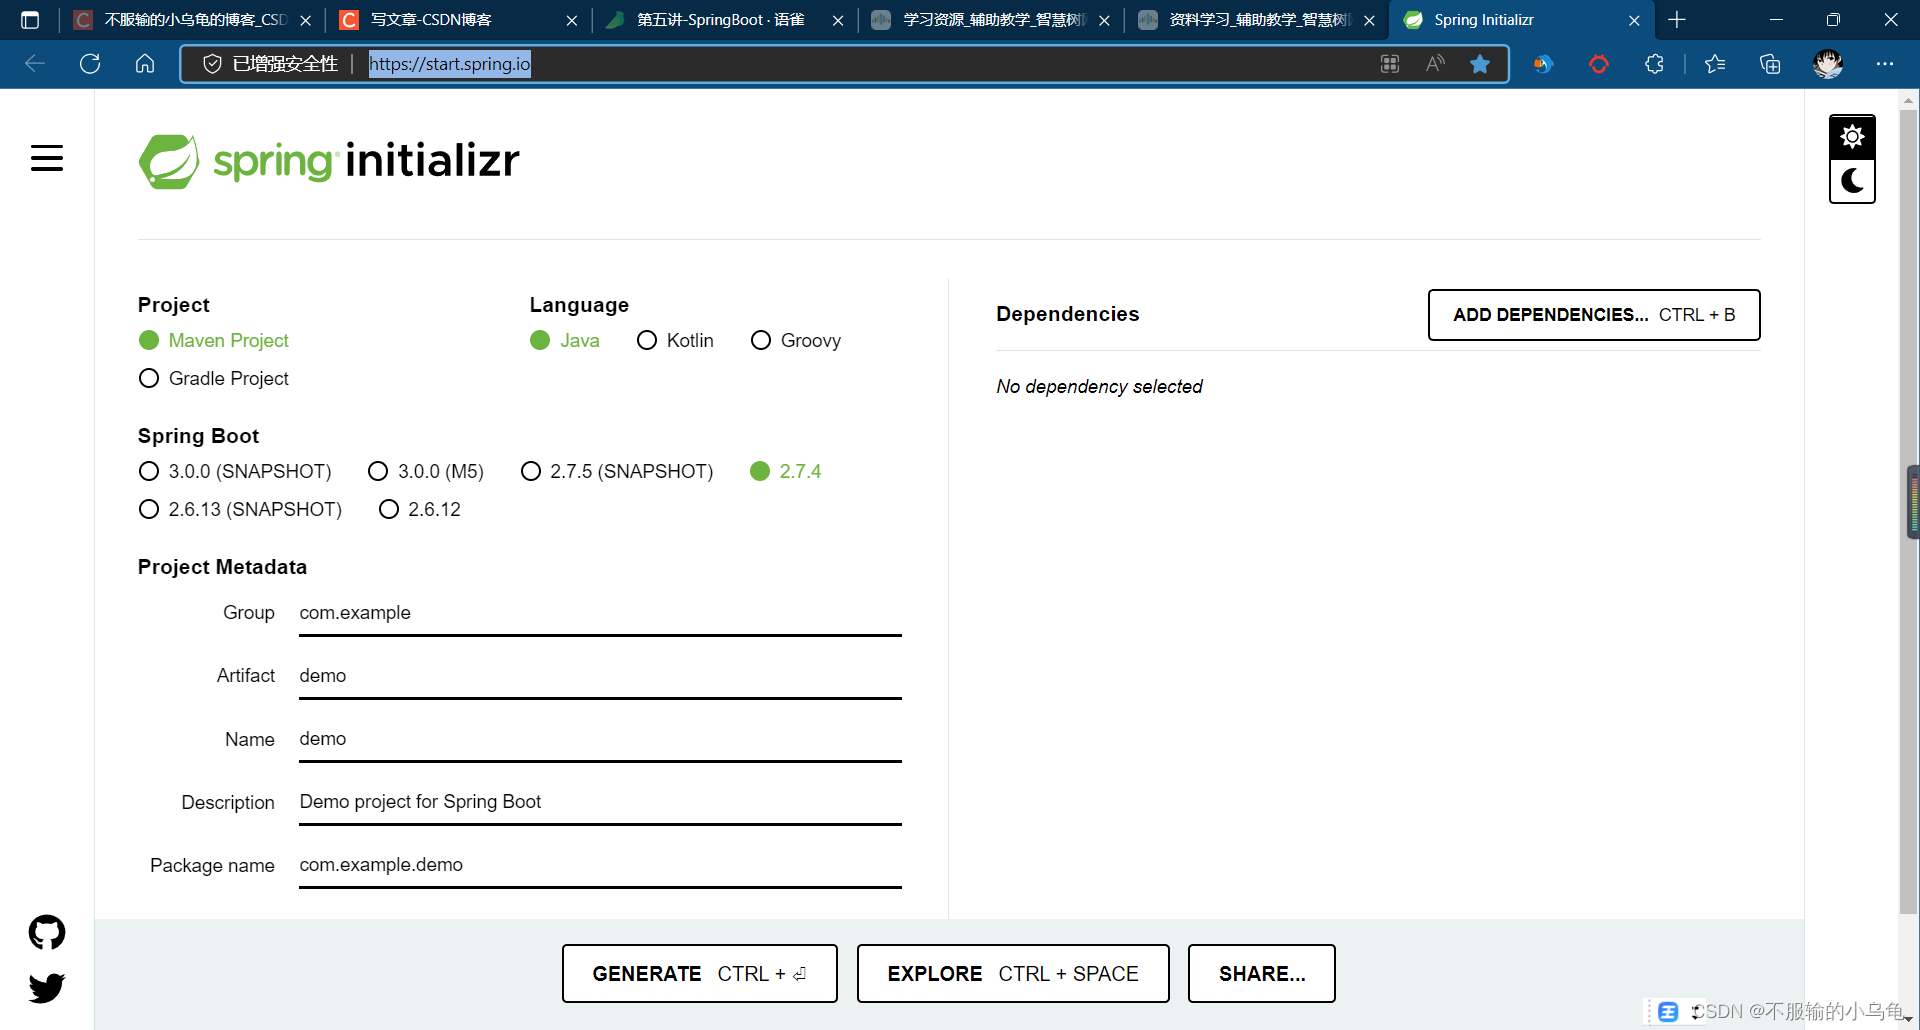
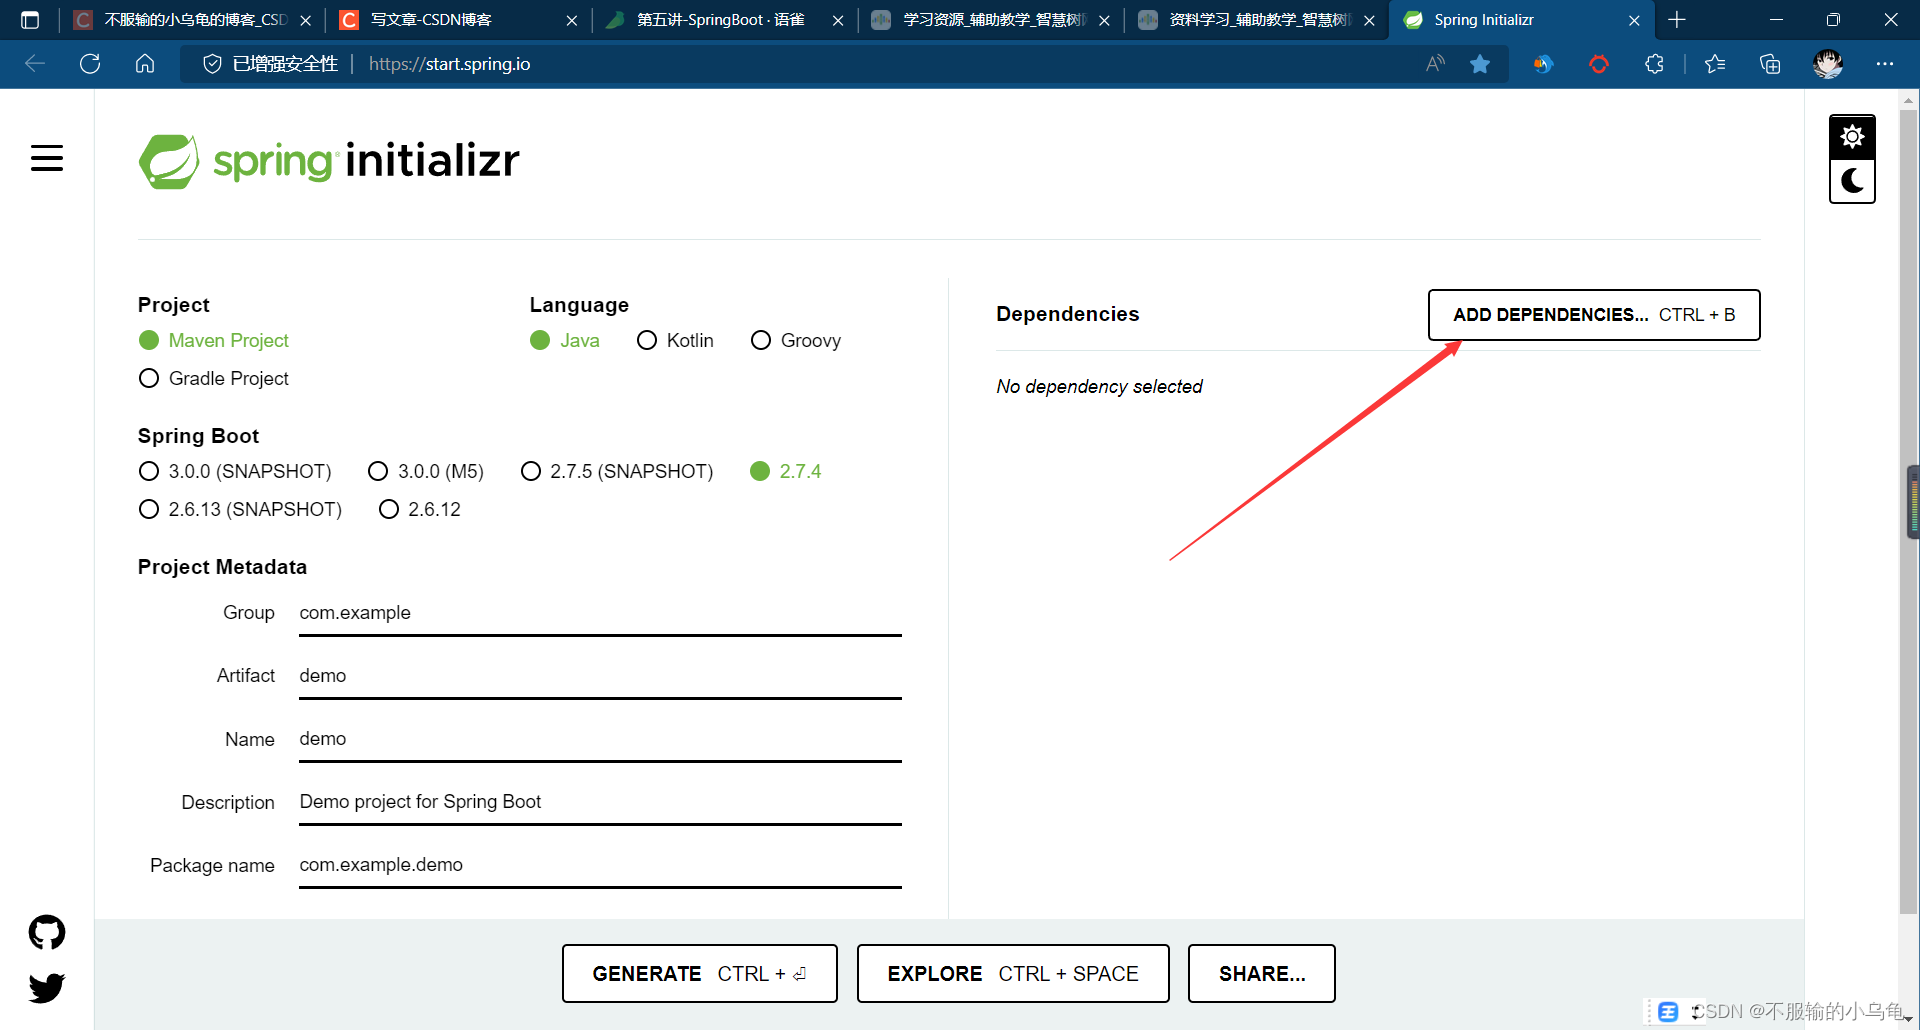
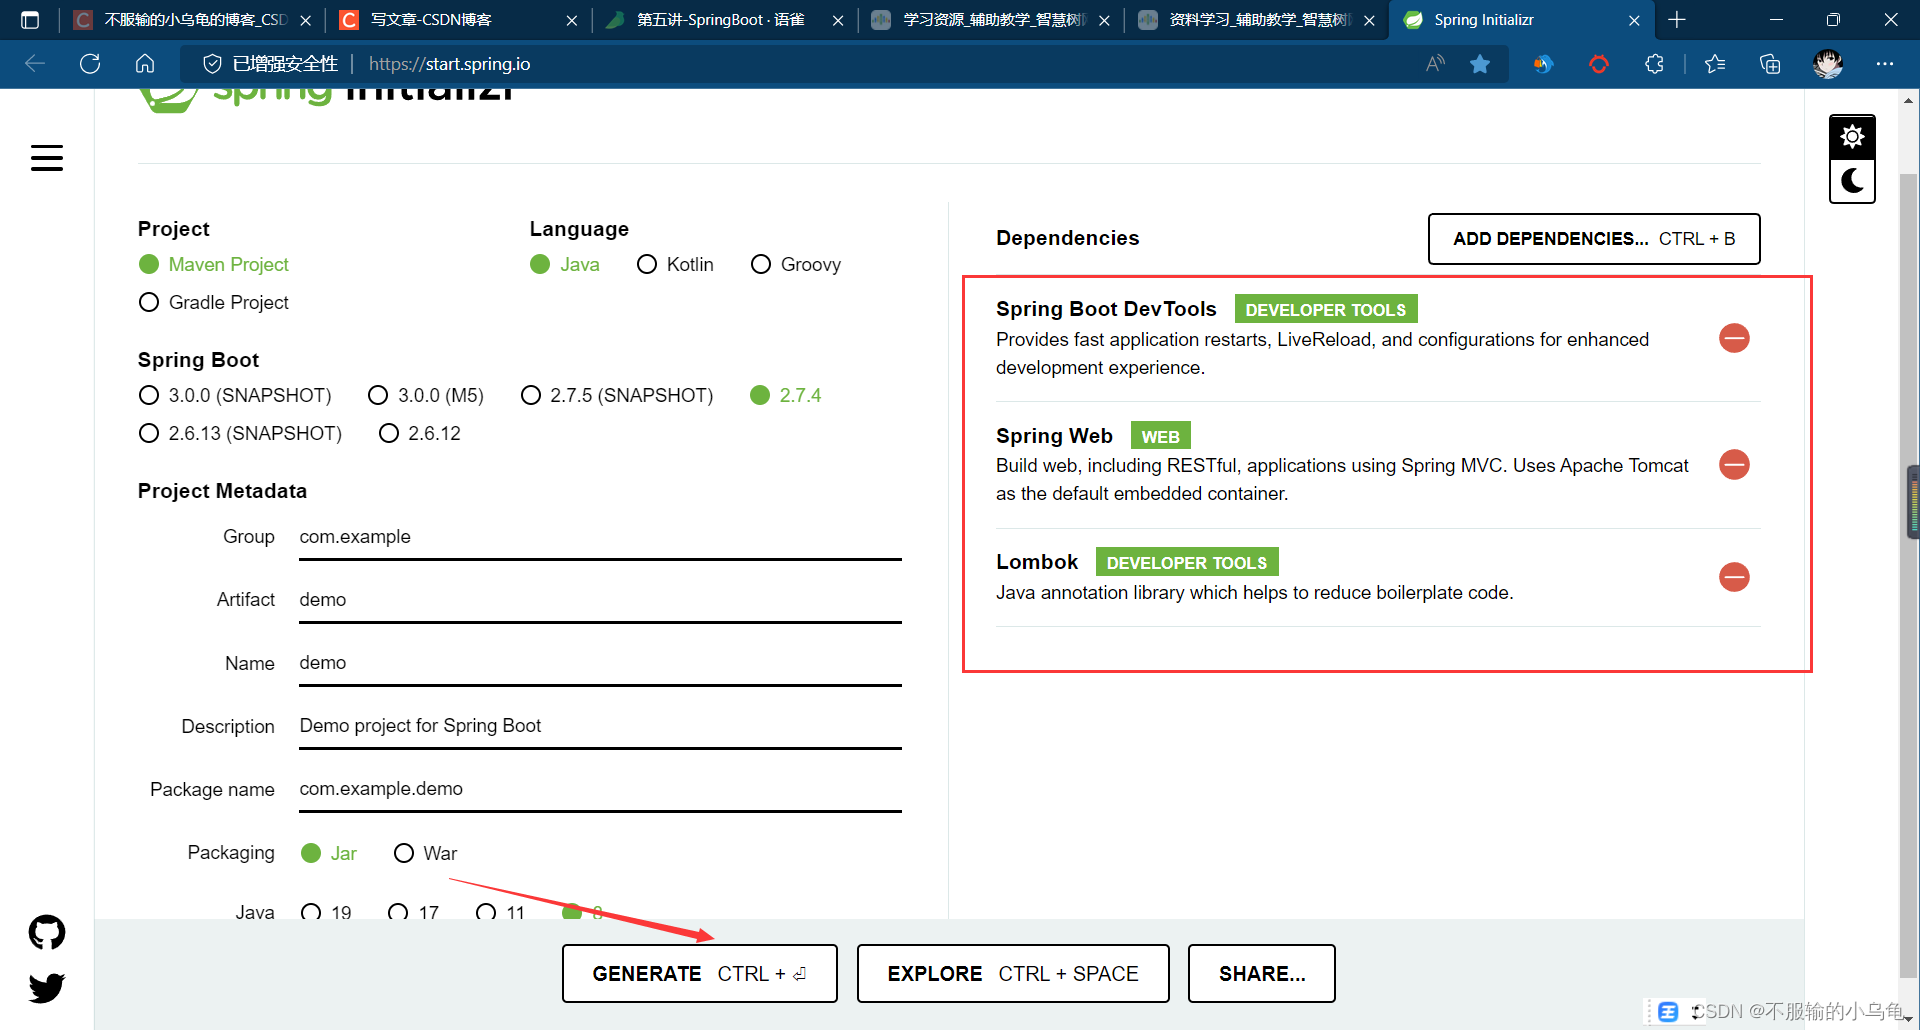
(2)Project选择Maven,Language选择Java,Spring Boot版本选择2.7.4,填写包名、文件名,Packaging选择Jar,Java选择8
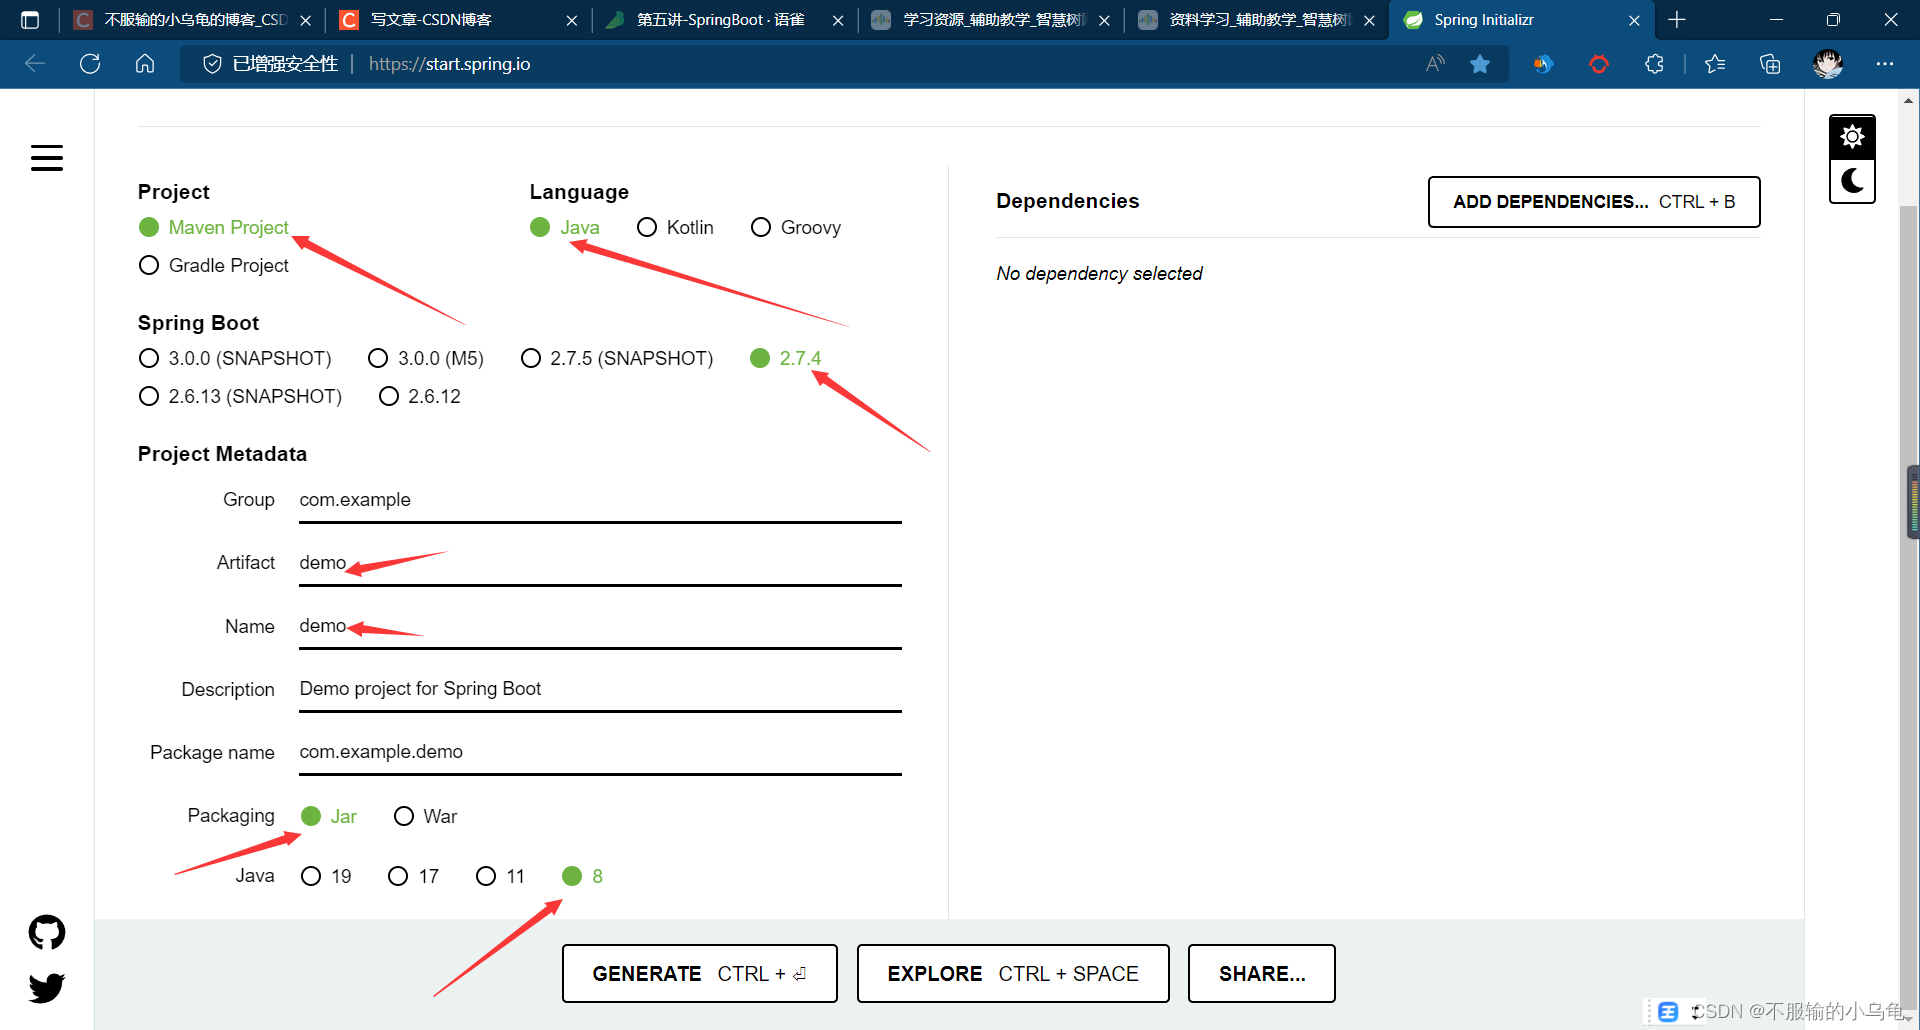
(3)点击右边ADD DEPENDENCIES,选择Spring Boot DevTools、Lombok和Spring Web,点击GENERATE创建
3、新建controller、dao、pojo、service文件夹,并在pojo文件夹下新建Person实体类

package com.example.springboot2.pojo;

import lombok.Data;
//Data自动生成set+get+toString
@Data
public class Person {


    private int id;
    private int age;
    private String name;

}
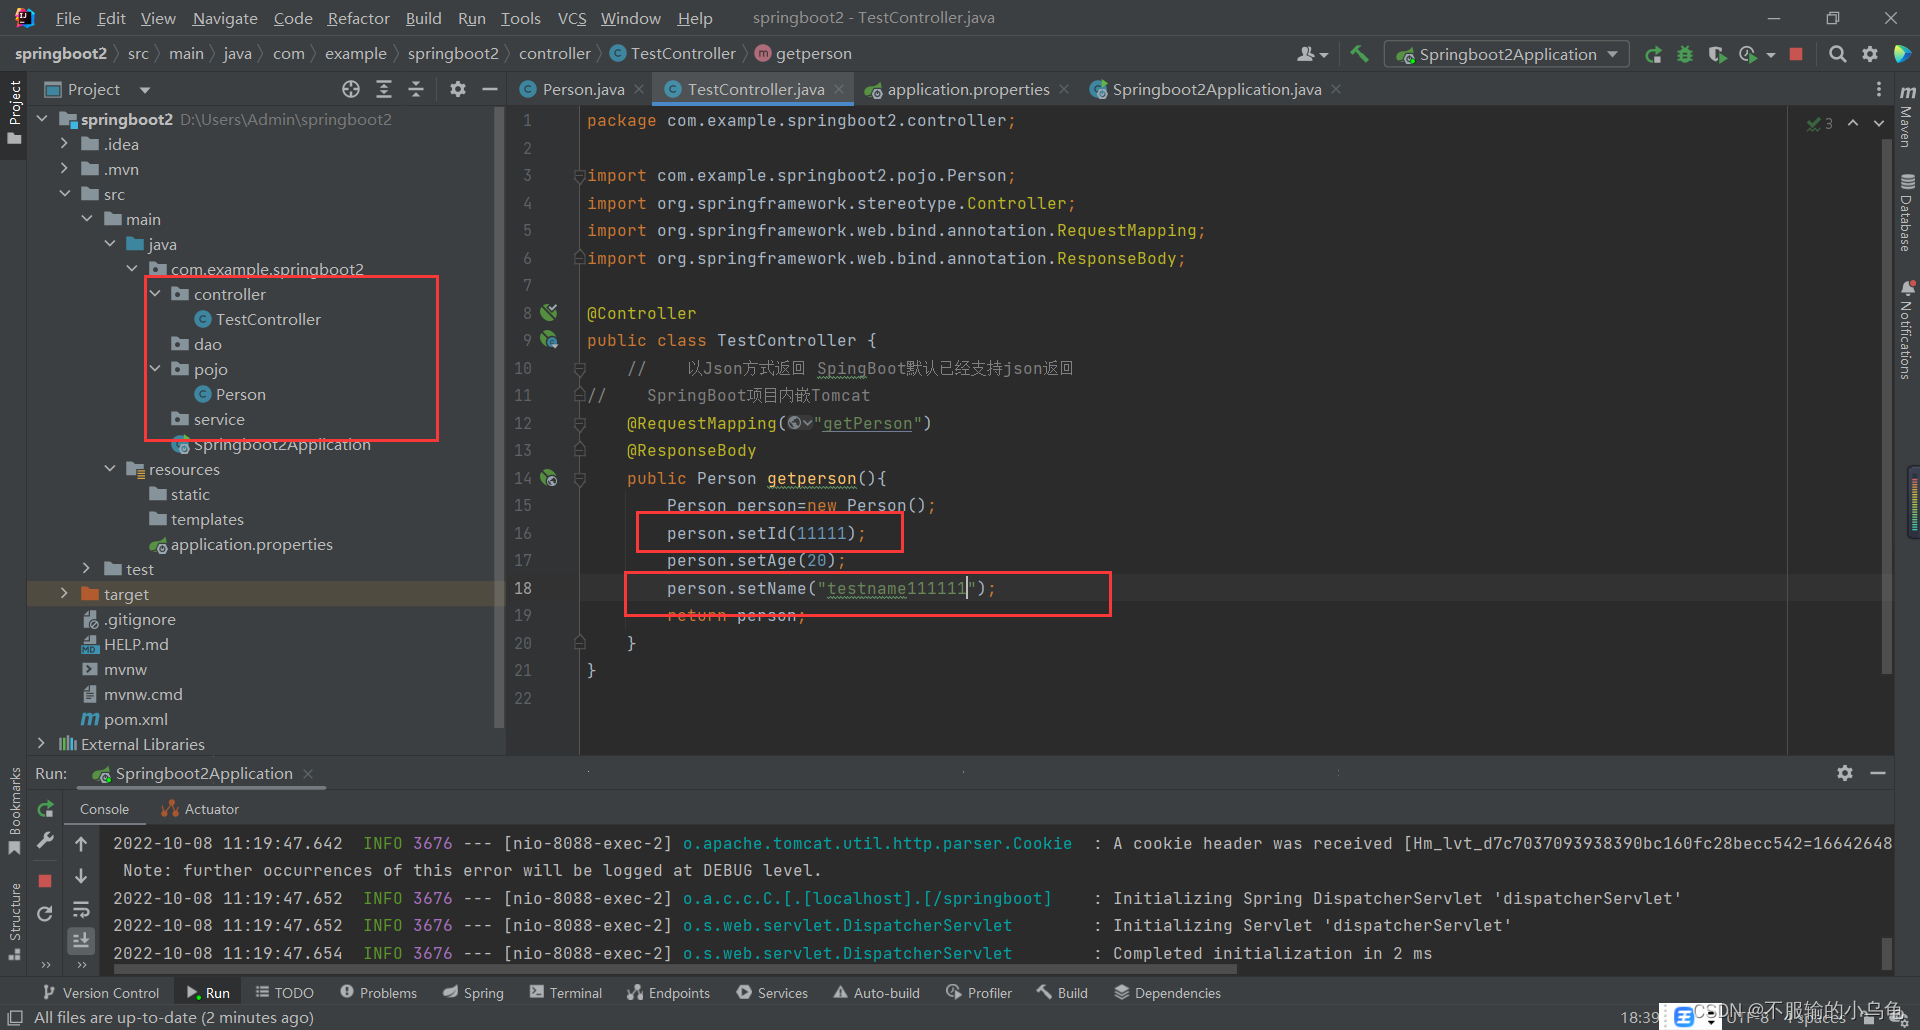
4、在controller文件夹下新建TestController类
package com.example.springboot2.controller;

import com.example.springboot2.pojo.Person;
import org.springframework.stereotype.Controller;
import org.springframework.web.bind.annotation.RequestMapping;
import org.springframework.web.bind.annotation.ResponseBody;

@Controller
public class TestController {


    //    以Json方式返回 SpingBoot默认已经支持json返回
    //    SpringBoot项目内嵌Tomcat
    @RequestMapping("getPerson")
    @ResponseBody
    public Person getperson(){


        Person person=new Person();
        person.setId(1);
        person.setAge(20);
        person.setName("testname123");
        return person;
    }
}
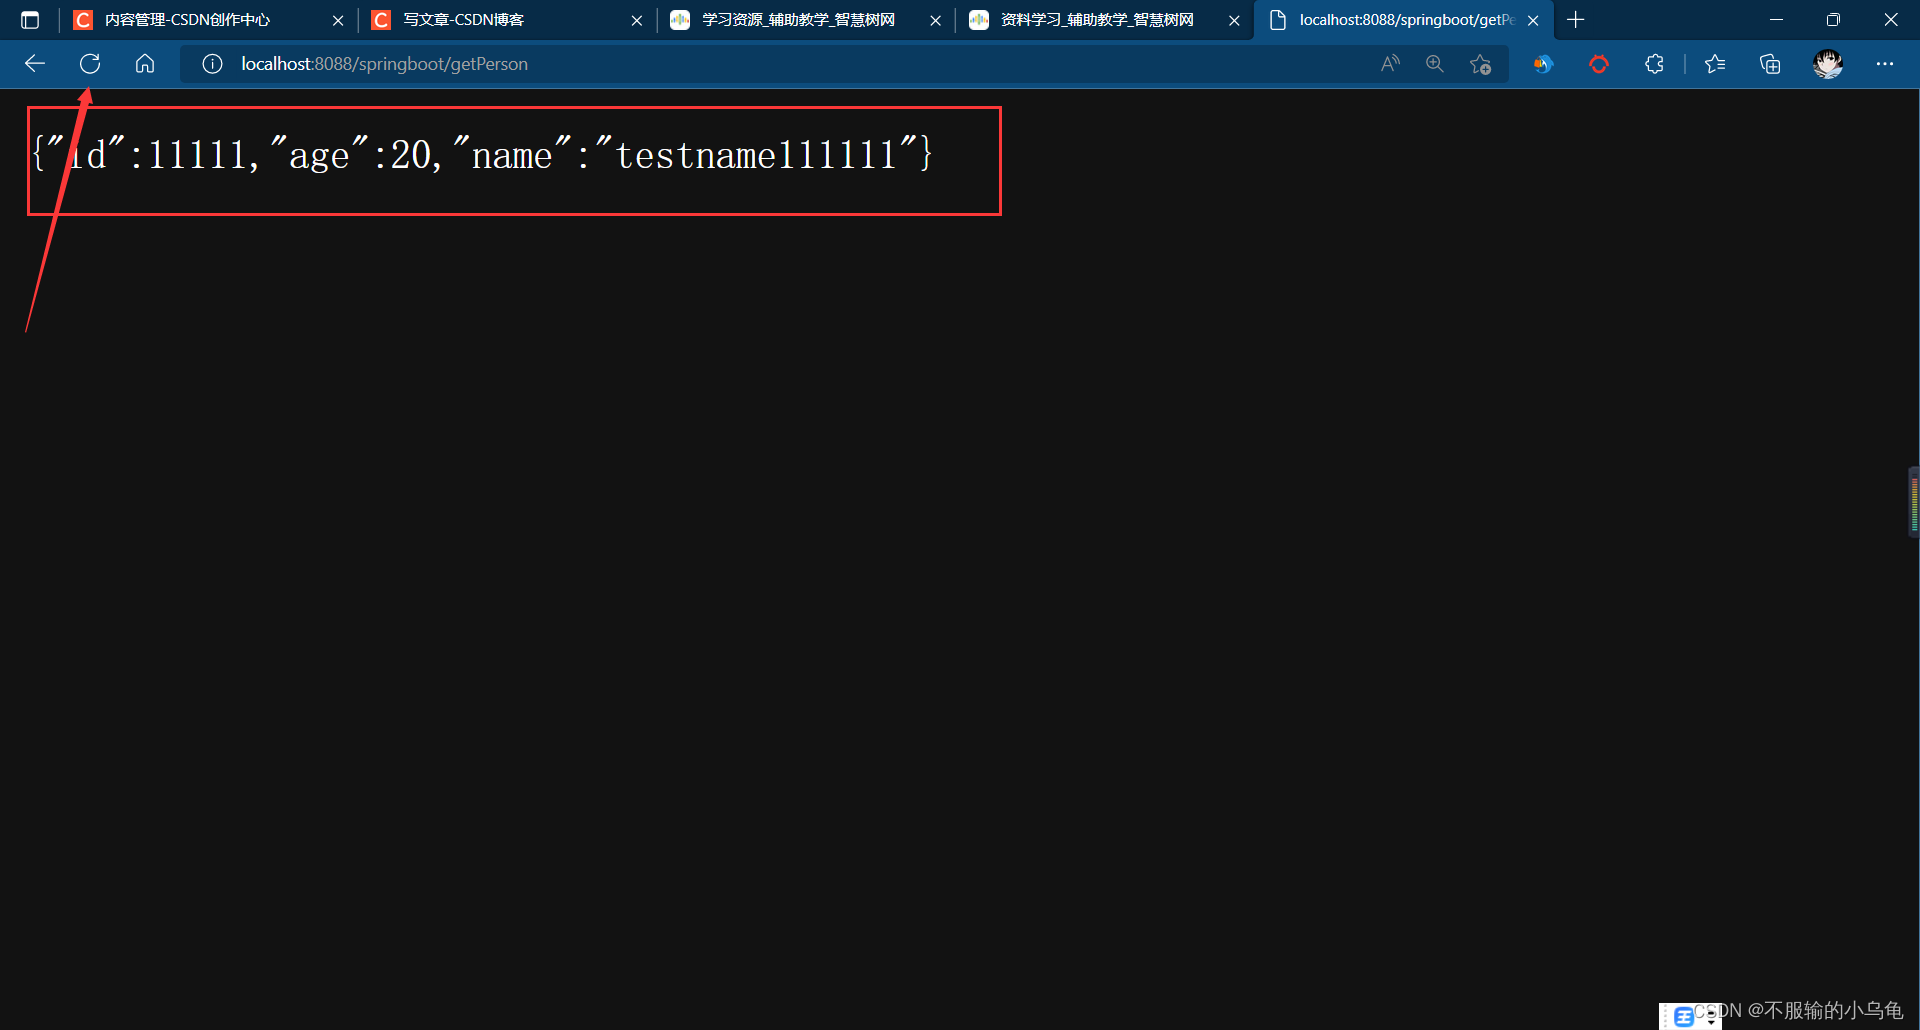
5、点击慢方法运行,也可以点击右上角绿色三角形图标直接运行,而不再需要使用Tomcat运行;Spring Boot默认使用8080端口号,所以我们在浏览器输入localhost:8080/getPerson就可以访问到数据啦

6、我们也可以修改端口号以及一些配置,所有的配置修改都在application.properties文件中进行修改,比如可以将端口号修改为8088,并修改访问路径为localhost:8088/springboot/getPerson
三、热更新
前面我们实现了一个简单的案例,接下来我们讲一下热更新。热更新的好处就在于修改代码后不需要再重启项目,会自动的刷新,简化了繁琐的操作流程。实现热更新需要一下几个步骤
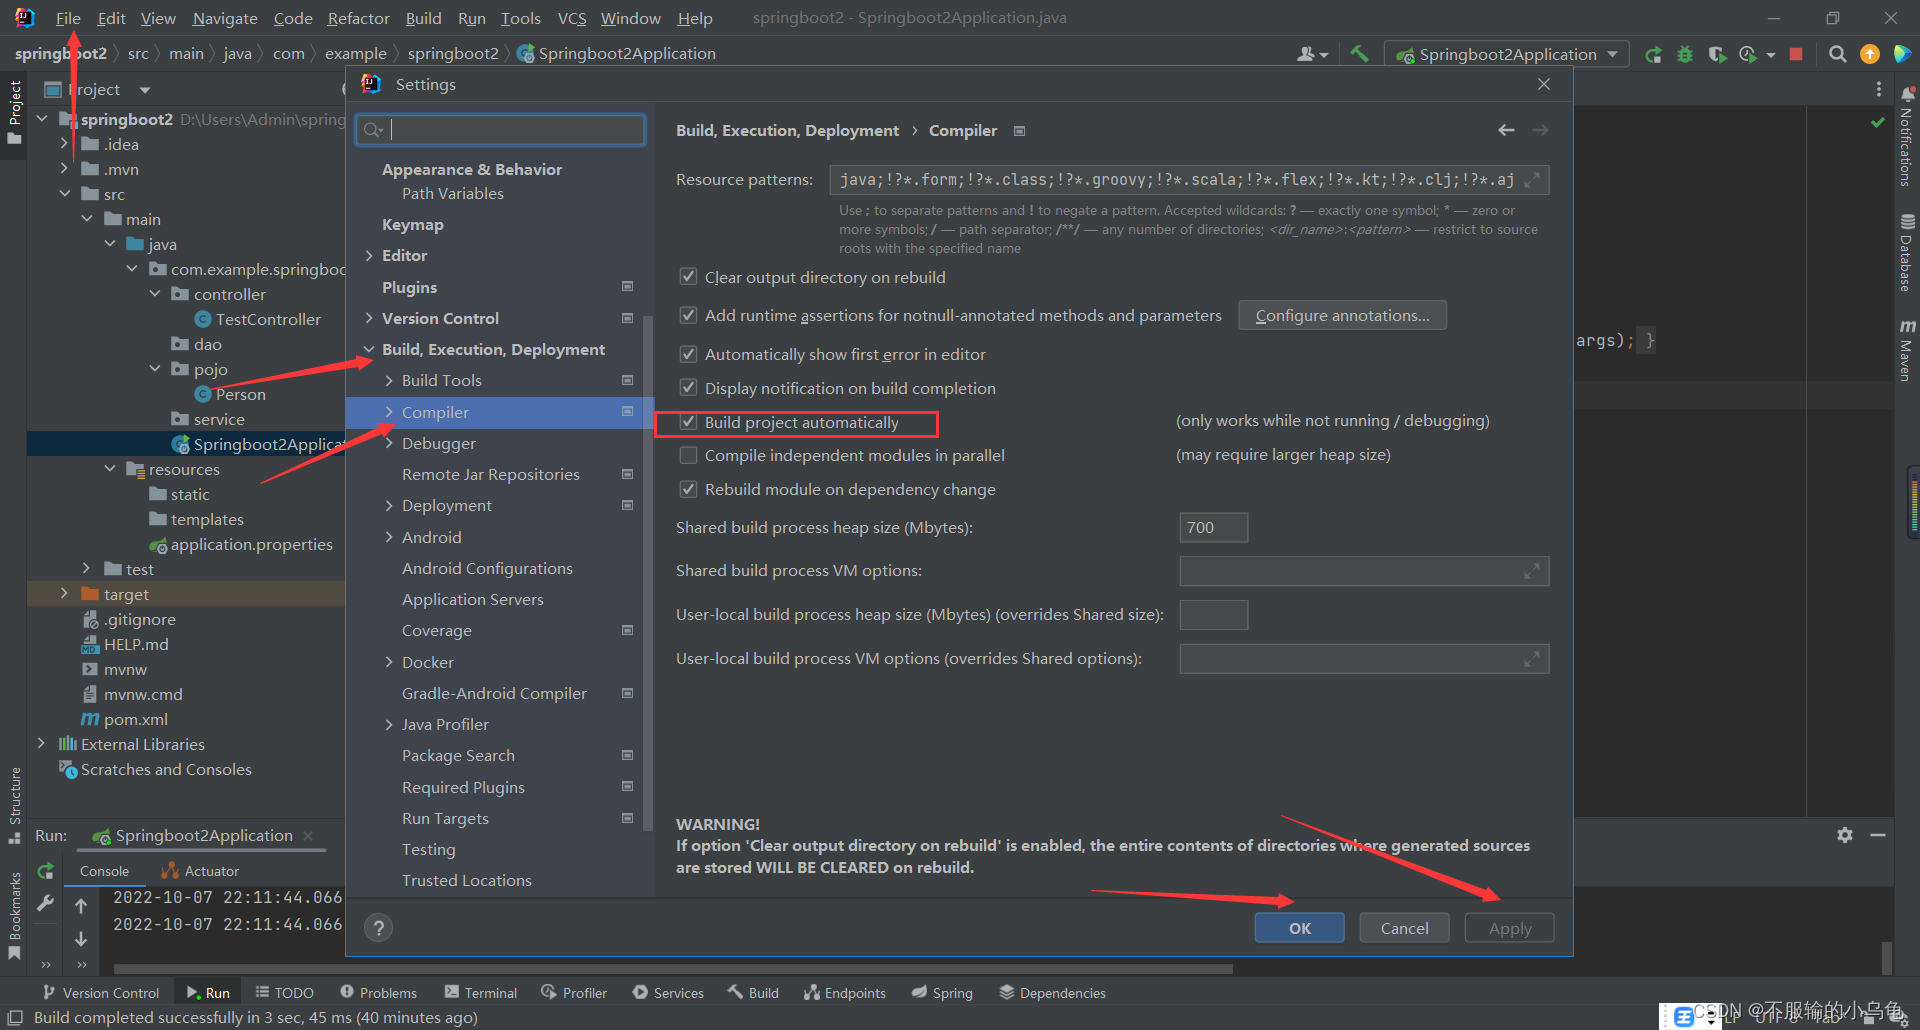
1、点击File,点击Settings,找到Compiler,勾选Build project automatically,点击Apply,点击OK
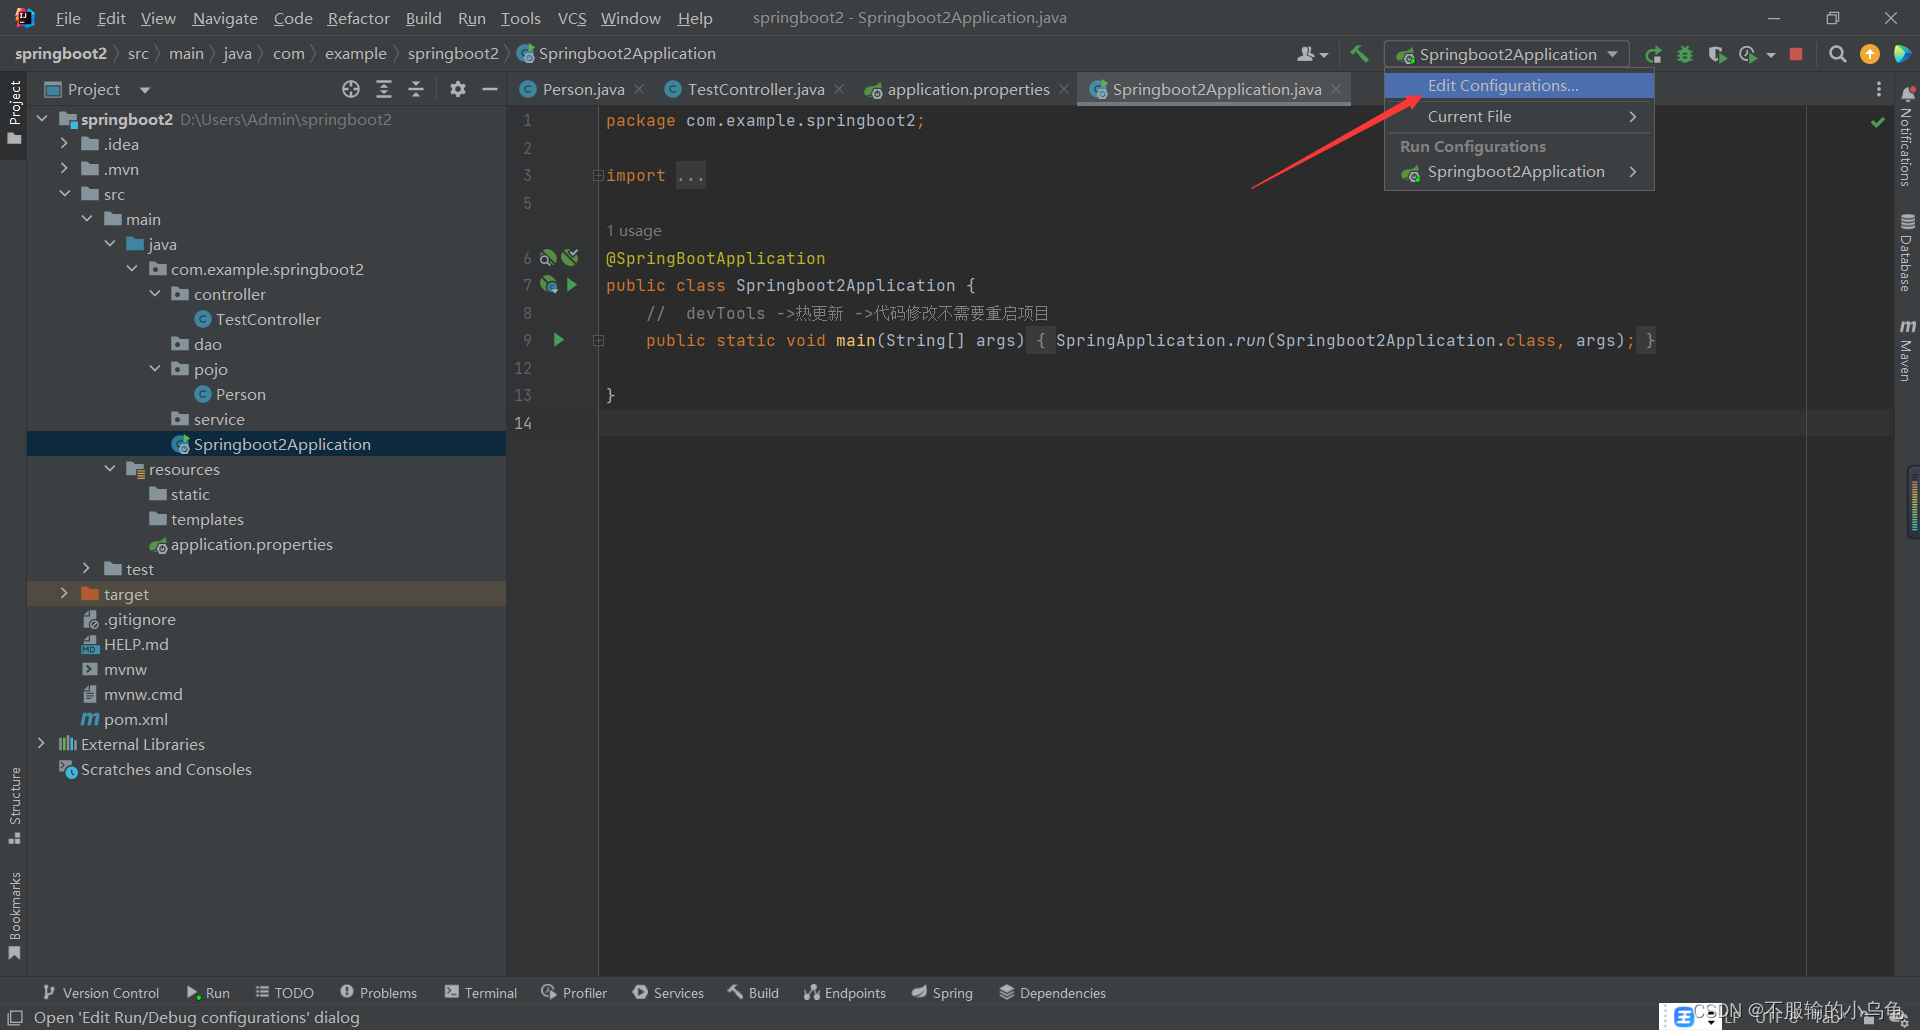
2、点击右上角,选择Edit Configurations
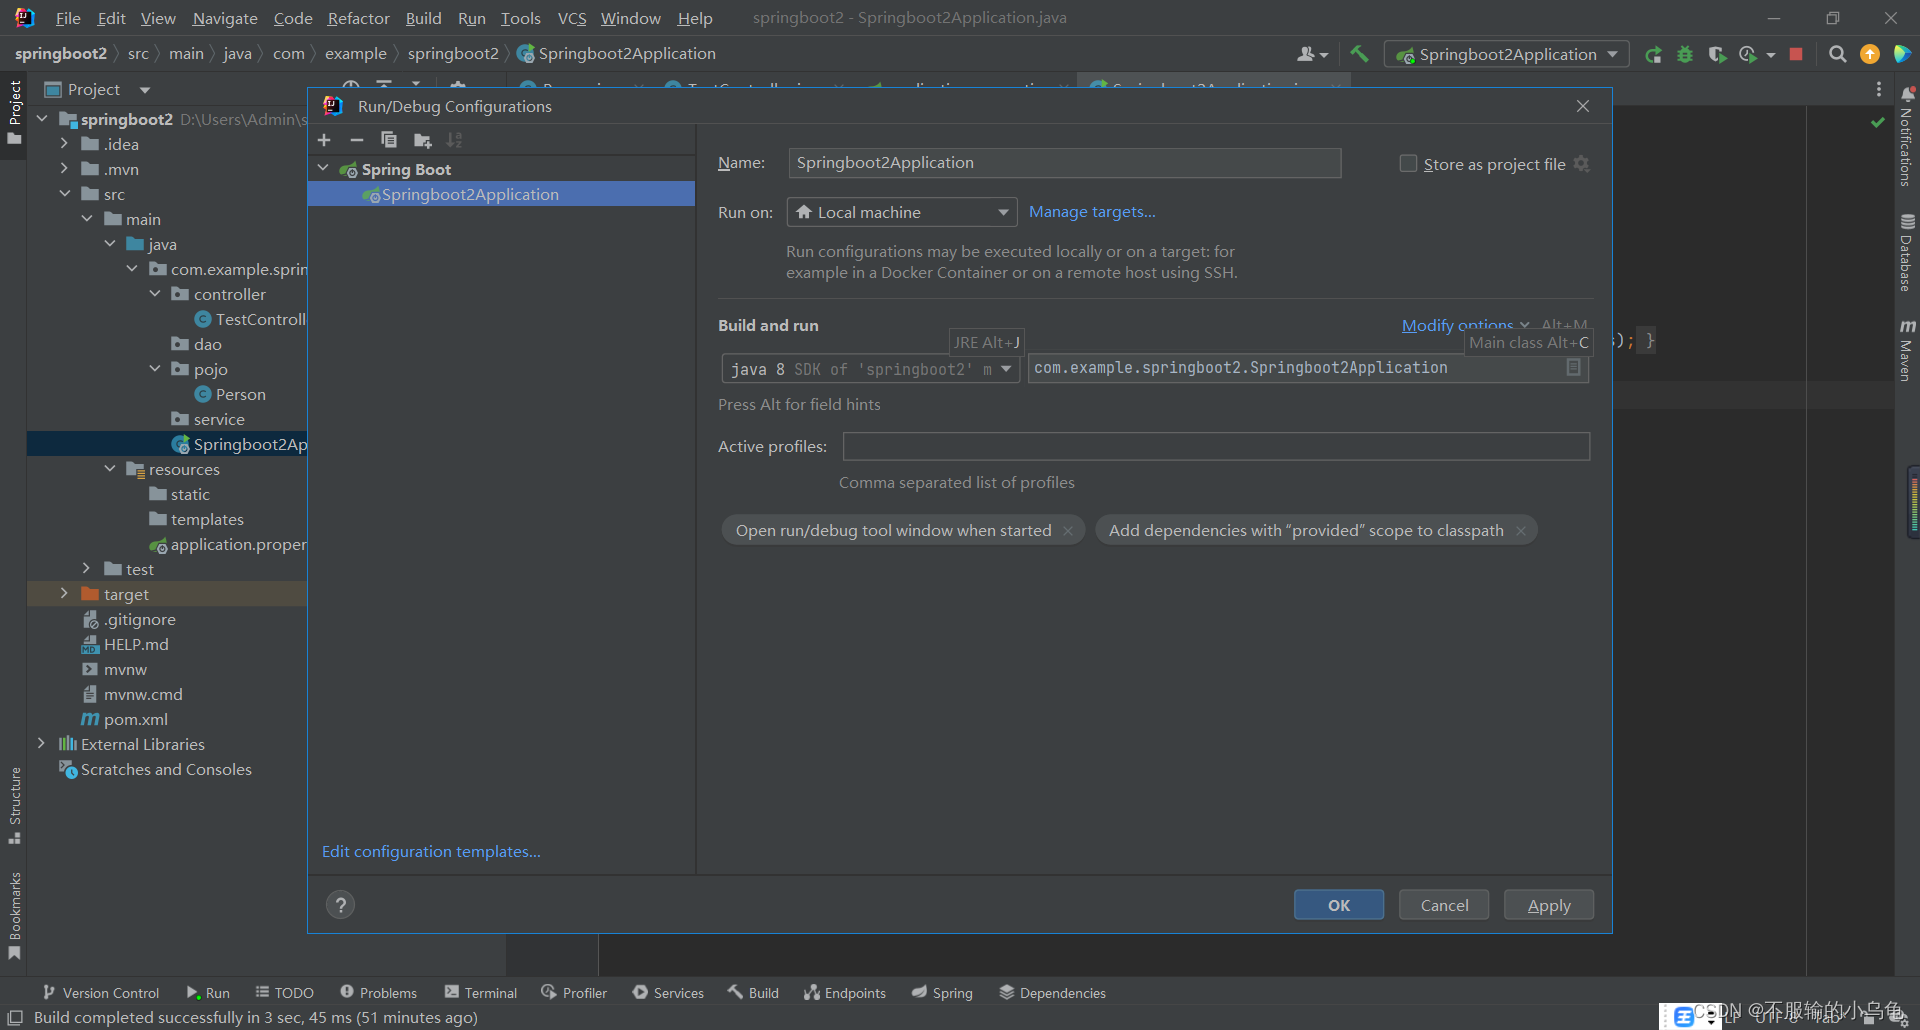
3、点击Modify options
4、点击On ‘Update’ action,选择Update classes and resources
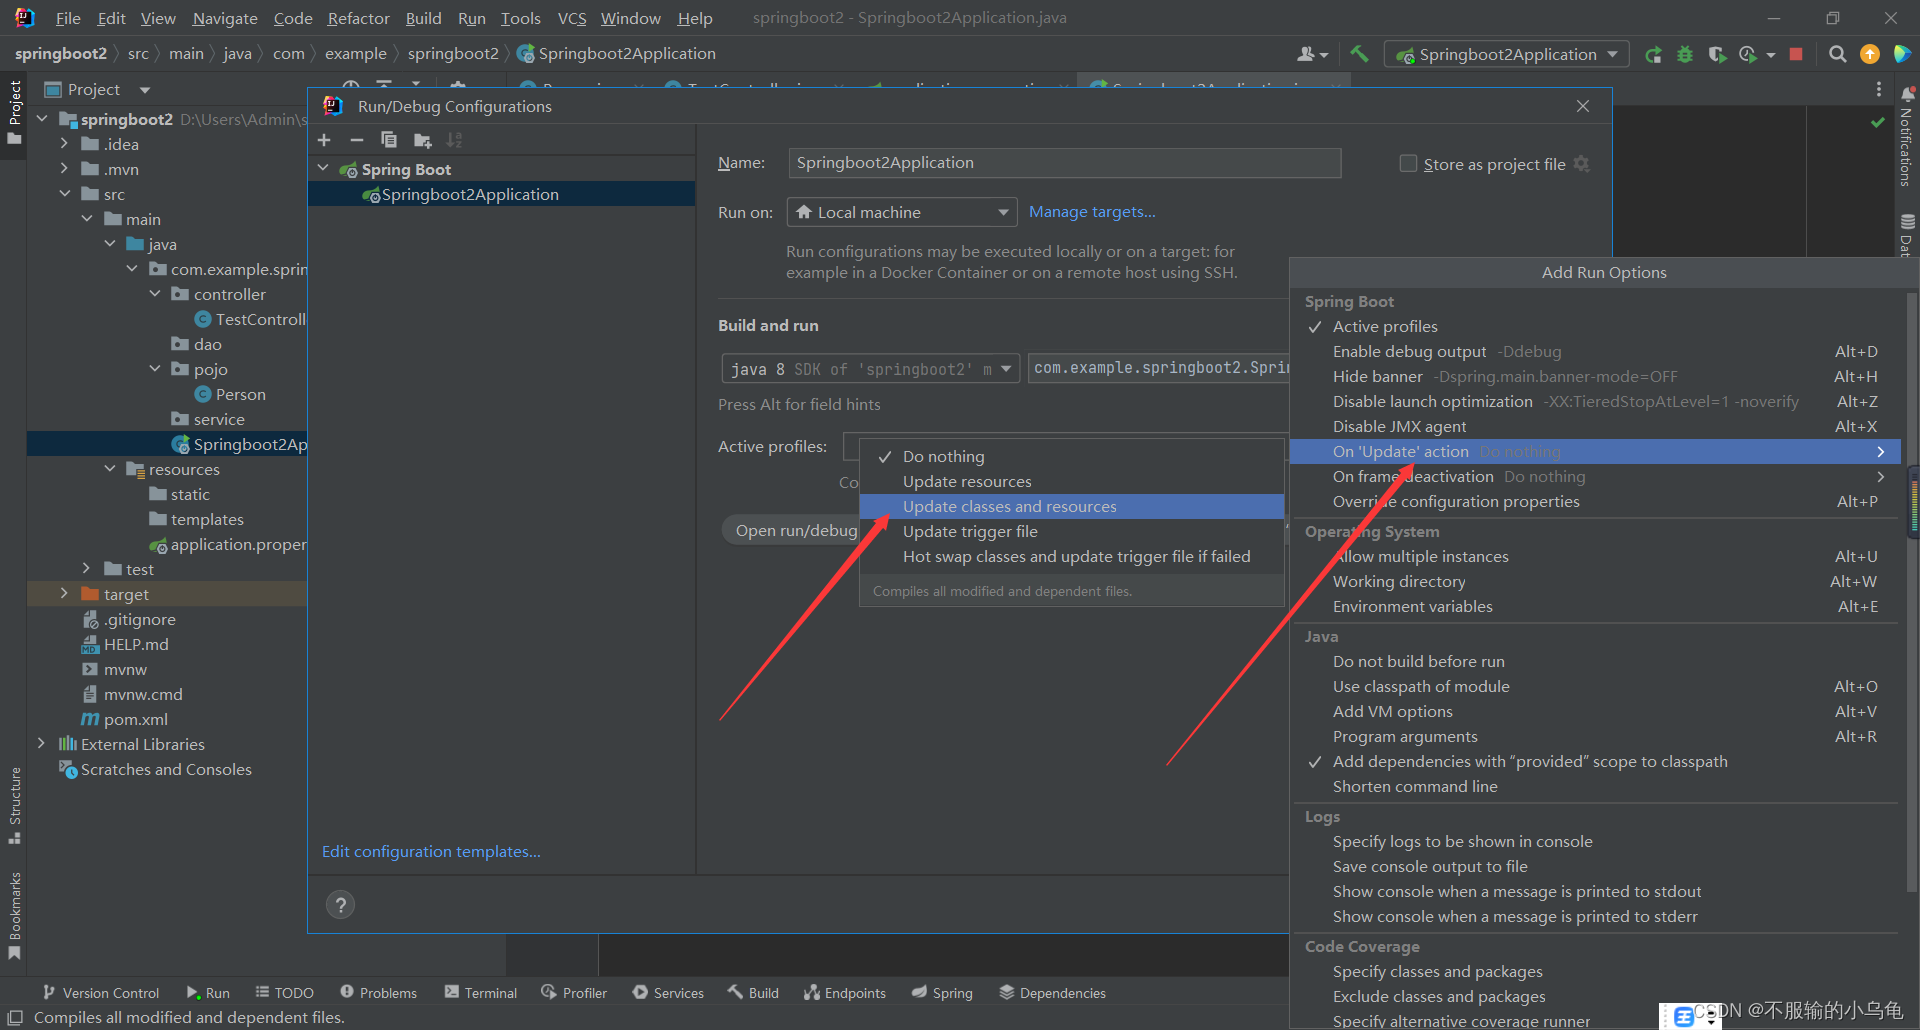
5、点击Modify options,点击On frame deactivation,选择Update classes and resources

6、点击Apply,然后点击OK,然后重启项目
7、现在我们测试一下效果,在java文件中修改代码,然后不需要重启项目,而在浏览器直接刷新页面会跟着变化,这就是热更新的好处
四、文件访问
之前Spring进行文件访问比较麻烦,而Spring Boot就比较简单啦!
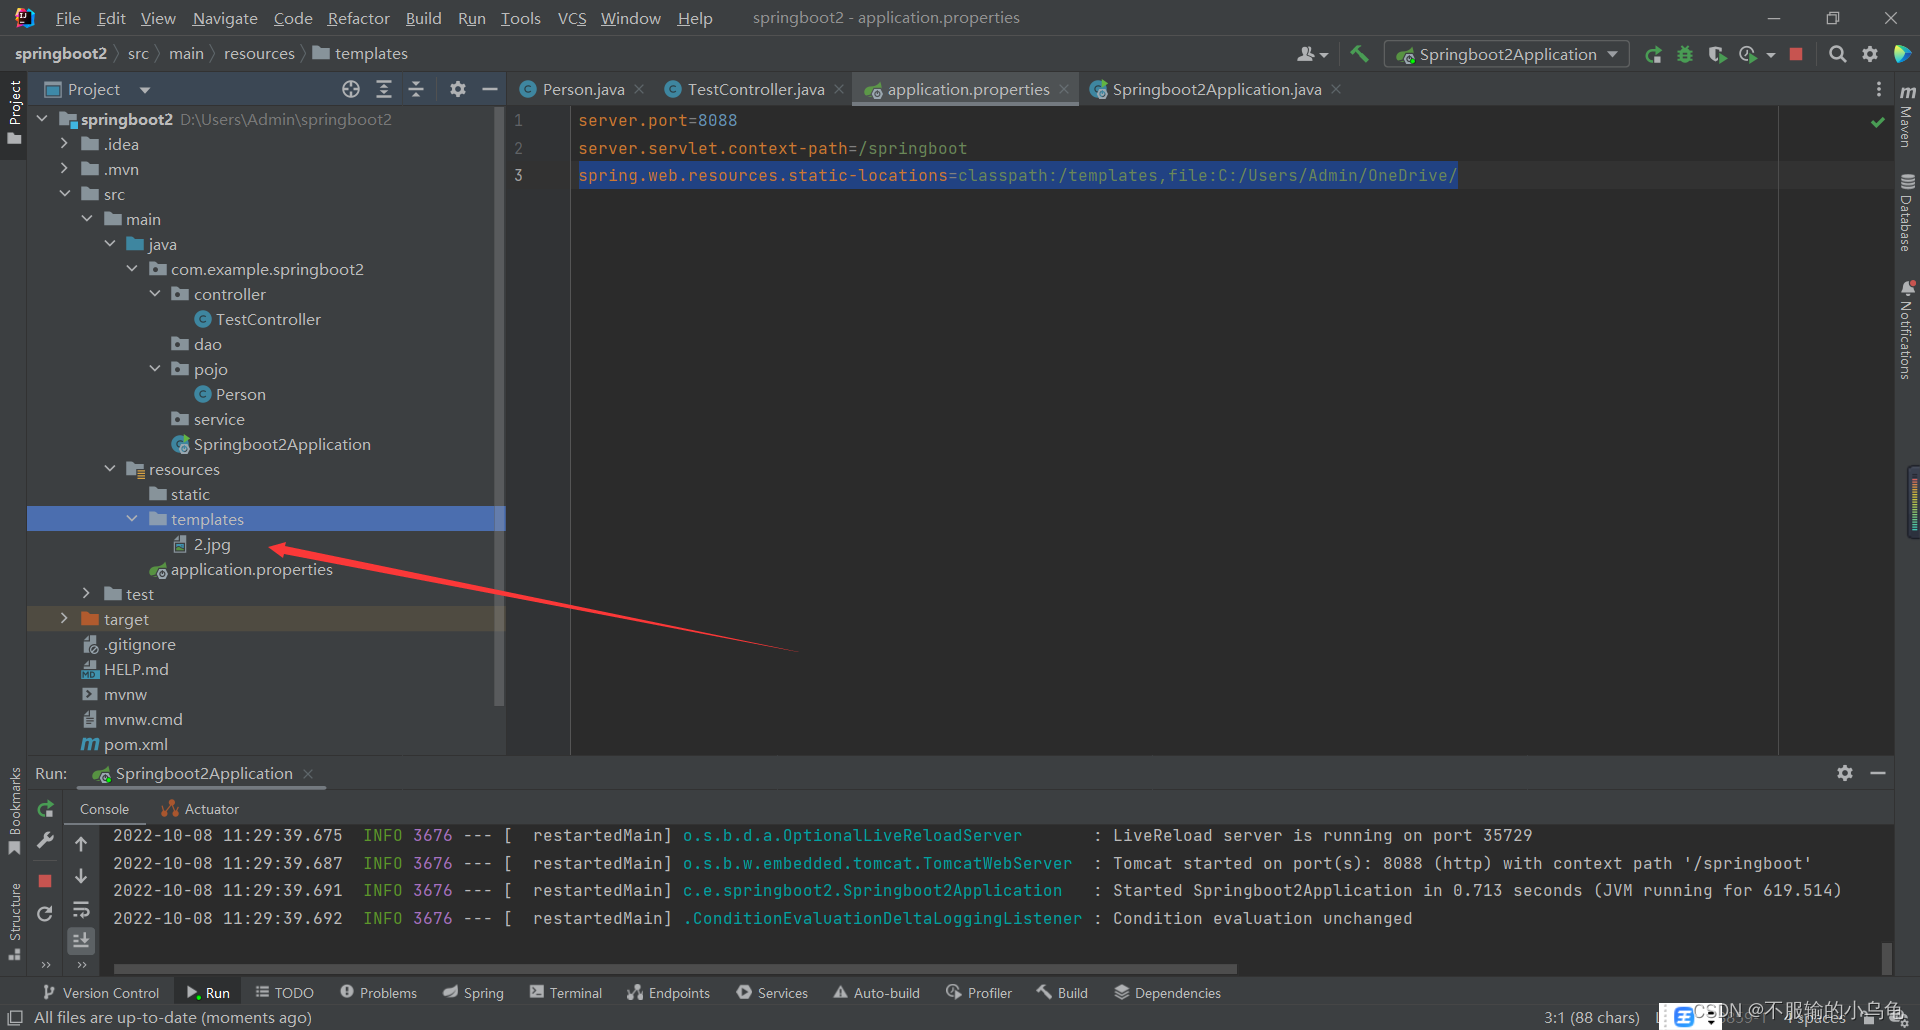
1、只需要在配置文件中加入代码
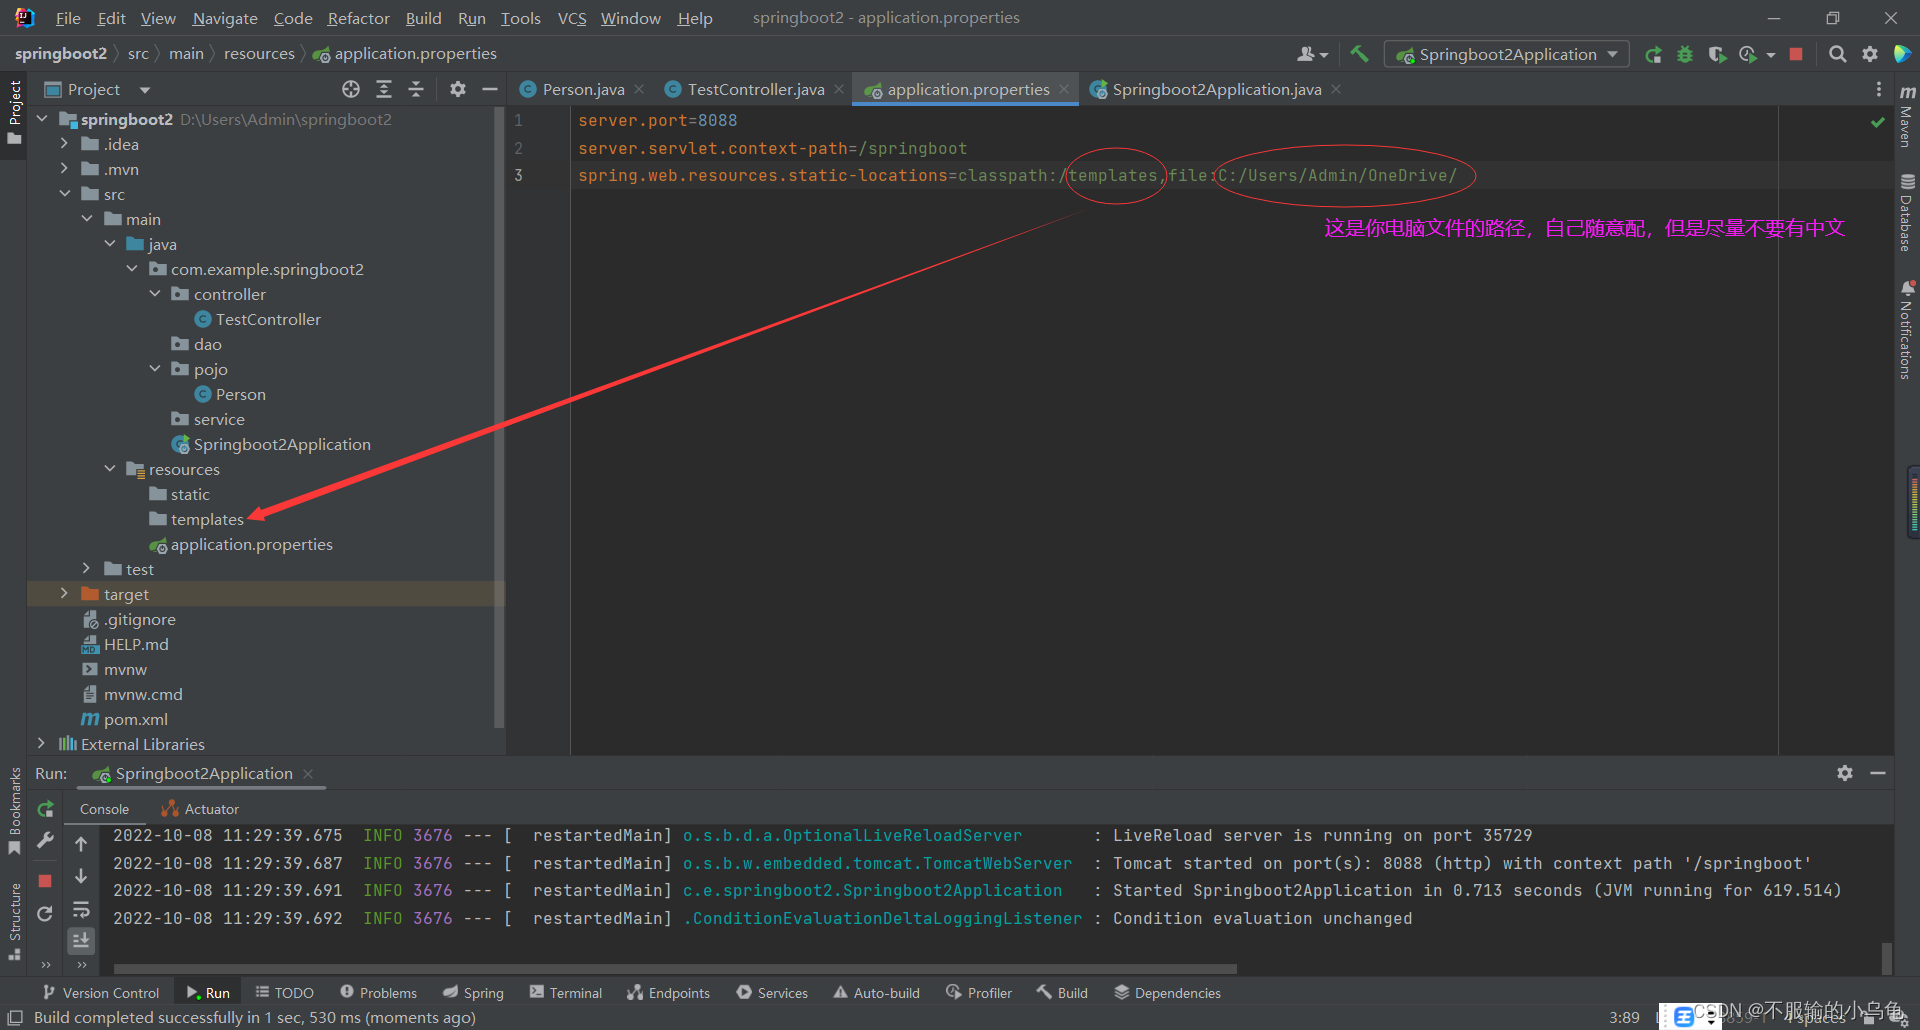
spring.web.resources.static-locations=classpath:/templates,file:C:/Users/Admin/OneDrive/
2、导入一张图片到templates文件夹下
3、我们只要在路径后面加上图片的名字就可以在浏览器访问到这张图片啦
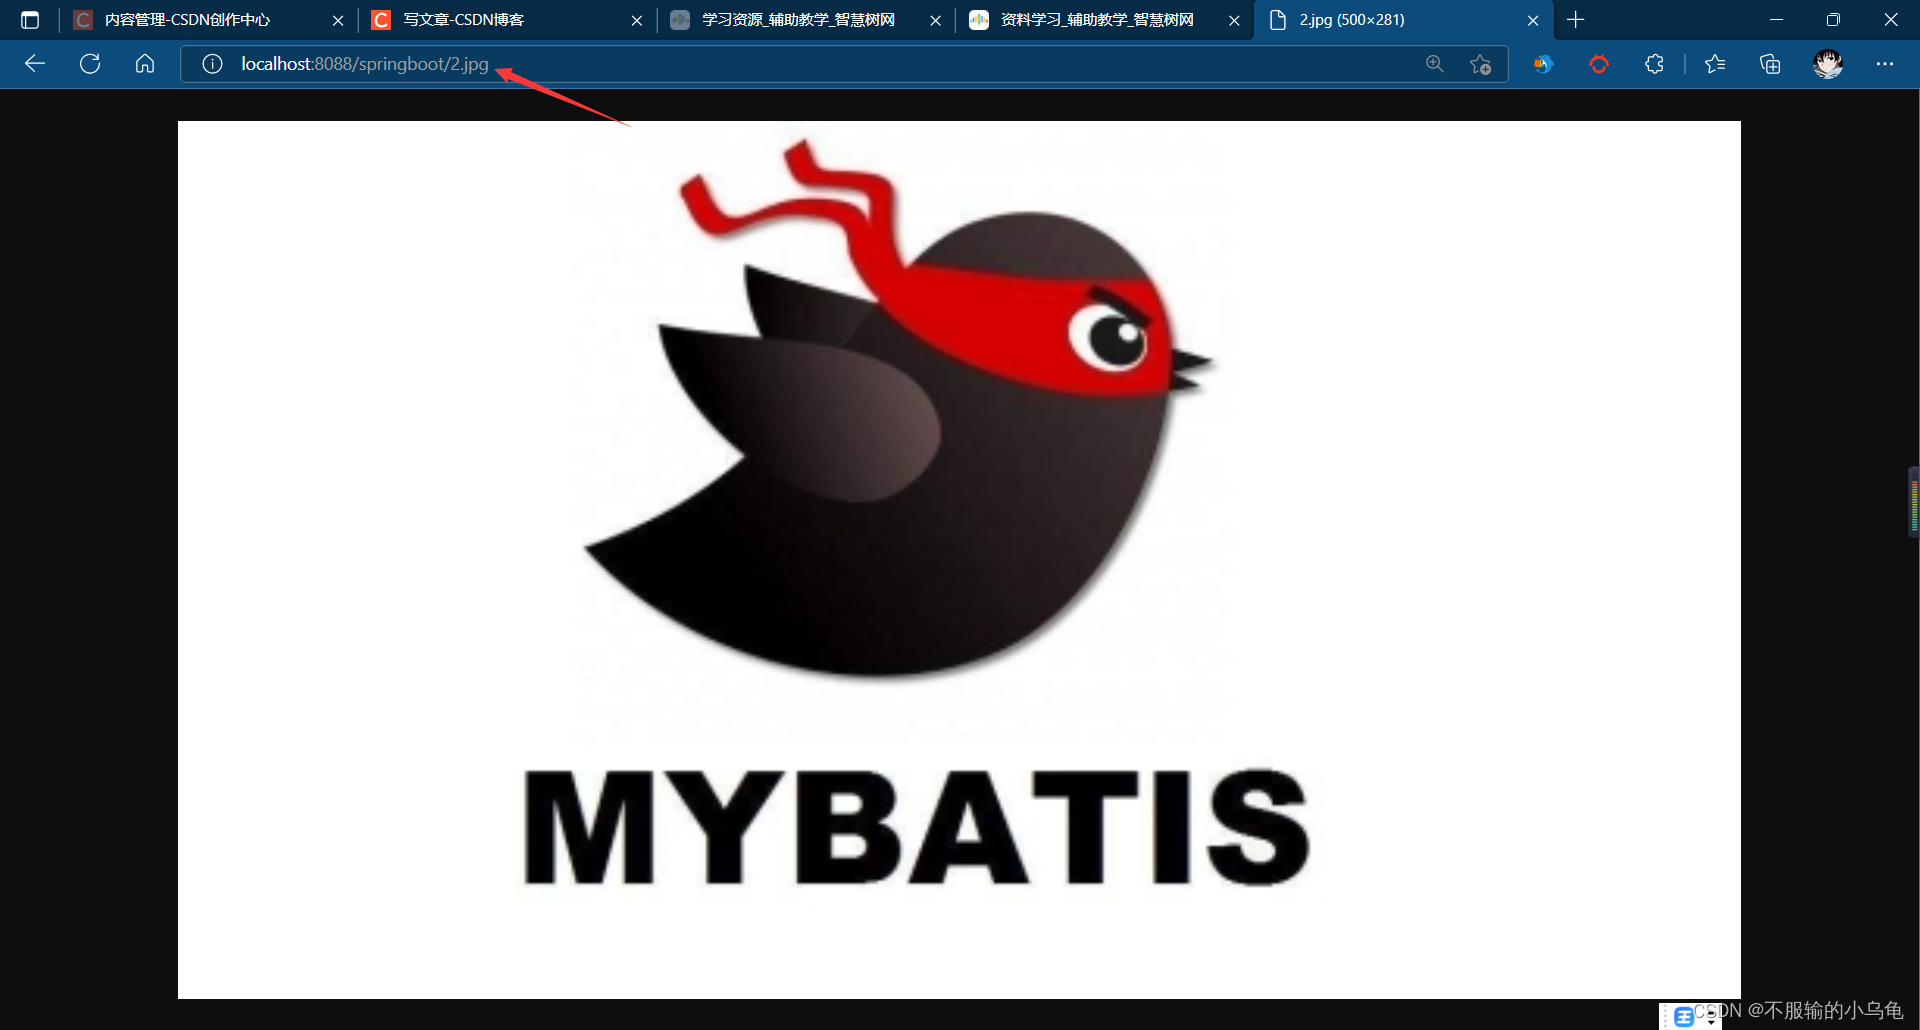
4、我们还可以访问我们电脑的资源,比如我自己配的C:/Users/Admin/OneDrive,我就可以在浏览器访问这个文件夹下的图片、视频以及音频
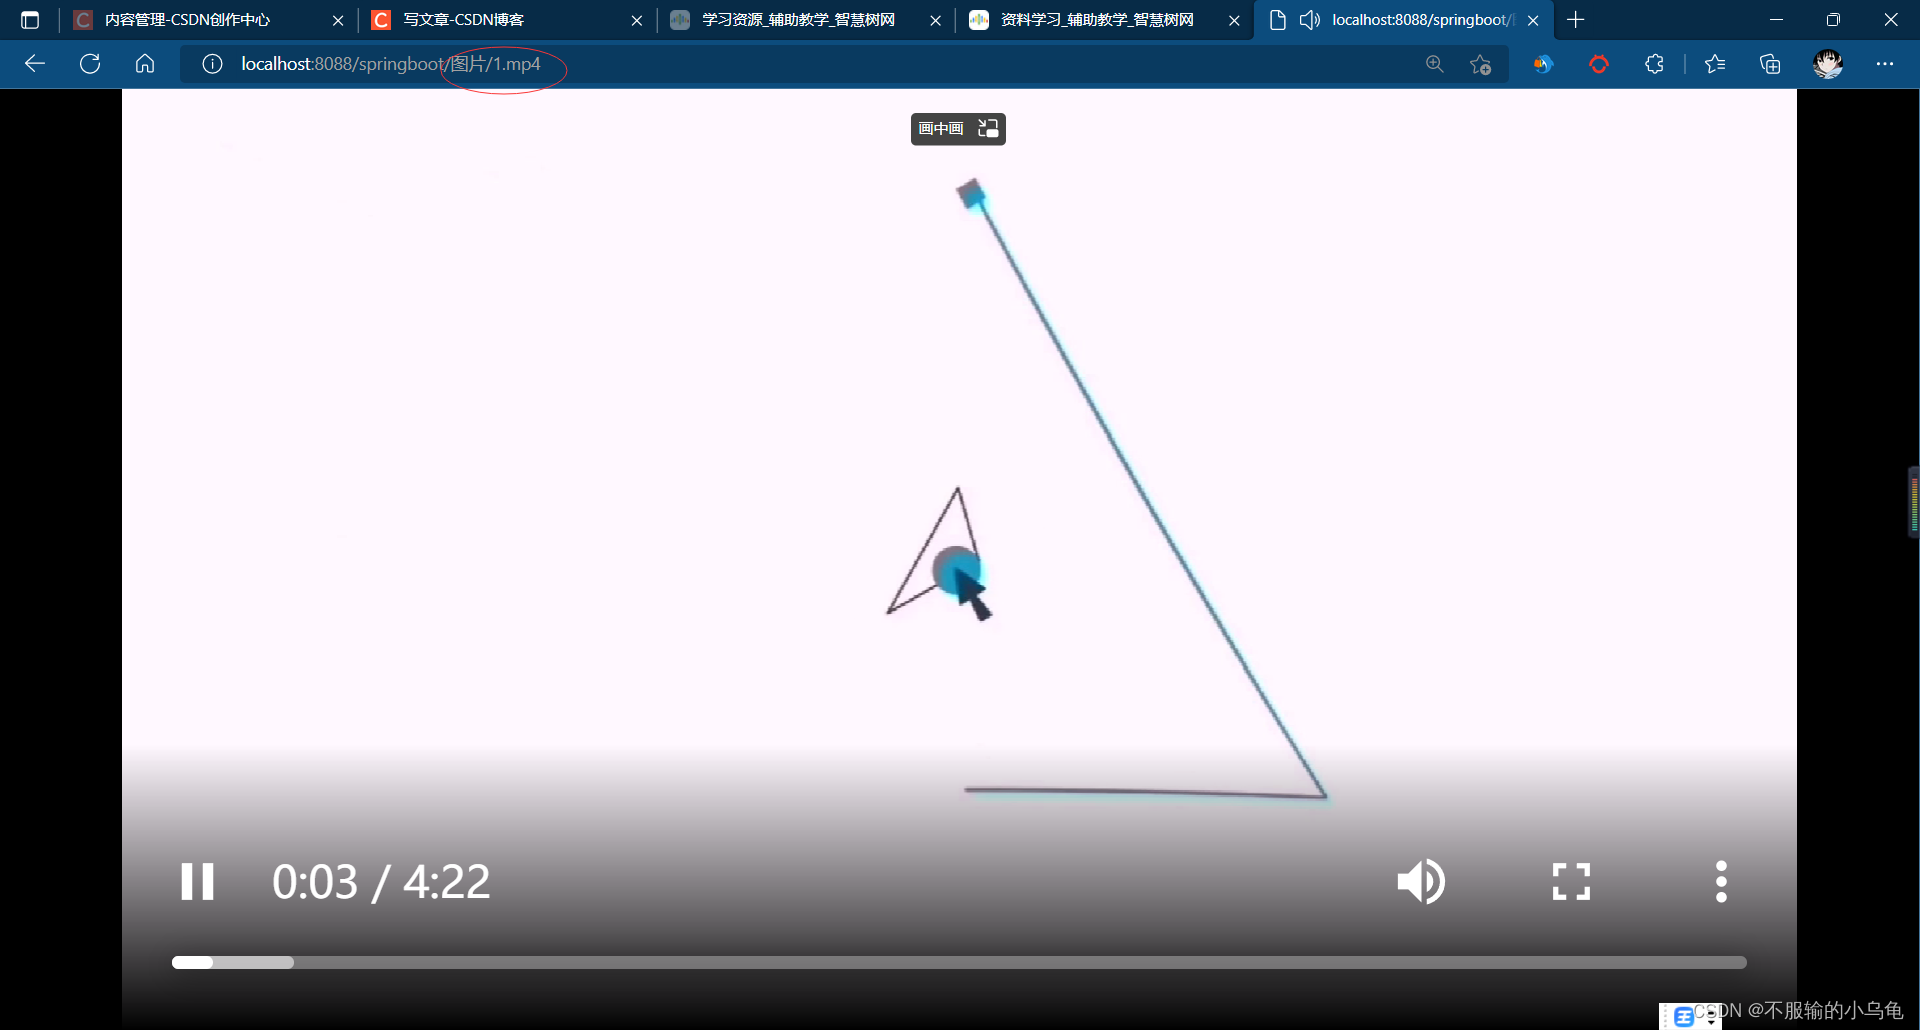
五、用转发的方式进行图片、视频及音频访问
1、修改TestController类
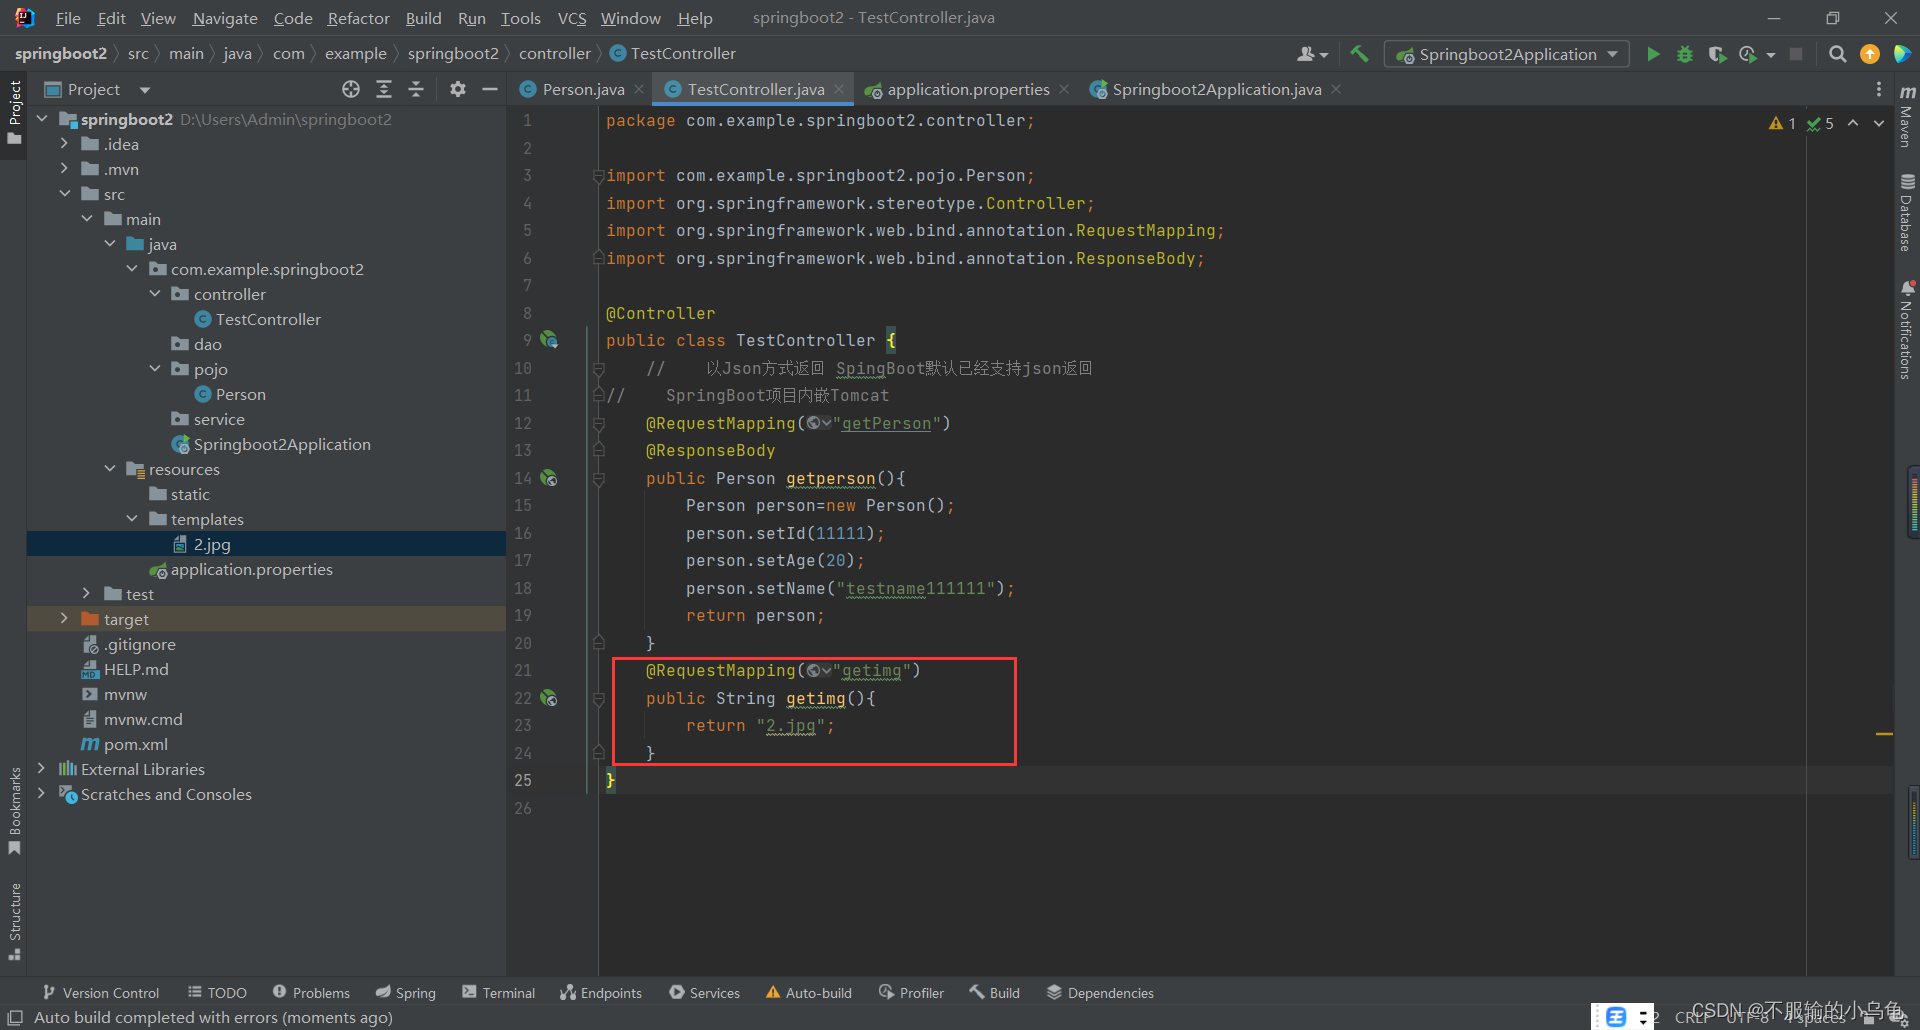
  @RequestMapping("getimg")
    public String getimg(){


        return "2.jpg";
    }
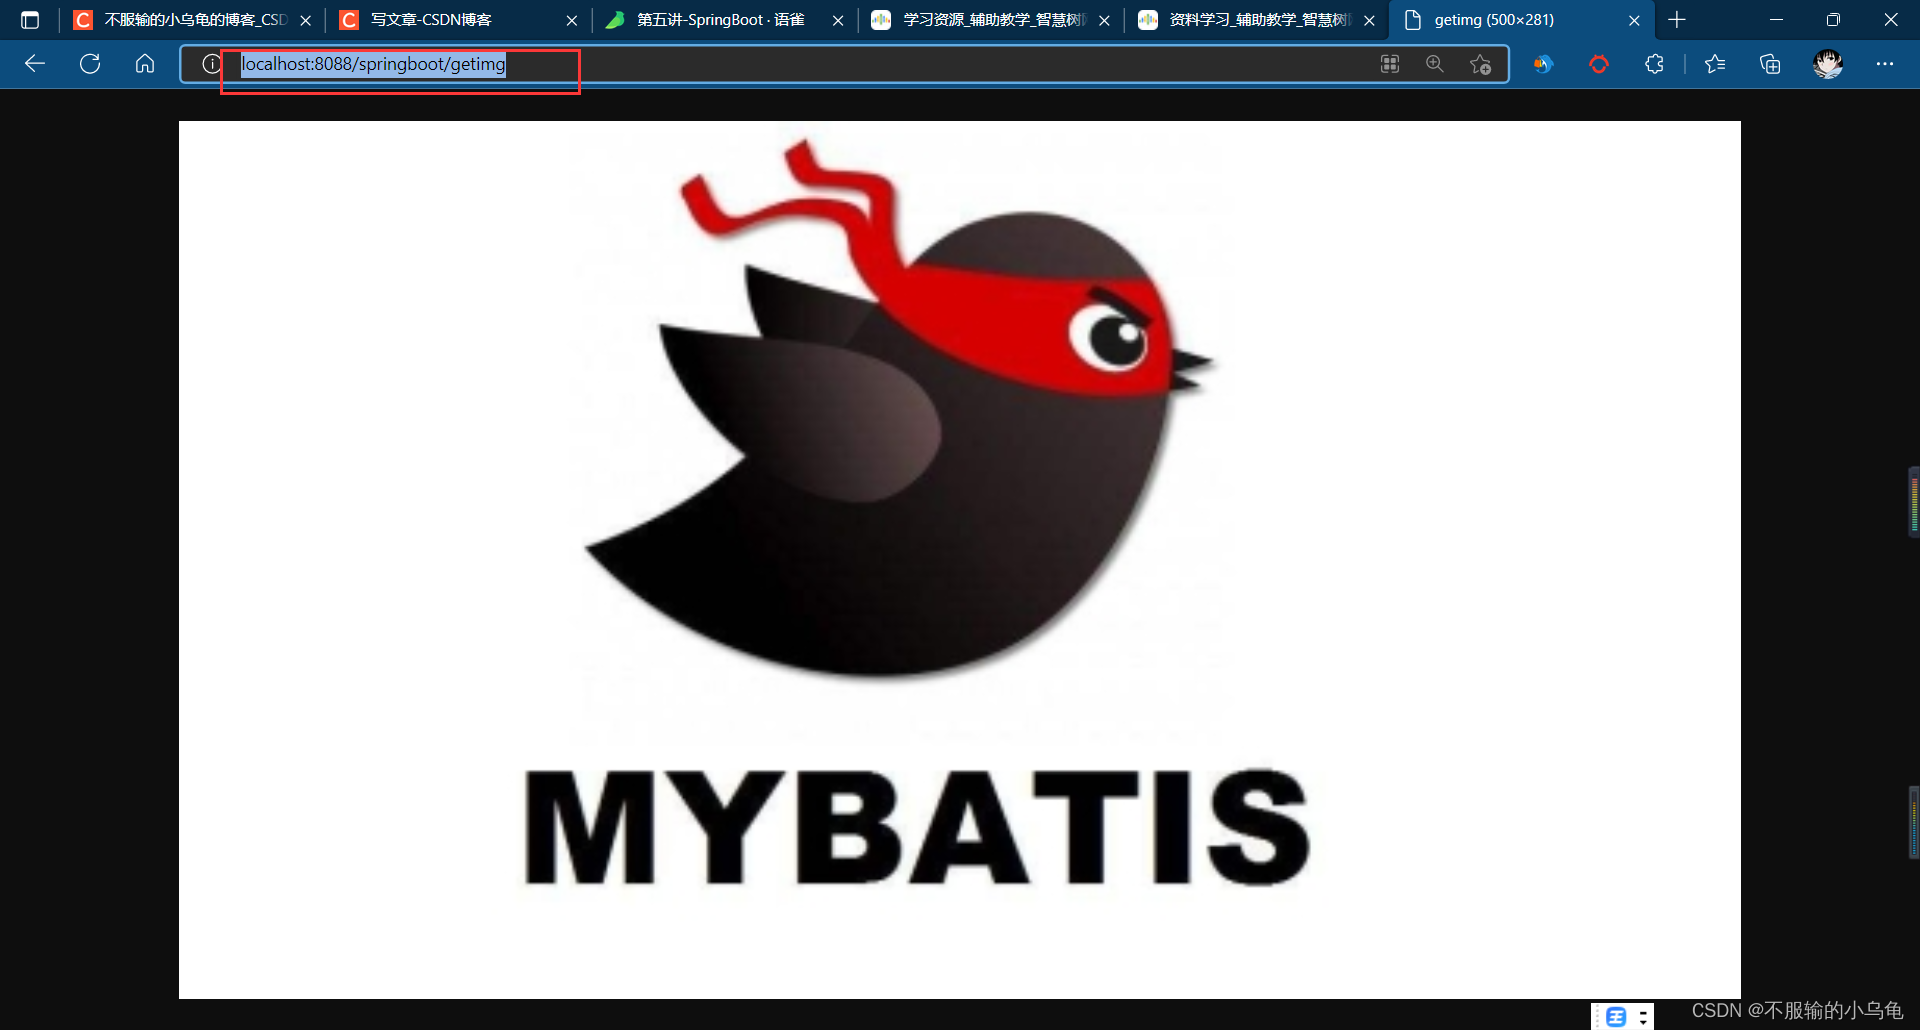
2、访问路径http://localhost:8088/springboot/getimg,依旧可以访问到图片
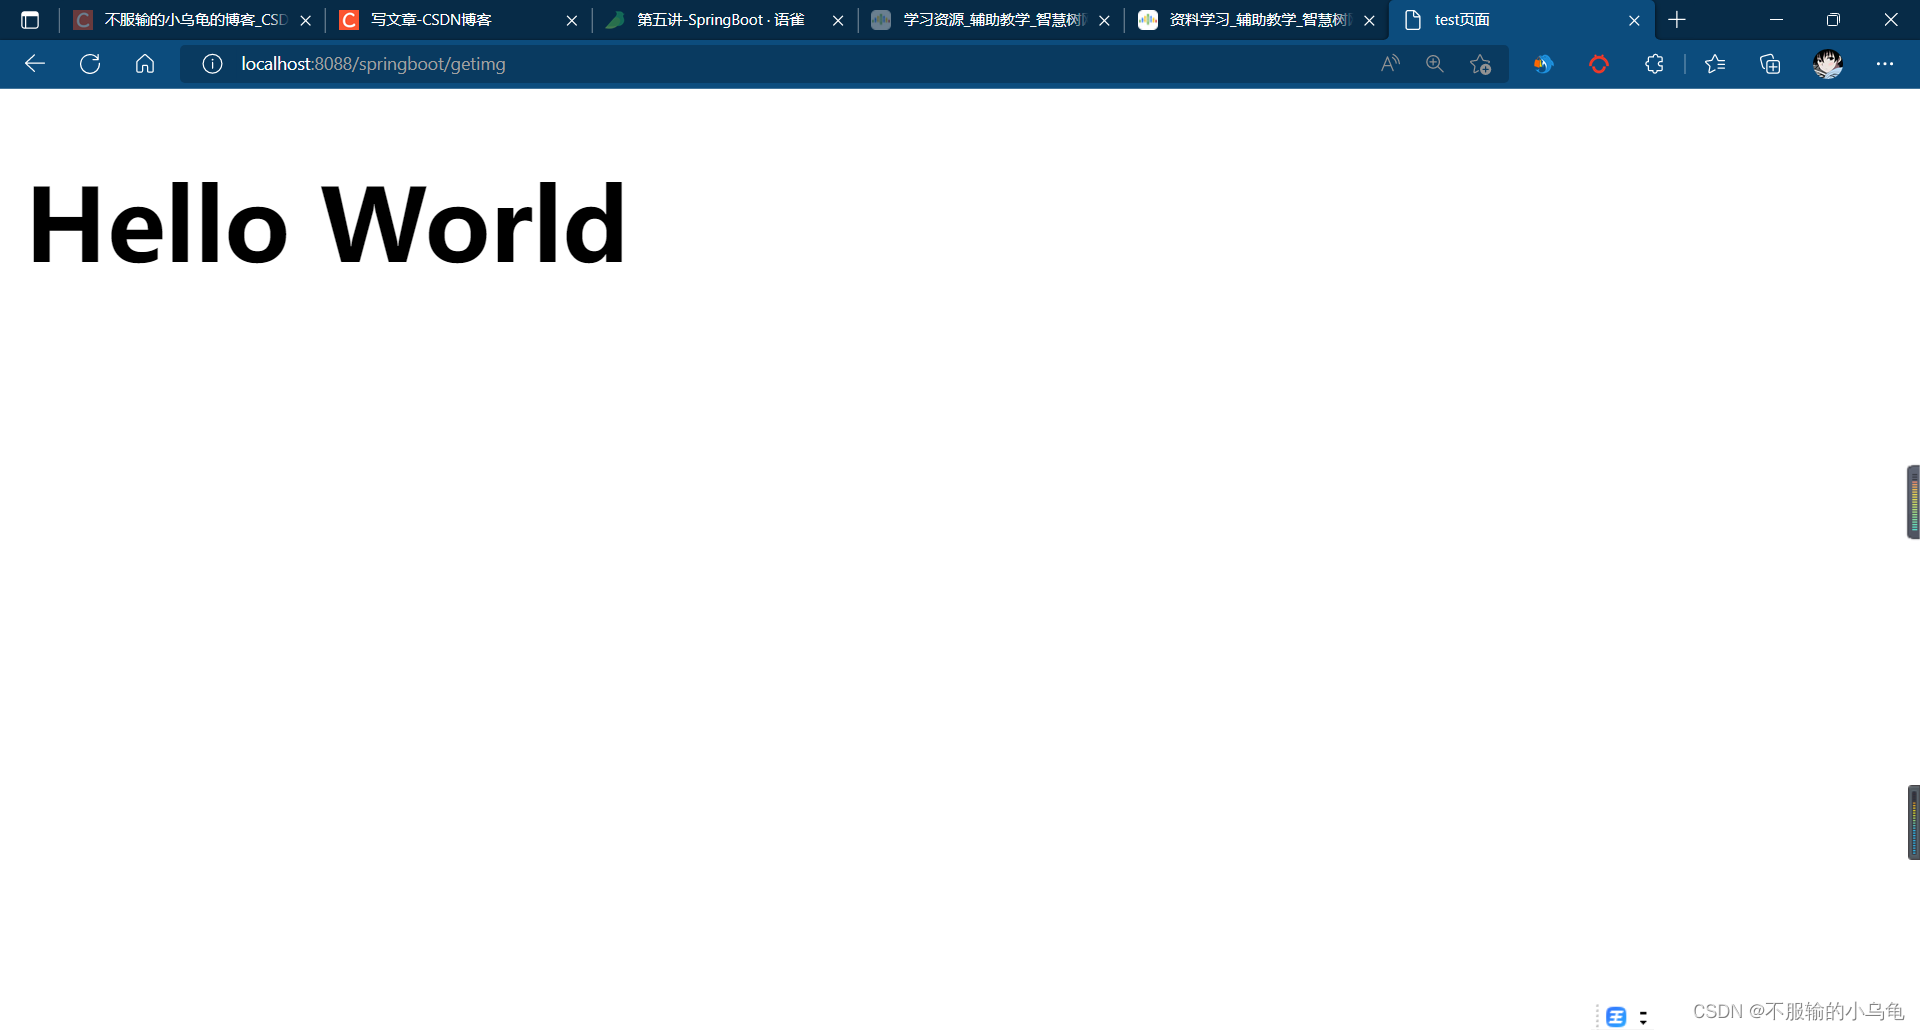
六、用转发的方式进行jsp访问
1、在templates文件夹下新建index.jsp
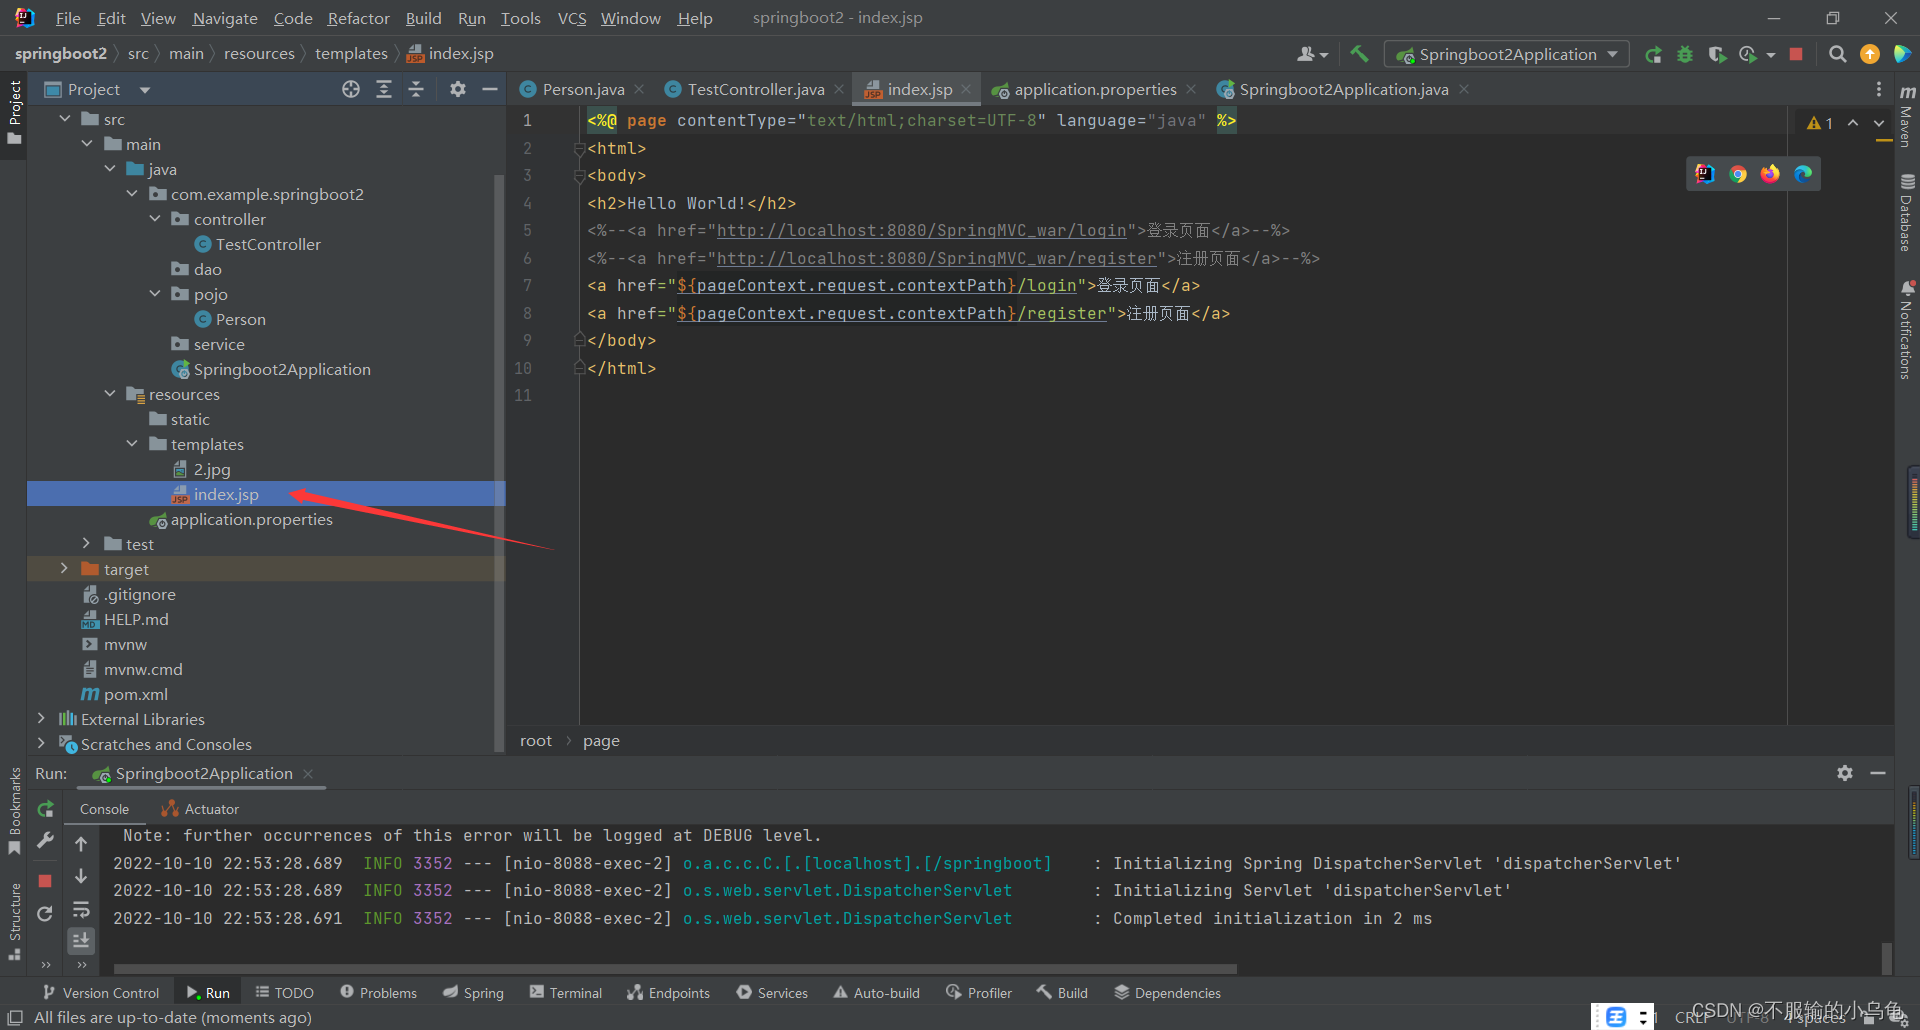
<%@ page contentType="text/html;charset=UTF-8" language="java" %>
<html>
<body>
<h2>Hello World!</h2>
<%--<a href="http://localhost:8080/SpringMVC_war/login">登录页面</a>--%>
<%--<a href="http://localhost:8080/SpringMVC_war/register">注册页面</a>--%>
<a href="${pageContext.request.contextPath}/login">登录页面</a>
<a href="${pageContext.request.contextPath}/register">注册页面</a>
</body>
</html>
2、修改TestController类
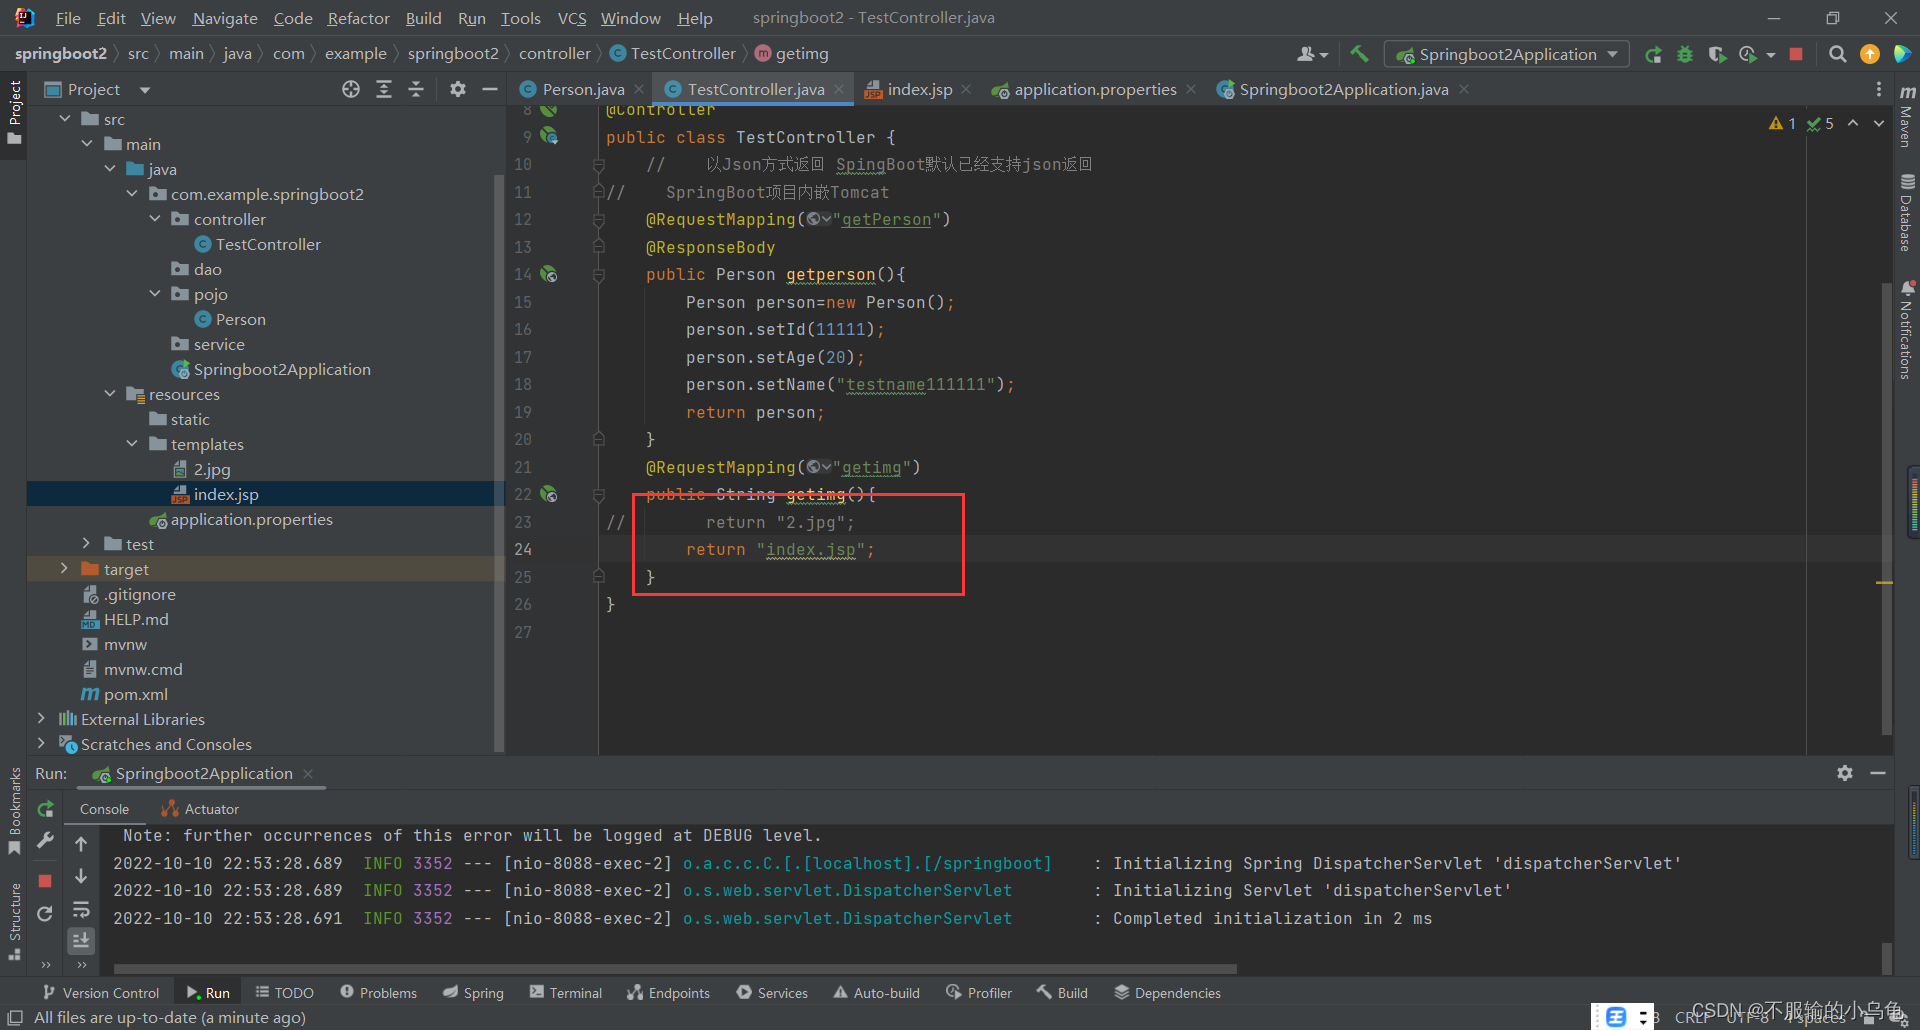
   @RequestMapping("getimg")
    public String getimg(){


//        return "2.jpg";
        return "index.jsp";
    }
3、再次访问路径http://localhost:8088/springboot/getimg,浏览器不能显示文件内容,而直接将jsp文件下载下来
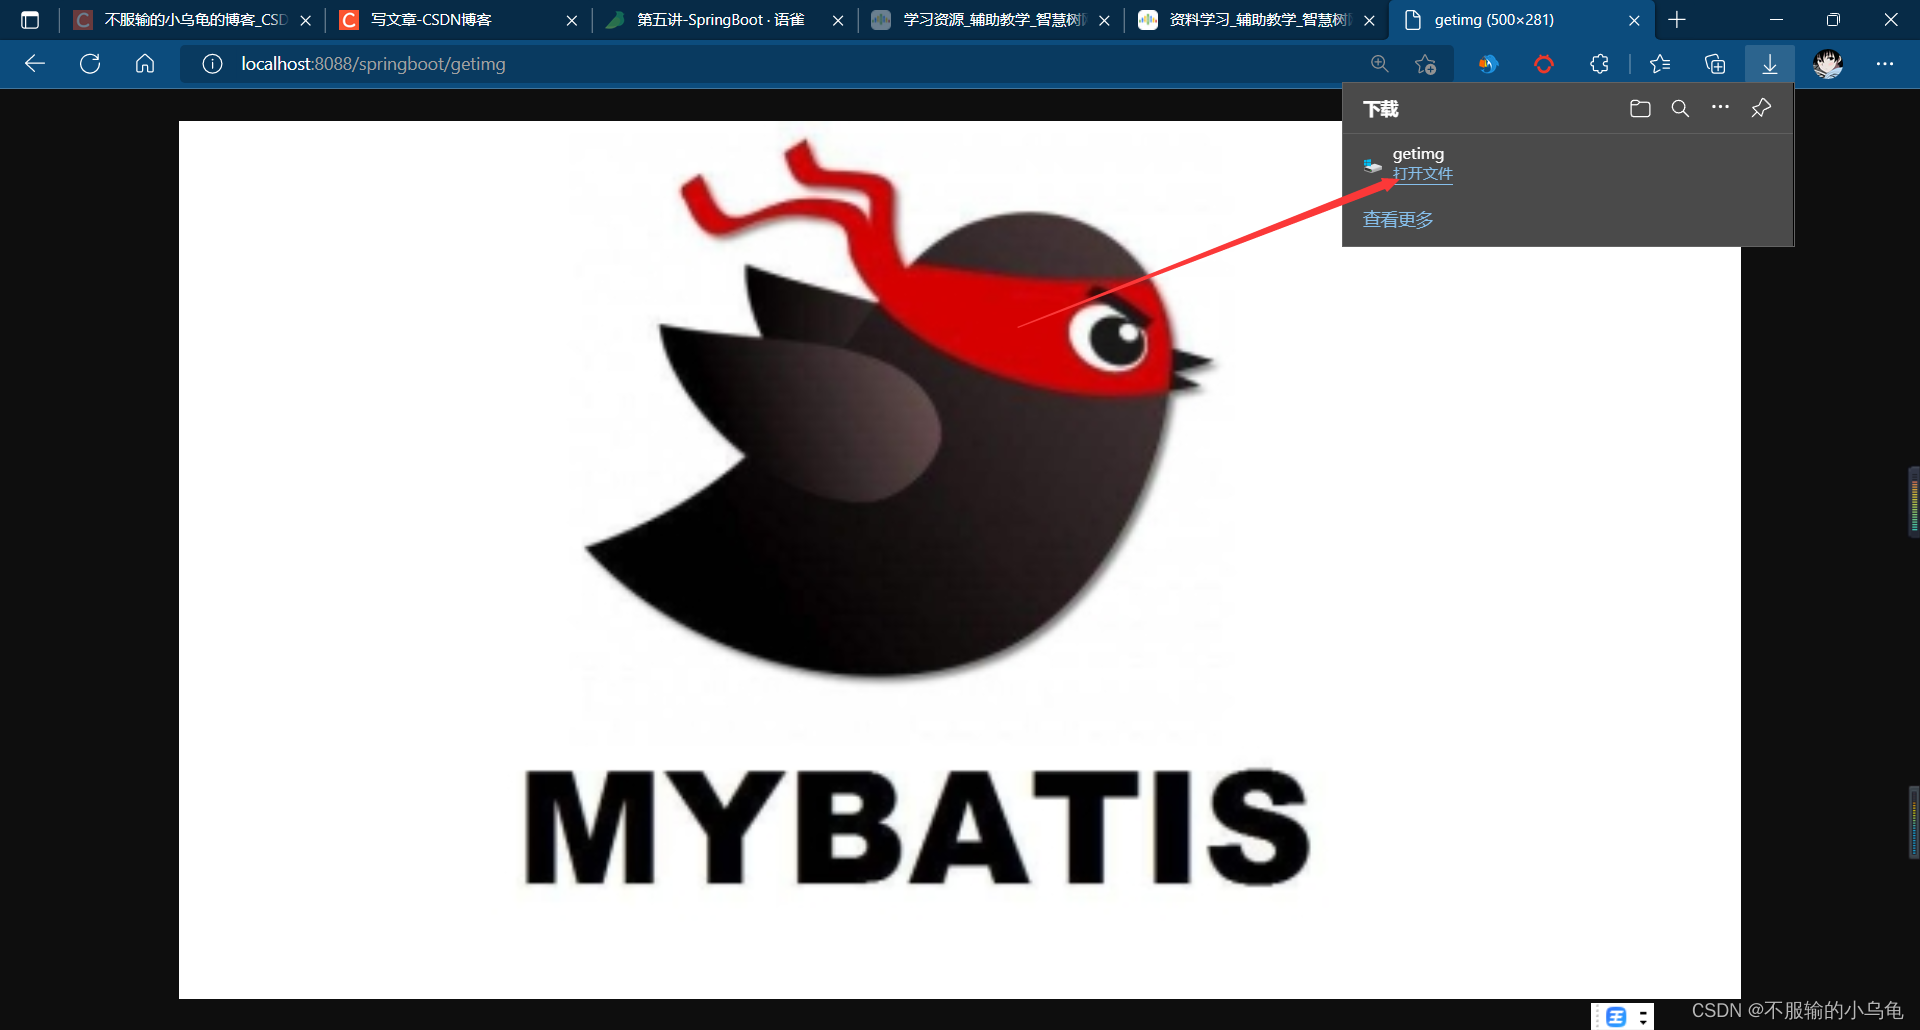
4、原因:浏览器不能解析转发的jsp
七、用转发的方式进行文本访问
1、在templates文件夹下新建1.txt
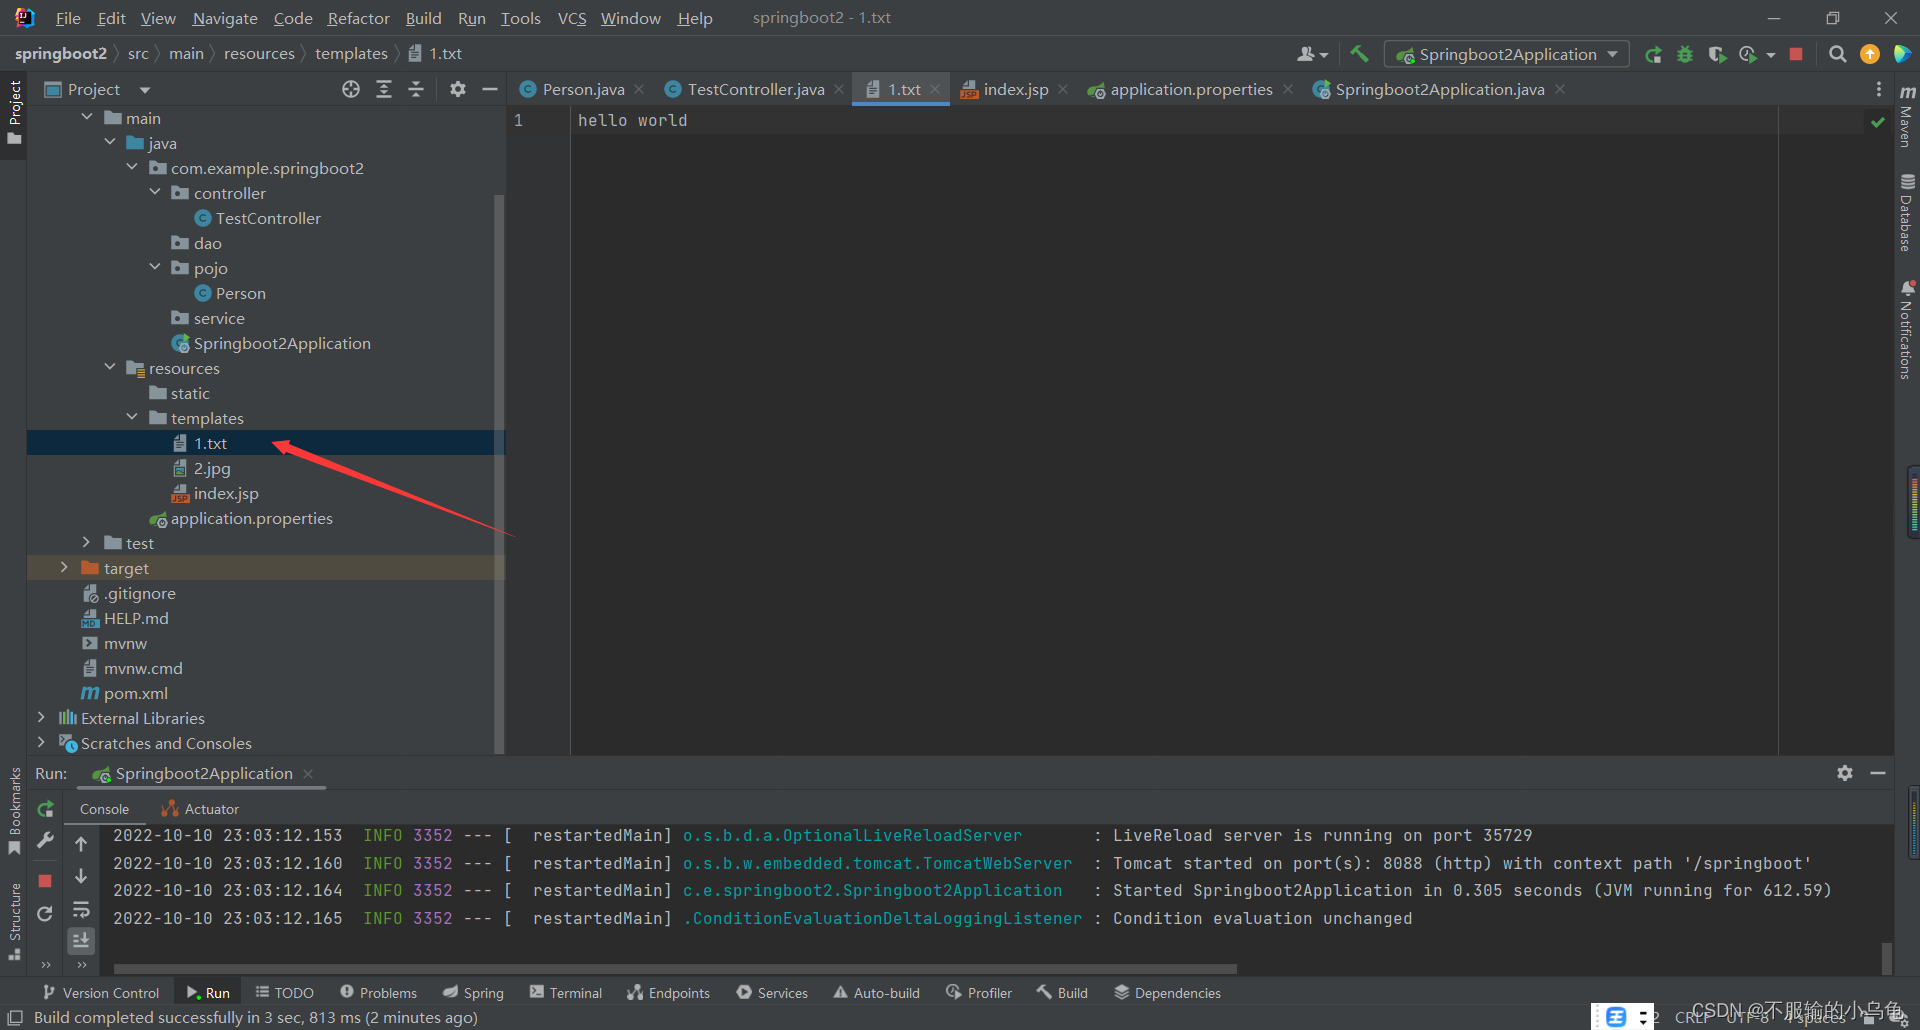
hello world
2、修改TestController类
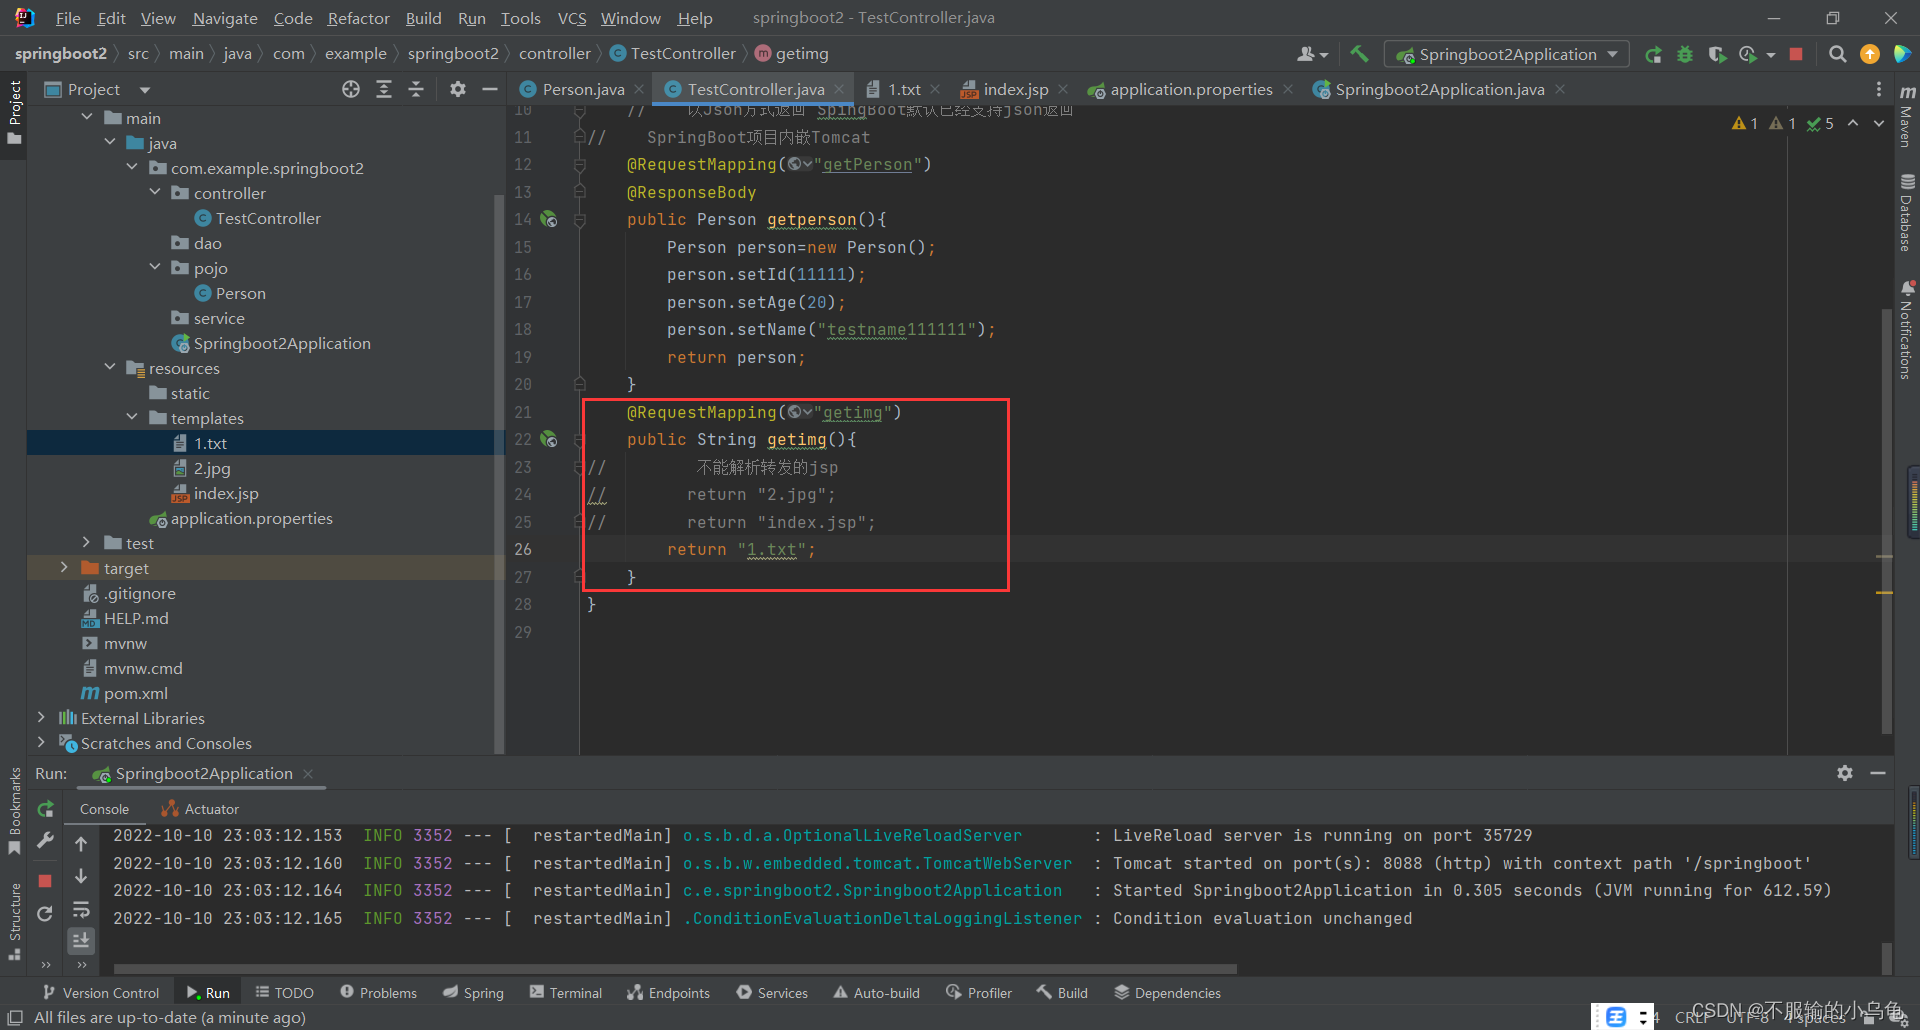
    @RequestMapping("getimg")
    public String getimg(){


//         不能解析转发的jsp
//        return "2.jpg";
//        return "index.jsp";
        return "1.txt";
    }
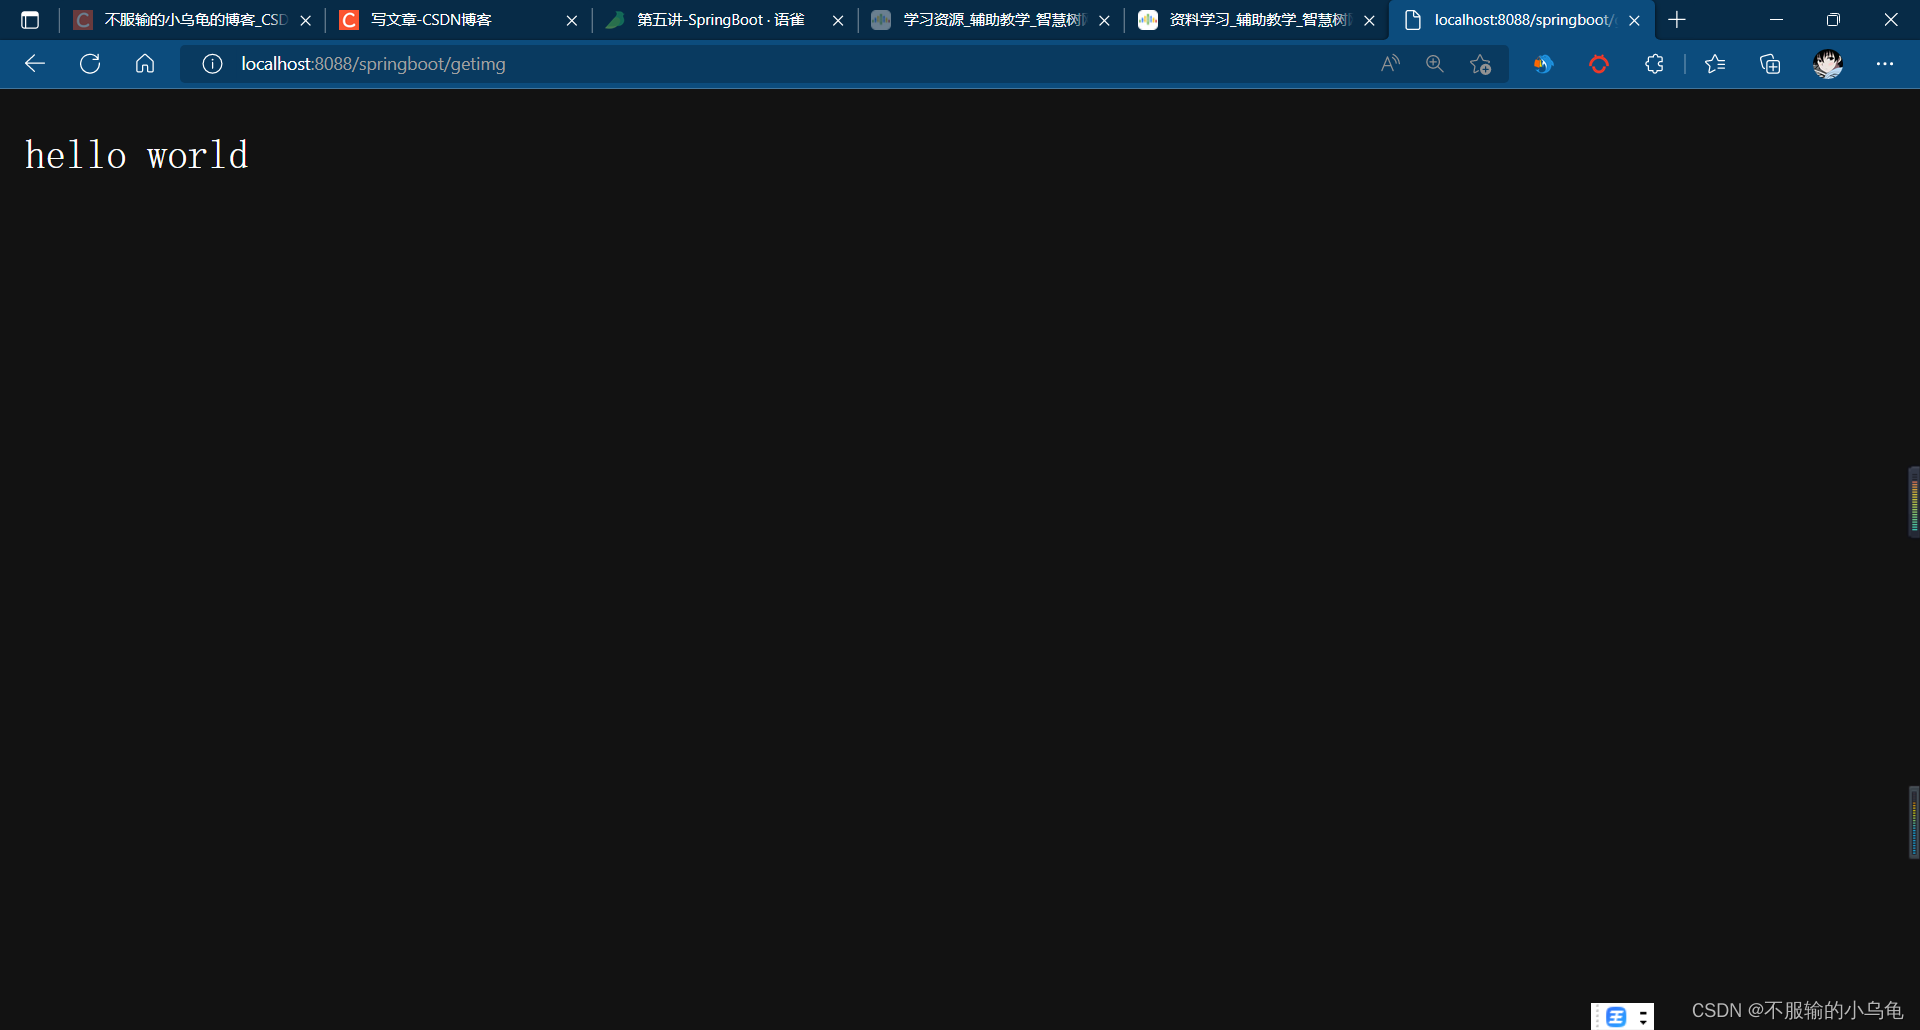
3、刷新浏览器页面,出现hello world
八、用转发的方式进行HTML文件访问
1、在templates文件夹下新建test.html
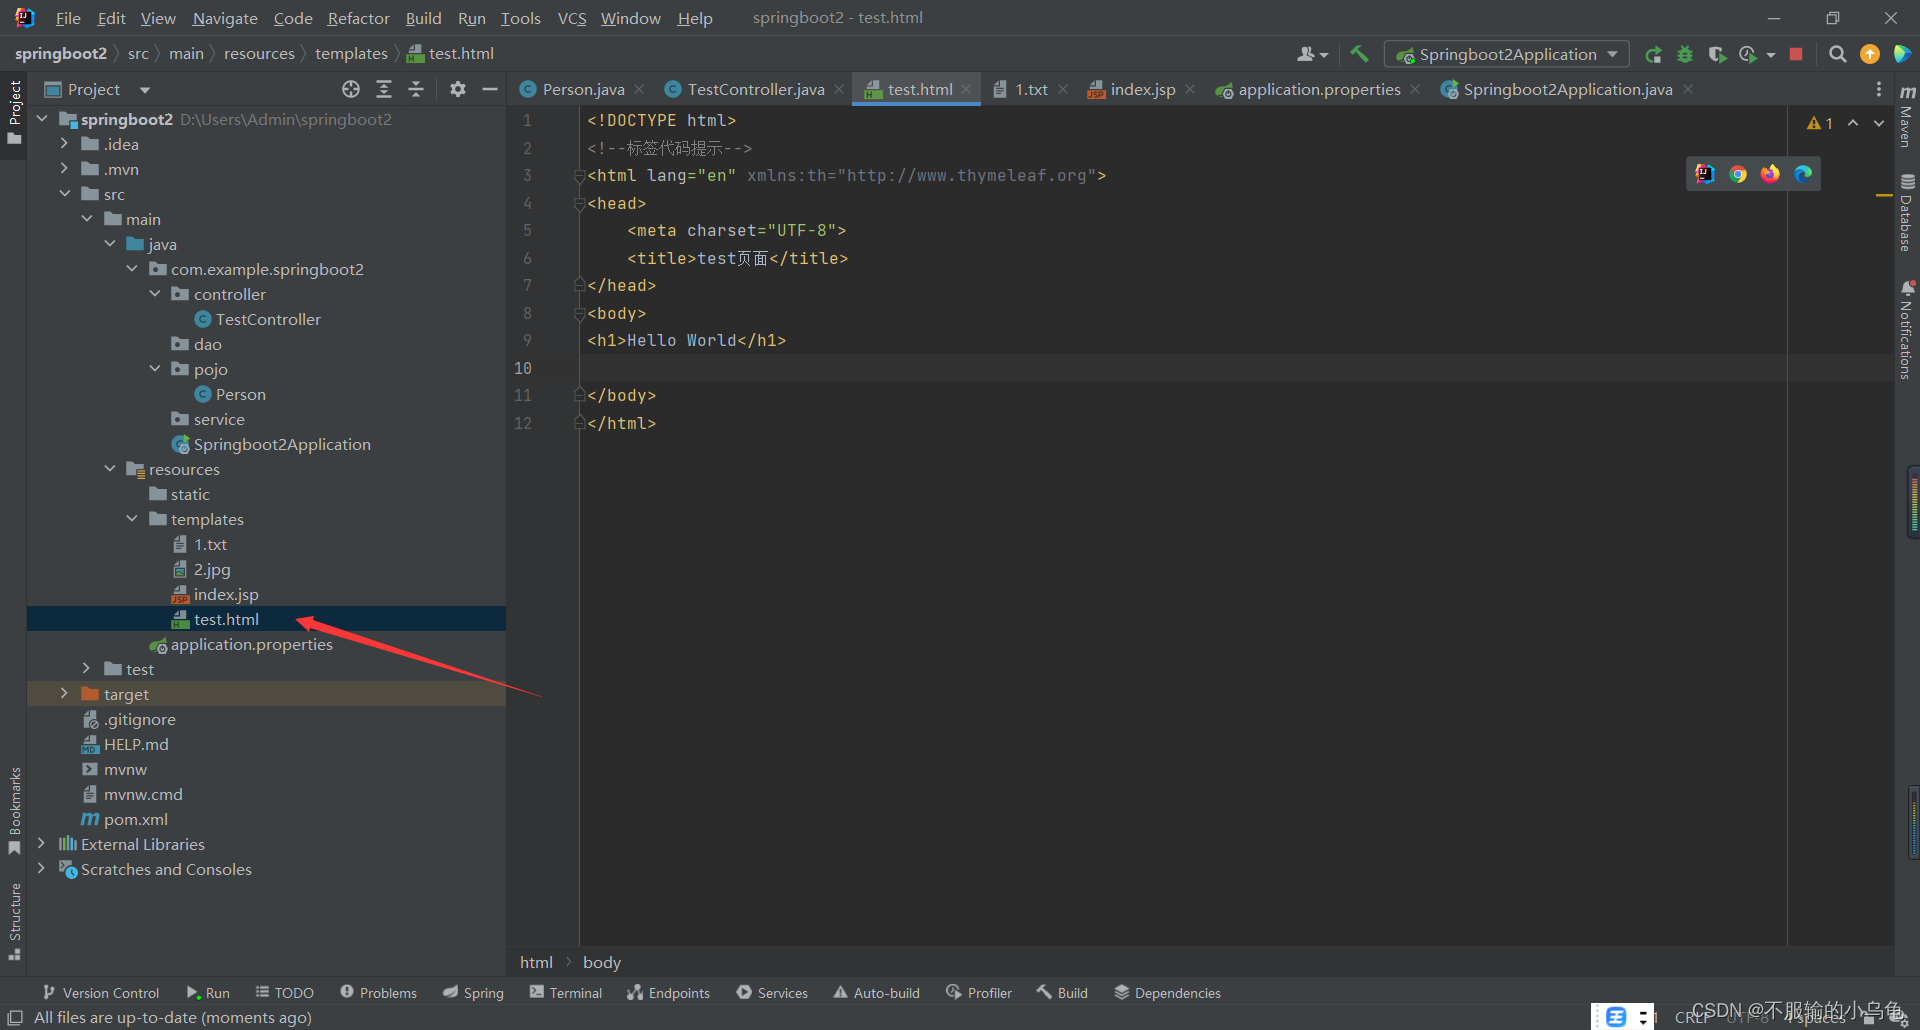
<!DOCTYPE html>
<!--标签代码提示-->
<html lang="en" xmlns:th="http://www.thymeleaf.org">
<head>
    <meta charset="UTF-8">
    <title>test页面</title>
</head>
<body>
<h1>Hello World</h1>
</body>
</html>
2、修改TestController类
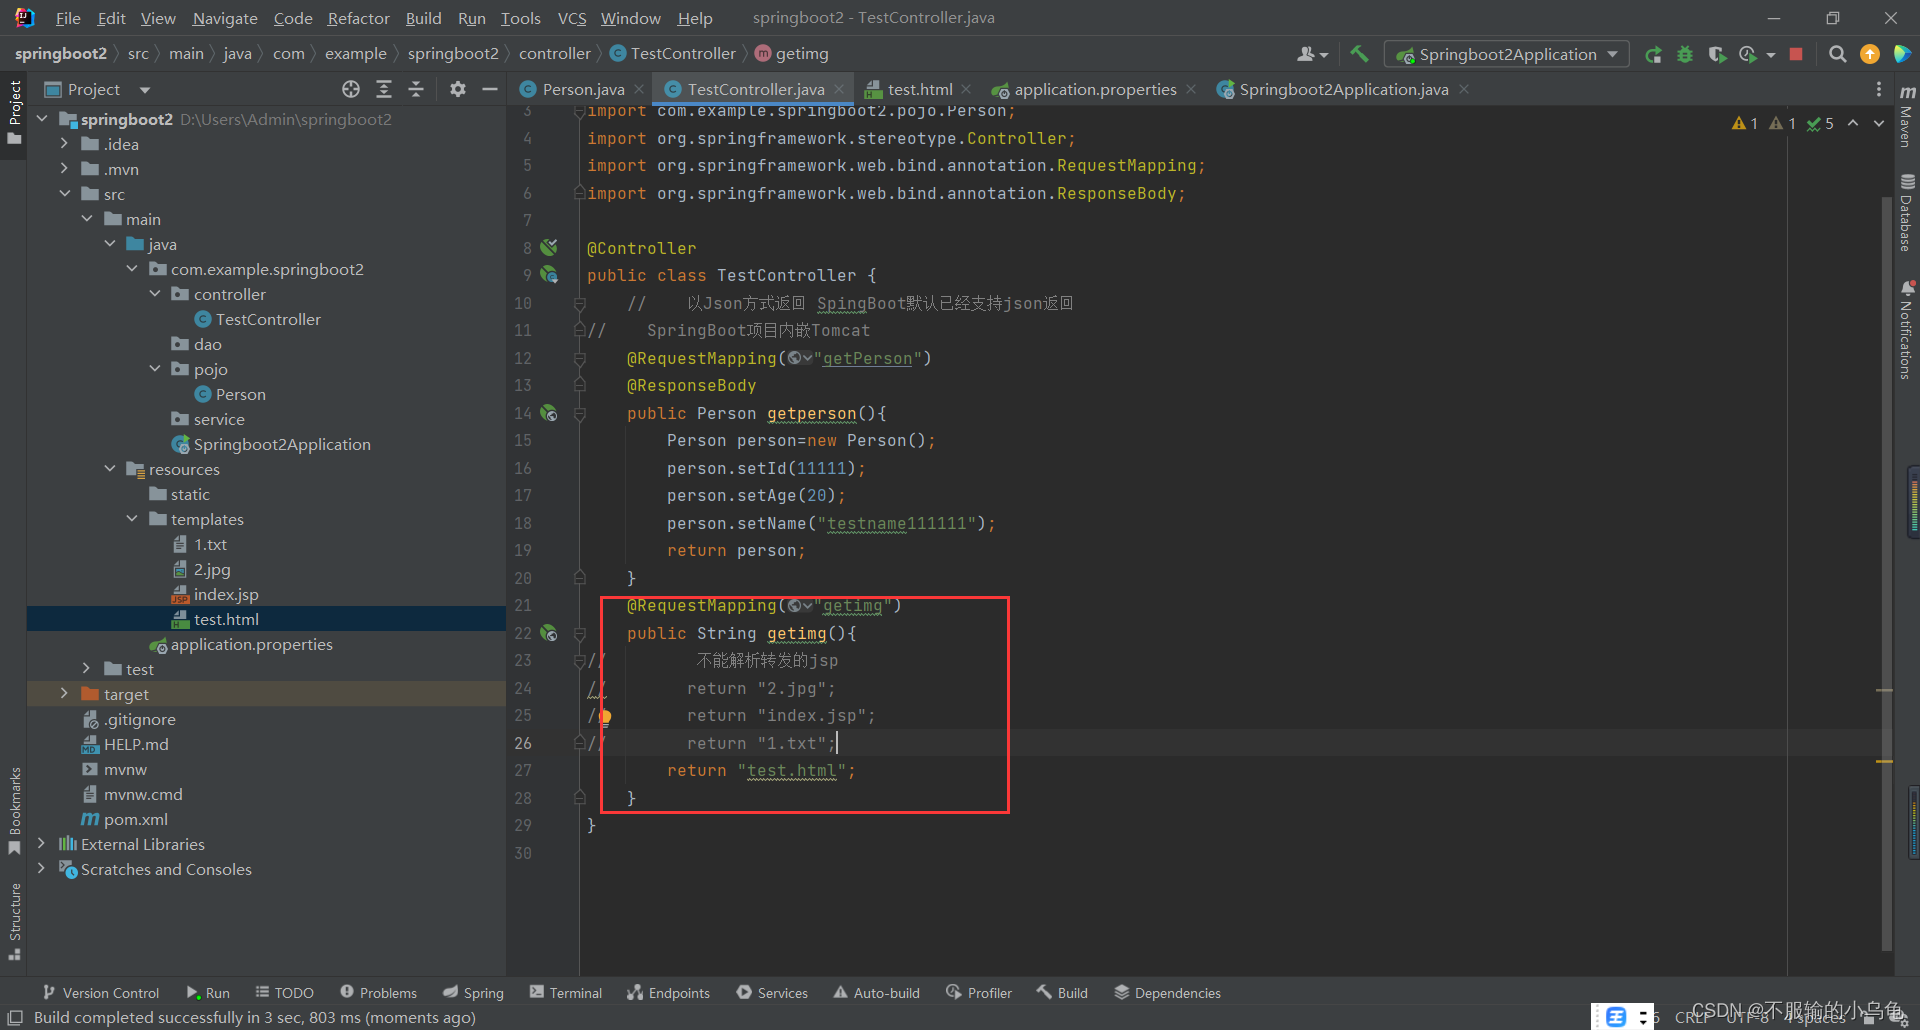
    @RequestMapping("getimg")
    public String getimg(){


//         不能解析转发的jsp
//        return "2.jpg";
//        return "index.jsp";
//        return "1.txt";
        return "test.html";
    }
3、刷新浏览器页面,出现Hello World
九、thymeleaf
在jsp中使用el表达式,但是html不认识el表达式,所以我们使用thymeleaf
1、在pom.xml中导入thymeleaf依赖包
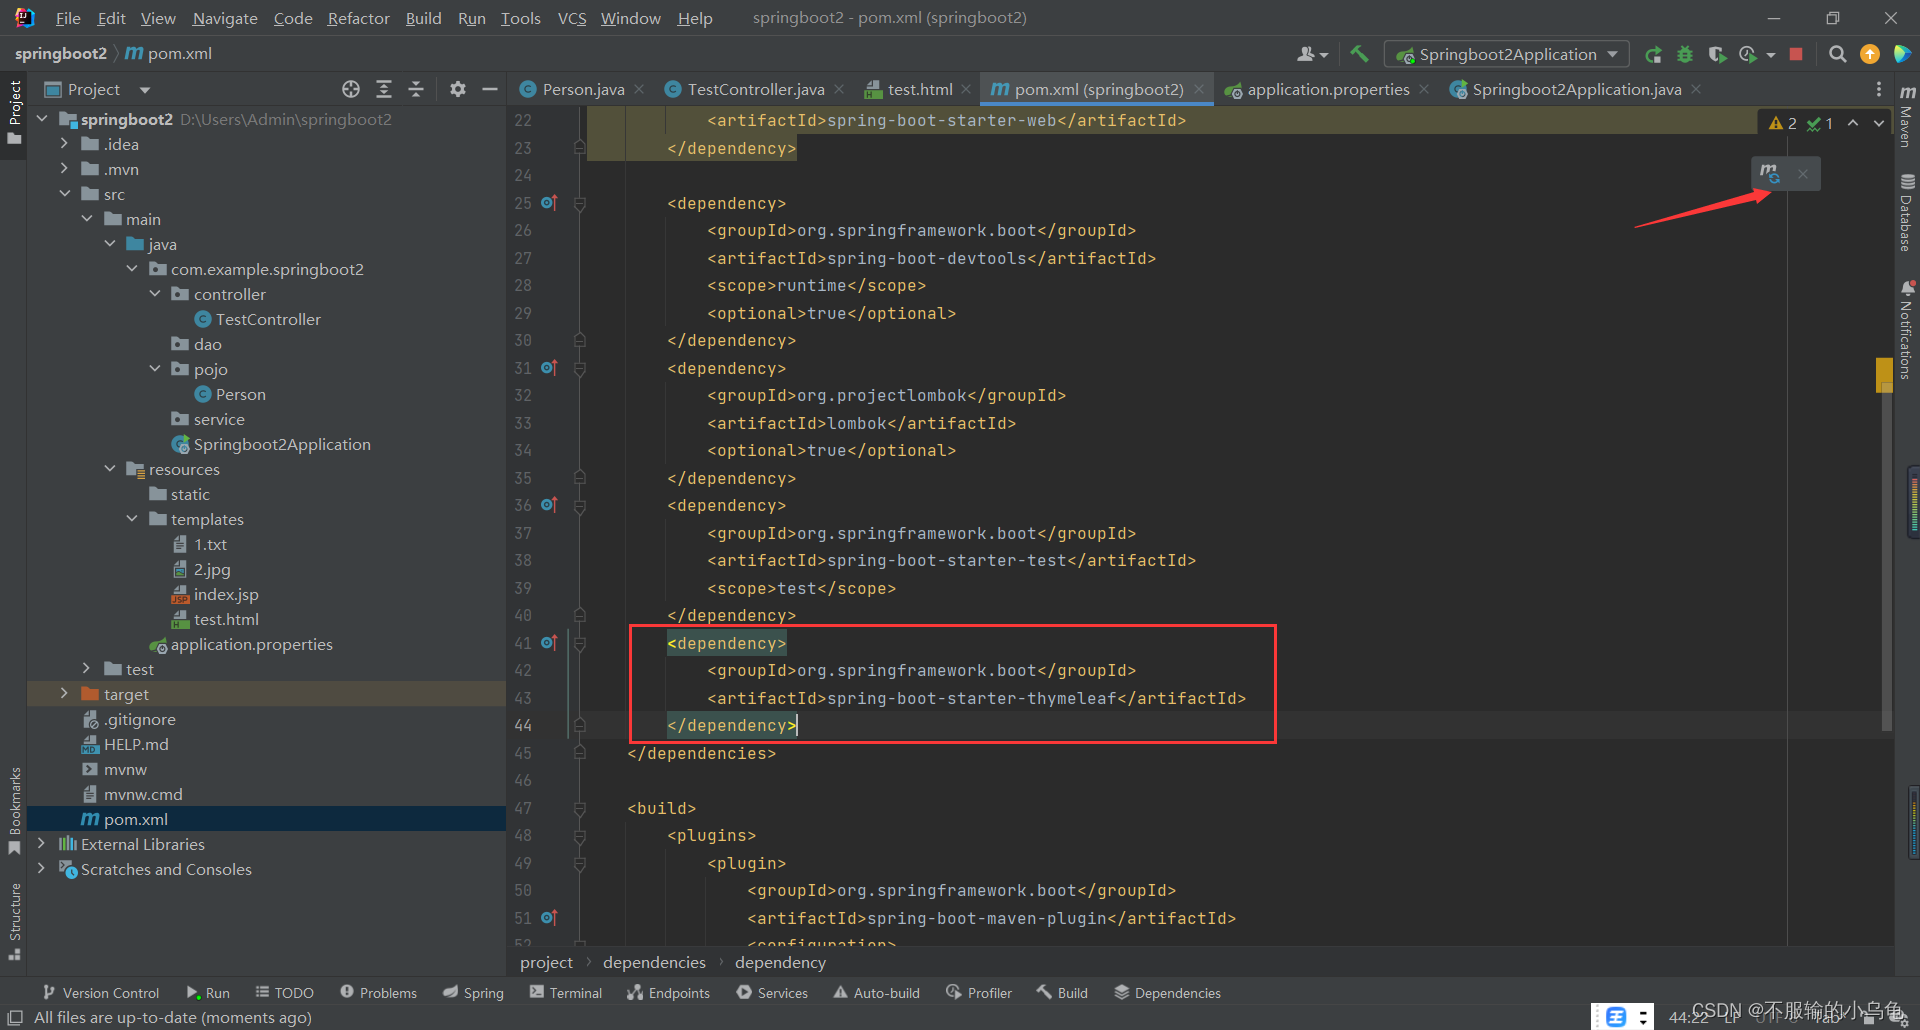
<dependency>
			<groupId>org.springframework.boot</groupId>
			<artifactId>spring-boot-starter-thymeleaf</artifactId>
</dependency>
2、修改test.html

<!DOCTYPE html>
<!--标签代码提示-->
<html lang="en" xmlns:th="http://www.thymeleaf.org">
<head>
    <meta charset="UTF-8">
    <title>test页面</title>
</head>
<body>
<h1>Hello World</h1>
<div th:text="${name}"></div>
<div>${name}</div>
3、修改TestController类
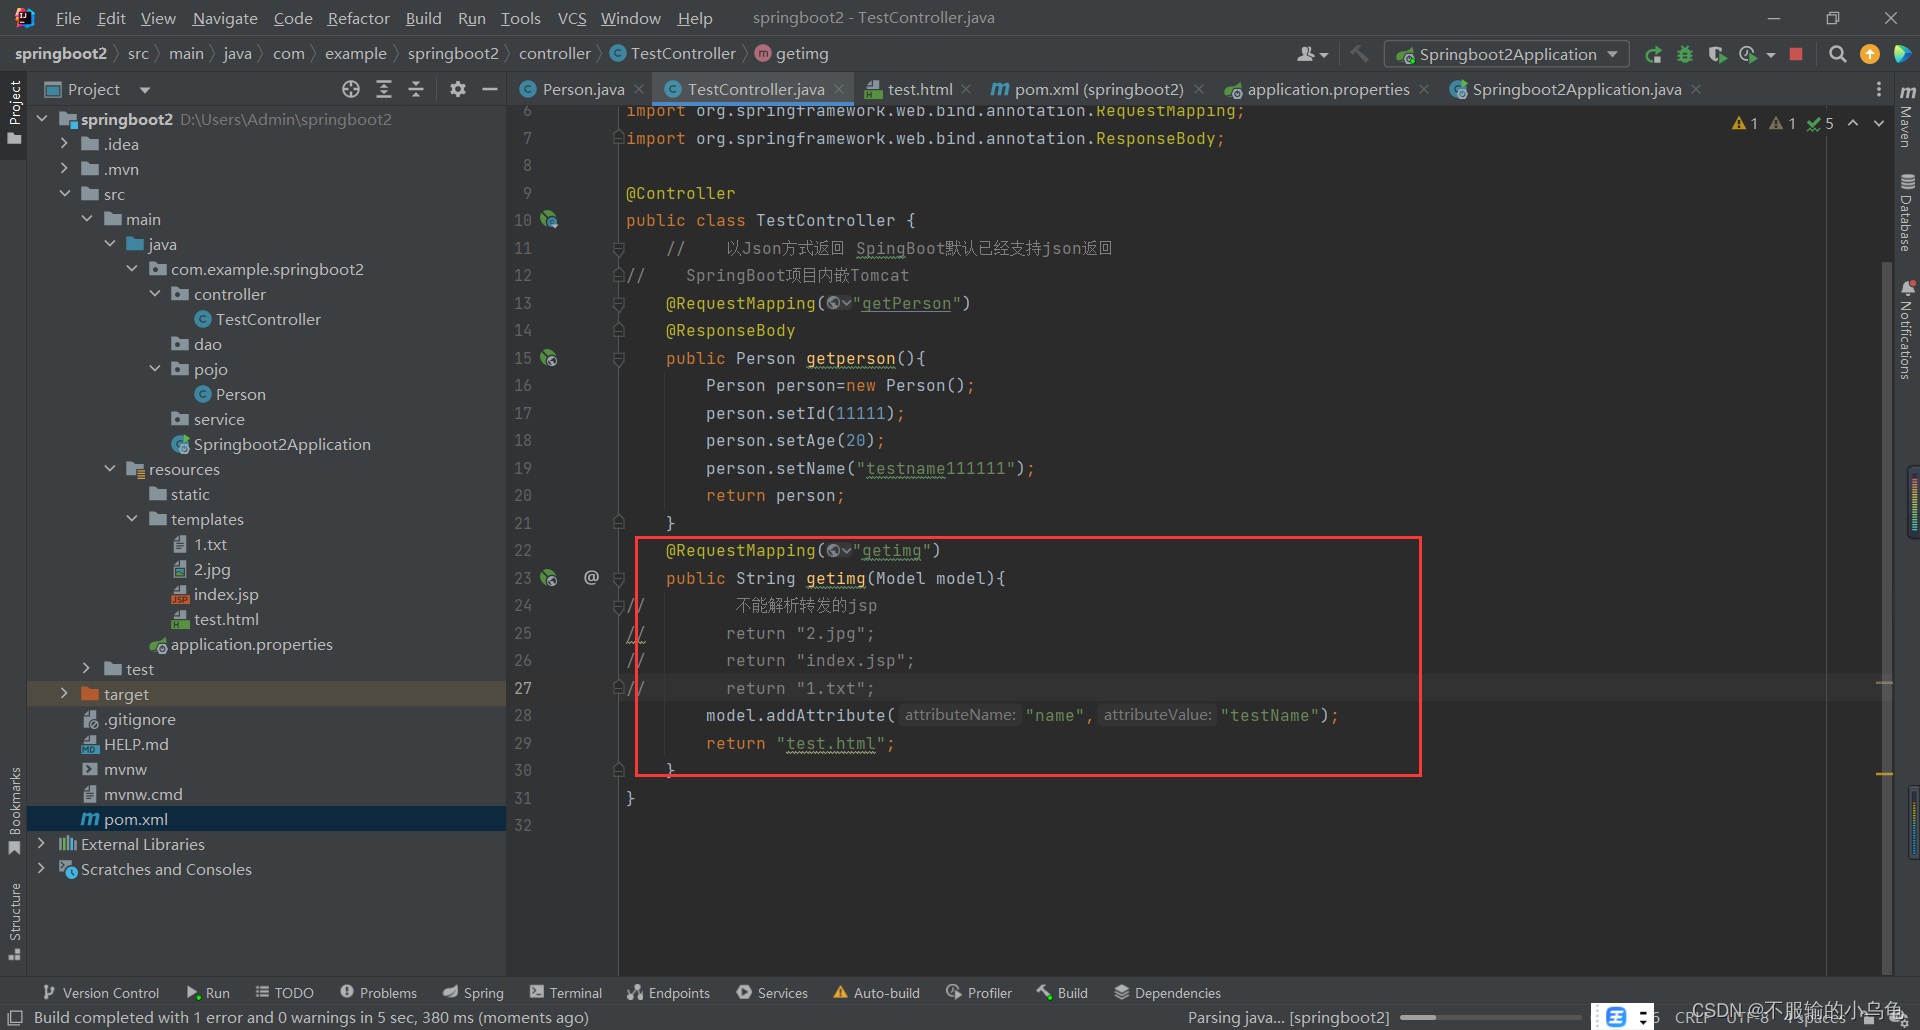
    @RequestMapping("getimg")
    public String getimg(Model model){


//         不能解析转发的jsp
//        return "2.jpg";
//        return "index.jsp";
//        return "1.txt";
        model.addAttribute("name","testName");
        return "test.html";
    }
4、重启项目,访问浏览器,html支持thymeleaf,而不认识el表达式

十、列表标签
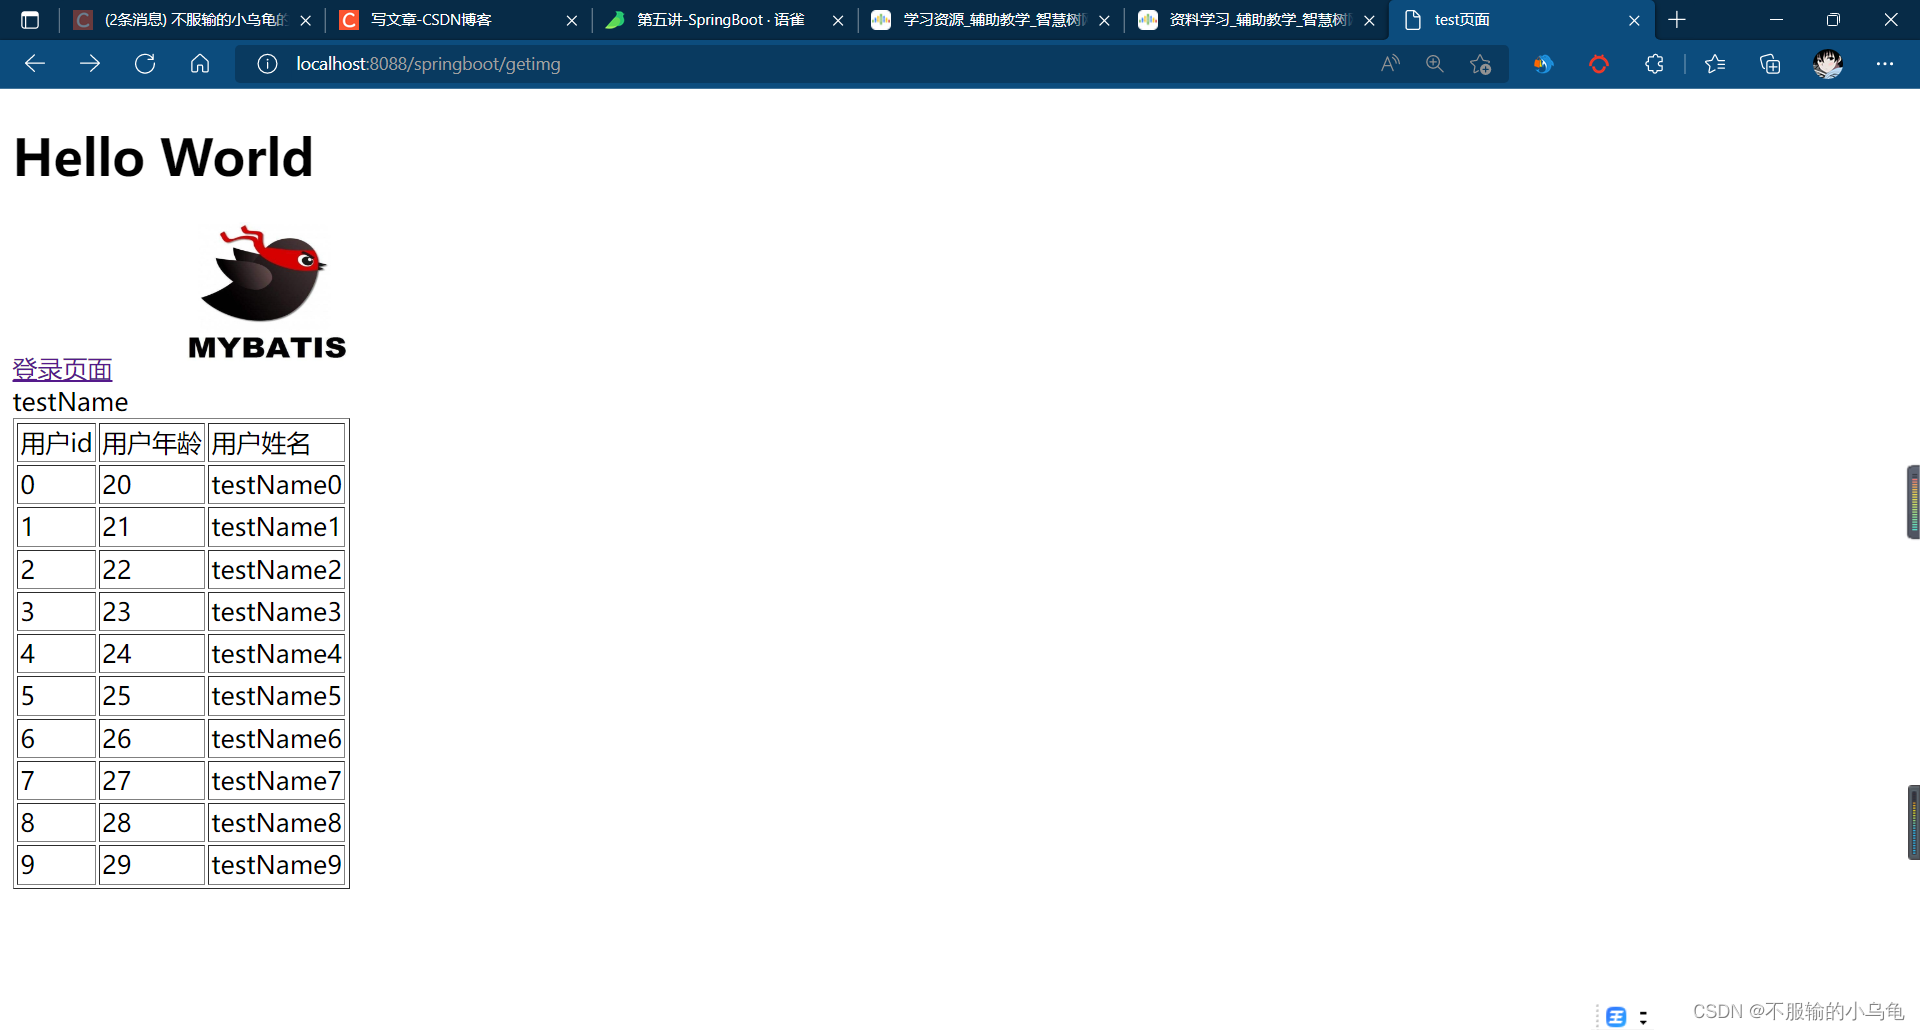
1、修改修改TestController类
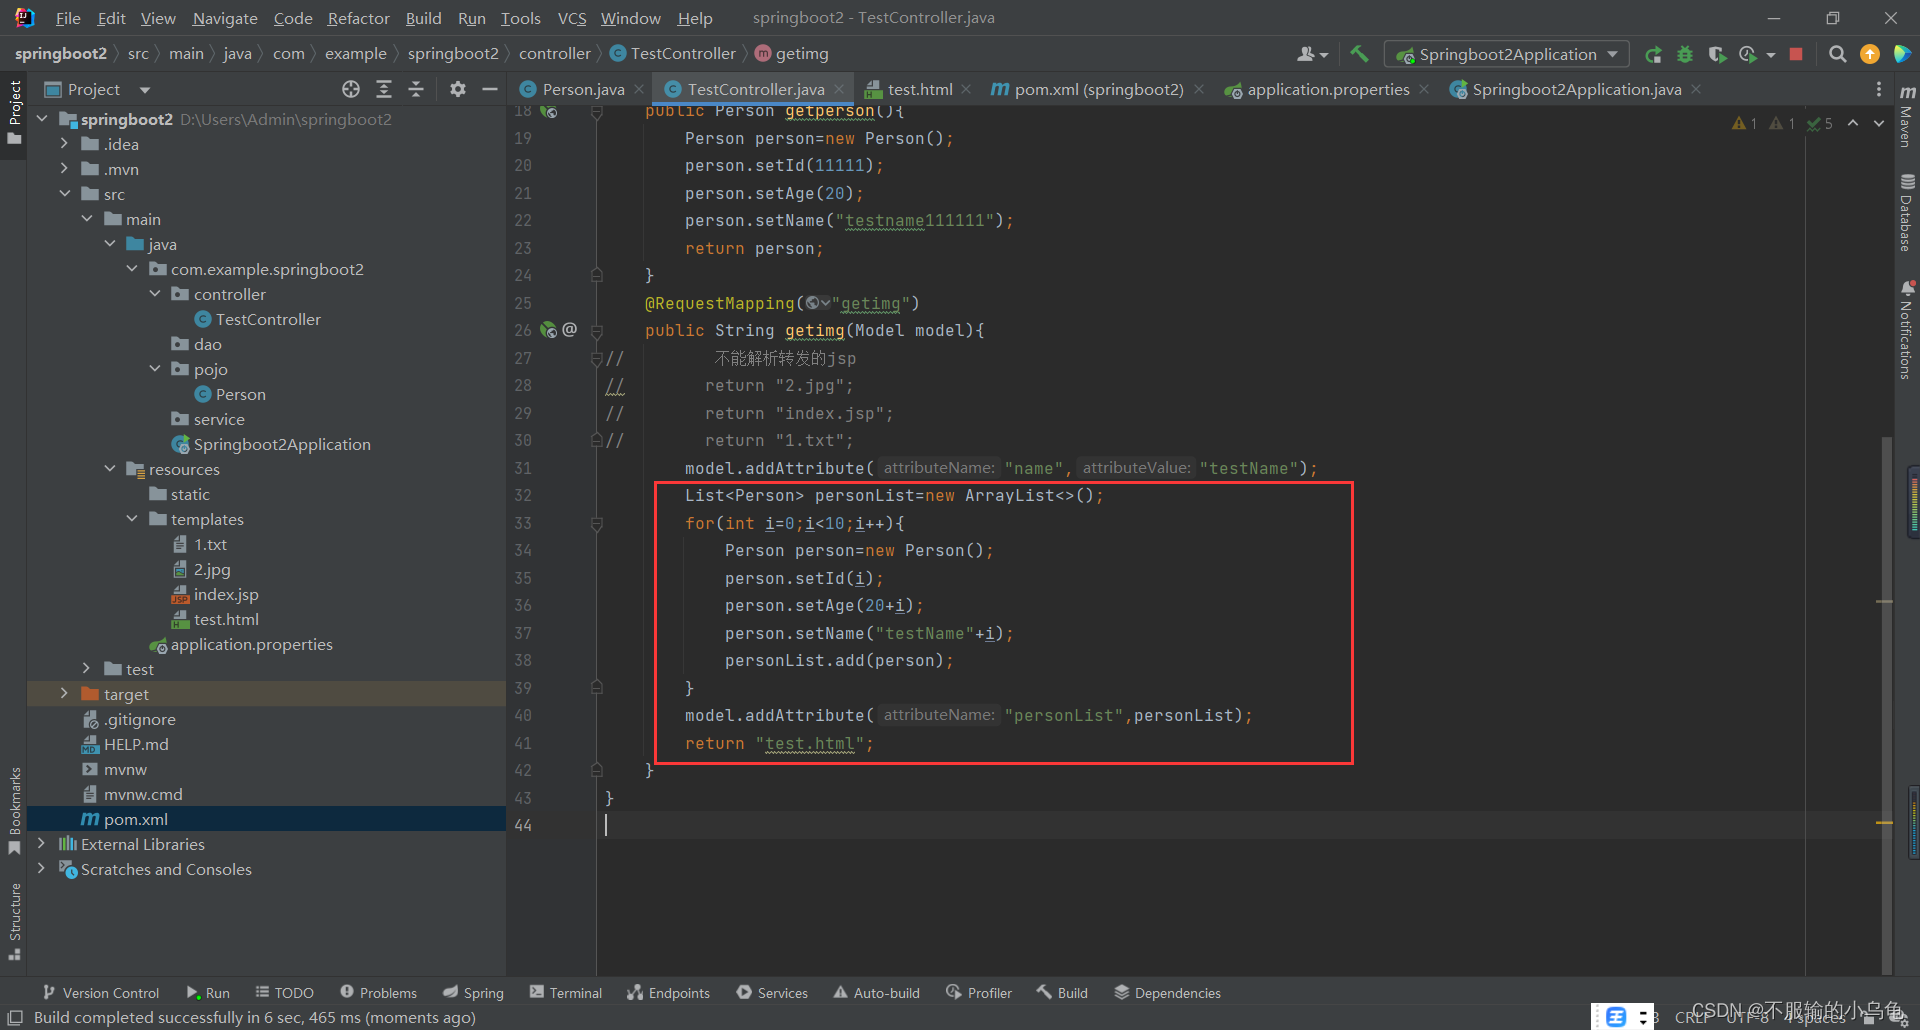
    @RequestMapping("getimg")
    public String getimg(Model model){


//         不能解析转发的jsp
//        return "2.jpg";
//        return "index.jsp";
//        return "1.txt";
        model.addAttribute("name","testName");
        List<Person> personList=new ArrayList<>();
        for(int i=0;i<10;i++){


            Person person=new Person();
            person.setId(i);
            person.setAge(20+i);
            person.setName("testName"+i);
            personList.add(person);
        }
        model.addAttribute("personList",personList);
        return "test.html";
    }
2、修改test.html

<!DOCTYPE html>
<!--标签代码提示-->
<html lang="en" xmlns:th="http://www.thymeleaf.org">
<head>
<meta charset="UTF-8">
<title>test页面</title>
</head>
<body>
<h1>Hello World</h1>
<!--<a th:href="@{/login}">登录页面</a>-->
<!--<img th:src="@{2.jpg}" width="200" height="100"/>-->
<!--html不认识el表达式-->
<!--html+thymeleaf-->
<!--<div>${name}</div>-->
<div th:text="${name}"></div>
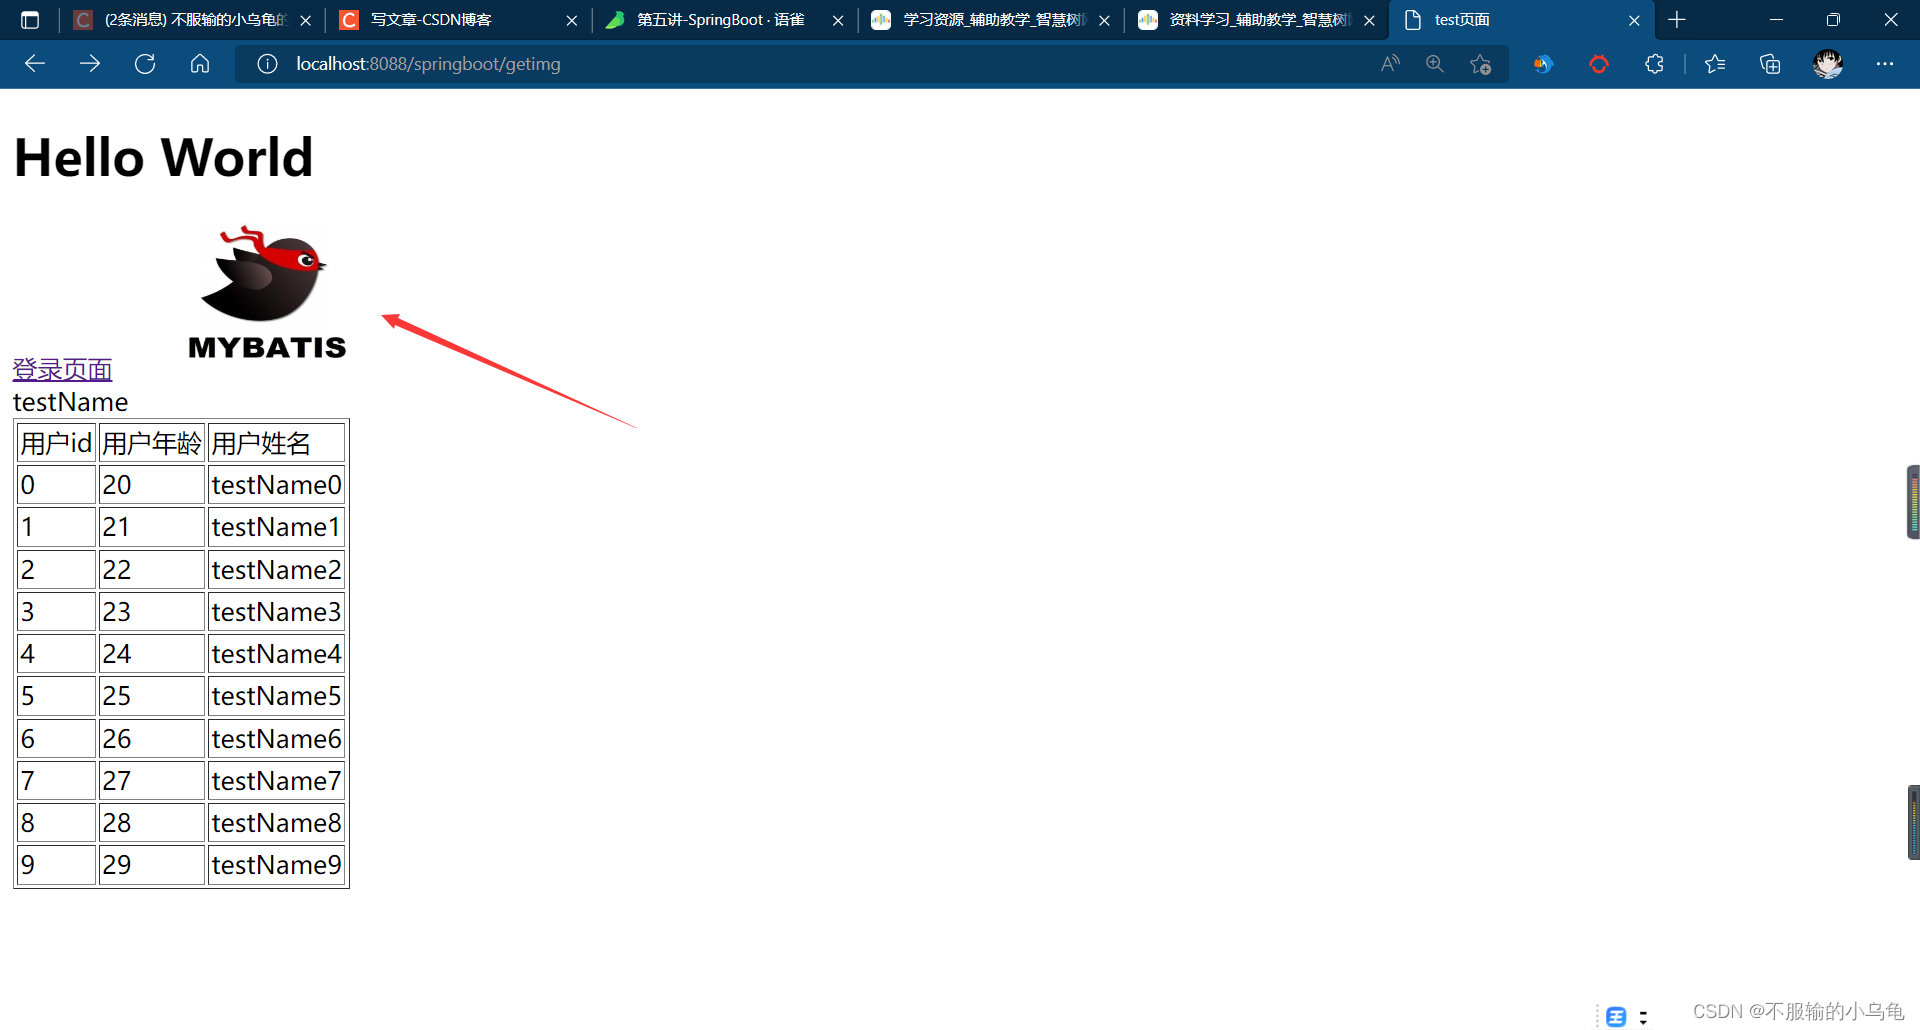
<table border="1">
<tr>
<td>用户id</td>
<td>用户年龄</td>
<td>用户姓名</td>
</tr>
<tr th:each="person:${personList}">
<td th:text="${person.id}">用户id</td>
<td th:text="${person.age}">用户年龄</td>
<td th:text="${person.name}">用户姓名</td>
</tr>
</table>
</body>
</html>
3、刷新浏览器,出现有序列表
十一、链接表达式
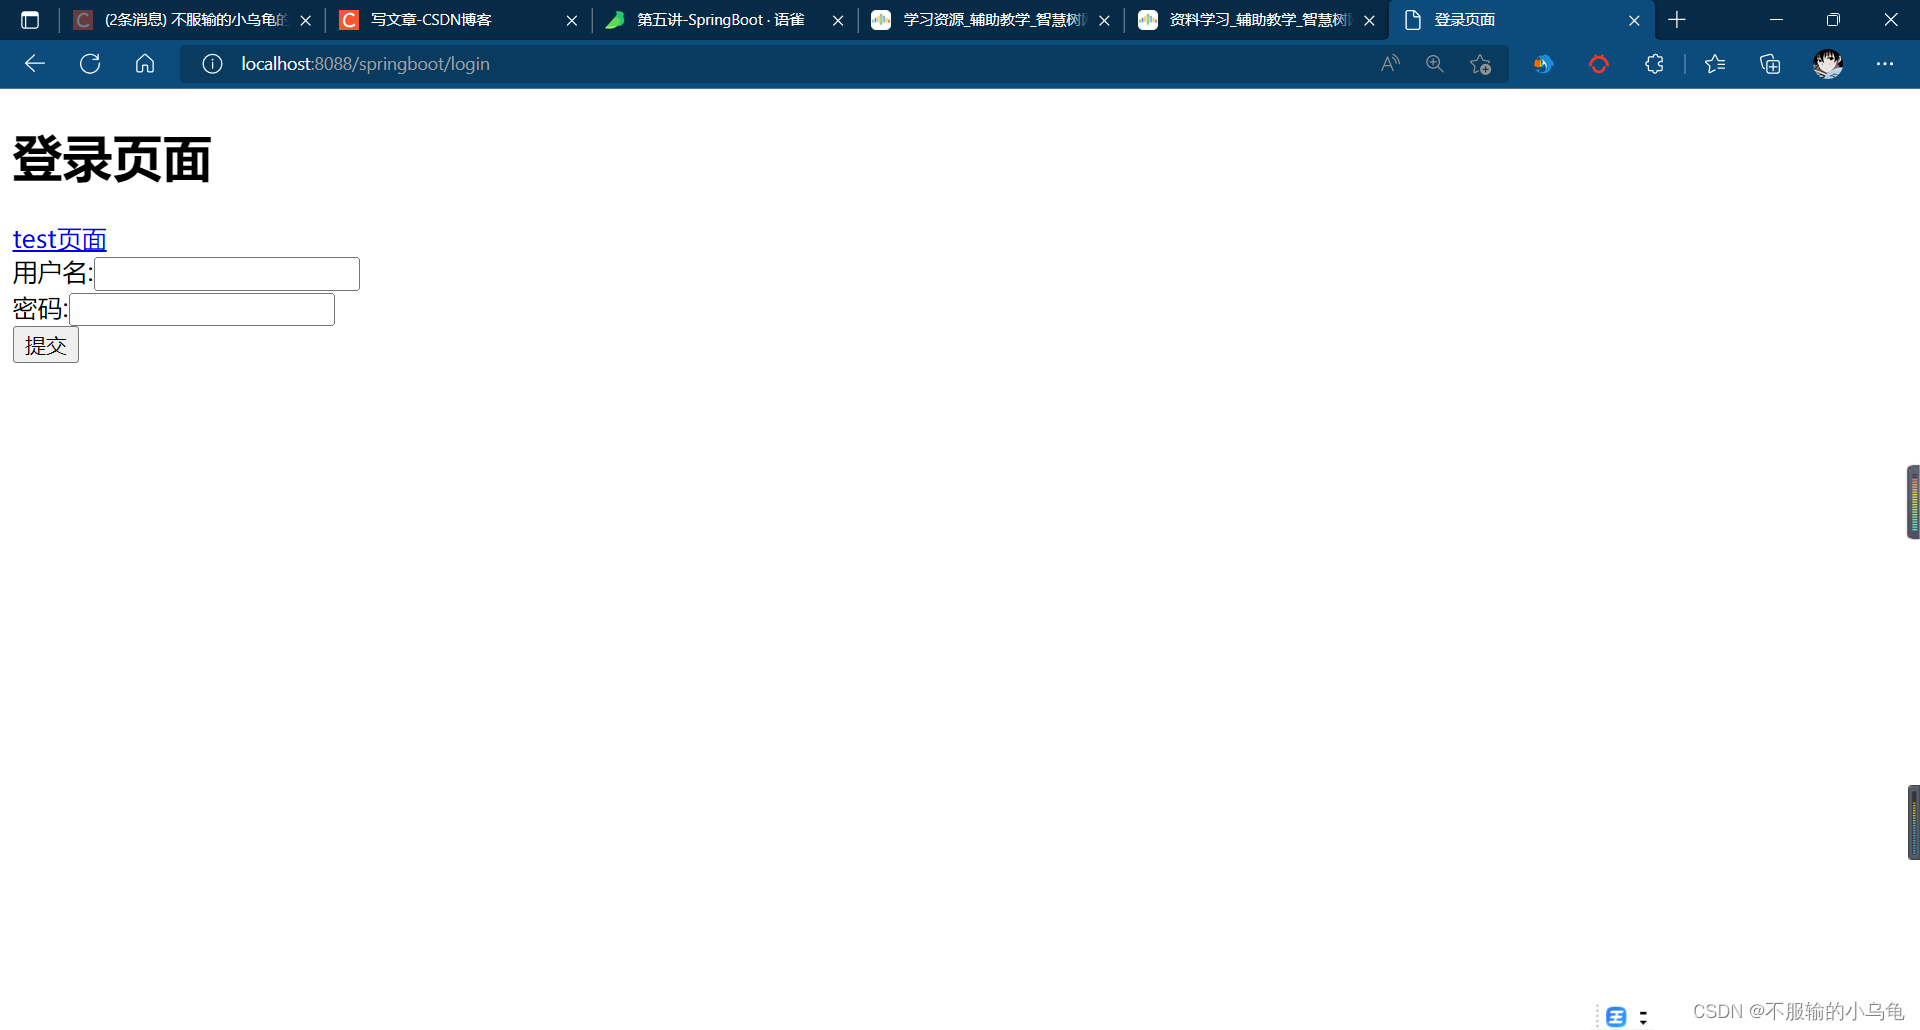
1、在templates文件夹下新建login.html
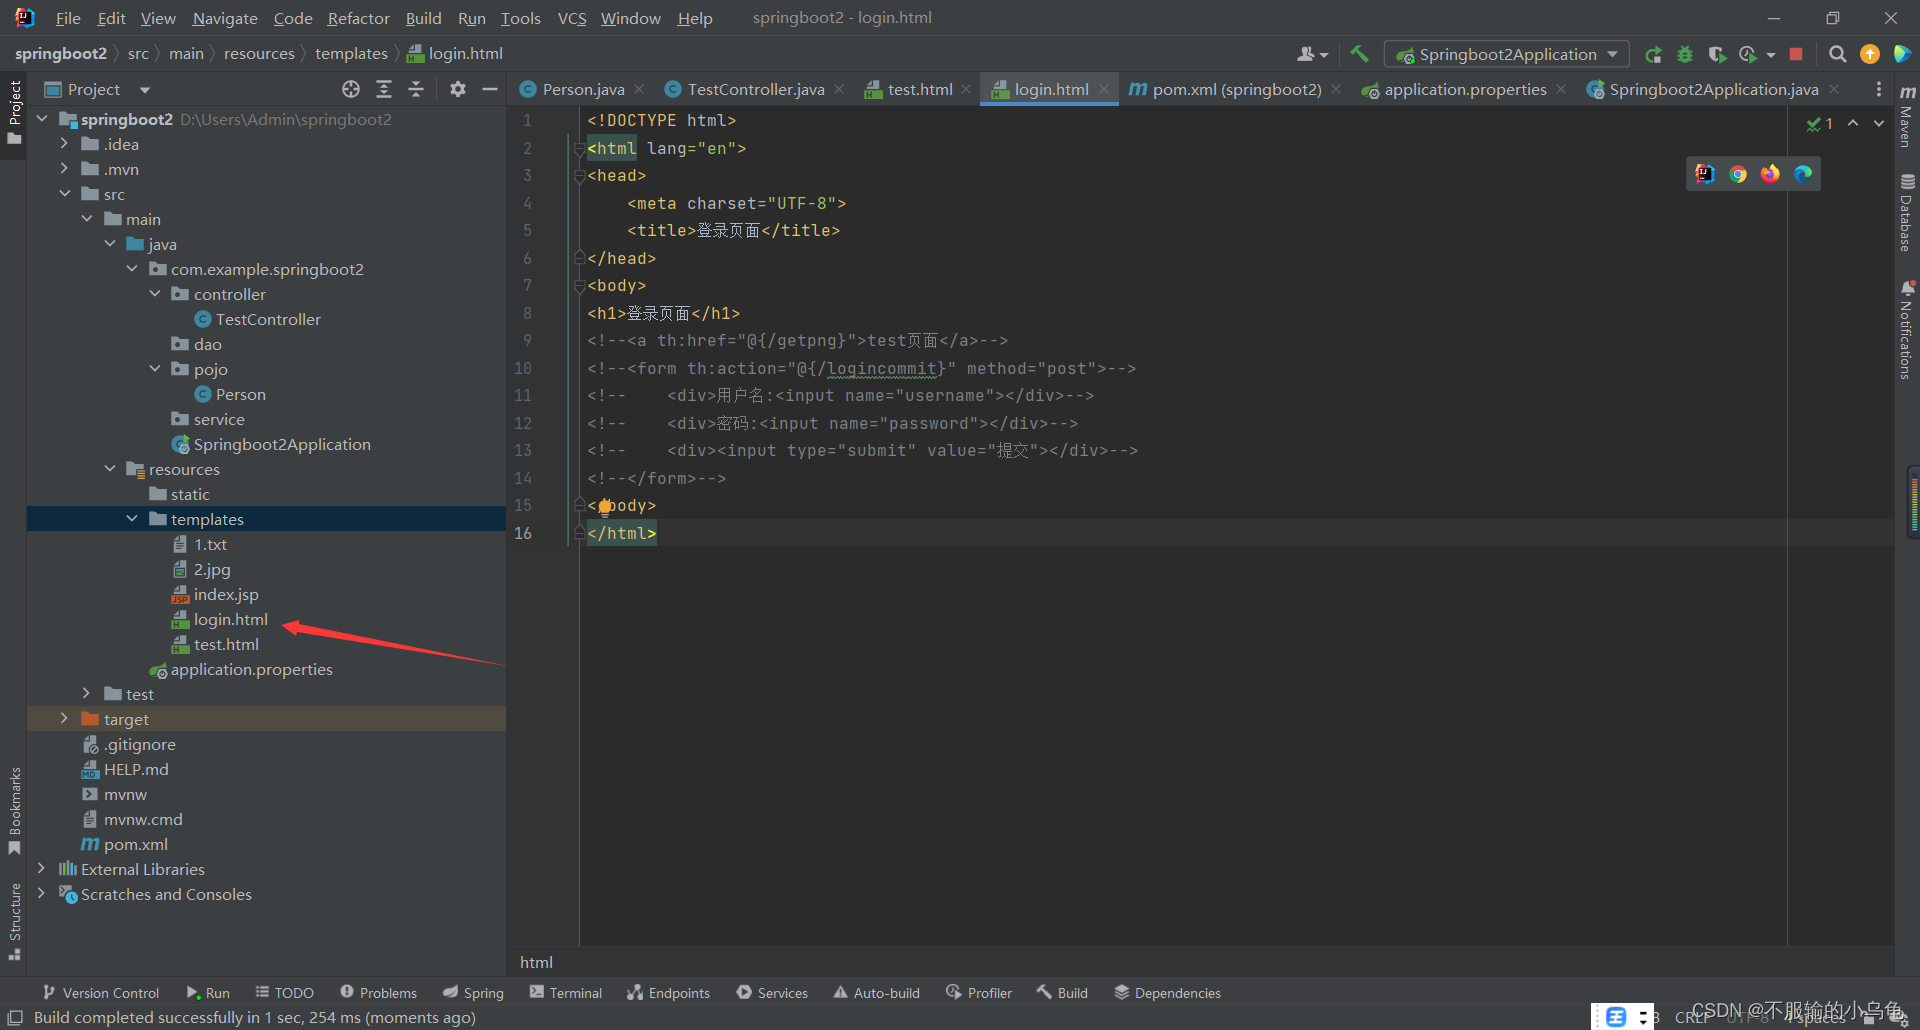
<!DOCTYPE html>
<html lang="en">
<head>
    <meta charset="UTF-8">
    <title>登录页面</title>
</head>
<body>
<h1>登录页面</h1>
<!--<a th:href="@{/getpng}">test页面</a>-->
<!--<form th:action="@{/logincommit}" method="post">-->
<!--    <div>用户名:<input name="username"></div>-->
<!--    <div>密码:<input name="password"></div>-->
<!--    <div><input type="submit" value="提交"></div>-->
<!--</form>-->
</body>
</html>
2、修改test.html
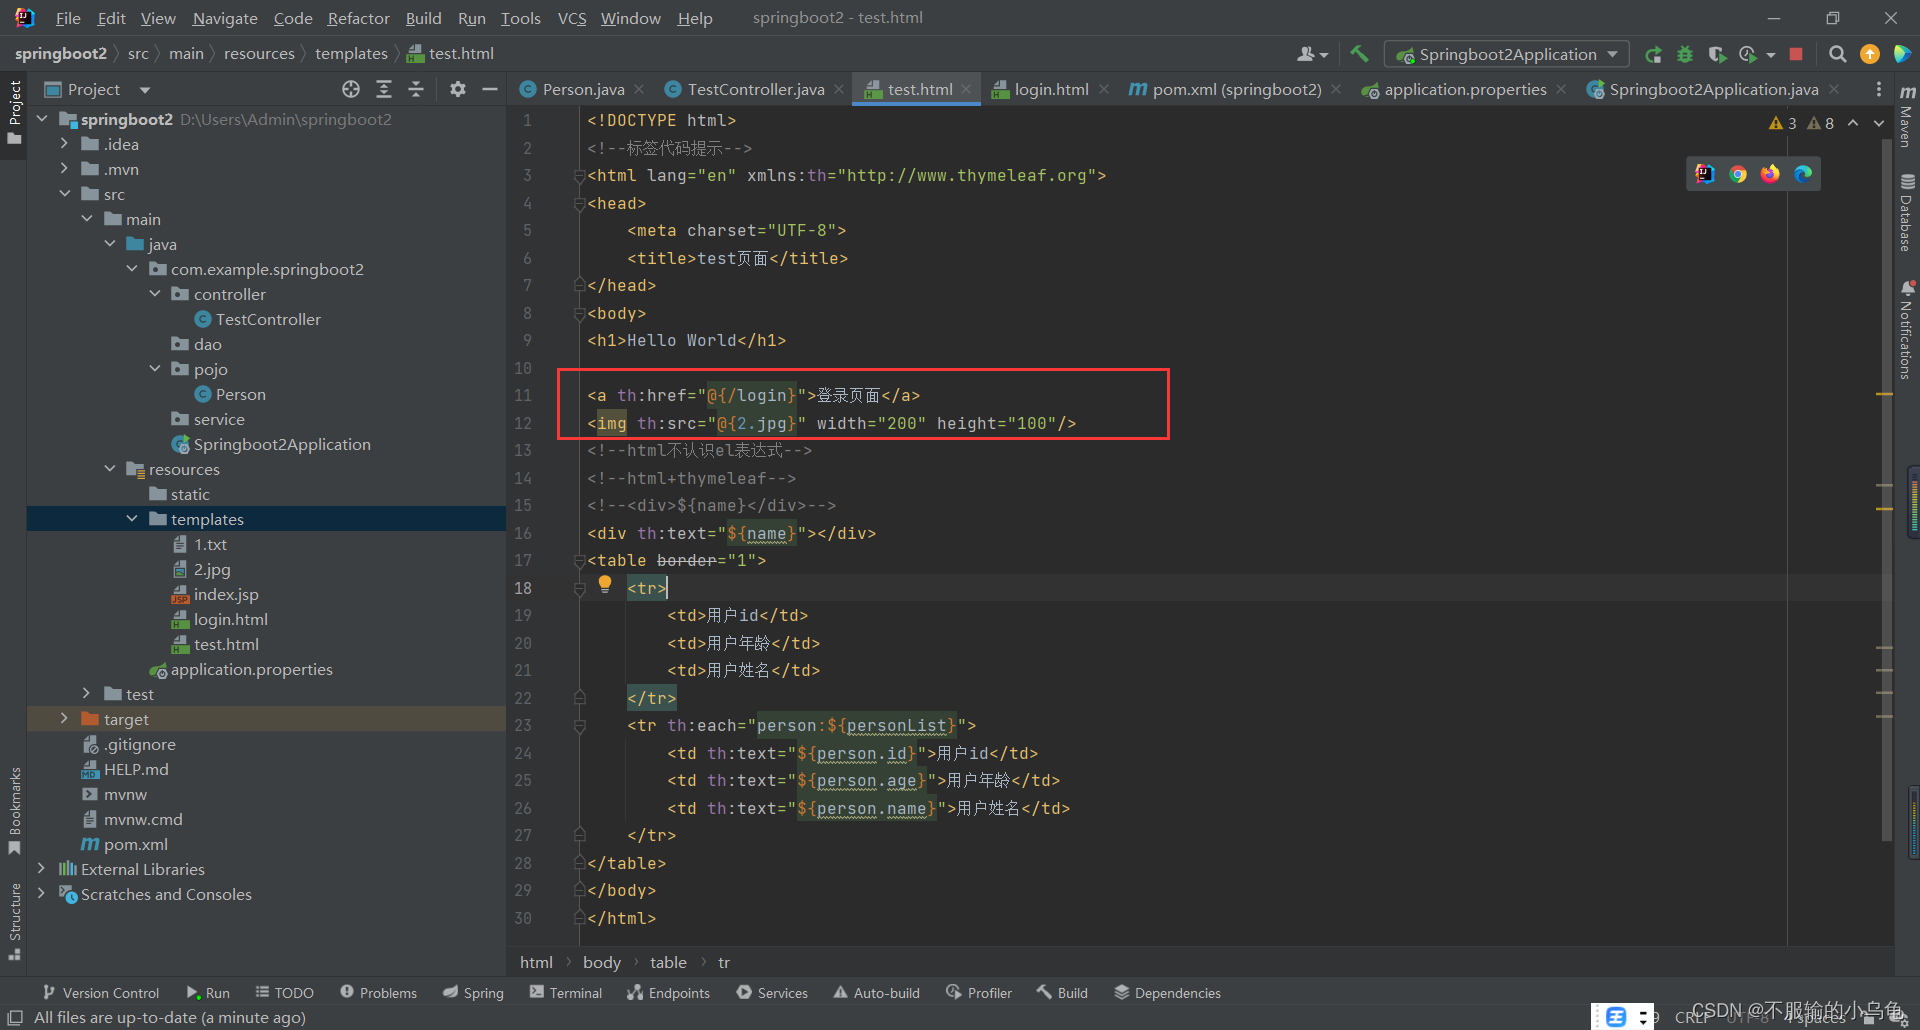
<a th:href="@{/login}">登录页面</a>
<img th:src="@{2.jpg}" width="200" height="100"/>
3、修改TestController类
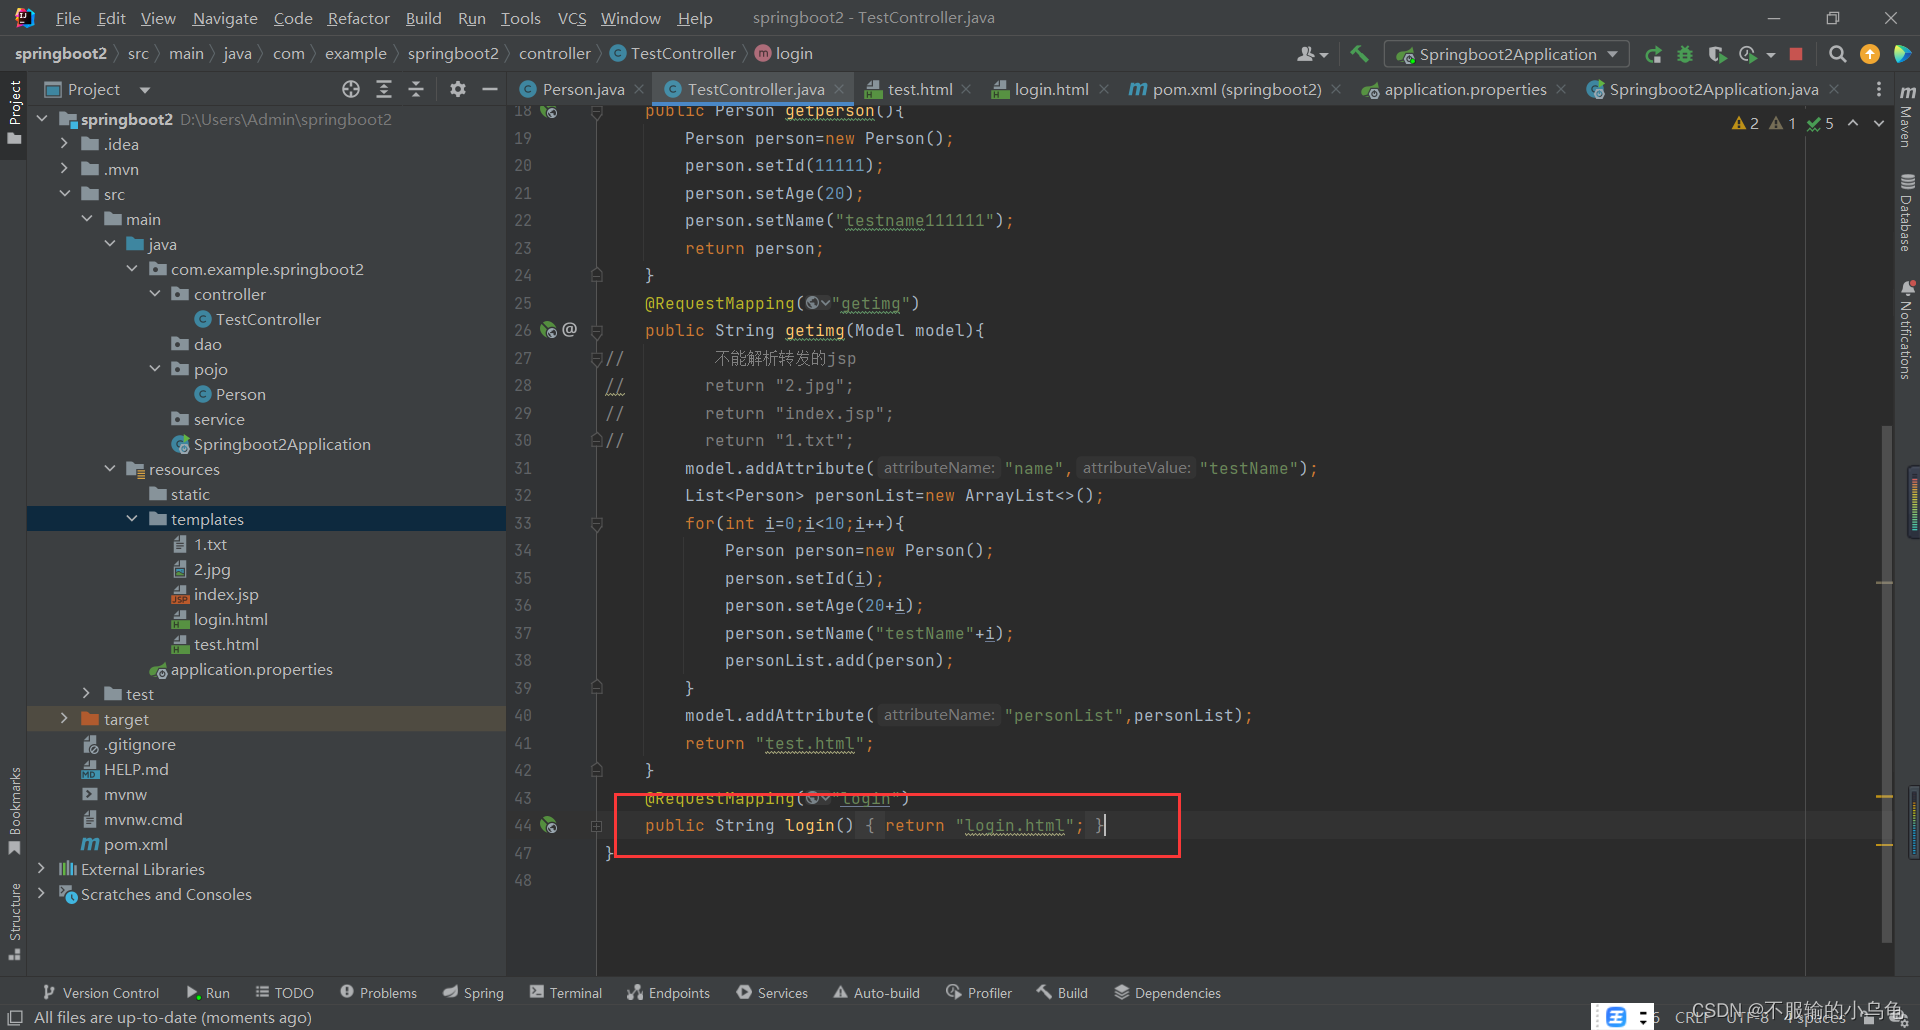
  @RequestMapping("login")
    public String login(){


        return "login.html";
    }
4、重启项目,访问新路径

十二、表单请求
1、修改login.html
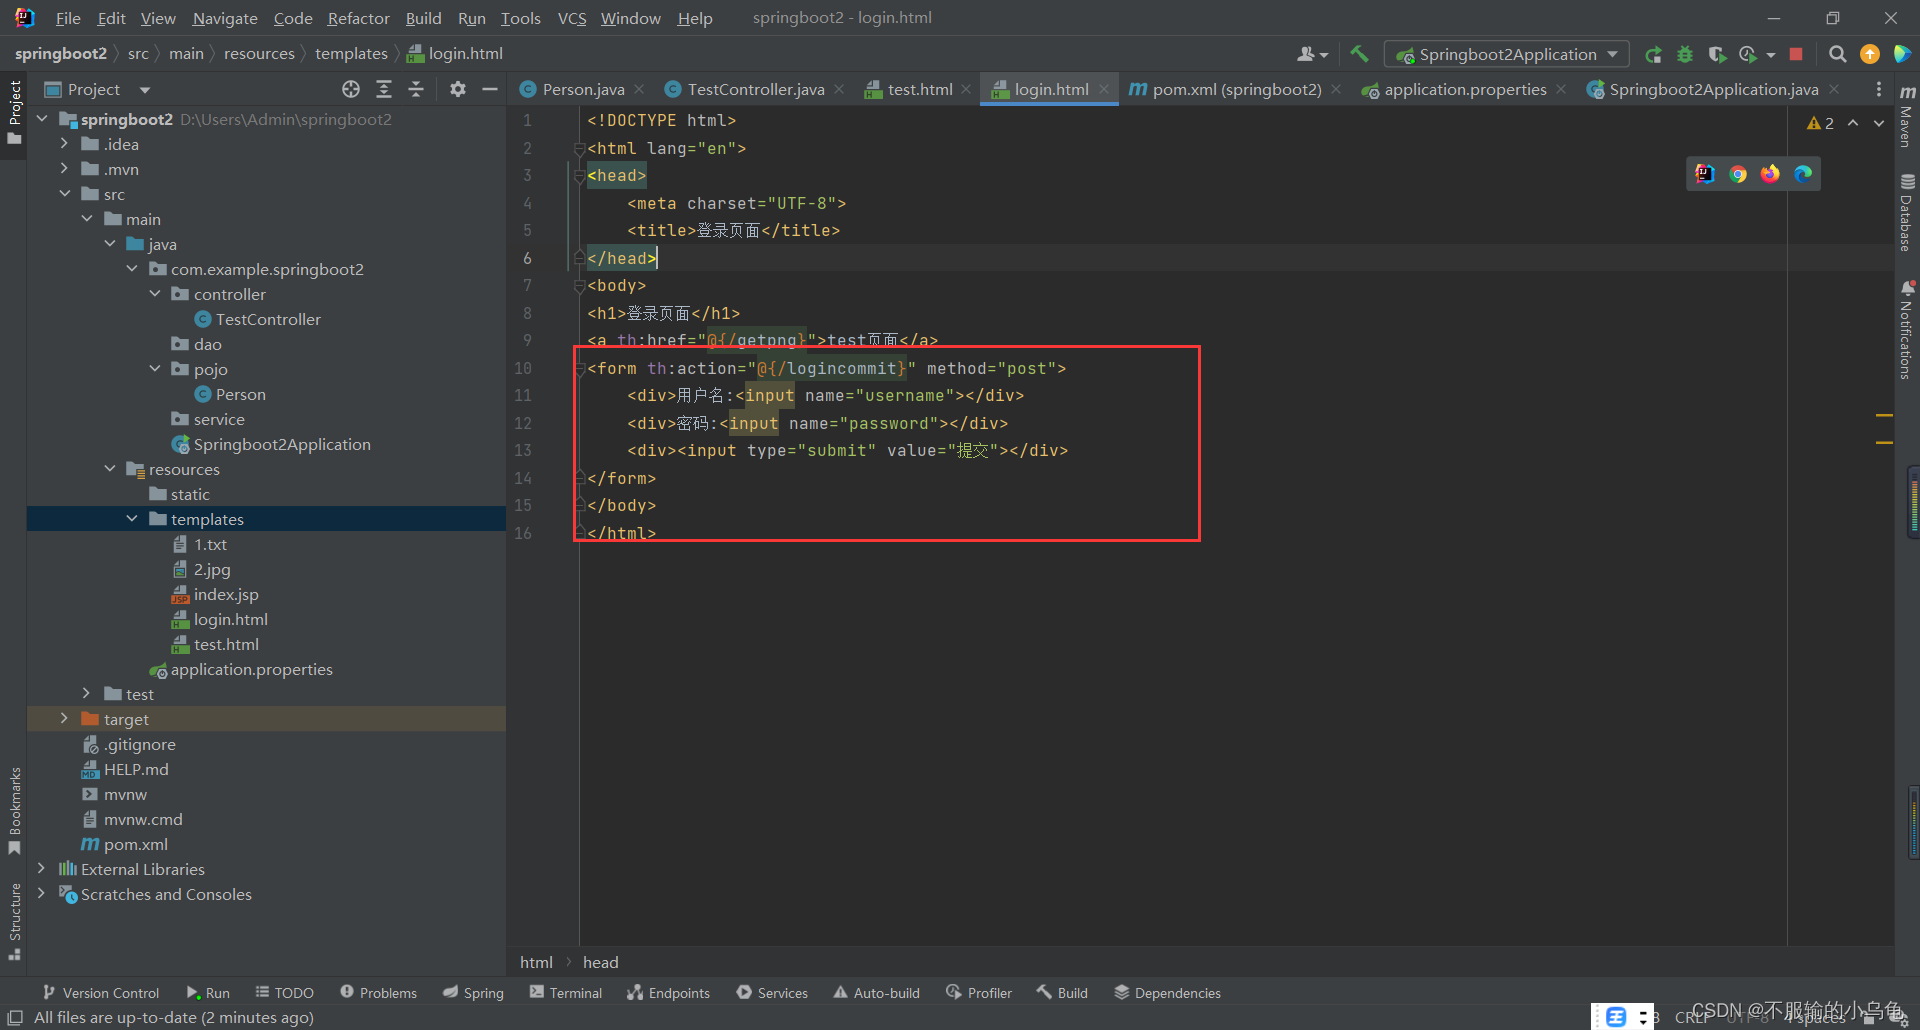
<!DOCTYPE html>
<html lang="en">
<head>
    <meta charset="UTF-8">
    <title>登录页面</title>
</head>
<body>
<h1>登录页面</h1>
<a th:href="@{/getpng}">test页面</a>
<form th:action="@{/logincommit}" method="post">
    <div>用户名:<input name="username"></div>
    <div>密码:<input name="password"></div>
    <div><input type="submit" value="提交"></div>
</form>
</body>
</html>
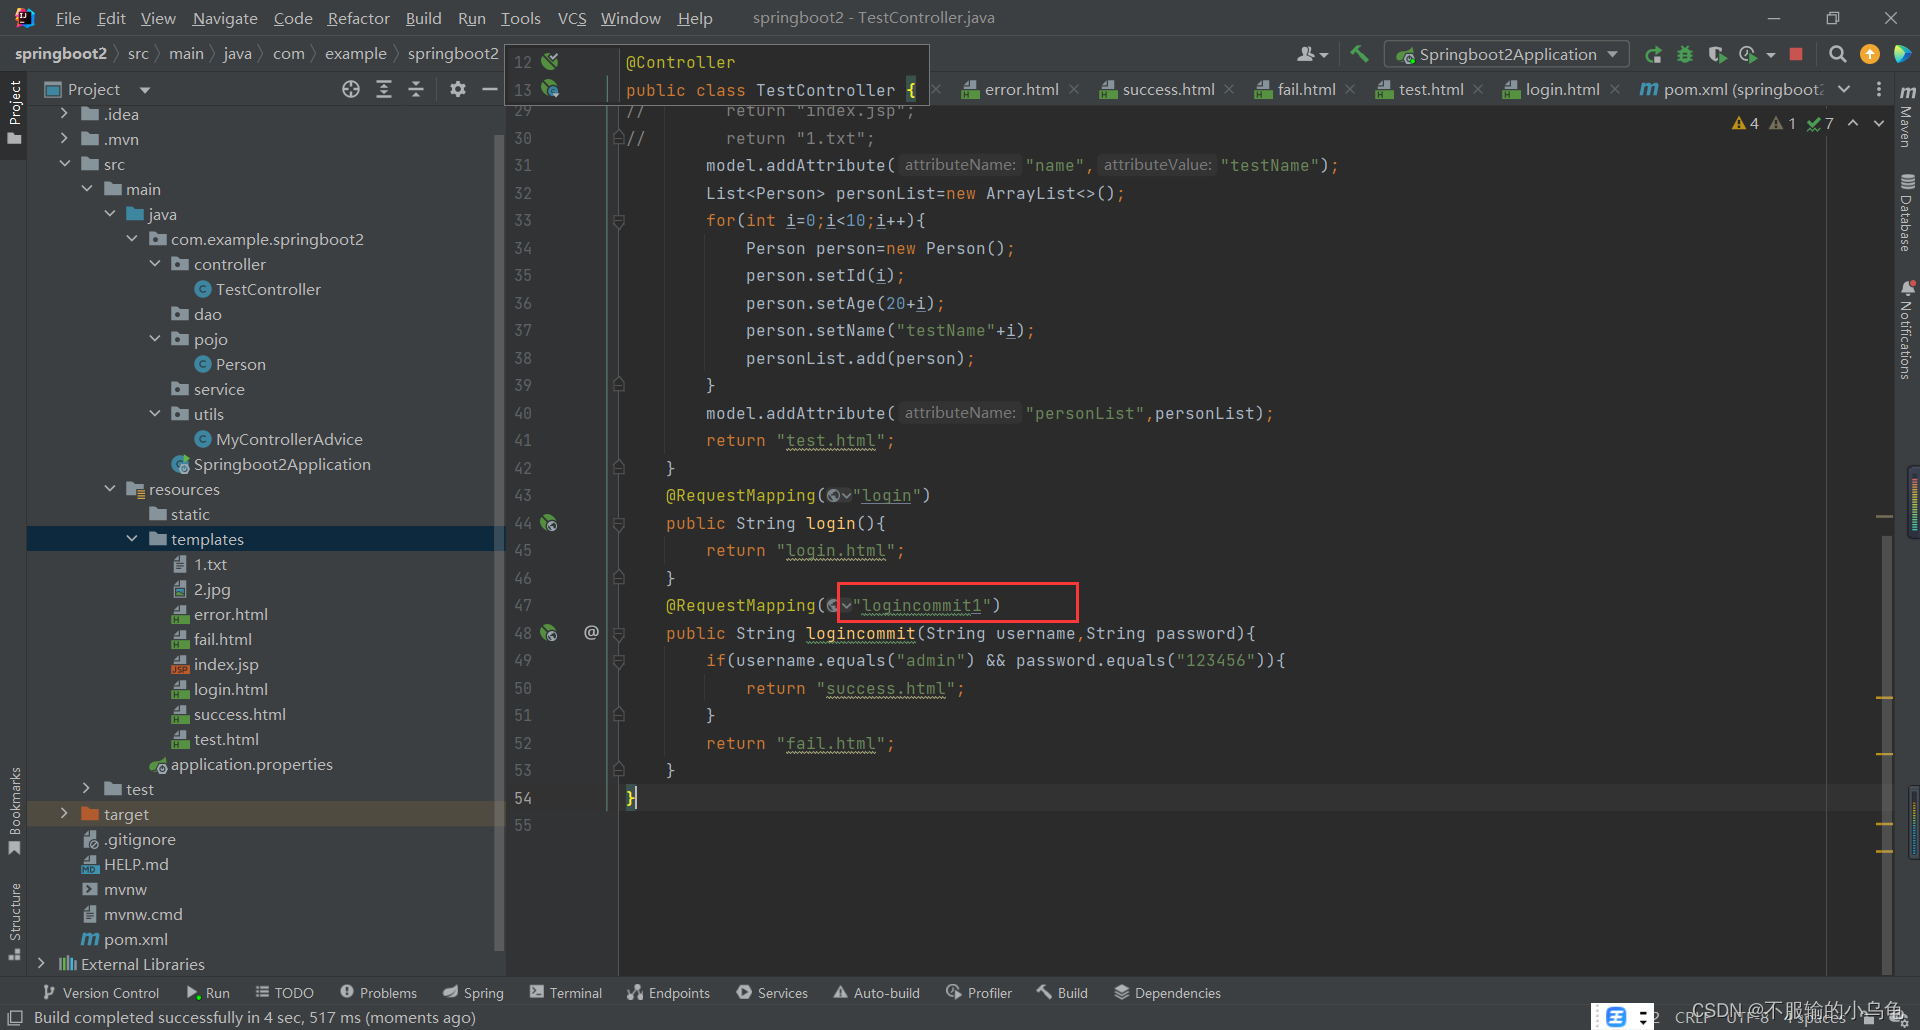
2、修改TestController类
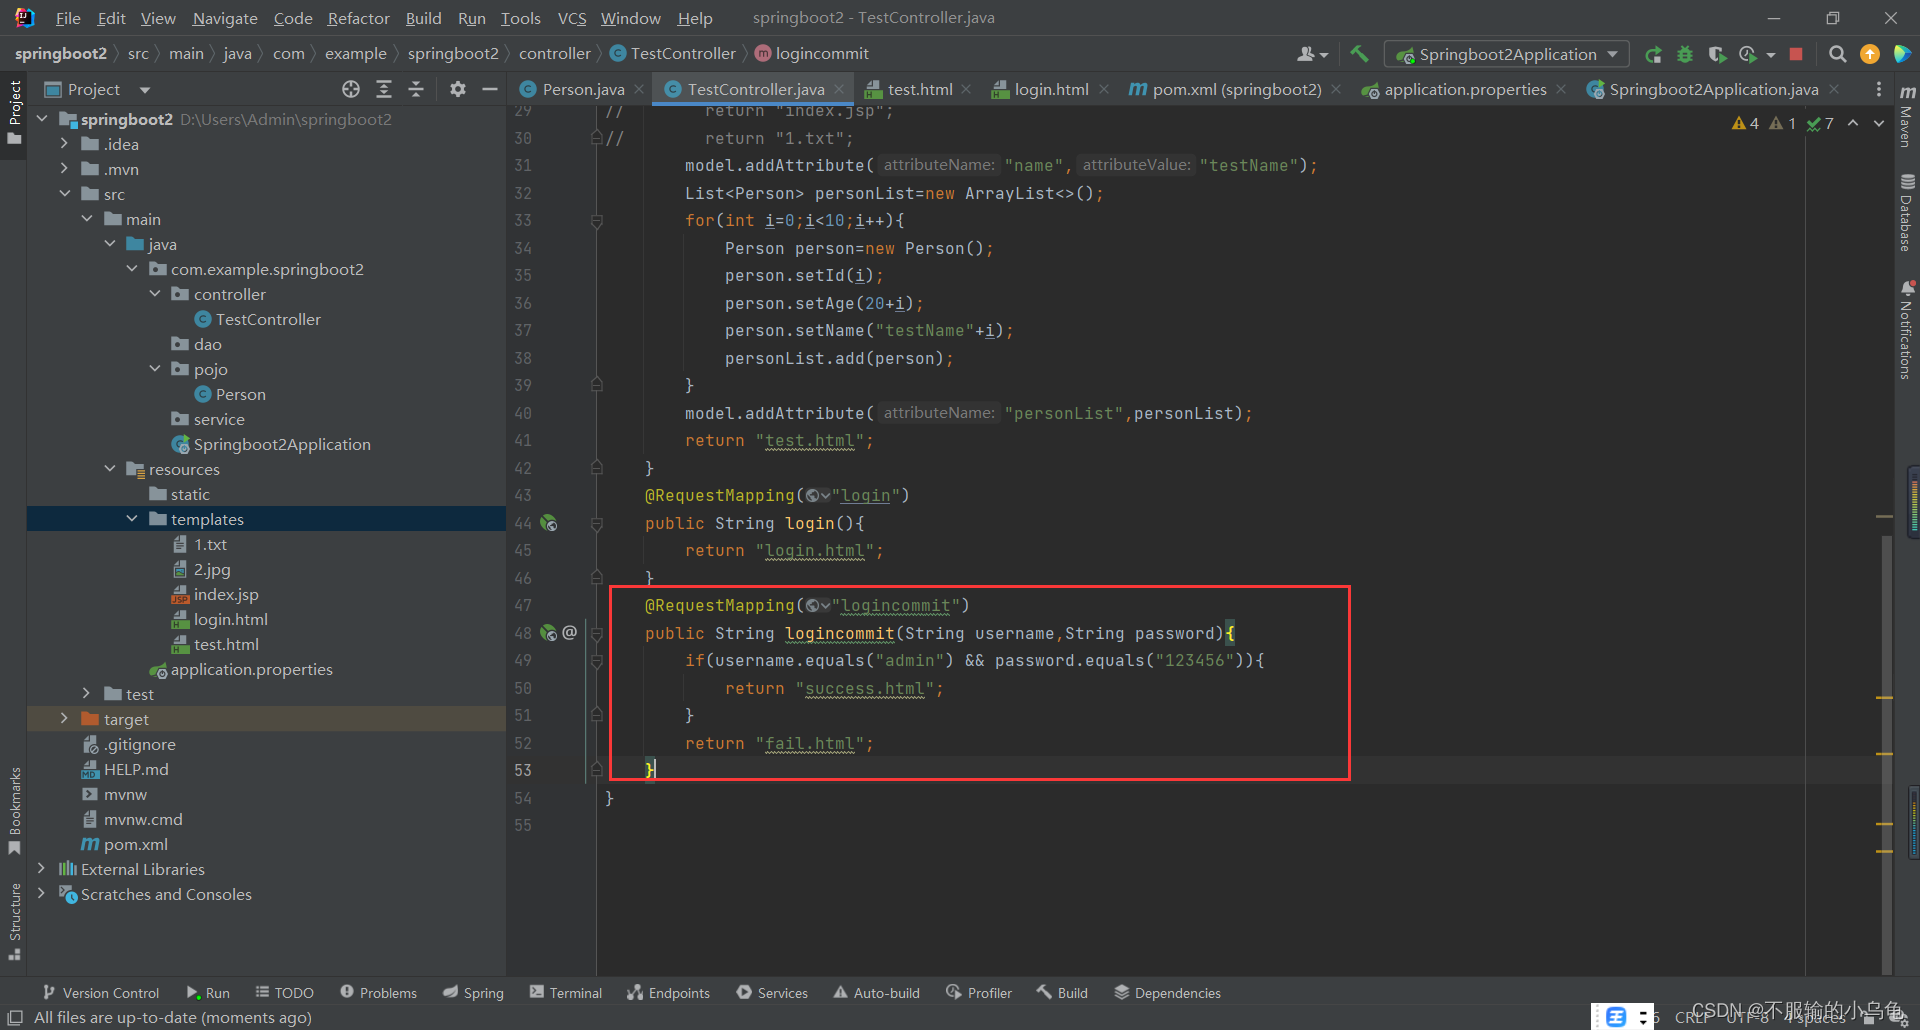
3、在templates文件夹下新建success.html
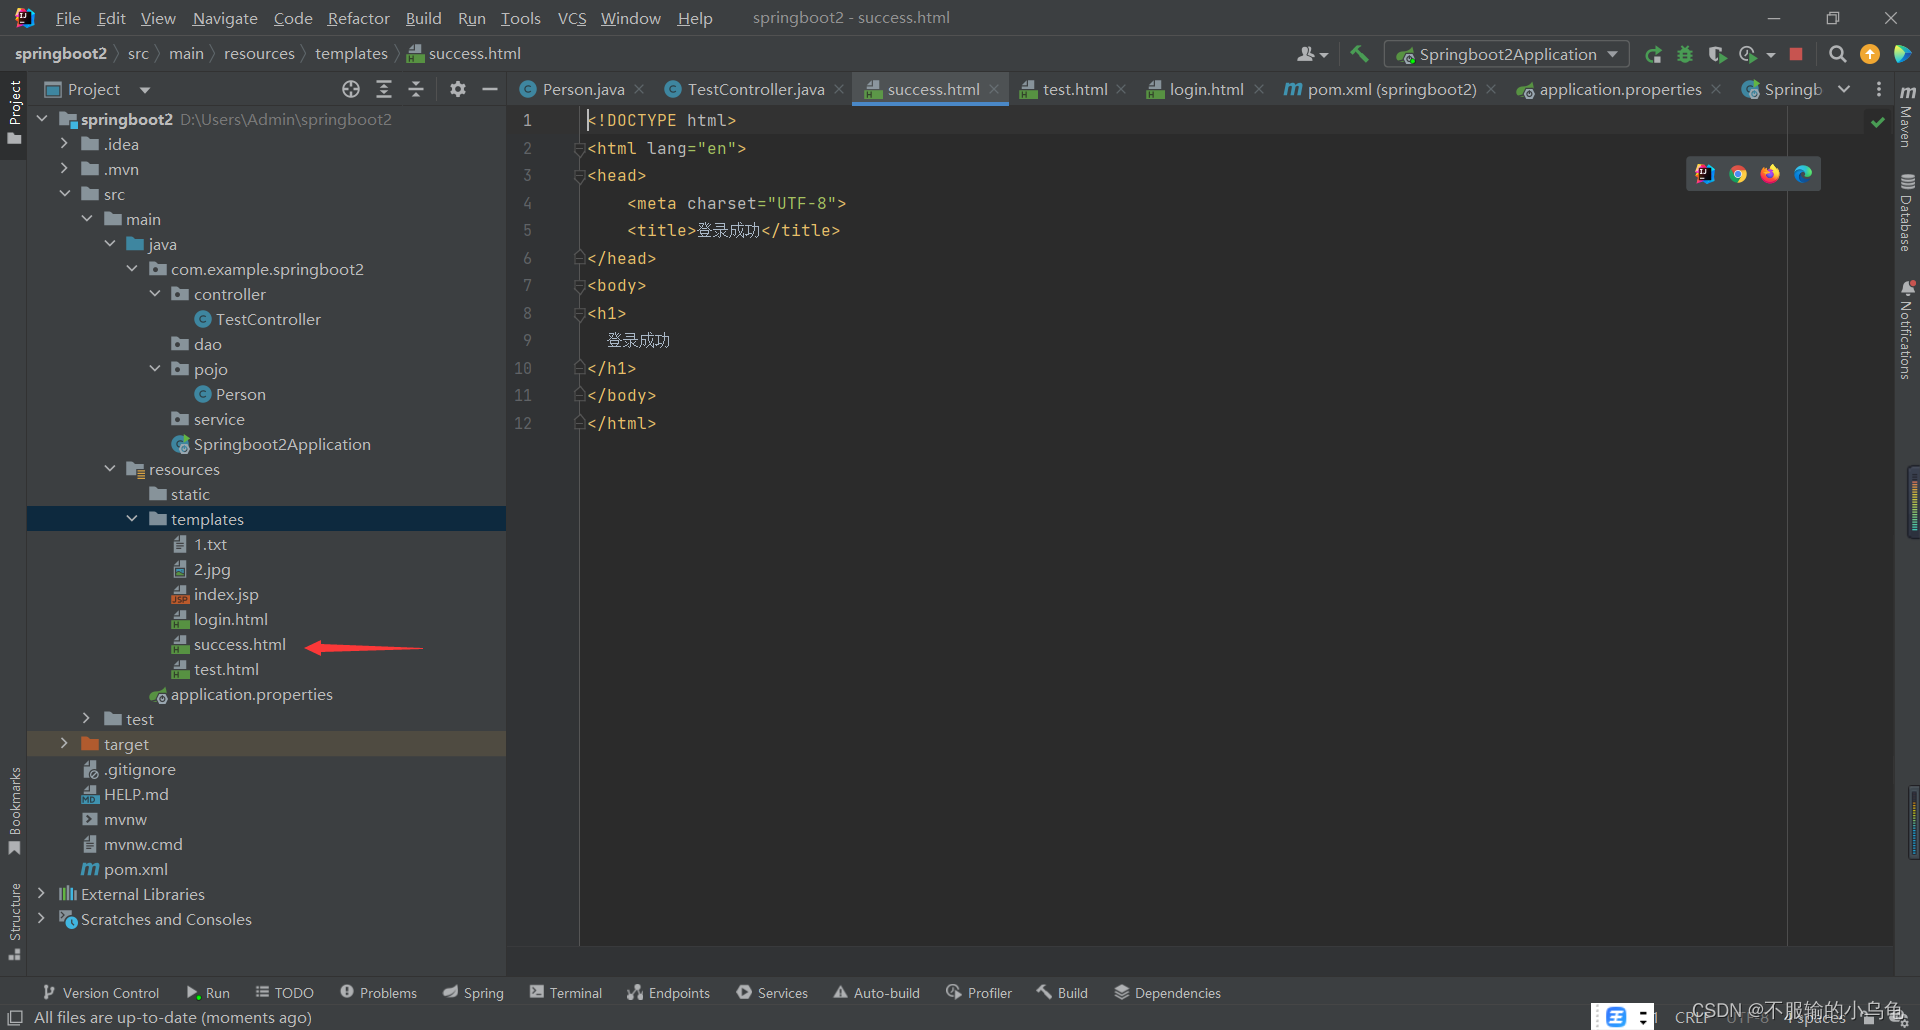
<!DOCTYPE html>
<html lang="en">
<head>
    <meta charset="UTF-8">
    <title>登录成功</title>
</head>
<body>
<h1>
  登录成功
</h1>
</body>
</html>
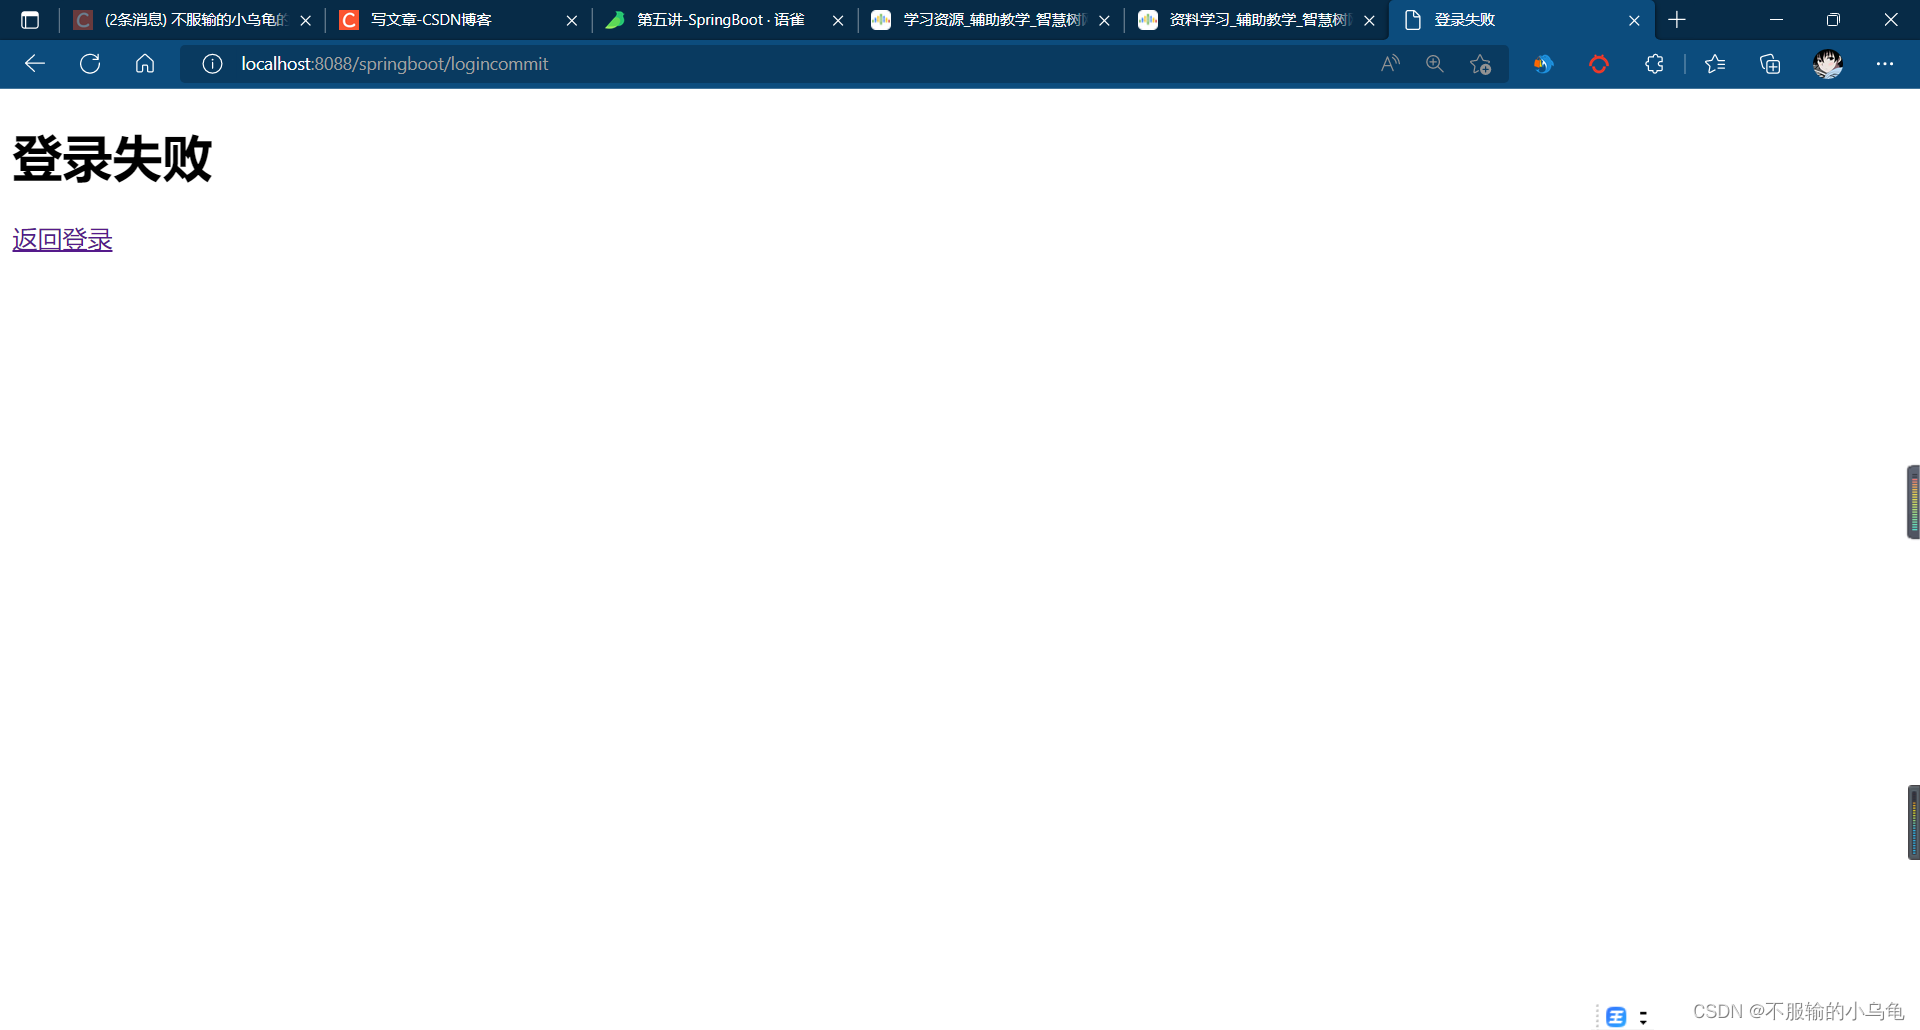
4、在templates文件夹下新建fail.html
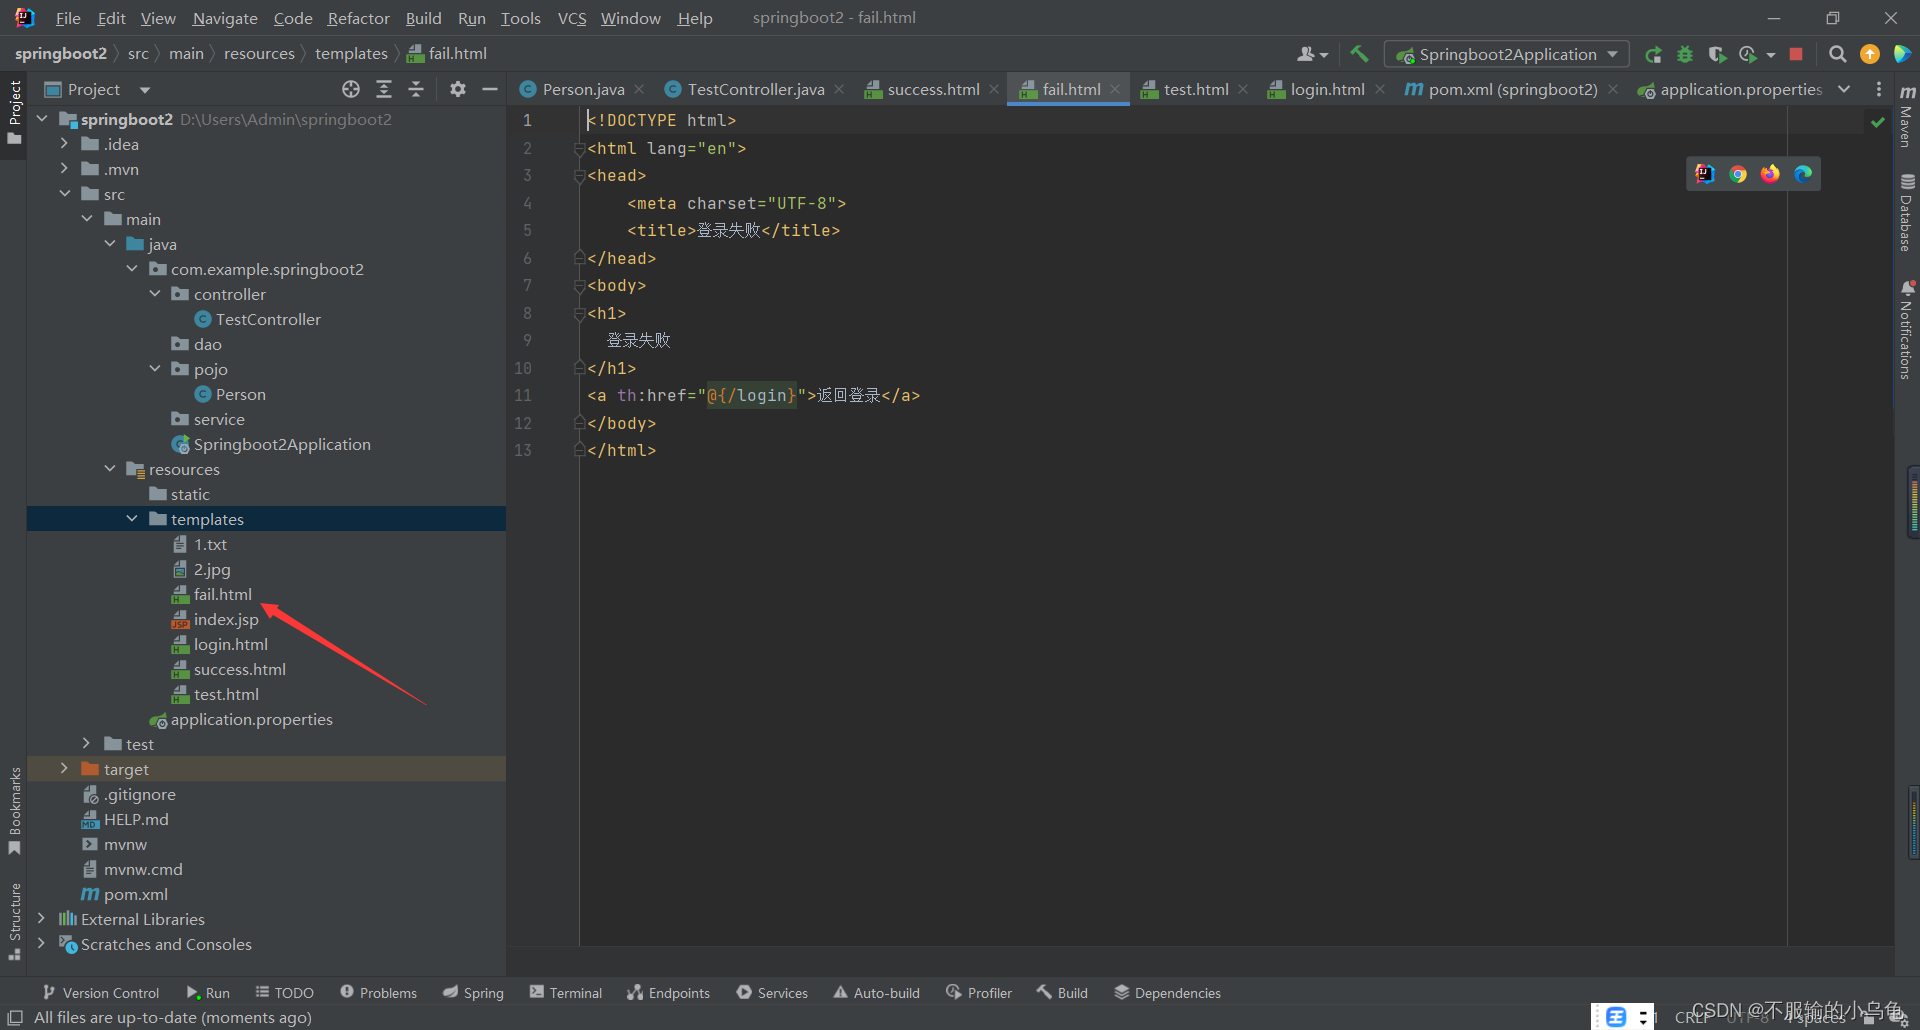
<!DOCTYPE html>
<html lang="en">
<head>
    <meta charset="UTF-8">
    <title>登录失败</title>
</head>
<body>
<h1>
  登录失败
</h1>
<a th:href="@{/login}">返回登录</a>
</body>
</html>
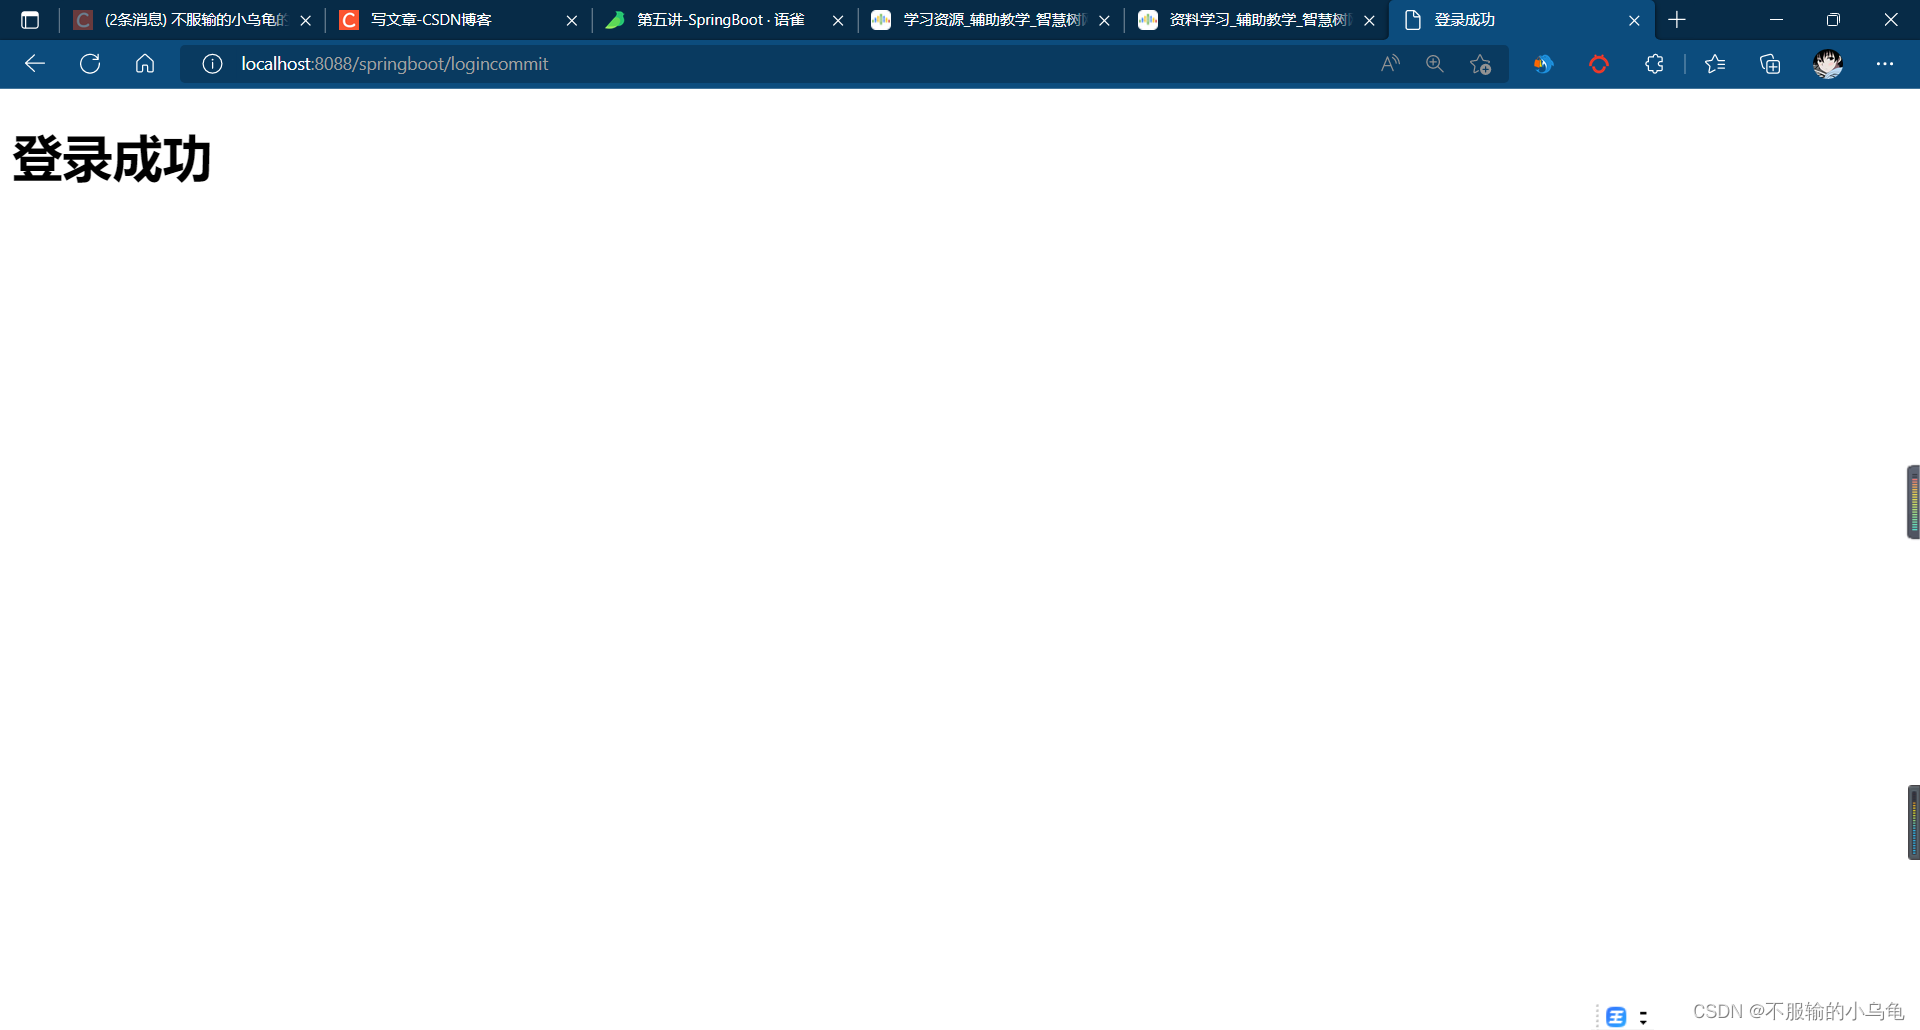
5、重启项目
(1)登录成功

(2)登录失败

十三、统一异常拦截
1、新建包utils,创建MyControllerAdvice类
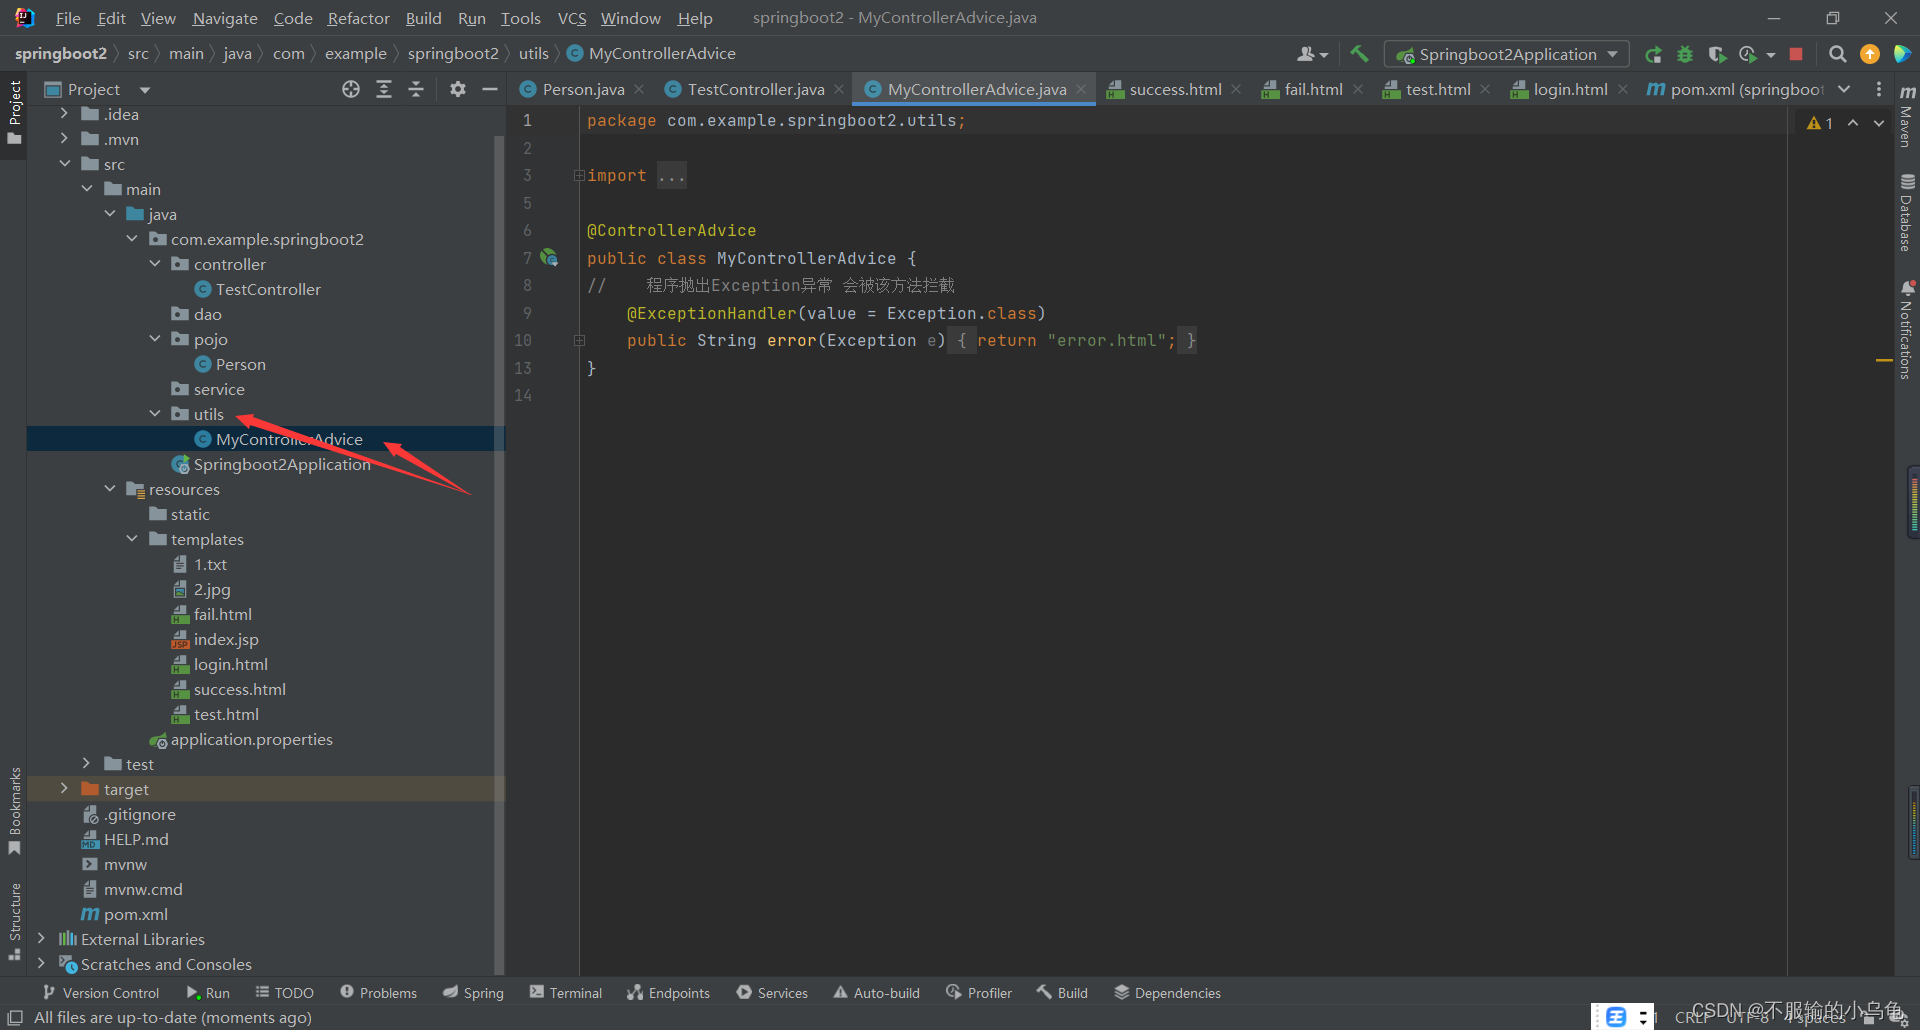
package com.example.springboot2.utils;

import org.springframework.web.bind.annotation.ControllerAdvice;
import org.springframework.web.bind.annotation.ExceptionHandler;

@ControllerAdvice
public class MyControllerAdvice {


//    程序抛出Exception异常 会被该方法拦截
    @ExceptionHandler(value = Exception.class)
    public String error(Exception e){


        return "error.html";
    }
}
2、在templates文件夹下新建error.html
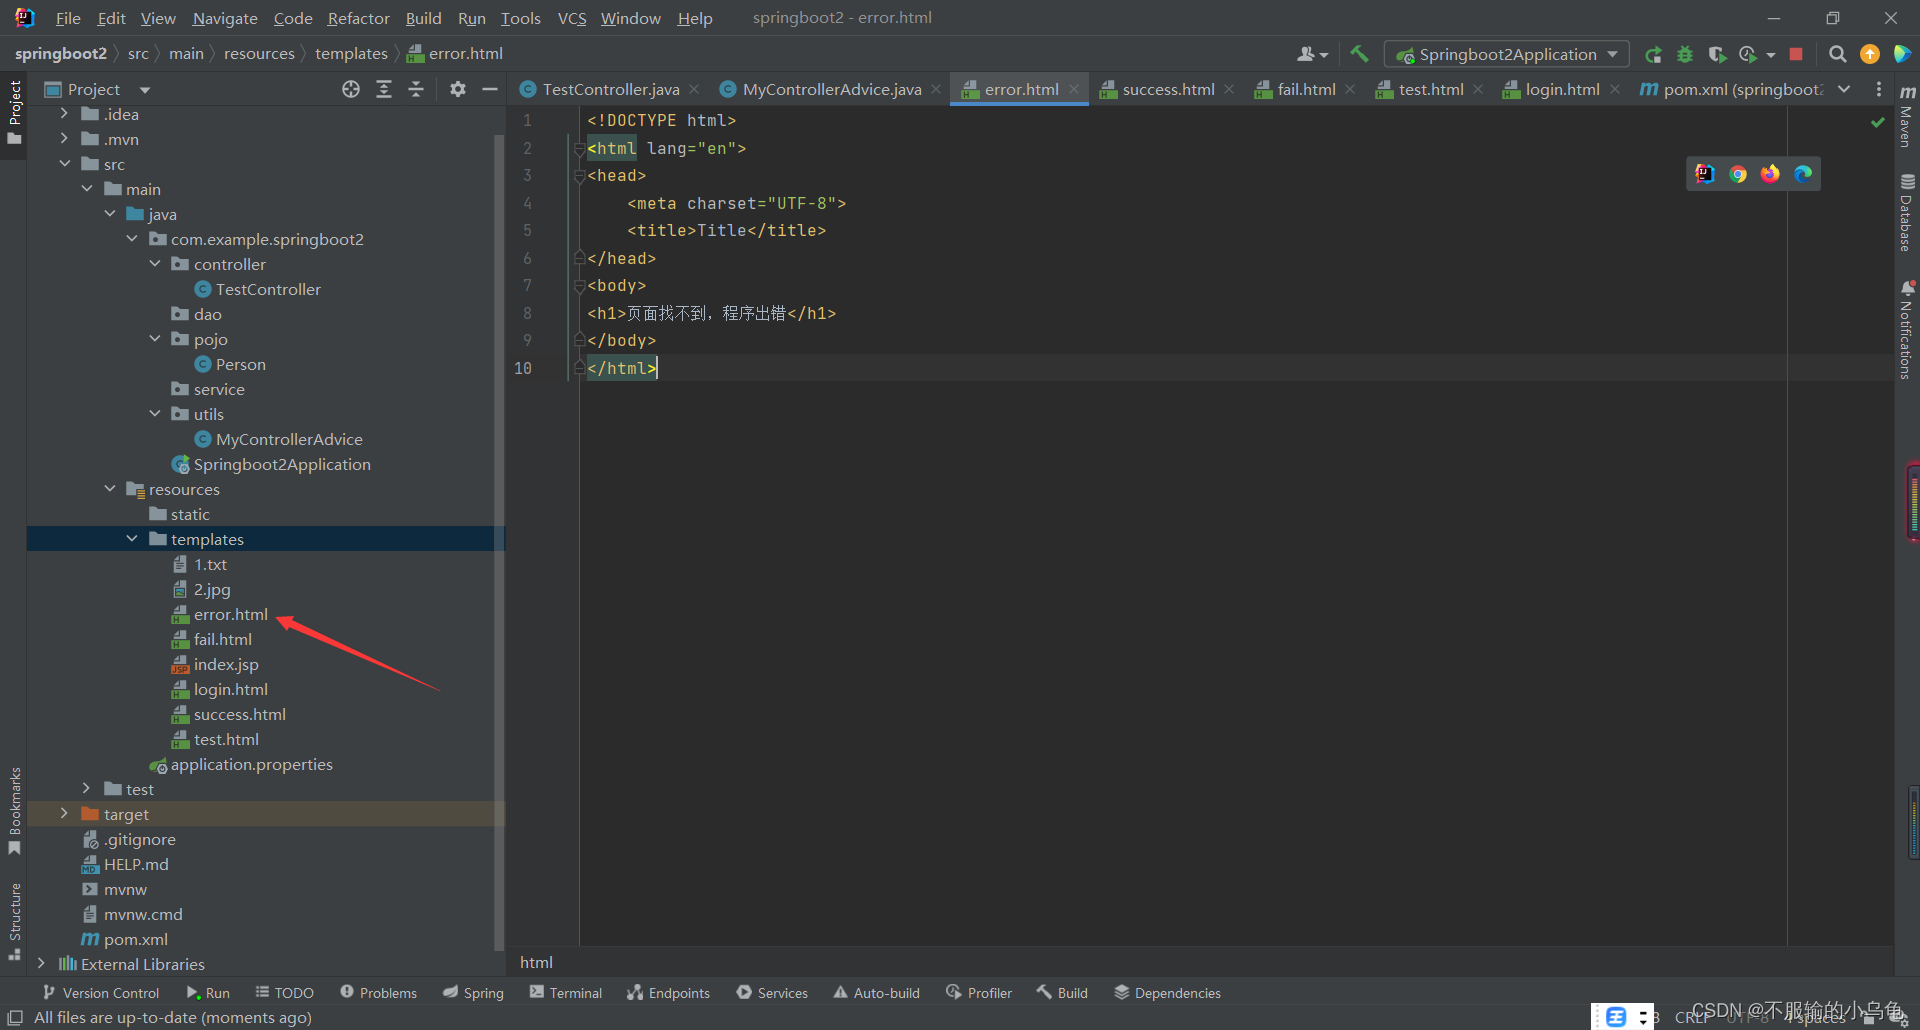
<!DOCTYPE html>
<html lang="en">
<head>
    <meta charset="UTF-8">
    <title>Title</title>
</head>
<body>
<h1>页面找不到,程序出错</h1>
</body>
</html>
3、修改TestController类,制造错误
4、刷新页面,输入错误用户名和密码,就会跳到error.html


十四、资源下载
下载地址:SpringBoot开发之Spring Boot入门
今天学习就到这里啦,期待下次的学习!!!