转自:https://www.zhihu.com/question/51342434/answer/128673785
作者:ZOMI
链接:https://www.zhihu.com/question/51342434/answer/128673785
来源:知乎
著作权归作者所有。商业转载请联系作者获得授权,非商业转载请注明出处。
 现在做图片分割的都是基于FCN的升级版、FCN超级升级版,FCN改版、FCN超级改版。。。个人觉得最难的、也是个人正在学习的是从如何研究自己的样本,什么样的样本集才能提高最后结果的精度和召回率;有了样本然后怎么给CNN训练,训练后如何把CNN->FCN,然后到FCN能够对新的数据进行分割。整套流程能够自动化下来就更加perfect了。
如果对FCN的理解不是很多的话,可以参考一下本人的博客:
[5] 全卷积网络 FCN 详解
现在做图片分割的都是基于FCN的升级版、FCN超级升级版,FCN改版、FCN超级改版。。。个人觉得最难的、也是个人正在学习的是从如何研究自己的样本,什么样的样本集才能提高最后结果的精度和召回率;有了样本然后怎么给CNN训练,训练后如何把CNN->FCN,然后到FCN能够对新的数据进行分割。整套流程能够自动化下来就更加perfect了。
如果对FCN的理解不是很多的话,可以参考一下本人的博客:
[5] 全卷积网络 FCN 详解
链接:https://www.zhihu.com/question/51342434/answer/128673785
来源:知乎
著作权归作者所有。商业转载请联系作者获得授权,非商业转载请注明出处。
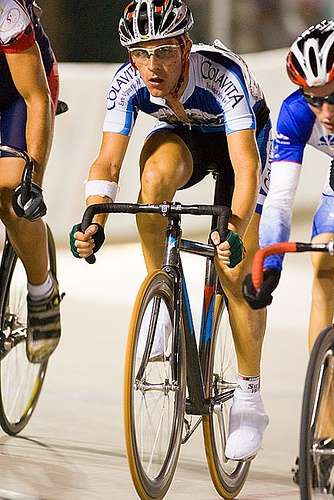
测试输入的图片
<img src="https://pic2.zhimg.com/50/v2-4f671bd944ae9df868fc758c2ef9ca52_hd.jpg" data-rawwidth="334" data-rawheight="500" class="content_image" width="334">
现在可以直接来点代码吗?
# import package
import numpy as np
from PIL import Image
import caffe

# 初始化地址
caffe_root = 'fcn.berkeleyvision.org-master/voc-fcn8s/'
model_def = caffe_root + 'deploy.prototxt' # 模型文件
model_weights = caffe_root + 'fcn8s-heavy-pascal.caffemodel' #模型权重值
test_image = 'images/2007_000129.jpg' #测试图片

# load image, switch to BGR, subtract mean, and make dims C x H x W for Caffe
im = Image.open(test_image)
in_ = np.array(im, dtype=np.float32)
in_ = in_[:,:,::-1] # change RGB image to BGR image
in_ -= np.array((104.00698793,116.66876762,122.67891434))
in_ = in_.transpose((2,0,1)) # Reshape the image from (500, 334, 3) to (3, 500, 334)

net = caffe.Net(model_def, model_weights, caffe.TEST) #导入模型
net.blobs['data'].reshape(1, *in_.shape)
net.blobs['data'].data[...] = in_ #读入图像
net.forward() #图片进入前馈卷积神经网络
out = net.blobs['score'].data[0].argmax(axis=0) #最后得到的图片

print net.blobs['score'].data[0].shape #(21, 500, 334)
print net.blobs['score'].data[0].argmax(axis=0)
好了,已经用fcn模型训练网一张图片了,接着就是要看看图片到底是怎么样的楽
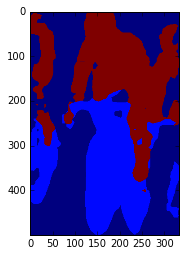
import matplotlib.pyplot as plt
# display plots in this notebook
%matplotlib inline

# set display defaults

print out.shape
plt.imshow(out)
最后的效果:
<img src="https://pic1.zhimg.com/50/v2-0b27ac285d27901a5f61d5e11aae0075_hd.jpg" data-rawwidth="186" data-rawheight="256" class="content_image" width="186">现在做图片分割的都是基于FCN的升级版、FCN超级升级版,FCN改版、FCN超级改版。。。个人觉得最难的、也是个人正在学习的是从如何研究自己的样本,什么样的样本集才能提高最后结果的精度和召回率;有了样本然后怎么给CNN训练,训练后如何把CNN->FCN,然后到FCN能够对新的数据进行分割。整套流程能够自动化下来就更加perfect了。
如果对FCN的理解不是很多的话,可以参考一下本人的博客:
[5] 全卷积网络 FCN 详解