Servlet API并不复杂,主要学习三个类:
HttpServlet HttpServletRequest HttpServletResponse
这部分介绍HttpServlet类
HttpServlet
我们写Servlet代码的时候,第一步就是先创建类,继承自HTTPServlet并重写其中的某些方法
核心方法
1.init:在HttpServlet实例化之后被调用一次(由tomcat完成调用)

tomcat首次收到/hello这样的请求时,就会调用到HelloWorld进行实例化,实例化只进行一次,就类似于之前讲到的懒汉模式,后续再收到/hello的时候就不再次实例化了,复用之前的HelloServlet即可
可以重写这个方法来加入一些初始化信息

当我们启动服务器后并没有直接打印

当收到请求关联/hello路径时才会执行


2.destroy:在 HttpServlet 实例不再使用的时候调用一次

启动服务器后在浏览器中出发请求,当终止程序后,就会调用destroy

这里的destroy能不能打印出来主要是看关闭程序的方法
1.如果你直接关闭进程,此时有可能来不及执行destroy
2.如果是按tomcat插件的停止按钮,本质是通过tomcat的8005端口主动停止,就能触发destroy
3.service方法
当收到路径匹配的http请求就会触发该方法
我们看看service的源码就可以发现,GETPOST等方法都是由service调用的
先触发service才执行到后续方法
protected void service(HttpServletRequest req, HttpServletResponse resp) throws ServletException, IOException {
        String method = req.getMethod();
        long lastModified;
        if (method.equals("GET")) {
            lastModified = this.getLastModified(req);
            if (lastModified == -1L) {
                this.doGet(req, resp);
            } else {
                long ifModifiedSince = req.getDateHeader("If-Modified-Since");
                if (ifModifiedSince < lastModified) {
                    this.maybeSetLastModified(resp, lastModified);
                    this.doGet(req, resp);
                } else {
                    resp.setStatus(304);
                }
            }
        } else if (method.equals("HEAD")) {
            lastModified = this.getLastModified(req);
            this.maybeSetLastModified(resp, lastModified);
            this.doHead(req, resp);
        } else if (method.equals("POST")) {
            this.doPost(req, resp);
        } else if (method.equals("PUT")) {
            this.doPut(req, resp);
        } else if (method.equals("DELETE")) {
            this.doDelete(req, resp);
        } else if (method.equals("OPTIONS")) {
            this.doOptions(req, resp);
        } else if (method.equals("TRACE")) {
            this.doTrace(req, resp);
        } else {
            String errMsg = lStrings.getString("http.method_not_implemented");
            Object[] errArgs = new Object[]{method};
            errMsg = MessageFormat.format(errMsg, errArgs);
            resp.sendError(501, errMsg);
        }

    }
init destroy service是HttpServlet最关键的三个方法
面试题:简述Servlet的生命周期
servlet的生命周期就是从servlet出现到销毁的全过程
主要分为以下几个阶段:
加载类—>实例化(为对象分配空间)—>初始化(为对象的属性赋值)—>请求处理(服务阶段)—>销毁
服务器启动时(web.xml中配置load-on-startup=1,默认为0)或者第一次请求该servlet时,就会初始化一个Servlet对象,也就是会执行初始化方法init(ServletConfig conf),该servlet对象去处理所有客户端请求,service(ServletRequest req,ServletResponse res)方法中执行,最后服务器关闭时,才会销毁这个servlet对象,执行destroy()方法。其中加载阶段无法观察,但是初始化、服务、销毁阶段是可以观察到的
HttpServlet 的实例只是在程序启动时创建一次. 而不是每次收到 HTTP 请求都重新创建实例
4.其他方法
doGet 收到 GET 请求的时候调用(由 service 方法调用)
doPost 收到 POST 请求的时候调用(由 service 方法调用)
doPut/doDelete/doOptions/... 收到其他请求的时候调用(由 service 方法调用)
我们使用这些方法
@WebServlet("/method")
public class MethodServlet extends HttpServlet {
    @Override
    protected void doGet(HttpServletRequest req, HttpServletResponse resp) throws ServletException, IOException {
        System.out.println("GET");
        resp.getWriter().write("GET");
    }

    @Override
    protected void doPost(HttpServletRequest req, HttpServletResponse resp) throws ServletException, IOException {
        System.out.println("POST");
        resp.getWriter().write("POST");
    }

    @Override
    protected void doPut(HttpServletRequest req, HttpServletResponse resp) throws ServletException, IOException {
        System.out.println("PUT");
        resp.getWriter().write("PUT");
    }

    @Override
    protected void doDelete(HttpServletRequest req, HttpServletResponse resp) throws ServletException, IOException {
        System.out.println("DELETE");
        resp.getWriter().write("DELETE");
    }
}
启动服务器后在浏览器输入URL
 我们发现只显示了GET, 其它请求都没有被调用
因此通过URL的方式,发送的是一个GET请求,所以只调用doGet方法
那么其他几种方法可以使用ajax写代码构造.也可以使用postman构造


控制台也会打印日志

postman是后端开发非常好用的工具,可以通过postman对后端代码进行验证和测试
前端有mockserver这种工具,构造一些虚拟的数据验证前端效果,最终需要"联调"
还可以用ajax构造请求
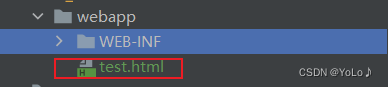
这个文件要放到webapp目录下
<!DOCTYPE html>
<html lang="en">
<head>
    <meta charset="UTF-8">
    <meta http-equiv="X-UA-Compatible" content="IE=edge">
    <meta name="viewport" content="width=device-width, initial-scale=1.0">
    <title>Document</title>
</head>
<body>
<!-- 构造ajax -->
<!-- 引入jquery -->
<script src="https://cdn.bootcdn.net/ajax/libs/jquery/3.6.4/jquery.min.js"></script>
<script>
        $.ajax({
            type: 'get',
<!--     这里是绝对路径       -->
<!--            url: '/ServletHelloWorld/test.html',-->
<!--      相对路径      -->
            url: 'method',
            success: function(body,status){
                console.log(body);
            }
        });
    </script>
</body>
</html>
可以在控制台看到日志

将type改成post后

注意这个URL:
还是加了这个ContextPath路径,后面部分要与文件名相匹配

再来看我们构造的ajax请求

这个url是一个相对路径,相对路径有个基准目录,基准目录就是该html所在的路径
就相当于给http://127.0.0.1:8080/ServletHelloWorld的基础上再拼接一个method,然后发送请求
url: '/ServletHelloWorld/test.html'
这种写法是绝对路径的写法,前面带有/,注意注解中的/不是绝对路径
还要记得写servlet代码时,每次修改都要记得重启服务器!