首先让我们回到最开始的问题:
请使用InputSystem为一个3D对象制作通过键盘移动跳跃,鼠标攻击的脚本
我们已经编写了三个InputAction变量,分别是控制上下左右的Move,控制跳跃的Jump,控制攻击的Attack。
	[Header("移动")]
    public InputAction Move;
    [Header("攻击")]
    public InputAction Attack;
    [Header("跳跃")]
    public InputAction Jump;
然后我们需要在Inspector窗口中进行编辑,分别为Move绑定键盘上的WASD键,Jump绑定Space,Attack绑定鼠标左键。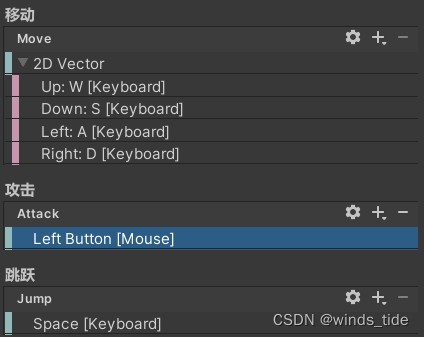
给这个3d物体添加Rigid body,再创建一个Sphere作为子弹,为其编写脚本。
Bullet
using System.Collections;
using System.Collections.Generic;
using UnityEngine;

public class Bullet : MonoBehaviour
{


    // Start is called before the first frame update
    void Start()
    {


        Destroy(this.gameObject, 2);
    }

    // Update is called once per frame
    void Update()
    {


        this.transform.Translate(Vector3.forward * 50 * Time.deltaTime);
    }
}
public class NewBehaviourScript : MonoBehaviour
{


    [Header("移动")]
    public InputAction Move;
    [Header("攻击")]
    public InputAction Attack;
    [Header("跳跃")]
    public InputAction Jump;
    Rigidbody rigi;
    //方向
    Vector3 dir;
    public GameObject bullet;

    void Start()
    {


        //启用
        Move.Enable();
        Attack.Enable();
        Jump.Enable();

        rigi = this.GetComponent<Rigidbody>();

        Jump.performed += (con) =>
        {


            rigi.AddForce(Vector3.up * 200);
        };

        Attack.performed += (con) =>
        {


            Instantiate(bullet, this.transform.position, Quaternion.LookRotation(this.transform.forward));
        };

    }

    void Update()
    {


        dir.x = Move.ReadValue<Vector2>().x;
        dir.z = Move.ReadValue<Vector2>().y;
        dir.y = 0;
        rigi.AddForce(dir * 10);


    }
}