大家好,我是小张~
之前不是说要做一个项目么,上篇文章实现了一个单网页应用,集成了图片OCR文本识别 功能模块:PaddleOCR + Django 实现一个OCR在线识别网站,一起来玩呀,
本篇将沿着之前的工作继续完善项目,由于之前单页面体验很不好,只有一个页面需要用户自己在浏览器里面输入url 地址才能展现,
如果项目中有一个导航栏的话那用户体验就非常棒了,每个导航菜单栏绑定一个路由,连接一个单页,用户点击菜单栏的方式来实现页面跳转
因此,本篇文章主要开发的功能有两点:
- 1,页面导航栏开发,以及路由绑定;
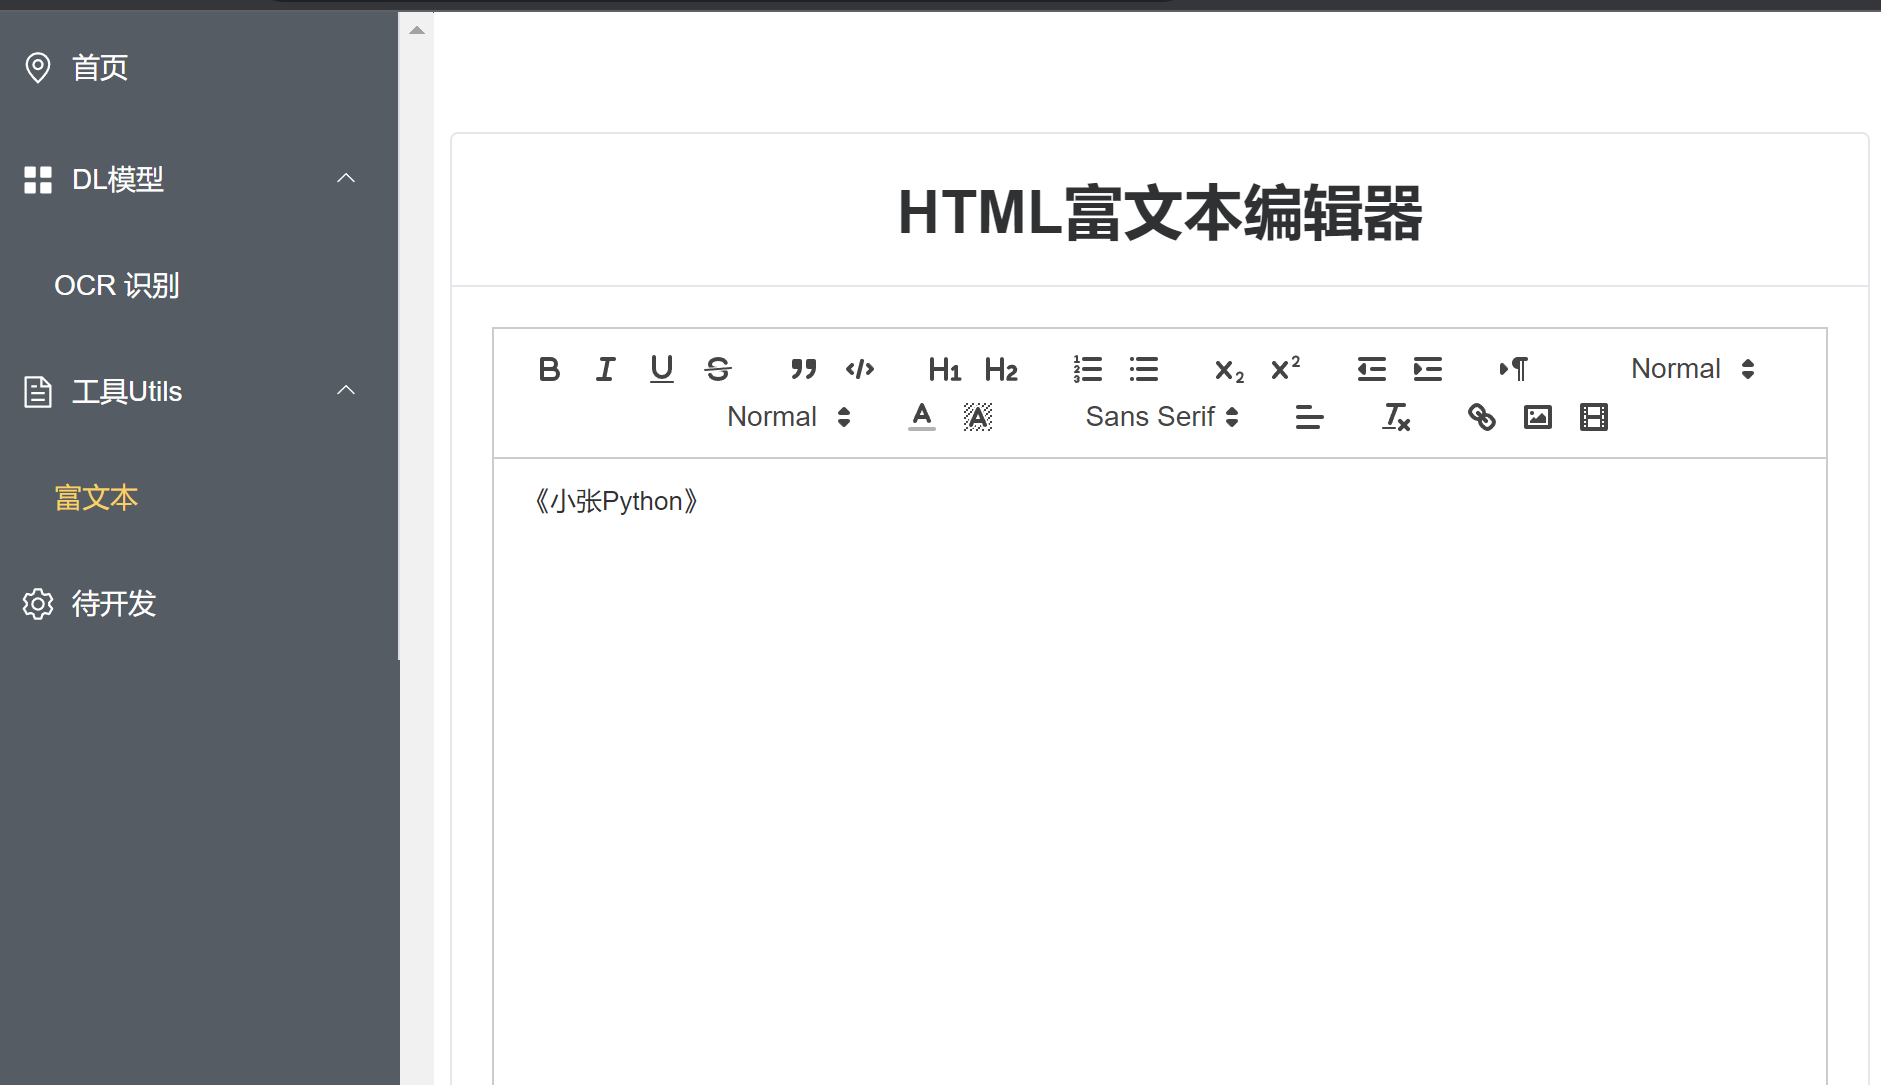
- 2,在之前项目页面中再添加一个菜单:富文本编辑器菜单
本次项目完善因为主要是页面视觉方面的一些完善,主要改动的是前端 Vue 页面,后端 模块暂时没有改动。
最终效果如下:

此时 Vue脚手架的路径树如下;
│  .gitignore
│  babel.config.js
│  jsconfig.json
│  list.txt
│  package-lock.json
│  package.json
│  README.md
│  tsconfig.json
│  vue.config.js
│
├─public
│      favicon.ico
│      index.html
└─src
    │  App.vue
    │  main.ts
    │  router.ts
    │  shims-vue.d.ts
    │
    ├─assets
    │      logo.png
    │
    ├─components
    │      HelloWorld.vue
    │
    ├─layout
    │      MainContent.vue
    │      SideBar.vue
    │
    └─page
        ├─editor
        │      htmlEditor.vue
        │
        └─paddle
                textOcrPage.vue
加入导航栏
导航栏用到了 Element-Plus 中的 Menu组件,因为目前项目中所有的导航栏信息比较少,不是通过后端接口获取,因此这里导航栏相关信息都是写死的,但每个meau-item关联一个路由路径,使得用户通过点击方式来进行跳转。
SideBar.vue
<template>
    <aside class="site-sidebar">
        <div class="site-sidebar__inner">
            <el-menu
                active-text-color="#ffd04b"
                background-color="#545c64"
                class="el-menu-vertical-demo"
                default-active="1"
                text-color="#fff"
                @open="handleOpen"
                @close="handleClose">
                <el-menu-item index="1"   @click="$router.push({ path: '/' })">
                    <el-icon><location /></el-icon>
                    <span>首页</span>
                </el-menu-item>
                <el-sub-menu index="2">
                <template #title>
                    <el-icon><icon-menu /></el-icon>
                    <span>DL模型</span>
                </template>
                    <el-menu-item index="2-1" @click="$router.push({ path: '/paddle-ocr' })">
                        <span>OCR 识别</span>
                    </el-menu-item>
                </el-sub-menu>
                <el-sub-menu index="3" >
                    <template #title>
                    <el-icon><document /></el-icon>
                    <span>工具Utils</span>
                    </template>
                    <el-menu-item index="3-1" @click="$router.push({ path: '/html-editor' })">
                        <span> 富文本</span>
                    </el-menu-item>
                </el-sub-menu>
                <el-menu-item index="4">
                    <el-icon><setting /></el-icon>
                    <span>待开发</span>
                </el-menu-item>
            </el-menu>
        </div>
    </aside>
</template>
<script lang="ts" setup>
import {


  Document,
  Menu as IconMenu,
  Location,
  Setting,
} from '@element-plus/icons-vue'
const handleOpen = (key: string, keyPath: string[]) => {


}
const handleClose = (key: string, keyPath: string[]) => {


}
</script>

<style  scoped>
.site-sidebar{


     position: fixed;
    top: 0px;
    left: 0;
    bottom: 0;
    z-index: 1020;
    width: 230px;
  overflow: hidden;
  background-color: #545c64;
}
.site-sidebar__inner{


    height: 100%;
    padding-bottom: 15px;
    overflow-y: scroll;

}
</style>
布局组件
导航栏组件定义好之后,需要定义下整体内容布局:一般导航栏放置在左侧,右边放置内容区,因此可以定义一个主组件,左侧为导航栏组件,右边通过 vue-router 的<router-view> 插槽机制根据路由切换来控制右侧内容区内容的变换,
布局组件 MainContent.vue 如下:
<template>
  <div>
    <side-bar>
    </side-bar>
     <div class="site-content__wrapper">
        <router-view></router-view>
  </div>
  </div>
</template>
<script>
import SideBar from './SideBar.vue'
import {

    ref}  from 'vue'


export default{


    setup() {


    },
    components: {


        SideBar
    }
}
</script>
<style scoped>
.site-content__wrapper{


   margin-left: 230px;
}
</style>
定义嵌套路由
嵌套路由的 router-view 的使用规则,需要在父组件路由中配置 children项,而children是一个数组路由,如下方代码块router.ts所示,定义了三个路由路径分别对应三个子组件(由于vue3版本建议开发者使用typescript 作为主要开发语言,因此这里大部分脚本用 ts代替 js 集成):
/' ------------------->HelloWorld.vue
/paddle-ocr ------------------->textOcrPage.vue
/html-editor ------------------->htmlEditor.vue
import {

    createRouter,createWebHashHistory} from 'vue-router'
const routes = [
    {


        path: '/',
        component: ()=>import('@/layout/MainContent.vue'),
        children: [
            {


                path: '/',
                component:()=> import('@/components/HelloWorld.vue')
            },
            {


                path: '/paddle-ocr',
                component:()=> import('@/page/paddle/textOcrPage.vue')
            },
            {


                path: '/html-editor',
                name:'HTML-EDITOR',
                component:()=> import('@/page/editor/htmlEditor.vue')
            },
        ]
    },
]
const router = createRouter({


    history:createWebHashHistory(),
    routes
})

export default router;
然后再在 main.ts脚本中 引入router,挂载到主组件中
import router from './router'

const app = createApp(App)
app.use(router)
app.mount('#app')
小结
好了,以上就是本篇文章的全部内容了,主要分为两方面内容:1,将 Quill 富文本组件集成在 Vue脚手架中,2,对项目进行完善,加入导航侧边栏来实现路由跳转。
项目全部代码获取方式,关注微信公号:小张Python,后台回复关键字:dl_interated 即可