every blog every motto: You can do more than you think.
https://blog.csdn.net/weixin_39190382?type=blog
0. 前言
二维面找角点/关键点 实现
1. 正文
1.1 前提
1.1.1 显示函数
def show(arr):
    plt.imshow(arr)
    plt.show()


def cvshow(arr):
    cv2.namedWindow('a', 0)
    cv2.imshow('a', arr)
    cv2.waitKey(0)
    cv2.destroyAllWindows()
1.1.2 数据
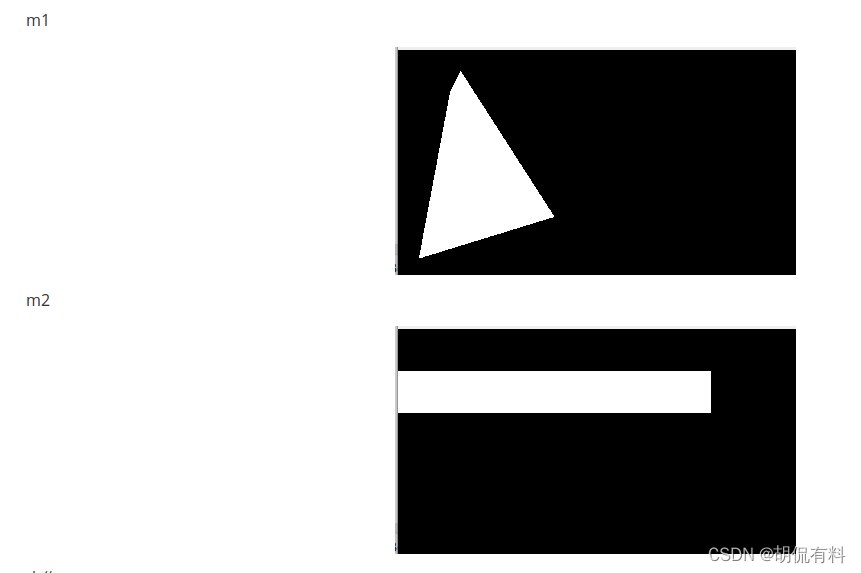
数据准备
img1 = np.zeros((1080, 1920, 3), np.uint8)
img2 = np.zeros((1080, 1920, 3), np.uint8)
area1 = np.array([[250, 200], [300, 100], [750, 800], [100, 1000]])
area2 = np.array([[0, 200], [1500, 200], [1500, 400], [0, 400]])
填充
m1 = cv2.fillPoly(img1, [area1], (255, 255, 255))
m2 = cv2.fillPoly(img2, [area2], (255, 255, 255))
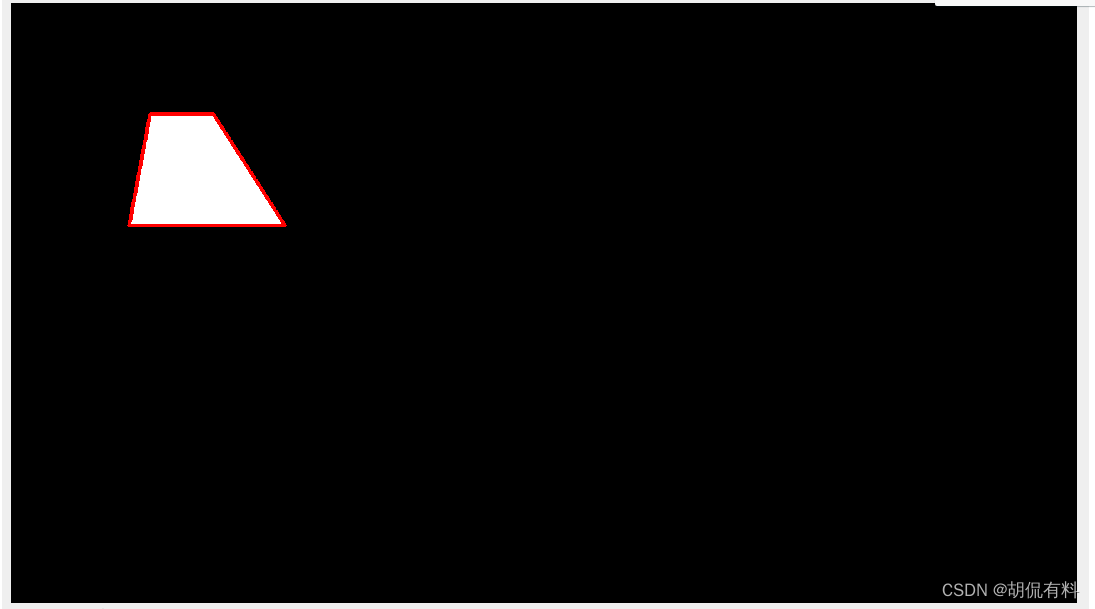
交集
res = cv2.bitwise_and(m1, m2)

1.2 方法一: 先找轮廓再找凸包
前置:
凸包: 简单解释,给定二位平面上的点击,凸包就是将最外层的点链接起来构成凸多边形,它包含所有的点
最终要的一点,可以实现对点集排序!!!!
默认是顺时针,先左上。若点出现偏移可能会右下开始,只要求点有序即可,可以不做深入研究。
例子:
扫描二维码关注公众号,回复:
14662035 查看本文章

import cv2
hull = cv2.convexHull(points, clockwise, returnpoints)
- hull : 输出凸包结果,n * 1 * 2 数据结构,n为外包围圈点数
- points: 输入的坐标点,通常为1 * n * 2 结构,n为所有的坐标点的数目
- clockwise:转动方向,TRUE为顺时针,否则为逆时针;
- returnPoints:默认为TRUE,返回凸包上点的坐标,如果设置为FALSE,会返回与凸包点对应的轮廓上的点。
a. 找轮廓
gray = cv2.cvtColor(res, cv2.COLOR_BGR2GRAY)  # 转灰度
_, bin = cv2.threshold(gray, 50, 255, cv2.THRESH_BINARY)  # 阈值
# 找轮廓
contours, hierarchy = cv2.findContours(bin, cv2.RETR_EXTERNAL, cv2.CHAIN_APPROX_SIMPLE)
# 轮廓画在图上
cv2.drawContours(res, contours, -1, (0, 0, 255), 5)
cvshow(res)
b. 找凸包
hull = cv2.convexHull(contours[0])
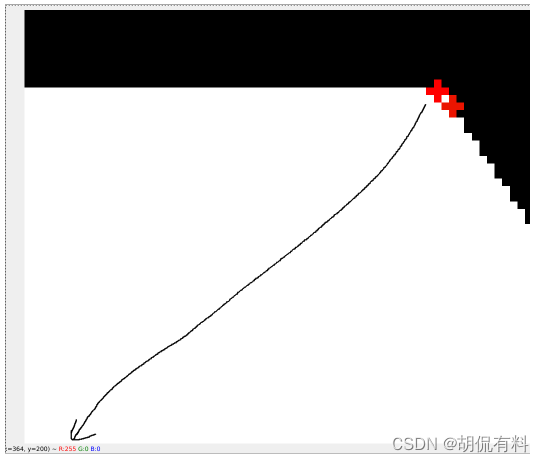
c. 显示凸包
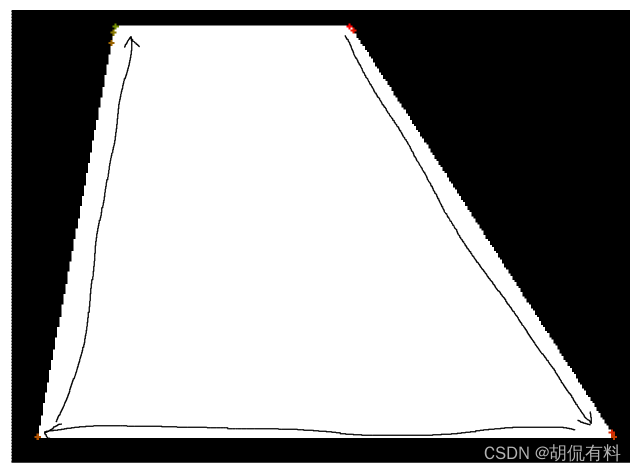
这里我们遍历凸包点,将点画在原图上。这里是以点画圆,值得注意的是,点的颜色随着次序改变而改变,具体来说,(opencv中是BRG)红色逐渐减弱,绿色逐渐加深,渐变的大小为20,可以根据点数自己设定,如10等。
color_offset = 20
for idx, i in enumerate(hull):
    x, y = i.ravel()
    cv2.circle(res, (x, y), 1, (0, color_offset * idx, 255 - color_offset * idx), -1)
d. 显示
注意:需要将cv2.drawContours注释,否则会有遮挡
cvshow(res)
如下图所示,我们看到点是按顺序排列的!!!!
e. 方法一总代码
# 方法一:先找轮廓再找凸包
gray = cv2.cvtColor(res, cv2.COLOR_BGR2GRAY)  # 转灰度
_, bin = cv2.threshold(gray, 50, 255, cv2.THRESH_BINARY)  # 阈值
# 找轮廓
contours, hierarchy = cv2.findContours(bin, cv2.RETR_EXTERNAL, cv2.CHAIN_APPROX_SIMPLE)
# 轮廓画在图上
cv2.drawContours(res, contours, -1, (0, 0, 255), 5)
hull = cv2.convexHull(contours[0])
1.3 方法二:先找角点再找凸包
a. 找角点
gray = cv2.cvtColor(res, cv2.COLOR_BGR2GRAY)  # 转灰度
corners = cv2.goodFeaturesToTrack(gray, 0, 0.01, 10) # 寻找角点
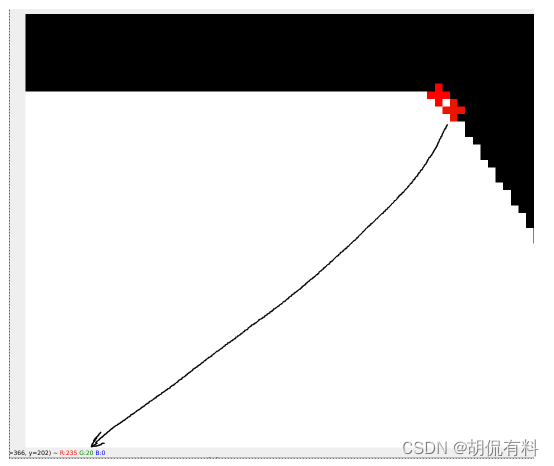
b. 显示一下角点
color_offset = 20
for idx, i in enumerate(corners):
    x, y = i.ravel()
    cv2.circle(res, (x, y), 1, (0, color_offset * idx, 255 - color_offset * idx), 3)

cvshow(res)
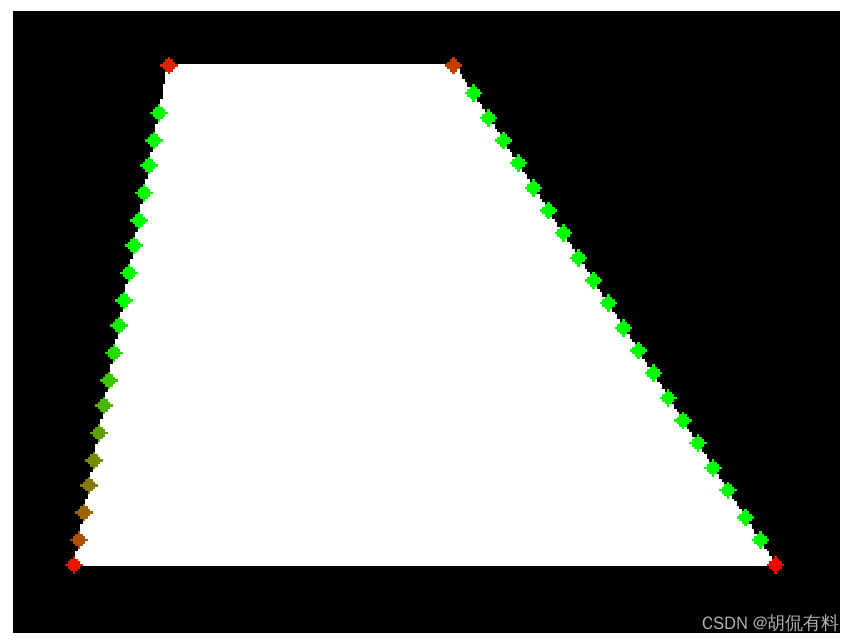
如下图所示,点是没有顺序的,这是 因为上面的角点检测算法返回的点的结果是点的质量返回的,即点检测质量越好约靠前。下图我们可以看到四个角上点质量最好排在前面,我们实际应用需要这些点有序。

c. 凸包
corners = np.int0(corners)
hull = cv2.convexHull(corners)
d. 显示凸包
color_offset = 20
for idx, i in enumerate(corners):
    x, y = i.ravel()
    cv2.circle(res, (x, y), 1, (0, color_offset * idx, 255 - color_offset * idx), 3)

cvshow(res)

e. 方法二总代码
# 方法二:先找角点再找轮廓
gray = cv2.cvtColor(res, cv2.COLOR_BGR2GRAY)  # 转灰度
corners = cv2.goodFeaturesToTrack(gray, 0, 0.01, 10) # 寻找角点
corners = np.int0(corners)
hull = cv2.convexHull(corners)
1.4 找轮廓点(角点、关键点)(附)
显示找到的点,点的颜色代表顺序。我们这里是点的顺序按从红色到绿色
color_offset = 20
for idx, i in enumerate(points):
    x, y = i.ravel()
    cv2.circle(res, (x, y), 1, (0, color_offset * idx, 255 - color_offset * idx), 3)

cvshow(res)
后续的案例图,放在这里提前看下,可以不深究,后续会逐步讲解
参考
[1] https://www.cnblogs.com/01black-white/p/16070686.html
[2] https://blog.csdn.net/weixin_44690935/article/details/109008946
[3] https://blog.csdn.net/lovetaozibaby/article/details/103214672