前言
实现签名的功能听着很复杂,其实很简单。使用canvas辅助的API和监听鼠标相关事件即可实现。
思考:
1、如何使用canvas画线 ?
2、如何判断在提交签名时判断是否有签名 ?
3、如何将canvas 转成的base64转成File文件对象传给后端 ?
Canvas的一些api介绍
1. 绘制直线
ctx.strokeStyle = "#000"  // 设置线条颜色
ctx.lineWidth = 2    // 设置线条宽度
ctx.beginPath()      // 开始绘图路径
ctx.moveTo(x, y)     // 将输入的坐标移动至直线起点
ctx.lineTo(x, y)     // 绘制直线到输入的坐标
ctx.stroke()         // 绘制图形的边界轮廓
ctx.closePath()      // 闭合绘图路径
2. ctx.toDataURL() 用于将canvas对象转换为base64编码
toDataURL接收两个参数
toDataURL(type, encoderOptions)
type :指定转换为base64编码后的图片的格式,如image/png、image/jpeg、image/webp等等,默认为image/png格式;
encoderOptions:用于设置转换为base64编码后图片的质量,取值范围0-1
3. ctx.clearRect() 方法清空给定矩形内的指定像素
ctx.clearRect(x, y, width, height)
x:要清除的矩形左上角的x坐标
y:要清除的矩形左上角的y坐标
width:要清除的矩形的宽度,以像素计
height:要清除的矩形的高度,以像素计
实现
- 定义一个points变量存放画线的坐标,我这边是如果坐标数量大于20个则表示有签名痕迹
- 监听鼠标按下事件时,记录起始位置,开启绘画状态
- 监听鼠标移动事件时,记录移动位置,开始画线,记录画线的坐标
- 监听鼠标松开事件时,更改绘画状态
全部的代码实现
<template>
  <div class="autographView">
    <div class="header">
      <span style="margin-right:20px">电子签名</span>
      <a-icon type="edit" />
    </div>
    <div class="autograph_container" ref="autographContainer">
      <canvas ref="canvasRef"
      @mousedown="mousedown"
      @mousemove="mousemove"
      @mouseup="mouseup"></canvas>
    </div>
    <div class="autograph_btn">
      <div style="margin-right: 30px;">
        <a-button class="confirm-btn" icon="check" block @click="handleCommit">确定</a-button>
      </div>
      <div>
        <a-button class="close-btn" icon="close" block @click="handleClear">清除</a-button>
      </div>
    </div>
  </div>
</template>
<script>
export default {
name: 'autographView',
data () {
return {
ctx: null, // 存储canvas
isPrint: false,
strokeStyle: '#000', // 线条颜色
lineWidth: 2, // 线条粗细
startX: 0, // 记录起始x轴位置
startY: 0, // 记录起始Y轴位置
points: [] // 记录坐标 用来判断是否有签名的
}
},
mounted () {
this.initCanvas()
},
methods: {
initCanvas () {
// 获取父元素的宽高
const { width, height } = this.$refs.autographContainer.getBoundingClientRect()
const canvas = this.$refs.canvasRef
canvas.width = width // 设置canvas的宽
canvas.height = height // 设置canvas的高
// 获取2d画布上的上下文,所有的图形绘制都可以通过ctx的属性和方法来完成
this.ctx = canvas.getContext('2d')
},
// 监听鼠标按下事件
mousedown (event) {
event.preventDefault()
// 获取鼠标按下的基于offsetParent的位置
this.startX = event.offsetX
this.startY = event.offsetY
this.isPrint = true // 开启绘画状态
},
// 监听鼠标移动
mousemove (event) {
event.preventDefault()
// 要判断是否是开启了绘画状态
if (!this.isPrint) return
const obj = {
x: event.offsetX,
y: event.offsetY
}
// 设置线条颜色
this.ctx.strokeStyle = this.strokeStyle
// 设置线条宽度
this.ctx.lineWidth = this.lineWidth
// 开始描绘路径
this.ctx.beginPath()
// 将鼠标按下时记录的起始坐标移至直线起点
this.ctx.moveTo(this.startX, this.startY)
// 定义线条结束坐标
this.ctx.lineTo(obj.x, obj.y)
// 绘制图形的线条
this.ctx.stroke()
// 闭合绘图路径
this.ctx.closePath()
// 更新起始位置
this.startX = obj.x
this.startY = obj.y
// 记录坐标
this.points.push(obj)
},
// 监听鼠标松开事件
mouseup () {
// 更改绘画状态
this.isPrint = false
},
// 清除
handleClear () {
// clearRect() 方法清空给定矩形内的指定像素
const { width, height } = this.$refs.canvasRef
this.ctx.clearRect(0, 0, width, height)
// 清空坐标
this.points = []
},
// 提交
handleCommit () {
// 判断至少有20个坐标 才算有签名
if (this.points.length < 20) {
this.$message.error('签名不能为空!')
return
}
// 转成base64
const baseFile = this.$refs.canvasRef.toDataURL() // 默认转成png格式的图片编码
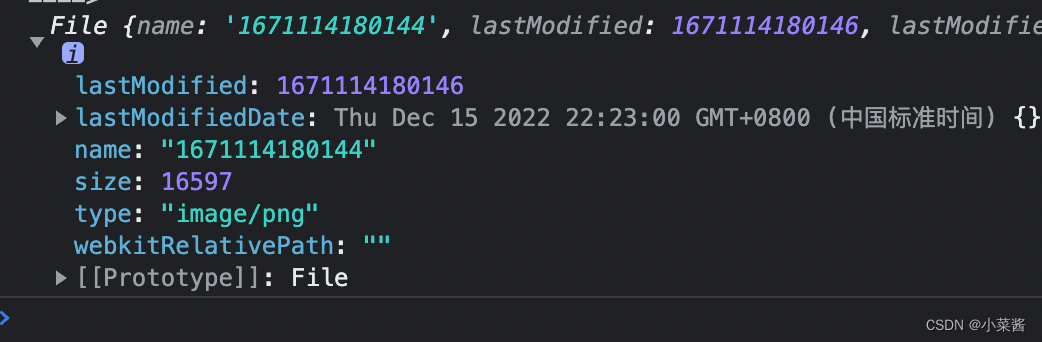
const filename = Date.now() // 用时间戳做文件名吧
const file = this.dataURLToFile(baseFile, filename) // 图片文件形式 传给后端存储即可
console.log('====>', file)
},
// 将base64转成File文件对象
dataURLToFile (dataURL, filename) {
const arr = dataURL.split(',')
// 获取图片格式
const imgType = arr[0].match(/:(.*?);/)[1]
// atob() 方法用于解码使用 base-64 编码的字符串
const dec = atob(arr[1])
let n = dec.length
const u8arr = new Uint8Array(n)
while (n--) {
// 转成ASCII码
u8arr[n] = dec.charCodeAt(n)
}
return new File([u8arr], filename, { type: imgType })
}
}
}
</script>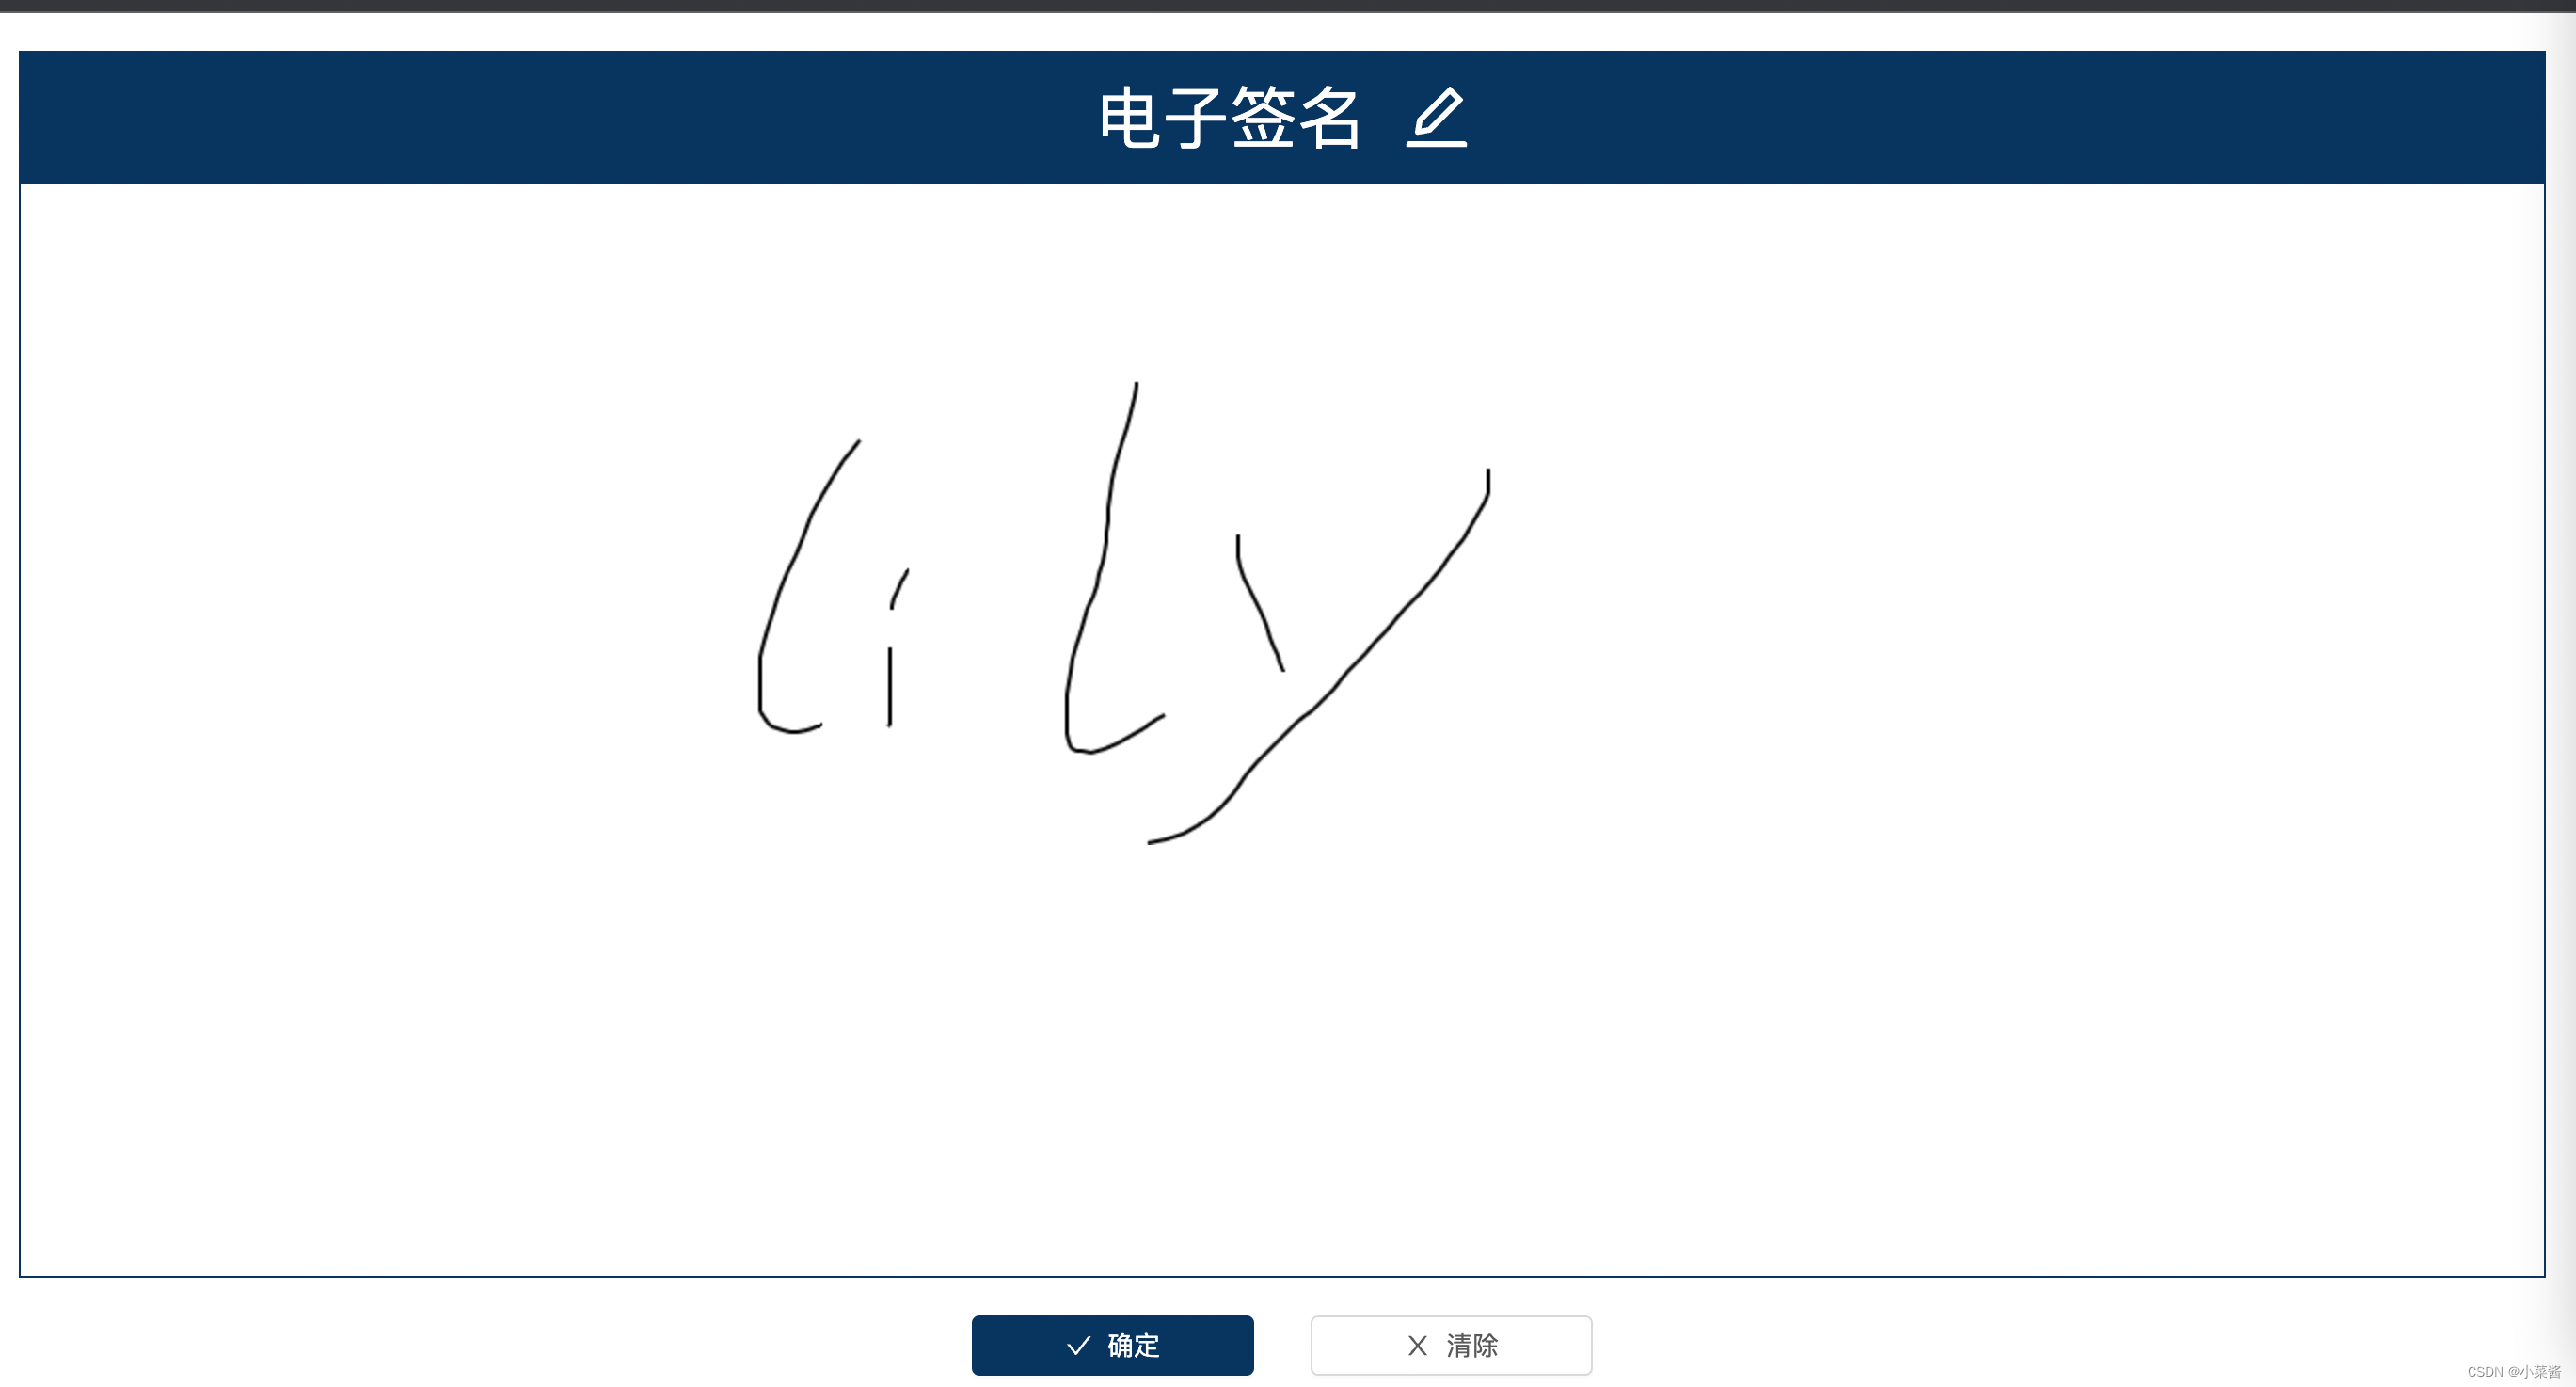
打印的file对象长这样