由于从网上直接copy的评分组件虽然能用,但是我找到的组件渲染做得稍差,于是准备自己改进一下。
先放一个效果图:
一.准备
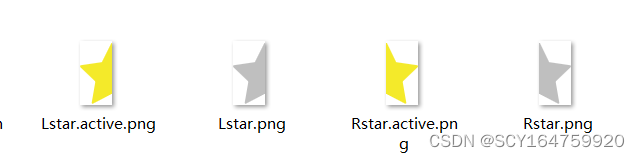
准备类似的四张图片,图片一定要根据像素点精准对半切开,否则在小程序中会出现重叠现象。
推荐在iconfont图标库中选择自己想要的图标,下载到本地后使用【画图3D】将图片进行对半裁剪。
示例图片如下:
二. 组件部分
代码的wxss部分借鉴了借鉴文章,但改进了其JS渲染部分。
【说明】:本组件默认评分为1分,最低分为0.5分,不支持打0分。大家可自行更改JS文件stars数组中的flag1和flag2以及star_num来自定义起评分。
在微信开发者工具中新建一个component,此次示例取名为star
1.star.js
【bgImgL】对应未选中左半星图片路径
【bgfImgL】对应已选中左半星图片路径
【bgImgR】对应未选中右半星图片路径
【bgfImgR】对应已选中右半星图片路径
以上四个图片路径请自行替换为本地图片路径
// components/star.js
Component({
  /**
   * 组件的属性列表
   */
  properties: {
    //接收自定义的高度
    setSize:Number,
  },

  data: {
    stars: [
      {
        flag1: 2,
        flag2: 2,
        bgImgL: "/src/icons/Lstar.png",
        bgfImgL: "/src/icons/Lstar.active.png",
        bgImgR: "/src/icons/Rstar.png",
        bgfImgR: "/src/icons/Rstar.active.png",
      },
      {
        flag1: 1,
        flag2: 1,
        bgImgL: "/src/icons/Lstar.png",
        bgfImgL: "/src/icons/Lstar.active.png",
        bgImgR: "/src/icons/Rstar.png",
        bgfImgR: "/src/icons/Rstar.active.png",
      },
      {
        flag1: 1,
        flag2: 1,
        bgImgL: "/src/icons/Lstar.png",
        bgfImgL: "/src/icons/Lstar.active.png",
        bgImgR: "/src/icons/Rstar.png",
        bgfImgR: "/src/icons/Rstar.active.png",
      },
      {
        flag1: 1,
        flag2: 1,
        bgImgL: "/src/icons/Lstar.png",
        bgfImgL: "/src/icons/Lstar.active.png",
        bgImgR: "/src/icons/Rstar.png",
        bgfImgR: "/src/icons/Rstar.active.png",
      },
      {
        flag1:1,
        flag2:1,
        bgImgL: "/src/icons/Lstar.png",
        bgfImgL: "/src/icons/Lstar.active.png",
        bgImgR: "/src/icons/Rstar.png",
        bgfImgR: "/src/icons/Rstar.active.png",
      },

    ],
    star_num: 1,  // 默认1分  最低0.5分
    Lindex:0,  //左下标
    Rindex:0,   //右下标
    oldScore:'', //旧分数
    newScore:''//新分数
  },

  /**
   * 组件的方法列表
   */
  methods: {
      //点击左边
    scoreL: function (e) {
      var _this = this;
      this.setData({
        oldScore:this.data.star_num
      })
      // console.log("旧分数",this.data.oldScore)
      var index = e.currentTarget.dataset.index;
      //改变分数
      _this.setData({
        star_num: index + 0.5 // 评分
      })
      this.setData({
        newScore:this.data.star_num
      })
      // console.log("新分数",this.data.newScore)
      this.judgeNum() //重新渲染星星
    },
    //点击右边
    scoreR: function (e) {
      this.setData({
        oldScore:this.data.star_num
      })
      var _this = this;
      var index = e.currentTarget.dataset.index;
      // 评分
      _this.setData({
        star_num: index + 1 // 评分
      })
      this.setData({
        newScore:this.data.star_num
      })
      this.judgeNum()
    },
    changeL(param){     //左移  1代表减 2代表加
      var that = this;
      // console.log("LL左下标",that.data.Lindex)
      // console.log("LL右下标",that.data.Rindex)
      var item ='stars['+that.data.Lindex+'].flag1'
      if(param===1){ //左移动
        // console.log("锚点1")
        const middle = that.data.Lindex
        var item ='stars['+middle+'].flag1'
        that.setData({
          [item]:1,
          Lindex:that.data.Lindex-1
        })
      }
      if(param===2){
        // console.log("锚点2")
        const middle = that.data.Lindex + 1
        var item ='stars['+middle+'].flag1'
        that.setData({
          [item]:2,
          Lindex:that.data.Lindex+1
        })
      }
    },
    changeR(param){    //右移  1代表减 2代表加
      const that = this
      var item ='stars['+that.data.Lindex+'].flag2'
      if(param===1){ //左移动
        // console.log("锚点3")
        that.setData({
          [item]:1,
          Rindex:this.data.Rindex-1
        })
      }
      if(param===2){
        // console.log("锚点4")
        const middle = that.data.Rindex + 1
        var item ='stars['+middle+'].flag2'
        that.setData({
          [item]:2,
          Rindex:this.data.Rindex+1
        })
      }
    },
    judgeNum:function(){
      const isPoint = (this.data.oldScore) % 1 ==0? false:true
      const flag = this.data.newScore - this.data.oldScore //分差
      if(flag<0)  {//分差小于0 扣分
        if(isPoint) {  //是小数(左)
          const LorR={
            toL:true,
            toR:false,
          }
          const count = Math.abs(flag)*2  //变化的次数 LRLR
          for (var i=0;i<count;i++)
          {
            if(LorR.toL){
              this.changeL(1)
            }
            if(LorR.toR){
              this.changeR(1)
            }
            LorR.toL=!LorR.toL
            LorR.toR=!LorR.toR
          }
        }//是整数(右)
        else{
          const LorR={
            toL:false,
            toR:true,
          }
          const count = Math.abs(flag)*2  //变化的次数 LRLR
          for (var i=0;i<count;i++)
          {
            if(LorR.toL){
              this.changeL(1)
            }
            if(LorR.toR){
              this.changeR(1)
            }
            LorR.toL=!LorR.toL
            LorR.toR=!LorR.toR
          }
        }
      }  //分差大于0 加分
      else{
        if(isPoint) {//是小数
        const LorR={
          toL:false,
          toR:true,
        }
        const count = Math.abs(flag)*2  //变化的次数 LRLR
        for (var i=0;i<count;i++)
        {
          if(LorR.toL){
            this.changeL(2)
          }
          if(LorR.toR){
            this.changeR(2)
          }
          LorR.toL=!LorR.toL
          LorR.toR=!LorR.toR
        }
        }
        else{ //是整数
          const LorR={
            toL:true,
            toR:false,
          }
          const count = Math.abs(flag)*2  //变化的次数 LRLR
          for (var i=0;i<count;i++)
          {
            if(LorR.toL){
              this.changeL(2)
            }
            if(LorR.toR){
              this.changeR(2)
            }
            LorR.toL=!LorR.toL
            LorR.toR=!LorR.toR
          }
        }
     }
    },
    setNum(){  //向父组件传值
      //传入的参数名称 starNum
      this.triggerEvent('myevent',{starNum:this.data.star_num})
    }
  }
})
2.star.wxml
<view class="stars" bindtap="setNum">
  <view wx:for="{

   {stars}}" wx:key="index" class="starItem" style="--width--:{

   {setSize}}rpx;--height--:{

   {setSize}}rpx">
    <image src="{

   {item.flag1 == 1 ? item.bgImgL : item.bgfImgL}}" data-index="{

   {index}}" bindtap='scoreL'>
    </image>
    <image src="{

   {item.flag2 == 1 ? item.bgImgR : item.bgfImgR}}" data-index="{

   {index}}" bindtap='scoreR'></image>
  </view>
</view>
3.star.wxss
.stars {
  display: flex;
  width: var(--width--);
  height: var(--height--);
  /* width: 100%;
  height: 100px; */
}

.stars view {
  position: relative;
  width: var(--width--);
  height: var(--height--);
  margin-right: 20rpx;
}

.stars view image:nth-of-type(1) {
  width: 50%;
  height: 100%;
  margin-right: -2rpx;
}
.stars view image:nth-of-type(2) {
  width: 50%;
  height: 100%;
  margin-left: -1rpx;
}
三.在页面中引用
该组件支持自定义高度,所以在其他页面中引用该组件时,需要传入一个参数来设置其宽高,尺寸为rpx,传入的参数名称为【setSize】,并且该组件支持将每次点击的评分回传到引入该组件的页面。
1.引入页面的json文件
组件的位置请自行替换为自己组件的位置,该处只为示例代码
{
  "usingComponents": {
    "star":"../../../components/star/star"
  }
}
2.引入页面的wxml文件
//setSize=100 表示将组件的高度设置为100rpx
//bind:myevent =“setStarNum”用于接收子组件回传的评分数值
//需在JS文件中写一个【setStarNum】函数
<star setSize='100' bind:myevent="setStarNum"></star>
3.引入页面的js文件
 setStarNum(e){
    console.log("获得的评分为",e.detail.starNum)
  },

  //评分已经拿到了,如何处理及操作可自行编写
四.效果演示
经过优化后的渲染过程不会出现原来copy的代码中星星频闪的问题,实际变化过程中要流畅很多,放两种图片自行对比
1.已优化
2.未优化
在切换时可看到明显的频闪现象。有兴趣的具体有可以去看借鉴的原文章,频闪是因为其每次都将原来星星的状态清零且重新渲染时未按顺序填色导致的。

编写不易,若使用过程中出现bug欢迎交流指正。