目录
扫描二维码关注公众号,回复:
14769943 查看本文章

SimpleAdapter (Context context, List> data, int resource, String[] from, int[] to)
为wListView设置Adaweipter为ListView
实验内容及步骤
在layout文件夹的布局文件activity_main.xml中设计如图界面,利用ListView组件模仿”当当APP”中的图书列表设计图书榜单显示的APP界面
步骤:
- 在主布局文件中设置ListView组件。
- 建立listitem布局文件,设计列表项布局
- 在MainActivity中根据相关资源对象定义图书适配器(Adapter)。
运行结果:

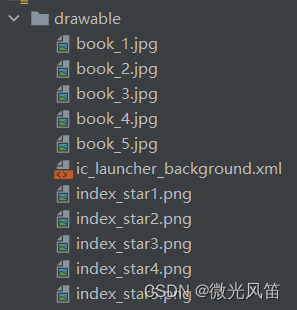
1、配置drawable文件
将book_img1~5.jpg:图书封面照片,index_star1~5.png:星级评定图片复制到drawable文件夹中
链接:图片资源链接
提取码:1234
2、配置listiem.xml文件
在layout文件夹中新建listiem.xml文件,写列表的每一项的UI
<?xml version="1.0" encoding="utf-8"?>
<LinearLayout xmlns:android="http://schemas.android.com/apk/res/android"
    android:layout_width="match_parent"
    android:layout_height="match_parent"
    android:orientation="horizontal"
    android:padding="10dp">
    <ImageView
        android:id="@+id/header"
        android:layout_width="240dp"
        android:layout_height="100dp"
        android:layout_weight="1.5"
        android:scaleType="centerCrop"
        android:background="#FF6200EE"
        android:src="@drawable/book_1"/>
    <RelativeLayout
        android:layout_width="wrap_content"
        android:layout_height="wrap_content"
        android:layout_weight="1">
        <TextView
            android:id="@+id/name"
            android:layout_width="match_parent"
            android:layout_height="20dp"
            android:textColor="@color/black"
            android:paddingLeft="10dp"
            android:text="Python编程从入到实践第二版"
            android:textSize="18dp" />
        <ImageView
            android:id="@+id/star"
            android:layout_width="65dp"
            android:layout_height="20dp"
            android:paddingLeft="10dp"
            android:src="@drawable/index_star5"
            android:scaleType="centerInside"
            android:layout_below="@+id/name"/>
        <TextView
            android:id="@+id/pl"
            android:layout_width="wrap_content"
            android:layout_height="20dp"
            android:paddingLeft="10dp"
            android:text="201759条评论"
            android:textSize="14dp"
            android:layout_below="@+id/name"
            android:layout_toRightOf="@+id/star"/>

        <TextView
            android:id="@+id/author"
            android:layout_width="match_parent"
            android:layout_height="wrap_content"
            android:paddingLeft="10dp"
            android:text="作者:[美]埃里克·马瑟斯(Eric Matthes)"
            android:textSize="14dp"
            android:layout_below="@+id/star"/>
        <TextView
            android:id="@+id/cb"
            android:layout_width="match_parent"
            android:layout_height="20dp"
            android:paddingLeft="10dp"
            android:text="出版社:人民邮电出版社"
            android:textSize="14dp"
            android:layout_below="@id/author"/>
        <TextView
            android:id="@+id/flag"
            android:layout_width="30dp"
            android:layout_height="20dp"
            android:paddingLeft="10dp"
            android:text="¥"
            android:textSize="18dp"
            android:textColor="@color/black"
            android:layout_below="@+id/cb"/>
        <TextView
            android:id="@+id/price"
            android:layout_width="match_parent"
            android:layout_height="20dp"
            android:paddingLeft="10dp"
            android:text="54.9"
            android:textSize="18dp"
            android:textColor="@color/black"
            android:layout_below="@+id/cb"
            android:layout_toRightOf="@+id/flag"/>
    </RelativeLayout>


</LinearLayout>
可以看到排版如图


3、导入到activity_main.xml中
在activity_main.xml文件中,定义一个ListView
<?xml version="1.0" encoding="utf-8"?>
<LinearLayout xmlns:android="http://schemas.android.com/apk/res/android"
    xmlns:app="http://schemas.android.com/apk/res-auto"
    xmlns:tools="http://schemas.android.com/tools"
    android:layout_width="match_parent"
    android:layout_height="match_parent"
    tools:context=".MainActivity">

    <!-- 定义一个ListView -->
    <ListView
        android:id="@+id/listView"
        android:layout_width="wrap_content"
        android:layout_height="wrap_content" >
    </ListView>

</LinearLayout>
4、配置Java代码
在MainActivity.java中写道
package com.example.a1025;

import androidx.appcompat.app.AppCompatActivity;

import android.os.Bundle;
import android.widget.ListView;
import android.widget.SimpleAdapter;

import java.util.ArrayList;
import java.util.HashMap;
import java.util.List;
import java.util.Map;

public class MainActivity extends AppCompatActivity {


    private String[] names = new String[]{"Python编程从入门到实践第2版","深入理解计算机系统","机器学习","Redis设计与实现","深入理解Java虚拟机:JVM高级特性与实践"};
    private int[] stars = new int[]{R.drawable.index_star5,R.drawable.index_star3,R.drawable.index_star4,R.drawable.index_star3,R.drawable.index_star5};
    private String[] pl = new String[]{"201759条评论","30097条评论","3347条评论","13161条评论","18990条评论"};
    private String[] author = new String[]{"作者:[美]埃里克·马瑟斯(Eric Matthes)","作者:(美)兰德尔 E.布莱恩特(Randal E.Bryant)等","作者:周志华","作者:黄健宏","作者:周志明"};
    private String[] cbs = new String[]{"出版社:人民邮电出版社","出版社:机械工业出版社","出版社:清华大学出版社","出版社:机械工业出版社","出版社:机械工业出版社"};
    private double[] price = new double[]{54.90,65.50,54.00,39.5,64.50};
    private int[] imageIds = new int[]{R.drawable.book_1,R.drawable.book_2,R.drawable.book_3,R.drawable.book_4,R.drawable.book_5};

    @Override
    protected void onCreate(Bundle savedInstanceState) {
        super.onCreate(savedInstanceState);
        setContentView(R.layout.activity_main);
        List<Map<String,Object>> listitem=new ArrayList<>();
        for(int i=0;i<5;i++){
            Map<String,Object>map_list=new HashMap<>();
            map_list.put("header",imageIds[i]);
            map_list.put("Name",names[i]);
            map_list.put("Star",stars[i]);
            map_list.put("pl",pl[i]);
            map_list.put("author",author[i]);
            map_list.put("cbs",cbs[i]);
            map_list.put("price",price[i]);
            listitem.add(map_list);
        }
        SimpleAdapter simpleAdapter=new SimpleAdapter(this,listitem,R.layout.listitem,new String[]{"header","Name","Star","pl","author","cbs","price"},new int[]{R.id.header,R.id.name,R.id.star,R.id.pl,R.id.author,R.id.cb,R.id.price});
        ListView listView=findViewById(R.id.listView);
        listView.setAdapter((simpleAdapter));
    }


}
【Java代码详解】
1.定义资源数组
    private String[] names = new String[]{"Python编程从入门到实践第2版","深入理解计算机系统","机器学习","Redis设计与实现","深入理解Java虚拟机:JVM高级特性与实践"};
    private int[] stars = new int[]{R.drawable.index_star5,R.drawable.index_star3,R.drawable.index_star4,R.drawable.index_star3,R.drawable.index_star5};
    private String[] pl = new String[]{"201759条评论","30097条评论","3347条评论","13161条评论","18990条评论"};
    private String[] author = new String[]{"作者:[美]埃里克·马瑟斯(Eric Matthes)","作者:(美)兰德尔 E.布莱恩特(Randal E.Bryant)等","作者:周志华","作者:黄健宏","作者:周志明"};
    private String[] cbs = new String[]{"出版社:人民邮电出版社","出版社:机械工业出版社","出版社:清华大学出版社","出版社:机械工业出版社","出版社:机械工业出版社"};
    private double[] price = new double[]{54.90,65.50,54.00,39.5,64.50};
    private int[] imageIds = new int[]{R.drawable.book_1,R.drawable.book_2,R.drawable.book_3,R.drawable.book_4,R.drawable.book_5};
2.新建list数组
List<Map<String,Object>> listitem=new ArrayList<>();3.赋值键值对,自定义名称为键,资源数组为值
for(int i=0;i<5;i++){
            Map<String,Object>map_list=new HashMap<>();
            map_list.put("header",imageIds[i]);
            map_list.put("Name",names[i]);
            map_list.put("Star",stars[i]);
            map_list.put("pl",pl[i]);
            map_list.put("author",author[i]);
            map_list.put("cbs",cbs[i]);
            map_list.put("price",price[i]);
            listitem.add(map_list);
        }
4. 使用SimpleAdapter创建ListView
SimpleAdapter simpleAdapter=new SimpleAdapter(this,listitem,R.layout.listitem,new String[]{"header","Name","Star","pl","author","cbs","price"},new int[]{R.id.header,R.id.name,R.id.star,R.id.pl,R.id.author,R.id.cb,R.id.price});SimpleAdapter的用法
SimpleAdapter (Context context, List<? extends Map<String, ?>> data, int resource, String[] from, int[] to)
SimpleAdapter对象,需要5个参数,后面4个是关键
- 第2个参数:是一个List<Map<? extends Map<string,?>>的集合对象,集合中的每个 Map<string,?>对象是一个列表项
- 第3个参数:该参数指定一个列表项布局界面的ID。
- 第4个参数:一个String[]类型的参数,决定提取Map对象中的那些key值对应的value类生成类表项 就是:需要显示value的key值
- 第5个参数:int[]类型的参数,决定填充哪些 组件,就是使用显示值得组件Id
6.为ListView设置Adapter
        ListView listView=findViewById(R.id.listView);
        listView.setAdapter((simpleAdapter));