提示:前端新人,初来乍到,若文章写的不好大家多包涵。
文章目录
前言
上一篇( 如何搭建vue框架-1)文章讲述了如何使用vue脚手架搭建基础,接下来就开始引用elementUI组件库进行页面布局,直接开始进入主题。
一、引入ElementUI
1、在vscode中打开项目,在终端输入命令:npm i element-ui -S(安装命令可以在elementUI官网查看),如果想要查看是否安装成功,可以打开根目录下的package.json文件进行查看。
  "dependencies": {


    "element-ui": "^2.15.10",  //elementui版本号
    "vue": "^2.5.2",  //vue版本号
    "vue-router": "^3.0.1"  //路由版本号
  },
2、在main.js中全局引用
给大家提个醒,/* eslint-disable no-new */这段代码不要删除,不然会报错。我习惯删除多余的注释或者没用的代码,但是刚开始不了解这段代码的作用就删了,找错找了很久(这是个坑。。。。)
import Vue from 'vue'  //这里是引入vue文件
import App from './App'  //这里是引入同目录下的App.vue模块
import router from './router'  //引用路由
import ElementUI from 'element-ui' //引用elementui
import 'element-ui/lib/theme-chalk/index.css' //引用elementui的css样式文件

Vue.use(ElementUI)
Vue.config.productionTip = false

/* eslint-disable no-new */
new Vue({


  el: '#app',
  router,
  components: {

     App },
  template: '<App/>'
})
3、App.vue页面自行调整
<template>
  <div id="app">
    <router-view />
  </div>
</template>

<script>
export default {


  name: "App"
};
</script>

<style scoped>
body {


  height: 100%;
  margin: 0px;
  padding: 0px;
}

#app {


  height: 100vh;
}
</style>
4、需要注意的是在build文件夹下webpack.base.conf.js中的一段代码,这段代码是一些规则限制,可能会影响到代码运行,这两部分在js中需要注释一下。(这也是个坑。。。。)
 const createLintingRule = () => ({


   test: /\.(js|vue)$/,
   loader: 'eslint-loader',
   enforce: 'pre',
   include: [resolve('src'), resolve('test')],
   options: {


     formatter: require('eslint-friendly-formatter'),
     emitWarning: !config.dev.showEslintErrorsInOverlay
   }
 })

...(config.dev.useEslint ? [createLintingRule()] : []),
二、路由配置及打开页面
1、创建一个存储页面的文件夹,我新创建了一个views文件夹,里面放了一个login.vue的页面。因为之后需要页面跳转和打开,所以需要将路由(route)进行配置一下,我在使用脚手架搭建框架时已经将路由安装了所以此时直接使用就行,不知道的朋友看我第一篇文章或者单独安装路由即可。
route文件下的index.vue代码如下:
import Vue from "vue";
import Router from "vue-router";

Vue.use(Router);

const routes = [
  {


    path: "/",
    redirect: "/login" /*重定向页面*/
  },
  {


    path: "/login",
    name: "login",
    component: () => import("@/views/login.vue"),
    meta: {

     title: "登录" }
  }
];

const router = new Router({


  base: process.env.BASE_URL,
  routes
});

export default router;
我的login.vue页面代码如下:
<template>
  <div class="flex-container">
    <div class="header">
      <span id="title">××××系统</span>
      <span>企业内部管理平台</span>
    </div>
    <div class="main">
      <el-form :model="form" :rules="rules" ref="form">
        <el-form-item prop="username">
          <el-input placeholder="请输入账号" prefix-icon="el-icon-user" v-model="form.username" style="width: 300px;">
          </el-input>
        </el-form-item>
        <el-form-item prop="password">
          <el-input placeholder="请输入密码" prefix-icon="el-icon-lock" v-model="form.password" style="width: 300px;"
            show-password></el-input>
        </el-form-item>
        <el-form-item>
          <el-checkbox v-model="form.checked">记住密码</el-checkbox>
        </el-form-item>
        <el-form-item>
          <el-button type="primary" style="width: 100%;" :loading="loginbtn" @click="submitForm('form')">登录</el-button>
        </el-form-item>
      </el-form>
    </div>
    <div class="footer">
      <p>
        <span><a href="javascript:void(0);">帮助</a></span>
        <span><a href="javascript:void(0);">关于</a></span>
        <span><a href="javascript:void(0);">更多</a></span>
      </p>
      <p>Copyright © 2022出品</p>
    </div>
  </div>
</template>

<script>
export default {


  name: "login",
  data() {


    return {


      form: {


        username: "",
        password: "",
        checked: false
      },
      loginbtn: false,
      rules: {


        username: [{

     required: true, message: "请输入用户名", trigger: "blur" }],
        password: [{

     required: true, message: "请输入密码", trigger: "blur" }]
      }
    };
  },
  components: {


  },
  methods: {


    //登录方法
    submitForm() {


      this.loginbtn = true;
      this.$refs.form.validate((valid) => {


        if (valid) {


          this.$notify({


            title: '登录成功',
            message: '您好,欢迎回来',
            type: 'success'
          });
          this.loginbtn = false;
          //this.$router.push({ path: "/index" });
        } else {


          this.loginbtn = false;
        }
      });
    }
  },
};
</script>
<style scoped>
.flex-container {


  display: flex;
  height: 100vh;
  flex-direction: column;
  align-items: center;
  justify-content: center;
}

.header {


  width: 100%;
  display: flex;
  margin: 100px 0 20px 0;
  flex-direction: column;
  align-items: center;
  justify-content: center;
}

.header #title {


  font-size: 30px;
}

.main {


  width: 500px;
  height: 400px;
  display: flex;
  padding-top: 20px;
  flex-direction: column;
  align-items: center;
  justify-content: center;
  border-radius: 30px;
  box-shadow: 0 1px 15px rgba(233, 204, 204);
}

.footer {


  width: 100%;
  display: flex;
  margin-top: 300px;
  flex-direction: column;
  align-items: center;
  line-height: 5px;
  color: rgb(174, 129, 137);
}

.footer span {


  padding: 0 15px;
}

.footer a {


  padding: 0 5px;
  color: rgba(0, 0, 0, .5);
  text-decoration: none;
}

.footer a:hover {


  color: rgba(0, 0, 0, 1);
}
</style>
2、在终端输入运行命令:npm run dev,等待项目启动并打开页面,默认页面将会是路由中配置的login页面。
需要注意的是页面中name属性值,要与路由的name属性值相同。
页面显示时会出现纵向滚动条,需要在index.html页面的body上添加属性来消除滚动条。
<!DOCTYPE html>
<html>
  <head>
    <meta charset="utf-8">
    <meta name="viewport" content="width=device-width,initial-scale=1.0">
    <title>系统</title>
  </head>
  <body style="overflow: hidden;">
    <div id="app"></div>
    <!-- built files will be auto injected -->
  </body>
</html>
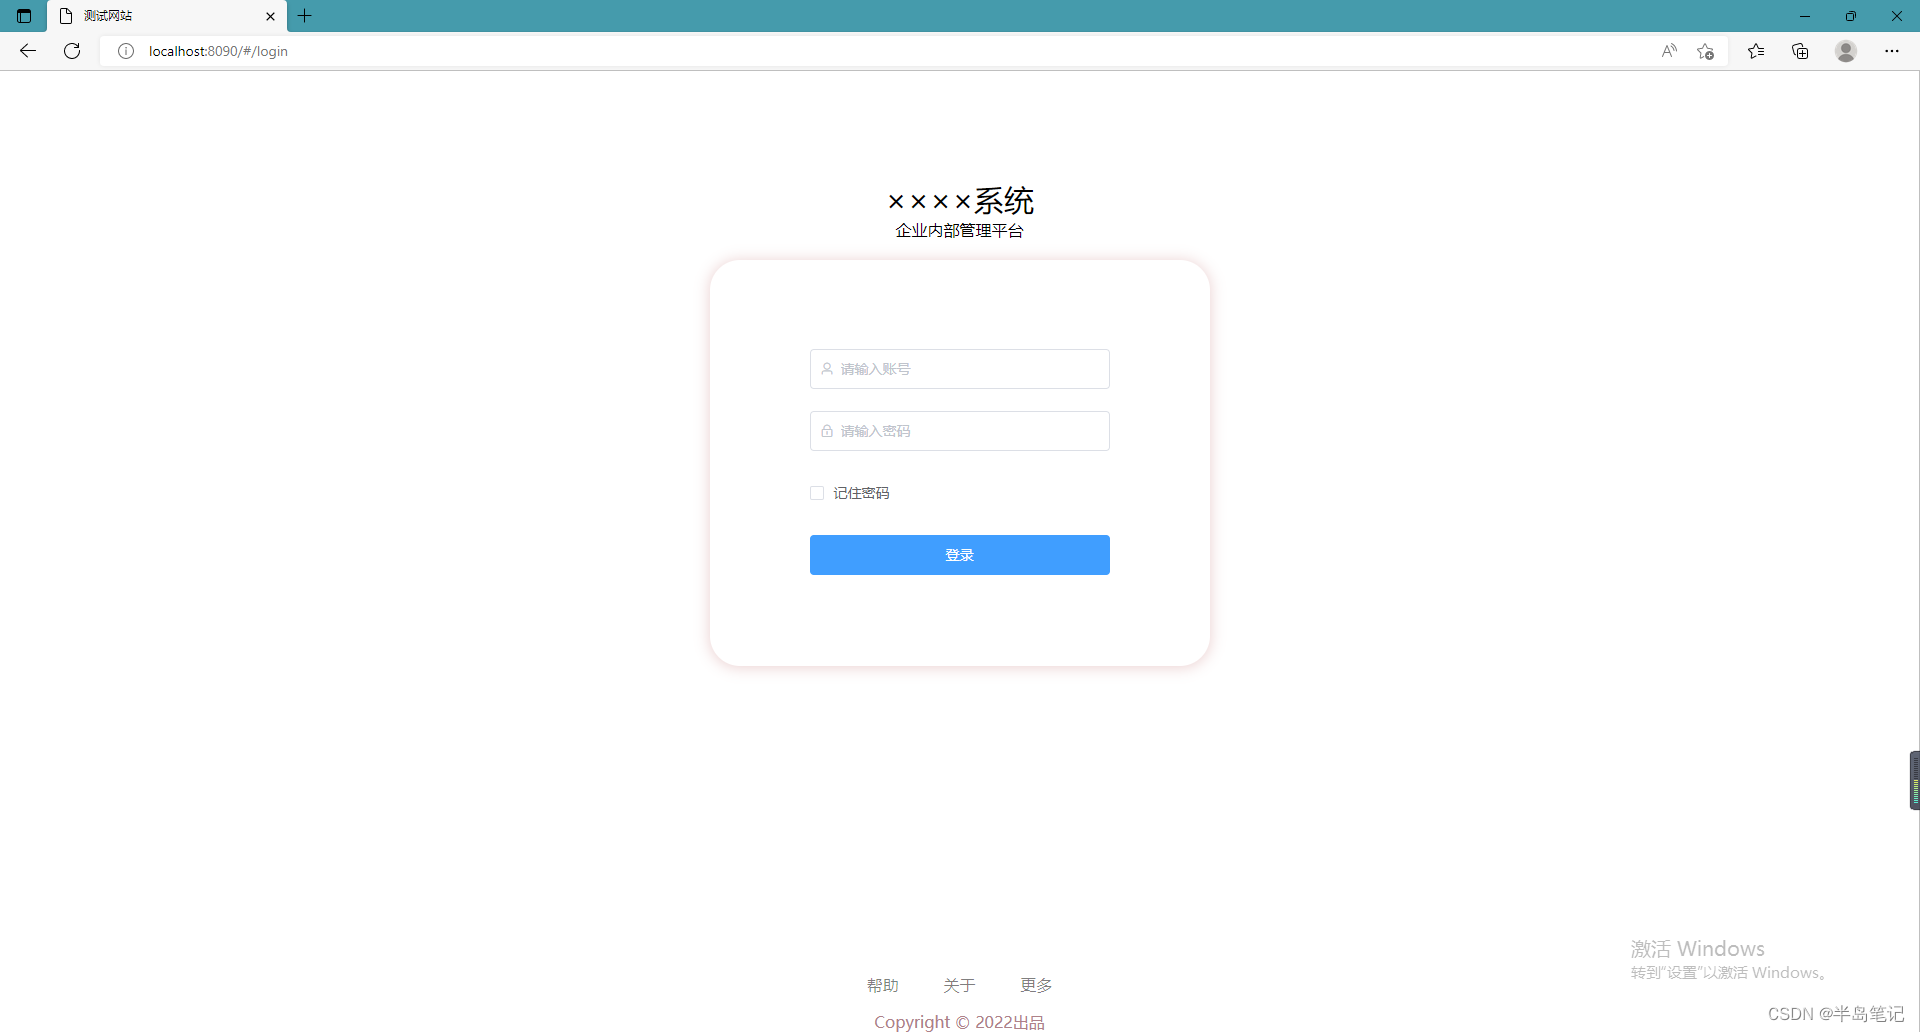
3、效果展示如下:
三、结束语
我本身是做后端C#和.net core开发的,但是对前端的UI效果很感兴趣,这个vue也是在工作中接触到的,给我感觉比较简约、清新,以前接触过easyUI和layUI,layUI界面也还行,直到接触了elementUI后,让我眼前一亮,所以平时自己上网学学,做个小的前端网站练手,写这些文章的初衷呢主要还是帮助一下想我一样的初学者,可以学到自己想学的东西。
(下一篇开始做登录后的home页布局,使用到的组件会多一点)