【项目背景】
最近接触小程序开发,用的mpvue,和vue差不多,上手较容易。
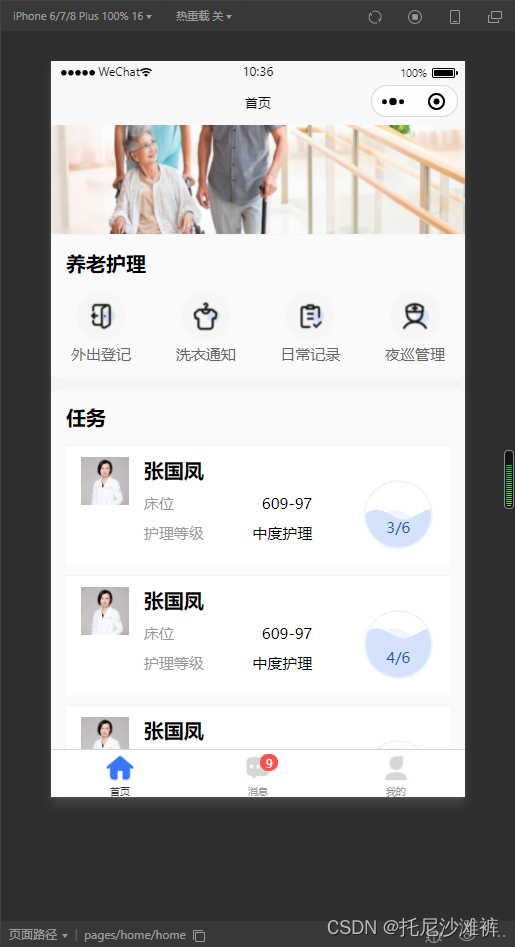
在开发过程中,遇到画水球图表的需求。先看效果图
【引入&项目结构】
我使用的组件是:mpvue-echarts(相关引入文章传送门),其实就是用vue把小程序的画布组件包了一下。
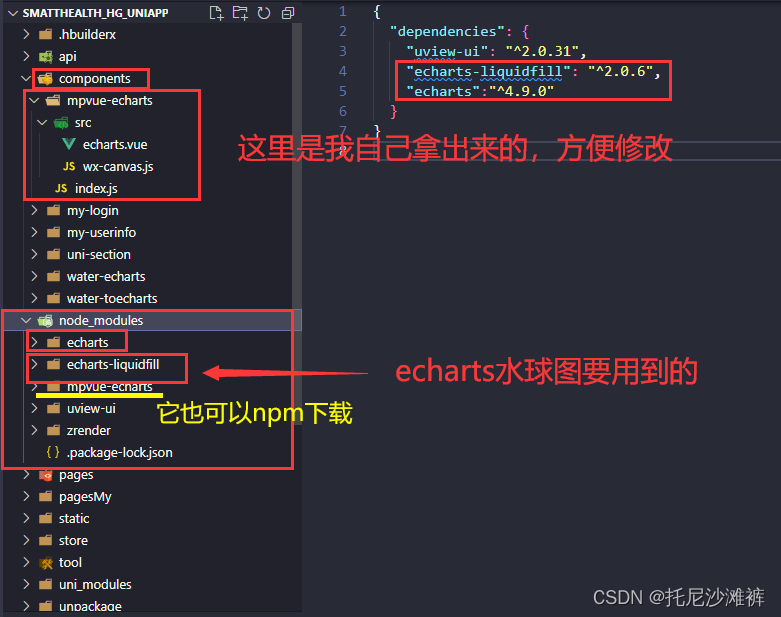
这里推荐使用我封装修改过的components插件
#【v-for循环渲染多个图表】
由于是一个页面显示多个图表,所以还需要参考:(https://github.com/F-loat/mpvue-echarts/blob/master/examples/src/pages/demos/multiCharts.vue)
以上例子写得很清楚,例子也是可行的。
// 正常引入如下
<mpvue-echarts :echarts="echarts" :onInit="onInit" canvasId="demo-canvas" />
canvasId是必写的,而且必须唯一,不唯一的话只能显示一个,其他的不会显示。
这里需要动态v-for循环出来多个图表,循环出来的canvasId就需要想办法变唯一
在文件mpvue-echarts/src/echarts.vue中,
props增加参数:
index:{


  type:String
}
原来的组件是这样的:
<canvas
    v-if="canvasId"
    class="ec-canvas"
    :id="canvasId"
    :canvasId="canvasId"
    @touchstart="touchStart"
    @touchmove="touchMove"
    @touchend="touchEnd"
    @error="error">
 </canvas>
改成这样:
<canvas
    v-if="canvasId"
    class="ec-canvas"
    :id="canvasId + index"  //加上index
    :canvasId="canvasId + index"  //加上index
    @touchstart="touchStart"
    @touchmove="touchMove"
    @touchend="touchEnd"
    @error="error">
  </canvas>
改完组件后这样使用
<mpvue-echarts :echarts="echarts" :onInit="onInit" canvasId="demo-canvas" :index = "myCourse.nd"/>
另一种方法:
// 也可以不改:mpvue-echarts/src/echarts.vue 如下使用:

<mpvue-echarts :echarts="echarts" :onInit="onInit" canvasId="demo-canvas + index"/>
现在就可以在v-for中显示多个图表了。
动态数据
既然是动态生成,option也可以不一样,正常情况下参数从function onInit(canvas, width, height)中传过来,但是参数是固定的,不能随便增加。
于是,需要又改原来组件~~(mpvue-echarts/src/echarts.vue)
props增加参数:
num1:{


      type: String
    },
    num2:{


      type: String
    },
然后,对比原来的init()方法是这样的:
if (typeof callback === 'function') {


          this.chart = callback(canvas, width, height);
        } else if (typeof this.onInit === 'function') {


          this.chart = this.onInit(canvas, width, height);
        }
改成这样:
if (typeof callback === 'function') {


          this.chart = callback(canvas, width, height,this.num1,this.num2); //加上自己的参数
        } else if (typeof this.onInit === 'function') {


          this.chart = this.onInit(canvas, width, height,this.num1,this.num2); //加上自己的参数
        }
在使用的时候:
<mpvue-echarts
            :echarts="echarts"
            :onInit="onInit"
            canvasId="a1 + myCourse.index" // canvasId 唯一
            :num1 = "myCourse.finshProCredit"  //传入自己的参数
            :num2 = "myCourse.proCredit"       //传入自己的参数
            />
就可以把自己的参数传到他的组件中,通过组件中init方法带回到onInit方法,所以再写onInit的时候,要这样写:
onInit(canvas, width, height,num1,num2) {


...
...
// let option = getScatterOption(num1,num2); // 这里可以看官方的例子 getScatterOption是你的方法
var option = {


    title: {


      text: num1 + '/' + num2,
    },
  }; // 也可以直接把echarts的option搬进来,直接拿num1,num2
chart.setOption(option);
...
}
这样也不需要像 官方例子 中写很多setOption方法,写一个就可以了。
写法也不止这一种,个人如何封装,就应如何灵活变通引用,完结~~