esp8266 NodeMCU v3物联网开发
》》》》》》》》》》
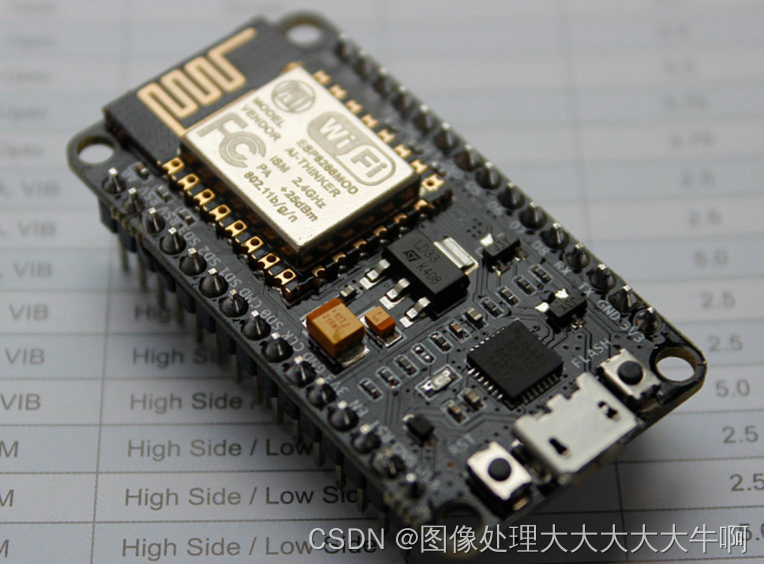
这块板子的淘宝链接》
》》》》》》》》》》
一.移植MicroPython
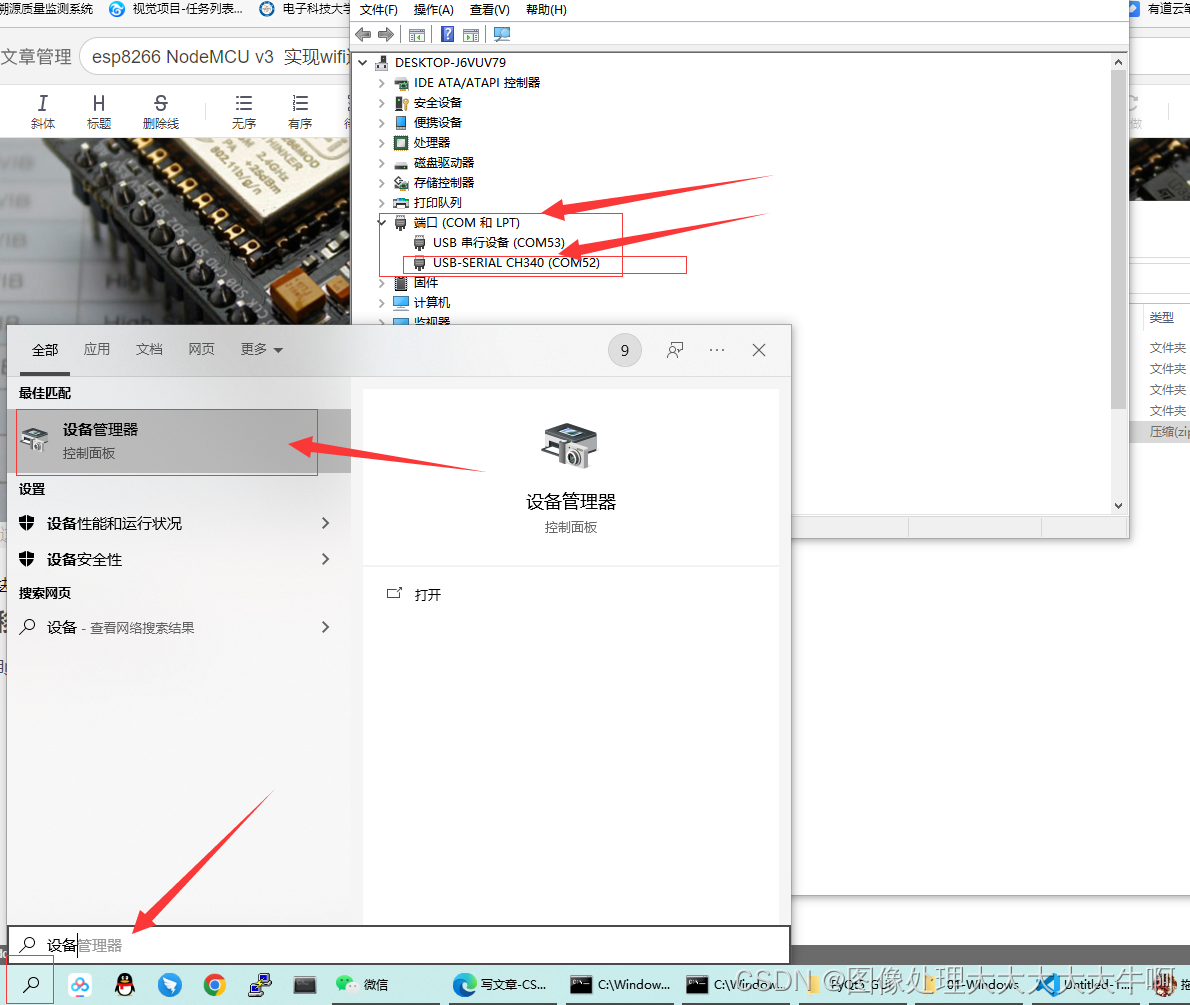
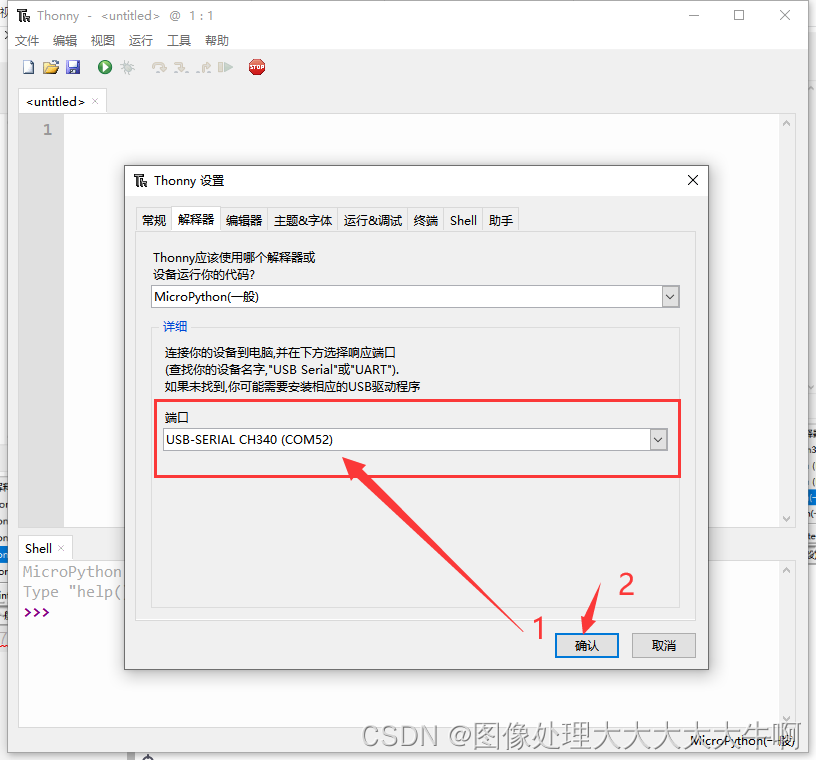
1.用microusb 数据线连接到电脑上,找到对应的串口号 这里是52,找不到端口的下载并安装串口驱动
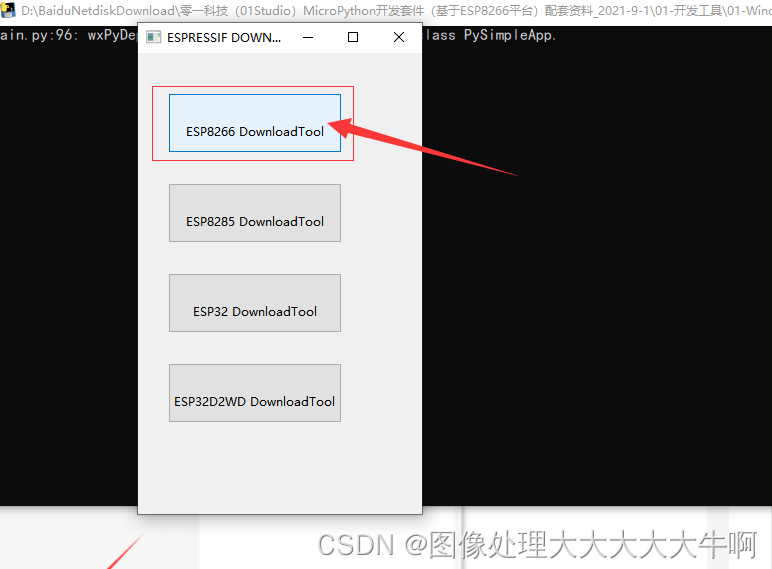
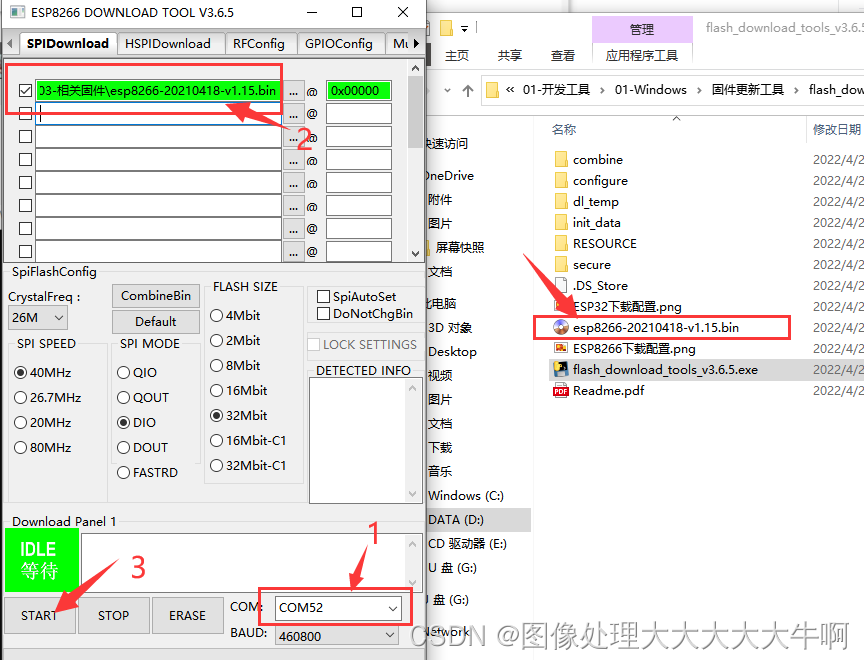
- 使用flash_download_tools烧录microPython 固件 文件下载
- 使用thonny IDE进行开发 下载安装包
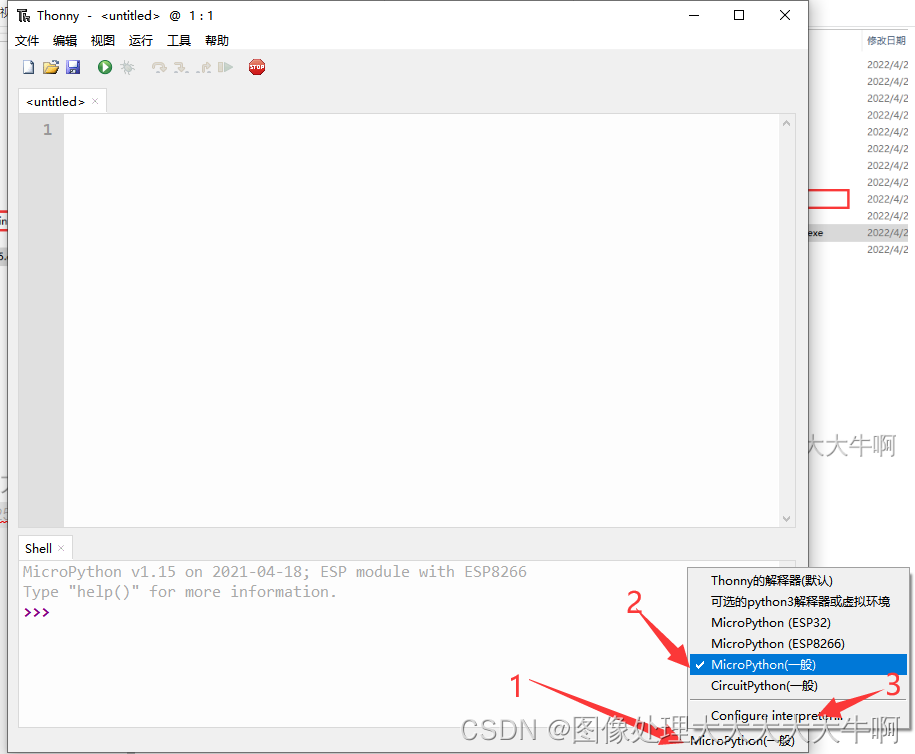
选择esp8266的端口
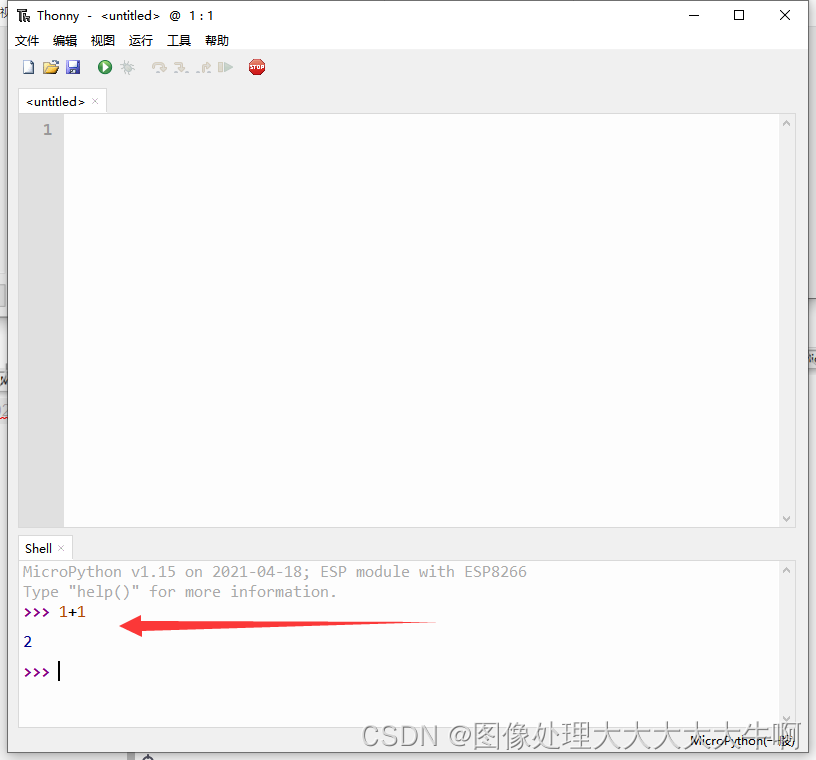
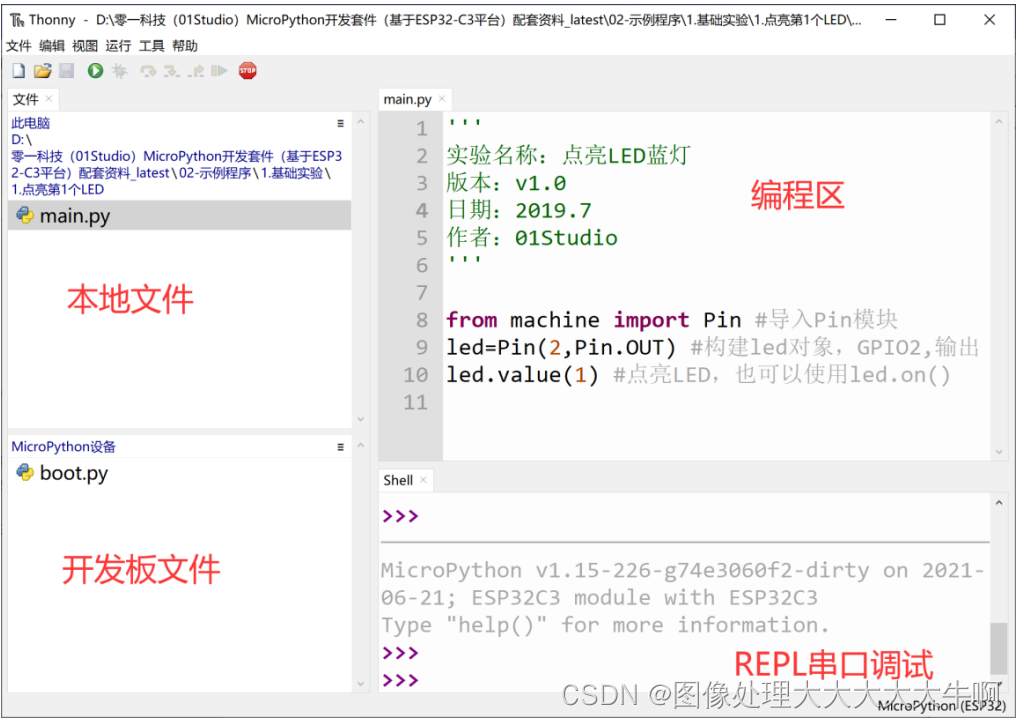
测试microPython
打开文件系统
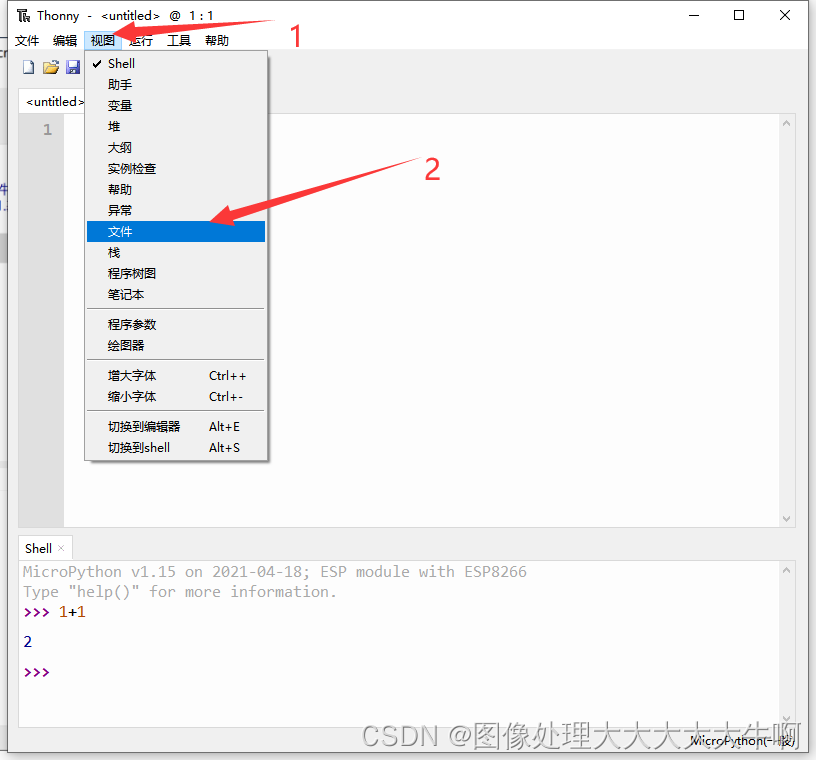
到此环境准备完毕
二. 连接wifi 案例
新建一个main.py 的文件
import network,time
from machine import I2C,Pin

#初始化相关模块
i2c = I2C(sda=Pin(13), scl=Pin(14))


#WIFI连接函数
def WIFI_Connect():

    WIFI_LED=Pin(2, Pin.OUT, value=1) #初始化WIFI指示灯

    wlan = network.WLAN(network.STA_IF) #STA模式
    wlan.active(True)                   #激活接口
    start_time=time.time()              #记录时间做超时判断

    if not wlan.isconnected():
        print('connecting to network...')
        wlan.connect('Xiaomi_3D6D', '!!!!tl820808') #输入WIFI账号密码

        while not wlan.isconnected():

            #LED闪烁提示
            WIFI_LED.value(0)
            time.sleep_ms(300)
            WIFI_LED.value(1)
            time.sleep_ms(300)

            #超时判断,15秒没连接成功判定为超时
            if time.time()-start_time > 15 :
                print('WIFI Connected Timeout!')
                break

    if wlan.isconnected():
        #LED点亮
        WIFI_LED.value(0)

        #串口打印信息
        print('network information:', wlan.ifconfig())


#执行WIFI连接函数
WIFI_Connect()
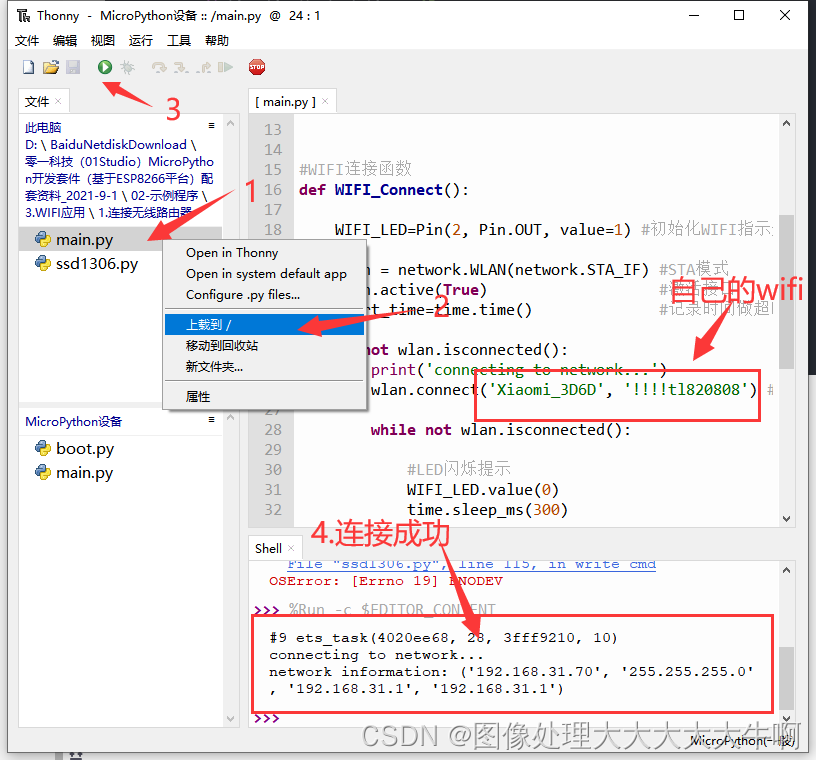
显示成功连接到wifi,灯光从闪烁变为常亮,ip为192.168.31.70。
三.进行mqtt 双向通信
1. 使用免费公告mqtt服务器
broker-cn.emqx.io
关于不同端口
tcp:1883
tls: 8883
WebSocket: 8083,8084
我们esp8266用的tcp 所以一定要1883端口
2.使用esp8266 发布订阅信息
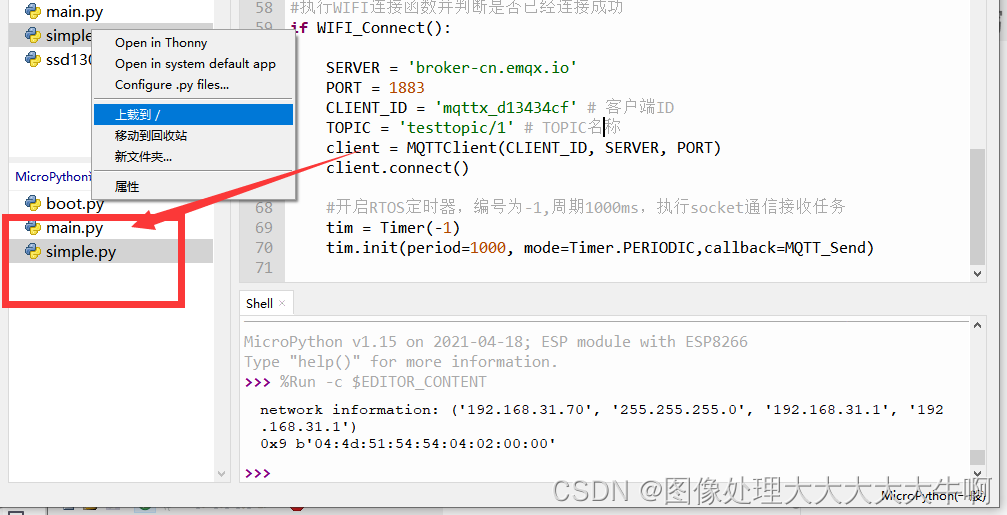
需要新建两个文件
main.py
import network,time
from simple import MQTTClient #导入MQTT板块
from machine import I2C,Pin,Timer
#初始化相关模块
i2c = I2C(sda=Pin(13), scl=Pin(14))
#WIFI连接函数
def WIFI_Connect():
WIFI_LED=Pin(2, Pin.OUT, value=1) #初始化WIFI指示灯
wlan = network.WLAN(network.STA_IF) #STA模式
wlan.active(True) #激活接口
start_time=time.time() #记录时间做超时判断
if not wlan.isconnected():
print('connecting to network...')
wlan.connect('Xiaomi_3D6D', '!!!!tl820808') #输入WIFI账号密码
while not wlan.isconnected():
#LED闪烁提示
WIFI_LED.value(0)
time.sleep_ms(300)
WIFI_LED.value(1)
time.sleep_ms(300)
#超时判断,15秒没连接成功判定为超时
if time.time()-start_time > 60 :
print('WIFI Connected Timeout!')
break
if wlan.isconnected():
#LED点亮
WIFI_LED.value(0)
#串口打印信息
print('network information:', wlan.ifconfig())
return True
else:
return False
#接收数据任务
def MQTT_Rev():
client.check_msg()
#发布数据任务
def MQTT_Send():
client.publish(TOPICSEND, 'Hello esp8266')
#设置MQTT回调函数,有信息时候执行
def MQTT_callback(topic, msg):
print('topic: {}'.format(topic))
print('msg: {}'.format(msg))
# 定时任务
def task(tim):
MQTT_Rev()
MQTT_Send()
#执行WIFI连接函数并判断是否已经连接成功
if WIFI_Connect():
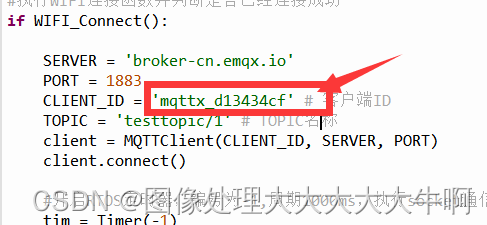
SERVER = 'broker-cn.emqx.io'
PORT = 1883
CLIENT_ID = 'xxxx' # 客户端ID
TOPICREV = 'testtopic/1' # 发送节点
TOPICSEND = 'testtopic/2' # 接收节点
client = MQTTClient(CLIENT_ID, SERVER, PORT)
client.set_callback(MQTT_callback) #配置回调函数
client.connect()
client.subscribe(TOPICREV) #订阅主题
#开启RTOS定时器,编号为-1,周期1000ms,执行socket通信接收任务
tim = Timer(-1)
tim.init(period=1000, mode=Timer.PERIODIC,callback=task)
以下代码保存为 simple.py
import usocket as socket
import ustruct as struct
from ubinascii import hexlify

class MQTTException(Exception):
    pass

class MQTTClient:

    def __init__(self, client_id, server, port=0, user=None, password=None, keepalive=0,
                 ssl=False, ssl_params={

    }):
        if port == 0:
            port = 8883 if ssl else 1883
        self.client_id = client_id
        self.sock = None
        self.server = server
        self.port = port
        self.ssl = ssl
        self.ssl_params = ssl_params
        self.pid = 0
        self.cb = None
        self.user = user
        self.pswd = password
        self.keepalive = keepalive
        self.lw_topic = None
        self.lw_msg = None
        self.lw_qos = 0
        self.lw_retain = False

    def _send_str(self, s):
        self.sock.write(struct.pack("!H", len(s)))
        self.sock.write(s)

    def _recv_len(self):
        n = 0
        sh = 0
        while 1:
            b = self.sock.read(1)[0]
            n |= (b & 0x7f) << sh
            if not b & 0x80:
                return n
            sh += 7

    def set_callback(self, f):
        self.cb = f

    def set_last_will(self, topic, msg, retain=False, qos=0):
        assert 0 <= qos <= 2
        assert topic
        self.lw_topic = topic
        self.lw_msg = msg
        self.lw_qos = qos
        self.lw_retain = retain

    def connect(self, clean_session=True):
        self.sock = socket.socket()
        addr = socket.getaddrinfo(self.server, self.port)[0][-1]
        self.sock.connect(addr)
        if self.ssl:
            import ussl
            self.sock = ussl.wrap_socket(self.sock, **self.ssl_params)
        premsg = bytearray(b"\x10\0\0\0\0\0")
        msg = bytearray(b"\x04MQTT\x04\x02\0\0")

        sz = 10 + 2 + len(self.client_id)
        msg[6] = clean_session << 1
        if self.user is not None:
            sz += 2 + len(self.user) + 2 + len(self.pswd)
            msg[6] |= 0xC0
        if self.keepalive:
            assert self.keepalive < 65536
            msg[7] |= self.keepalive >> 8
            msg[8] |= self.keepalive & 0x00FF
        if self.lw_topic:
            sz += 2 + len(self.lw_topic) + 2 + len(self.lw_msg)
            msg[6] |= 0x4 | (self.lw_qos & 0x1) << 3 | (self.lw_qos & 0x2) << 3
            msg[6] |= self.lw_retain << 5

        i = 1
        while sz > 0x7f:
            premsg[i] = (sz & 0x7f) | 0x80
            sz >>= 7
            i += 1
        premsg[i] = sz

        self.sock.write(premsg, i + 2)
        self.sock.write(msg)
        #print(hex(len(msg)), hexlify(msg, ":"))
        self._send_str(self.client_id)
        if self.lw_topic:
            self._send_str(self.lw_topic)
            self._send_str(self.lw_msg)
        if self.user is not None:
            self._send_str(self.user)
            self._send_str(self.pswd)
        resp = self.sock.read(4)
        assert resp[0] == 0x20 and resp[1] == 0x02
        if resp[3] != 0:
            raise MQTTException(resp[3])
        return resp[2] & 1

    def disconnect(self):
        self.sock.write(b"\xe0\0")
        self.sock.close()

    def ping(self):
        self.sock.write(b"\xc0\0")

    def publish(self, topic, msg, retain=False, qos=0):
        pkt = bytearray(b"\x30\0\0\0")
        pkt[0] |= qos << 1 | retain
        sz = 2 + len(topic) + len(msg)
        if qos > 0:
            sz += 2
        assert sz < 2097152
        i = 1
        while sz > 0x7f:
            pkt[i] = (sz & 0x7f) | 0x80
            sz >>= 7
            i += 1
        pkt[i] = sz
        #print(hex(len(pkt)), hexlify(pkt, ":"))
        self.sock.write(pkt, i + 1)
        self._send_str(topic)
        if qos > 0:
            self.pid += 1
            pid = self.pid
            struct.pack_into("!H", pkt, 0, pid)
            self.sock.write(pkt, 2)
        self.sock.write(msg)
        if qos == 1:
            while 1:
                op = self.wait_msg()
                if op == 0x40:
                    sz = self.sock.read(1)
                    assert sz == b"\x02"
                    rcv_pid = self.sock.read(2)
                    rcv_pid = rcv_pid[0] << 8 | rcv_pid[1]
                    if pid == rcv_pid:
                        return
        elif qos == 2:
            assert 0

    def subscribe(self, topic, qos=0):
        assert self.cb is not None, "Subscribe callback is not set"
        pkt = bytearray(b"\x82\0\0\0")
        self.pid += 1
        struct.pack_into("!BH", pkt, 1, 2 + 2 + len(topic) + 1, self.pid)
        #print(hex(len(pkt)), hexlify(pkt, ":"))
        self.sock.write(pkt)
        self._send_str(topic)
        self.sock.write(qos.to_bytes(1, "little"))
        while 1:
            op = self.wait_msg()
            if op == 0x90:
                resp = self.sock.read(4)
                #print(resp)
                assert resp[1] == pkt[2] and resp[2] == pkt[3]
                if resp[3] == 0x80:
                    raise MQTTException(resp[3])
                return

    # Wait for a single incoming MQTT message and process it.
    # Subscribed messages are delivered to a callback previously
    # set by .set_callback() method. Other (internal) MQTT
    # messages processed internally.
    def wait_msg(self):
        res = self.sock.read(1)
        self.sock.setblocking(True)
        if res is None:
            return None
        if res == b"":
            raise OSError(-1)
        if res == b"\xd0":  # PINGRESP
            sz = self.sock.read(1)[0]
            assert sz == 0
            return None
        op = res[0]
        if op & 0xf0 != 0x30:
            return op
        sz = self._recv_len()
        topic_len = self.sock.read(2)
        topic_len = (topic_len[0] << 8) | topic_len[1]
        topic = self.sock.read(topic_len)
        sz -= topic_len + 2
        if op & 6:
            pid = self.sock.read(2)
            pid = pid[0] << 8 | pid[1]
            sz -= 2
        msg = self.sock.read(sz)
        self.cb(topic, msg)
        if op & 6 == 2:
            pkt = bytearray(b"\x40\x02\0\0")
            struct.pack_into("!H", pkt, 2, pid)
            self.sock.write(pkt)
        elif op & 6 == 4:
            assert 0

    # Checks whether a pending message from server is available.
    # If not, returns immediately with None. Otherwise, does
    # the same processing as wait_msg.
    def check_msg(self):
        self.sock.setblocking(False)
        return self.wait_msg()
将 main.py 里面的wifi换成自己的

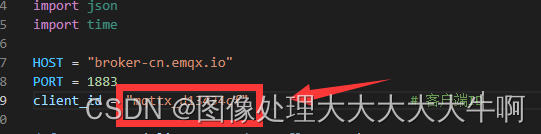
修改mqtt id, topic 可以自己设置一个 类似 test/1
然后上传到开发板里面
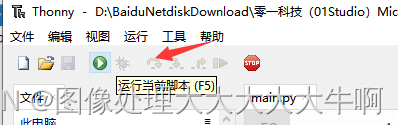
然后直接运行脚本
3.使用python 发布订阅消息
安装mqtt
pip install paho-mqtt
新建文件mqtt.py
#!/usr/bin/ python
# -*- encoding: utf-8 -*-
'''
@文件    :mqtt.py
@说明    :
@时间    :2022/05/02 19:12:54
@作者    :刘子沫
@邮箱    :[email protected]
@版本    :1.0
'''


import paho.mqtt.client as mqtt
from threading import Thread
import json
import time

HOST = "broker-cn.emqx.io"
PORT = 1883
client_id = "mqttx_d13434c"                     # 客户端ID

def on_connect(client, userdata, flags, rc):
    print("Connected with result code "+str(rc))
    client.subscribe("testtopic/2")         # 订阅消息


def on_message(client, userdata, msg):
    print("主题:"+msg.topic+" 消息:"+str(msg.payload.decode('utf-8')))


def on_subscribe(client, userdata, mid, granted_qos):
    print("On Subscribed: qos = %d" % granted_qos)


def on_disconnect(client, userdata, rc):
    if rc != 0:
        print("Unexpected disconnection %s" % rc)

def send_message():
    for i in range(10000):
        client.publish("testtopic/1", "Hello, World!")
        time.sleep(1)

client = mqtt.Client(client_id)
client.username_pw_set("xxxxxx", "xxxxxx")
client.on_connect = on_connect
client.on_message = on_message
client.on_subscribe = on_subscribe
client.on_disconnect = on_disconnect
client.connect(HOST, PORT, 60)
Thread(target=send_message).start()
client.loop_forever()
修改里面的id
运行
python 收到esp8266 发过来的信息
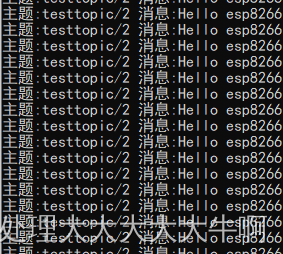
esp8266 收到python 主机发过来 的信息

需要嵌入式软件定制开发进群
686070107