前言:
自从微信官方把获取用户昵称与头像的功能改动以后,给我们开发和用户的操作又增加了很多负担,但是没办法,只能使用最新的使用方法了。
小程序用户头像昵称获取规则调整公告
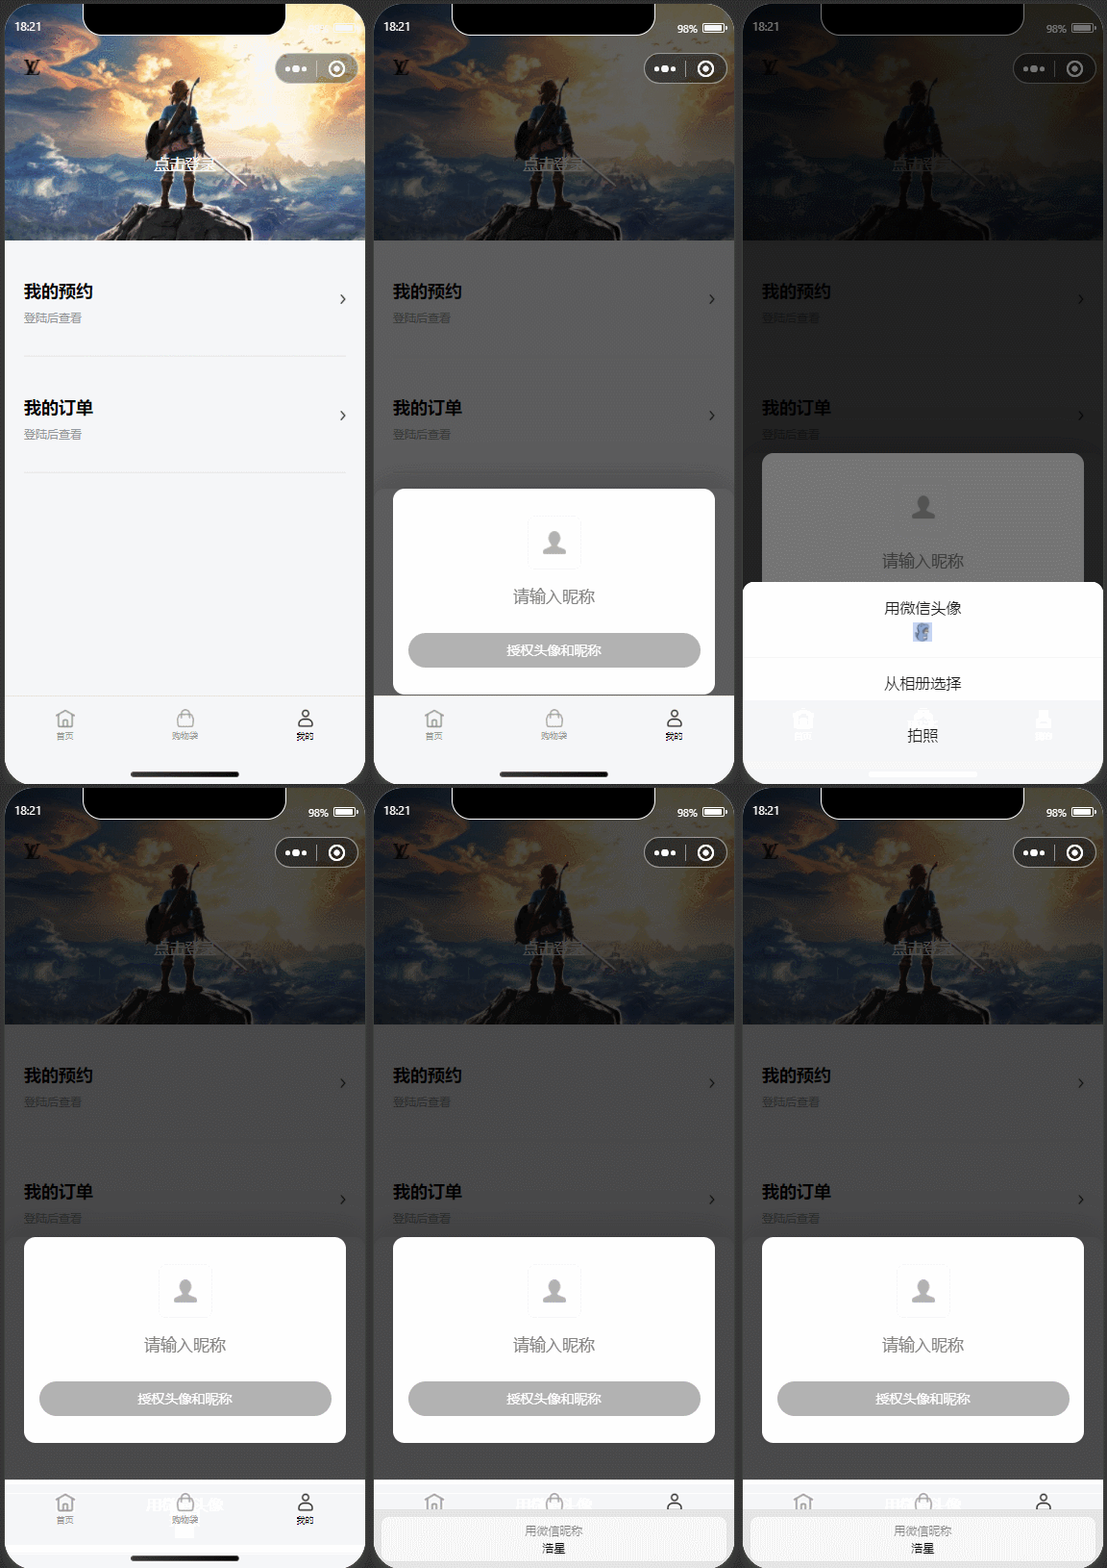
新版实现效果:
注意,真机的效果,昵称会有所不同

新版使用步骤:
1、index.wxml
获取头像核心代码:
open-type="chooseAvatar" bind:chooseavatar="onChooseAvatar"
<view class="user-content">
     <button class="avatar-wrapper" open-type="chooseAvatar" bind:chooseavatar="onChooseAvatar"
        style="border-radius: {

   {needBorderRadius?'6px':'0'}};"
        >
       <image wx:if="{

   {avatarUrl}}" class="avatar-img" mode="aspectFill" src="{

   {avatarUrl}}"></image>
       <image wx:else class="default-avatar-img" mode="widthFix" src="{

   {defaultAvatarUrl}}"></image>
    </button>
    <input type="nickname" class="nickname-input" placeholder="请输入昵称"
      adjust-position="{

   {false}}"
      bindfocus="focusNickNameInput"
      bindblur="blurNickNameInput"
      bindchange="changeNickeNameInput"
      bindinput="inputNickName"
      model:value="{

   {nickName}}"
      bindconfirm="confirmNickNameInput"
      bindkeyboardheightchange="bindkeyboardheightchange"
      maxlength="10"
      style="border-radius: {

   {needBorderRadius?'8px':'0'}};"
    />
</view>

<view>
    <button class="user-confirm-btn user-confirm-btn--{

   {canSaveUser?'enabled':'disabled'}}"
        catchtap="handleInputAvatarNameAfter"
        style="border-radius: {

   {needBorderRadius?'50rpx':'0'}};"
        >
        授权头像和昵称
    </button>
</view>
2、index.js
 defaultBorderAvatar.png
data: {
    avatarUrl:"",//头像
    defaultAvatarUrl:"/images/defaultBorderAvatar.png",
    canSaveUser:false,
    nickName:'' //昵称
}
// 选择头像
    onChooseAvatar(e){
      const { avatarUrl } = e.detail
      promisify(wx.getFileSystemManager().getFileInfo)({  filePath: avatarUrl })
      .then((fileInfo) => {
        let fileSize = fileInfo.size;
        // 文件大小 kb
        fileSize = Math.ceil(fileSize / 1024).toFixed(2);
        if(fileSize > (1024 * 5)){
          wx.showToast({
            title: '头像大小请不要超过5M',
            icon:"none"
          })
          return Promise.reject();
        }
        return fileInfo;
      }).then(()=>{
        console.log("------成功设置头像------");
        this.setData({
          avatarUrl,
        })
        this.observerCanSaveUser();
      }).catch(err=>{
        console.log(err);
      })
    },
// 昵称进入焦点
focusNickNameInput(e){},
// 昵称输入框失焦点
blurNickNameInput(e){},
//实际只有这个方法用到了
changeNickeNameInput(e){
this.observerCanSaveUser();
},
inputNickName(e){},
// 确认昵称
confirmNickNameInput(){},
// 昵称输入框 软件盘高度改变
bindkeyboardheightchange(e){
if(this.data.preInputBottom && this.data.inputBottom&& this.data.preInputBottom === this.data.inputBottom){
return;
}
if(!this.data.inputBottom){
this.setData({inputBottom:e.detail.height})
}else{
this.setData({
preInputBottom: this.data.inputBottom,
inputBottom:e.detail.height
})
}
},observerCanSaveUser(){
if(this.data.nickName && String(this.data.nickName).trim() && this.data.avatarUrl){
this.setData({
canSaveUser:true
})
}else{
this.setData({
canSaveUser:false
})
}
},
// 头像、昵称同时输入完后才保存,保存成功再关闭
handleInputAvatarNameAfter(){
//使用 wx.uploadFile 方法,把头像上传并保存起来
...
}3、index.wxss
.user-content{
  display: flex;
  flex-direction: column;
  align-items: center;
}
.avatar-wrapper {
  height: 112rpx;
  width: 112rpx;
  margin: 0;
  background-color: 0;
  background: 0;
  padding:0;
  border-radius: 0;
  border-radius: 0;
  border: 0;

  overflow: hidden;
}
.avatar-wrapper::after{ border: none; }
.avatar-wrapper image{
  width: 100%;
  height: 100%;
}

.container {
  display: flex;
}

.nickname-input {
  width: 608rpx;
  height: 108rpx;
  line-height: 112rpx;
  border-radius: 0;
  opacity: 1;
  box-sizing: border-box;

  font-size: 34rpx;
  font-weight: 400;
  color: #000000;

  text-align: center;
  margin-bottom: 24rpx;
}

.user-confirm-btn{
  width: 608rpx;
  height: 72rpx;
  line-height: 72rpx;
  background: #B2B2B2;
  border-radius: 0px 0px 0px 0px;
  opacity: 1;
  border-radius: 0;
  border: 0;

  font-size: 28rpx;
  font-weight: 400;
  color: #FFFFFF;
  }
.user-confirm-btn::after{ border: none; }
.user-confirm-btn--disabled{
  background: #B2B2B2;
}
.user-confirm-btn--enabled{
  background: #000000;
}
.close-image{
  width: 34rpx;
  height: 34rpx;
  position: absolute;
  top: 40rpx;
  right: 40rpx;
}