大数据技术之Maxwell入门案例学习
文章目录
1、写在前面
1.3.0版本开始不支持JDK8,本文是尚硅谷的教学文档,并加以个人学习记录
- Maxwell版本:
Maxwell1.2.9 - Zookeeper版本:
Zookeeper3.5.7 - Kafka版本:
Kafka2.4.1 - MySQL版本:
MySQL5.7
2. Maxwell 使用
2.1 Maxwell 安装部署
2.2 Maxwell 入门案例
2.2.1 监控 Mysql 数据并在控制台打印
- 实现步骤:
(1)运行 maxwell 来监控 mysql 数据更新
[whybigdata@node01 maxwell-1.29.2]$ bin/maxwell --user='maxwell' --password='123456' --host='node01' --producer=stdout
(2)向 mysql 的 test_maxwell 库的 test 表插入一条数据,查看 maxwell 的控制台输出
mysql> insert into test2 values(1,'aaa');

{


"database": "test_maxwell",	--库名
"table": "test",	--表名
"type": "insert",	--数据更新类型
"ts": 1637244821,	--操作时间
"xid": 8714,	    --操作 id
"commit": true, 	--提交成功
"data":  {

    	 		--数据
"id": 1,
"name": "aaa"
}
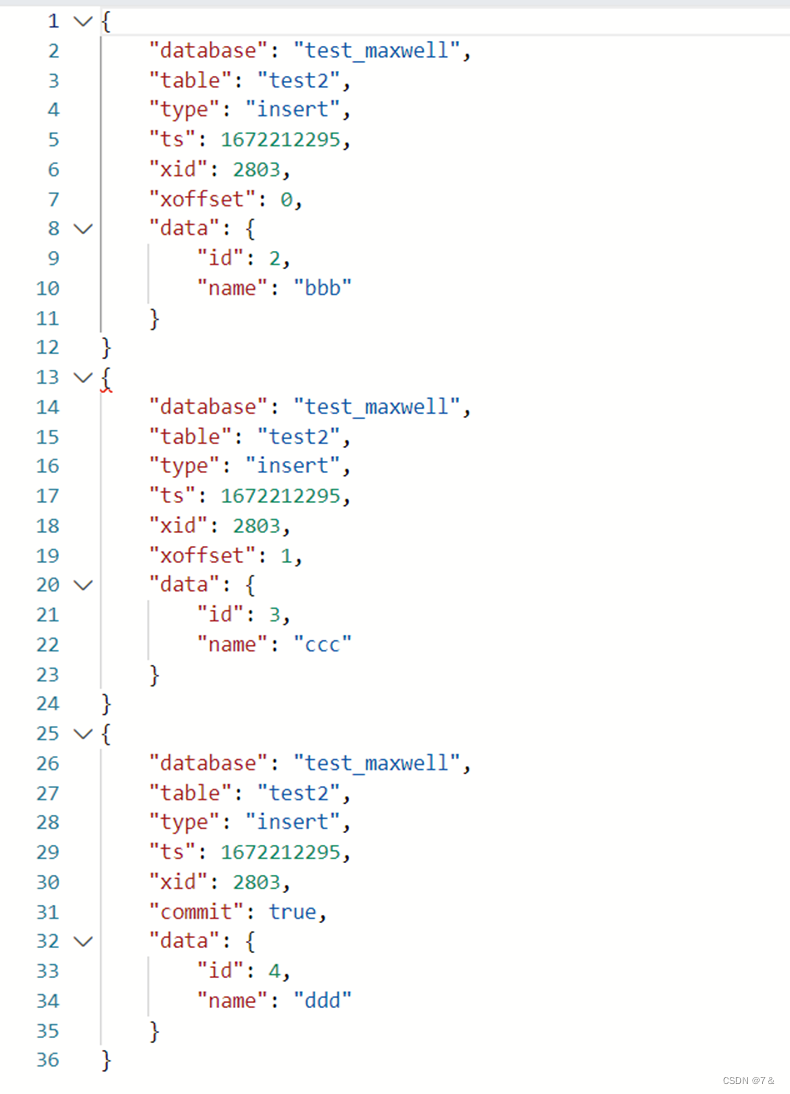
(3) 向 mysql 的 test_maxwell 库的 test 表同时插入 3 条数据,控制台发现了 3 条 json日志,说明 maxwell 是以数据行为单位进行日志的采集的。
mysql> INSERT INTO test2 VALUES(2,'bbb'),(3,'ccc'),(4,'ddd');

{"database":"test_maxwell","table":"test","type":"insert","ts"
:1637245127,"xid":9129,"xoffset":0,"data":{"id":2,"name":"bbb"
}}
{"database":"test_maxwell","table":"test","type":"insert","ts"
:1637245127,"xid":9129,"xoffset":1,"data":{"id":3,"name":"ccc"
}}
{"database":"test_maxwell","table":"test","type":"insert","ts"
:1637245127,"xid":9129,"commit":true,"data":{"id":4,"name":"dd d"}}

mysql> update test2 set name='zaijian' where id =1;

{"database":"test_maxwell","table":"test","type":"update","ts"
:1631618614,"xid":535,"commit":true,"data":{"id":1,"name":"zai jian"},"old":{"name":"nihao"}}
插入多条数据,只有最后一条插入的数据commit状态为true,其他的数据从往后按顺序排列,
xoffset作为标识

JSON数据
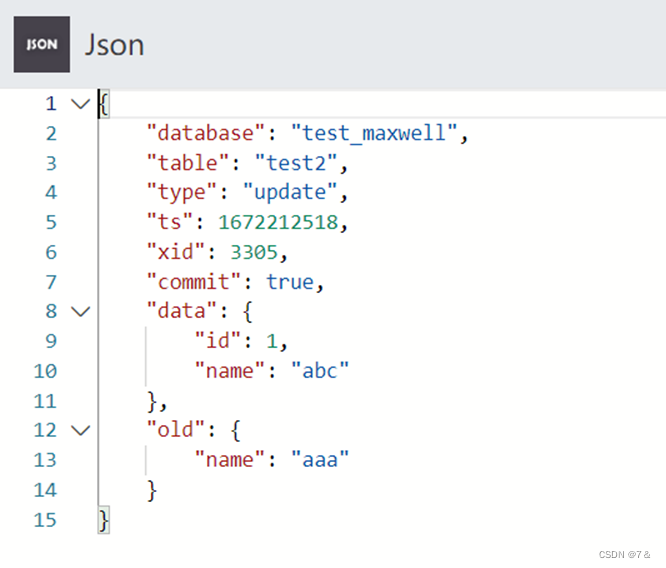
(4)修改test_maxwell 库的 test 表的一条数据,查看 maxwell 的控制台输出
mysql> update test2 set name='abc' where id =1;

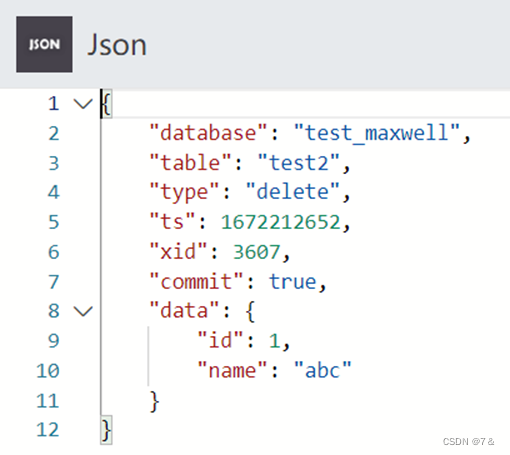
(5)删除test_maxwell 库的 test 表的一条数据,查看 maxwell 的控制台输出
mysql> DELETE FROM test2 WHERE id =1;

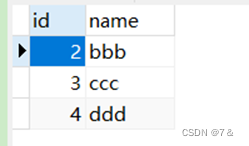
表的数据:
JSON数据
2.2.2 监控 Mysql 数据输出到 kafka
1)实现步骤:
(1)启动 zookeeper 和kafka
[atguigu@hadoop102 bin]$ jpsall
=============== hadoop102 ===============
3511 QuorumPeerMain
4127 Kafka
=============== node02 ===============
1885 Kafka
1342 QuorumPeerMain
=============== node03 ===============
1345 QuorumPeerMain
1886 Kafka
(2) 启动Maxwell 监控binlog
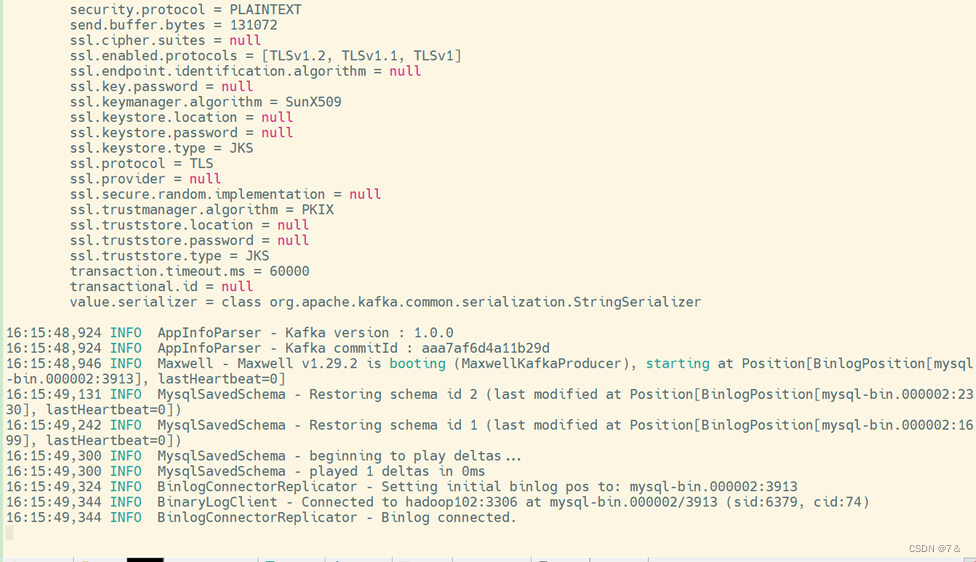
whybigdata@node01 maxwell-1.29.2]$ bin/maxwell --user='maxwell' --password='123456' --host='node01' --producer=kafka -- kafka.bootstrap.servers=node01:9092 --kafka_topic=maxwell
启动结果图
(3)打开 kafka 的控制台的消费者消费 maxwell 主题
[whybigdata@node01 ~]$ kafka-console-consumer.sh --bootstrap-server node01:9092 --topic maxwell
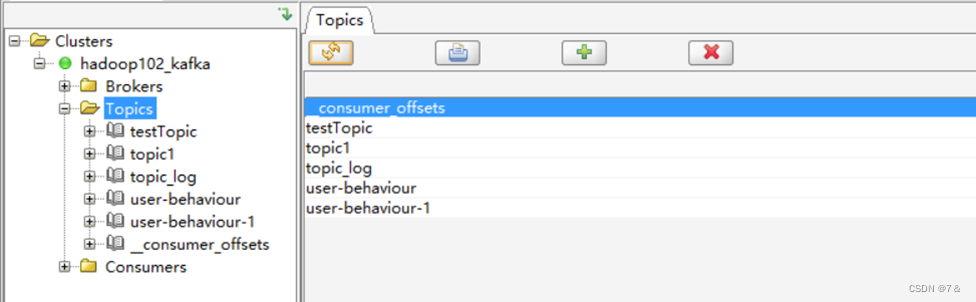
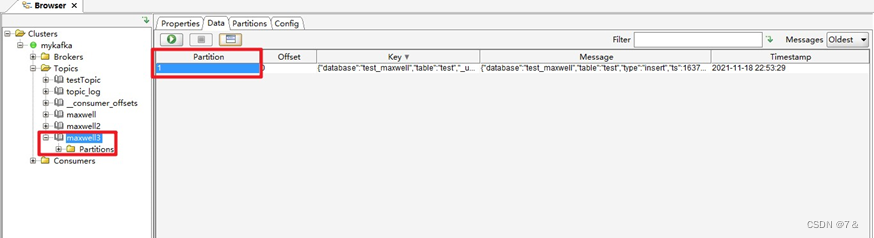
此处直接利用
OffsetExplorer工具查看Maxwell监控的结果
未执行上述命令前,OffsetExplorer观察到并没有maxwell主题
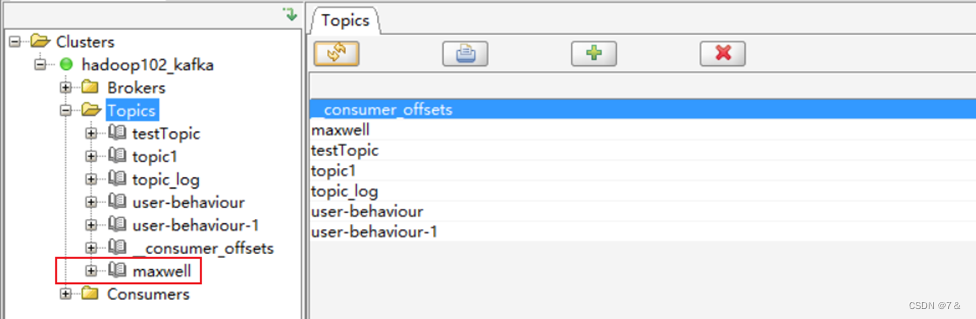
如下图所示,可以看到maxwell主题已经新增
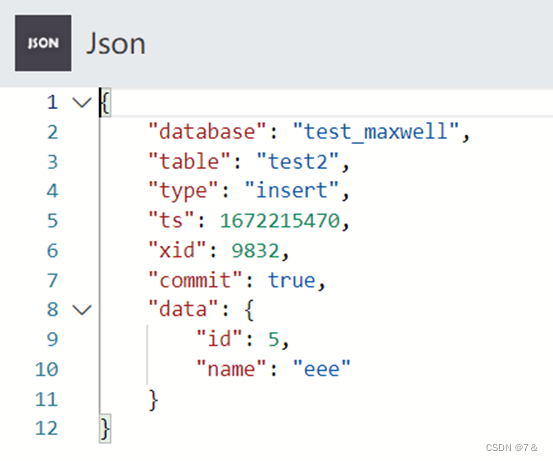
- 插入数据
mysql> insert into test2 values (5,'eee');
在控制台可以发现有一个
error,但是并不影响实验,具体什么原因,还不清楚,如下图所示:

查看
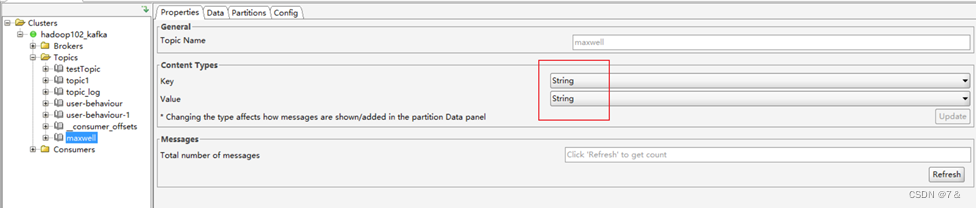
maxwell主题Data一栏,出现乱码

为防止key和value值乱码,提前在
properties栏设置content types为String,默认是Byte Array
查看结果

查看value值:JSON格式
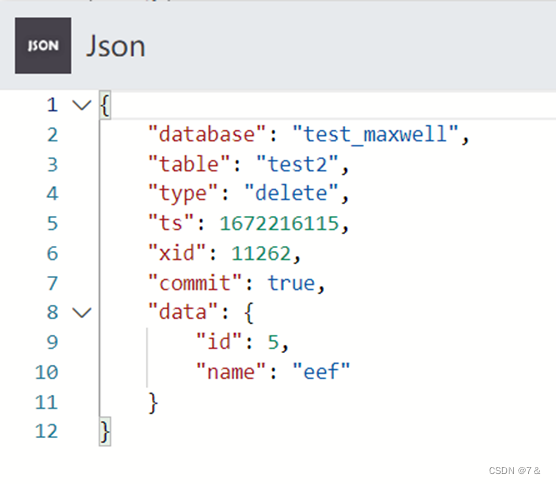
- 修改id=5的数据为eef

JSON数据:

- 删除id=5的数据

前面都是操作test2表,此次在test表插入一条(id=3,name=dd)的数据:

JSON数据
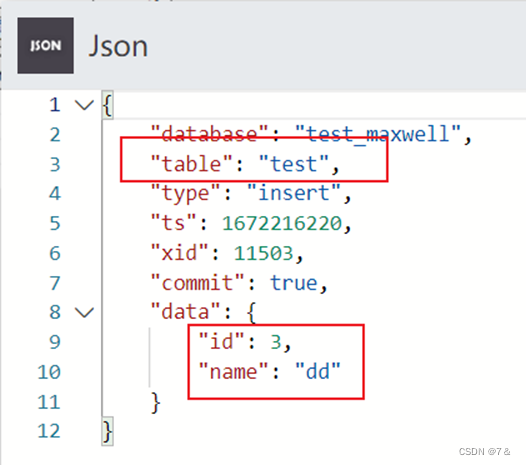
因为开启maxwell指定的producer为kafkaa且指定的–kafka_topic=maxwell所以,maxwell库中所有表的变化都会出现在maxwell主题中(是在0号分区)
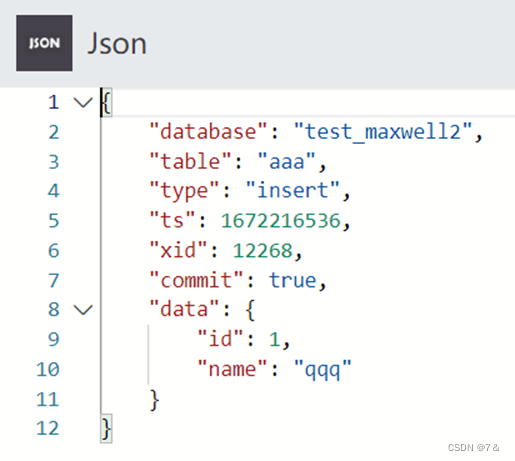
- 新建库test_maxwell2以及表aaa(id,name),插入新数据(id=1,name=qqq)

Maxwell主题也得到更新,依旧是在0号分区
(4)向 test_maxwell 库的test 表再次插入一条数据
Note:关闭上次启动的Maxwell进程,再次启动Maxwell,然后执行上述SQL插入命令
mysql> insert into test values (5,'eee');
(5)通过 kafka 消费者来查看到了数据,说明数据成功传入 kafka
{"database":"test_maxwell","table":"test","type":"insert","ts"
:1637245889,"xid":10155,"commit":true,"data":{"id":5,"name":"e ee"}}
2)kafka 主题数据的分区控制
在公司生产环境中,我们一般都会用 maxwell 监控多个 mysql 库的数据,然后将这些数据发往 kafka 的一个主题 Topic,并且这个主题也肯定是多分区的,为了提高并发度。那么如何控制这些数据的分区问题,就变得至关重要,实现步骤如下:
(1) 修改 maxwell 的配置文件,定制化启动maxwell 进程
[whybigdata@node01 maxwell-1.29.2]$ vim config.properties

# tl;dr config log_level=info
producer=kafka kafka.bootstrap.servers=node01:9092
# mysql login info
host=node01
user=maxwell
password=123456


#	*** kafka ***
# list of kafka brokers #kafka.bootstrap.servers=hosta:9092,hostb:9092
# kafka topic to write to
# this can be static, e.g. 'maxwell', or dynamic, e.g. namespace_%{database}_%{table}
# in the latter case 'database' and 'table' will be replaced with the values for the row being processed kafka_topic=maxwell3


#	*** partitioning ***
# What part of the data do we partition by? #producer_partition_by=database # [database, table, primary_key, transaction_id, column] producer_partition_by=database # 控制数据分区模式,可选模式有 库名,表名,主键,列名

# specify what fields to partition by when using producer_partition_by=column
# column separated list. #producer_partition_columns=name
# when using producer_partition_by=column, partition by this when
# the specified column(s) don't exist. #producer_partition_by_fallback=database
(2)手动创建一个 3 个分区的 topic,名字就叫做 maxwell3
[whybigdata@node01 maxwell-1.29.2]$ kafka-topics.sh --zookeeper node01:2181,hadoop103:2181,hadoop104:2181/kafka --create -- replication-factor 2 --partitions 3 --topic maxwell3
Note:
node01:2181,node02:2181,node03:2181/kafka必须加上kafka在zookeeper上的路径/kafka,同时逗号后面不要多留一个空格,不然会出现以下错误

(3)利用配置文件启动Maxwell 进程
[whybigdata@node01 maxwell-1.29.2]$ bin/maxwell --config ./config.properties
(4)向 test_maxwell 库的test 表再次插入一条数据
(5) 通过 kafka tool 工具查看,此条数据进入了 maxwell3 主题的 1 号分区
结果图
(6)向 test 库的 aaa 表插入一条数据
(7)通过 kafka tool 工具查看,此条数据进入了 maxwell3 主题的 0 号分区,说明库名会对数据进入的分区造成影响。

(8)再次往test_maxwell库的test2表插入数据,结果是:数据插入到maxwell3主题的1号分区

2.2.3 监控 Mysql 指定表数据输出控制台
(1) 运行 maxwell 来监控 mysql 指定表数据更新
限制可监控的表:
exclude排除所有库下的所有表,include只包含(监控)test_maxwell库下的test表
[whybigdata@node01 maxwell-1.29.2]$ bin/maxwell --user='maxwell' --password='123456' --host='node01' --filter 'exclude: *.*, include:test_maxwell.test' --producer=stdout
(2) 向 test_maxwell.test 表插入一条数据,查看 maxwell 的监控
mysql> insert into test_maxwell.test values(7,'ggg');

{
    "database":"test_maxwell",
    "table":"test",
    "type":"insert","ts"
    :1637247760,
    "xid":11818,
    "commit":true,
    "data":{
        "id":7,
        "name":"g gg"
    }
}
(3)向 test_maxwell.test2 表插入一条数据,查看 maxwell 的监控
mysql> insert into test1 values(1,'nihao');
本次没有收到任何信息,说明 include 参数生效,只能监控指定的 mysql 表的信息
Note:还可以设置 include:test_maxwell.*,通过此种方式来监控 mysql 某个库的所有表,也就是说过滤整个库。读者可以自行测试。
2.2.4 监控 Mysql 指定表全量数据输出控制台,数据初始化
初始化(Bootstraping)官网地址:https://maxwells-daemon.io/bootstrapping/
Maxwell 进程默认只能监控 mysql 的 binlog 日志的新增及变化的数据,但是Maxwell 是支持数据初始化的,可以通过修改 Maxwell 的元数据,来对 MySQL 的某张表进行数据初始化,也就是我们常说的全量同步。具体操作步骤如下:
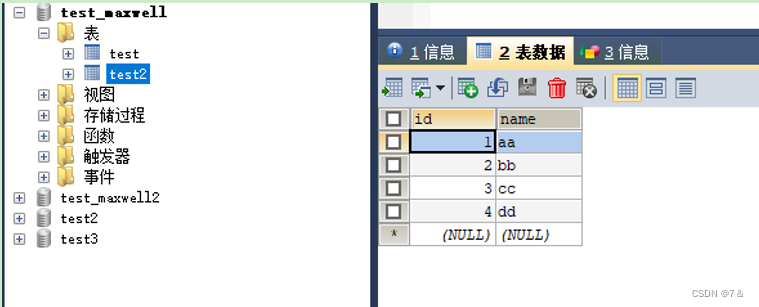
需求:将 test_maxwell 库下的 test2 表的四条数据,全量导入到 maxwell 控制台进行打印。
(1)修改 Maxwell 的元数据,触发数据初始化机制,在 mysql 的 maxwell 库中bootstrap
- 表中插入一条数据,写明需要全量数据的库名和表名
mysql> insert into maxwell.bootstrap(database_name,table_name) values('test_maxwell','test2');
执行上述语句前:
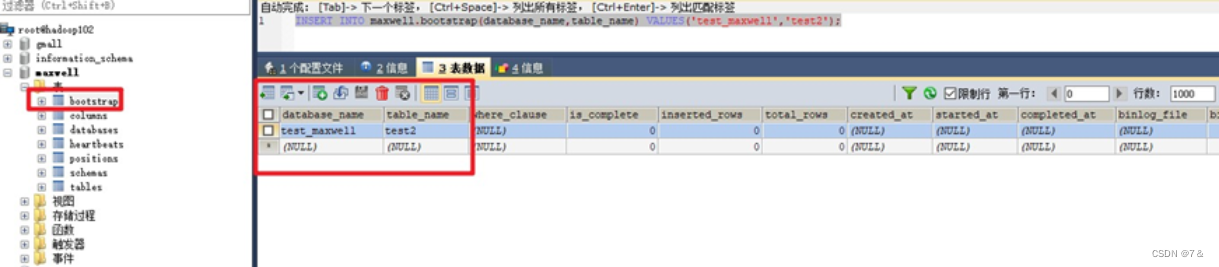
执行后boostrap表:

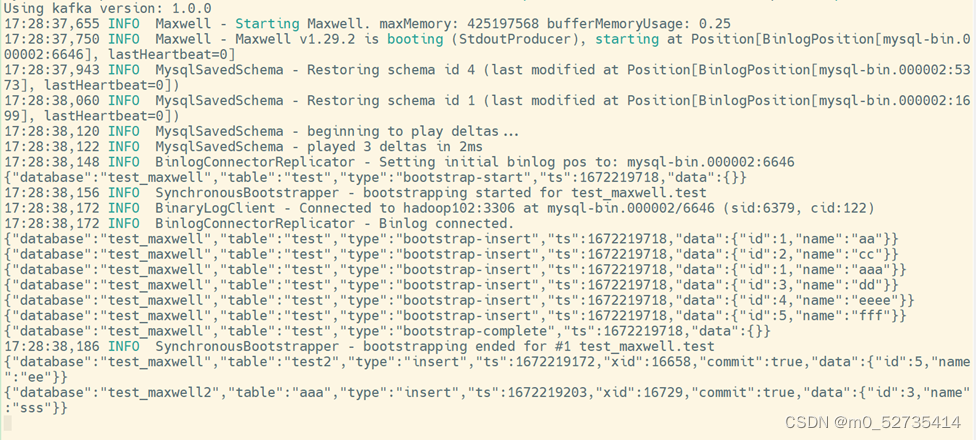
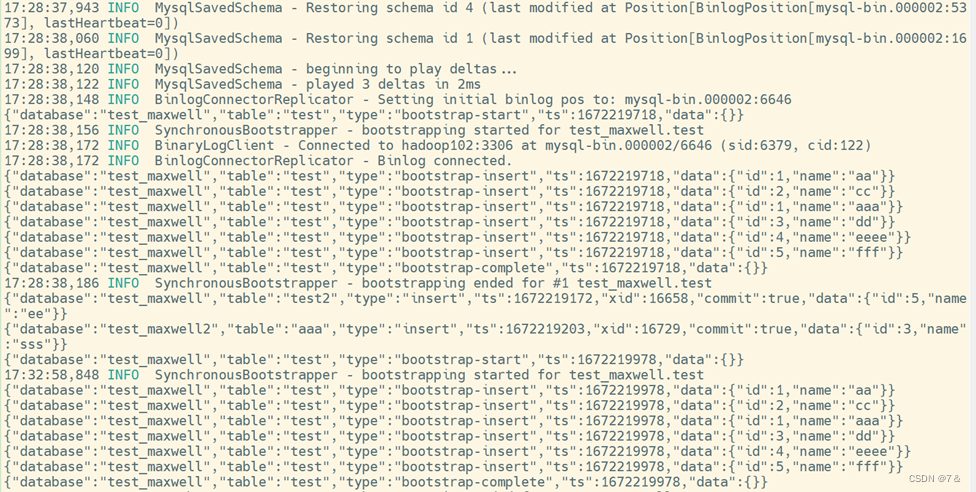
(2)启动 maxwell 进程,此时初始化程序会直接打印 test2 表的所有数据
[whybigdata@node01 maxwell-1.29.2]$ bin/maxwell --user='maxwell' --password='123456' --host='node01' producer=stdout
Using kafka version: 1.0.0
23:15:38,841 WARN MaxwellMetrics - Metrics will not be exposed: metricsReportingType not configured.
23:15:39,110 INFO Maxwell - Maxwell v1.22.0 is booting (StdoutProducer), starting at Position[BinlogPosition[mysql- bin.000004:611096], lastHeartbeat=1637248429242] 23:15:39,194 INFO MysqlSavedSchema - Restoring schema id 6 (last modified at Position[BinlogPosition[mysql- bin.000004:517625], lastHeartbeat=1637246435111])
23:15:39,299 INFO MysqlSavedSchema - Restoring schema id 1 (last modified at Position[BinlogPosition[mysql- bin.000004:158612], lastHeartbeat=0])
23:15:39,342 INFO MysqlSavedSchema - beginning to play deltas...
23:15:39,343 INFO MysqlSavedSchema - played 5 deltas in 1ms
{"database":"test_maxwell","table":"test2","type":"bootstrap- start","ts":1637248539,"data":{}}
23:15:39,367 INFO SynchronousBootstrapper - bootstrapping started for test_maxwell.test2
23:15:39,369 INFO BinlogConnectorReplicator - Setting initial binlog pos to: mysql-bin.000004:611096
{"database":"test_maxwell","table":"test2","type":"bootstrap- insert","ts":1637248539,"data":{"id":1,"name":"aa"}}
{"database":"test_maxwell","table":"test2","type":"bootstrap- insert","ts":1637248539,"data":{"id":2,"name":"bb"}}
{"database":"test_maxwell","table":"test2","type":"bootstrap- insert","ts":1637248539,"data":{"id":3,"name":"cc"}}
{"database":"test_maxwell","table":"test2","type":"bootstrap- insert","ts":1637248539,"data":{"id":4,"name":"dd"}}
{"database":"test_maxwell","table":"test2","type":"bootstrap- complete","ts":1637248539,"data":{}}
23:15:39,387 INFO SynchronousBootstrapper - bootstrapping ended for #8 test_maxwell.test2
23:15:39,465 INFO BinaryLogClient - Connected to node01:3306 at mysql-bin.000004/611096 (sid:6379, cid:108) 23:15:39,465 INFO	BinlogConnectorLifecycleListener - Binlog connected.
本人执行结果:
(3)当数据全部初始化完成以后,Maxwell 的元数据会变化
-
is_complete 字段从 0 变为 1
-
start_at 字段从 null 变为具体时间(数据同步开始时间)
-
complete_at 字段从 null 变为具体时间(数据同步结束时间)

本人执行结果

关闭maxwell,再次启动就不会再次初始化了(boostraping),如果需要再次初始化,需要再次执行sql:
insert into maxwell.bootstrap(database_name,table_name) values(‘test_maxwell’,‘test’);
boostrap表:

结束!