一.实验的目的
通过使用Android Studio的Fragment和layout,来实现简单的微信界面切换。
二.app的功能
能够通过应用底部的bottom来实现四个页面的来回切换。
三.实验过程
第一步:顶部设计:
top.xml 代码如下 :
<?xml version="1.0" encoding="utf-8"?>
<LinearLayout xmlns:android="http://schemas.android.com/apk/res/android"
    android:layout_width="match_parent"
    android:layout_height="55dp"
    android:background="@color/black">

    <TextView
        android:id="@+id/textView5"
        android:layout_width="wrap_content"
        android:layout_height="55dp"
        android:layout_weight="1"
        android:gravity="center"
        android:text="WeChat"
        android:textColor="@color/white"
        android:textSize="30sp" />
</LinearLayout>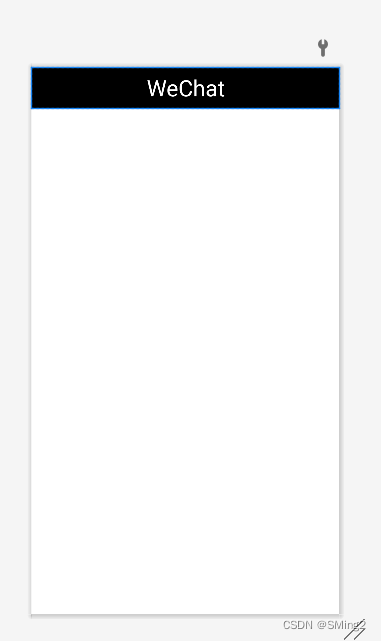
这样就设计好了微信上方部分;
第二步:底部设计:
bottom.xml 代码如下:
<?xml version="1.0" encoding="utf-8"?>
<LinearLayout xmlns:android="http://schemas.android.com/apk/res/android"
    xmlns:app="http://schemas.android.com/apk/res-auto"
    xmlns:tools="http://schemas.android.com/tools"
    android:layout_width="match_parent"
    android:layout_height="100dp"
    android:background="@color/black"


    >

    <LinearLayout
        android:id="@+id/linearLayout1"
        android:layout_width="0dp"
        android:layout_height="wrap_content"
        android:layout_weight="1"
        android:gravity="center"
        android:orientation="vertical">

        <ImageView
            android:id="@+id/imageView2"
            android:layout_width="30dp"
            android:layout_height="30dp"
            android:src="@drawable/p1"

            />

        <TextView
            android:id="@+id/textView2"
            android:layout_width="match_parent"
            android:layout_height="wrap_content"
            android:gravity="center"
            android:text="微信"
            android:textColor="@color/white"
            android:textSize="24sp" />

    </LinearLayout>

    <LinearLayout
        android:id="@+id/linearLayout2"
        android:layout_width="0dp"
        android:layout_height="wrap_content"
        android:layout_weight="1"
        android:gravity="center"
        android:orientation="vertical">

        <ImageView
            android:id="@+id/imageView3"
            android:layout_width="30dp"
            android:layout_height="30dp"
            android:src="@drawable/p2" />

        <TextView
            android:id="@+id/textView3"
            android:layout_width="match_parent"
            android:layout_height="wrap_content"
            android:gravity="center"
            android:text="联系人"
            android:textColor="@color/white"
            android:textSize="24sp" />

    </LinearLayout>

    <LinearLayout
        android:id="@+id/linearLayout3"
        android:layout_width="0dp"
        android:layout_height="wrap_content"
        android:layout_weight="1"
        android:gravity="center"
        android:orientation="vertical">

        <ImageView
            android:id="@+id/imageView4"
            android:layout_width="30dp"
            android:layout_height="30dp"
            android:src="@drawable/p3" />

        <TextView
            android:id="@+id/textView4"
            android:layout_width="wrap_content"
            android:layout_height="wrap_content"
            android:gravity="center"
            android:text="朋友圈"
            android:textColor="@color/white"
            android:textSize="24sp" />

    </LinearLayout>

    <LinearLayout
        android:id="@+id/linearLayout4"
        android:layout_width="0dp"
        android:layout_height="wrap_content"
        android:layout_weight="1"
        android:gravity="center"
        android:orientation="vertical">

        <ImageView
            android:id="@+id/imageView"
            android:layout_width="30dp"
            android:layout_height="30dp"
            android:src="@drawable/p4" />

        <TextView
            android:id="@+id/textView"
            android:layout_width="match_parent"
            android:layout_height="wrap_content"
            android:gravity="center"
            android:text="设置"
            android:textColor="@color/white"
            android:textSize="24sp" />

    </LinearLayout>
</LinearLayout>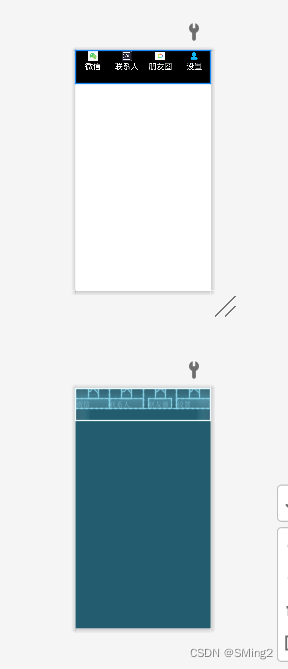
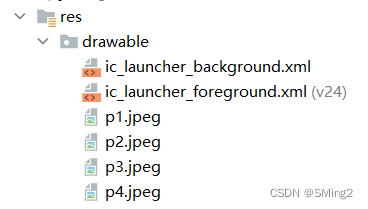
这是设置底下的四个按键部分,并且可以通过向drawable中粘贴图片将底部的四个按键图片化。
对四个按键编写xml 其中fragment_config代码如下:
<?xml version="1.0" encoding="utf-8"?>
<LinearLayout xmlns:android="http://schemas.android.com/apk/res/android"
    xmlns:tools="http://schemas.android.com/tools"
    android:layout_width="match_parent"
    android:layout_height="match_parent"
    tools:context=".Fragment_config">

    <!-- TODO: Update blank fragment layout -->
    <TextView
        android:layout_width="match_parent"
        android:layout_height="match_parent"
        android:gravity="center"
        android:text="设置"
        android:textSize="35sp" />

</LinearLayout>
除此之外,还需要编写另外三个的xml,格式同上代码。
第三步:编写activity_main.xml,将top.xml和bottom.xml的界面进行合并。 代码如下:
<?xml version="1.0" encoding="utf-8"?>
<LinearLayout xmlns:android="http://schemas.android.com/apk/res/android"
    xmlns:app="http://schemas.android.com/apk/res-auto"
    xmlns:tools="http://schemas.android.com/tools"
    android:layout_width="match_parent"
    android:layout_height="match_parent"
    android:orientation="vertical"
    tools:context=".MainActivity">

    <include
        layout="@layout/top"
        android:layout_width="match_parent"
        android:layout_height="wrap_content" />


    <FrameLayout
        android:id="@+id/id_content"
        android:layout_width="match_parent"
        android:layout_height="0dp"
        android:layout_weight="1">

    </FrameLayout>

    <include
        layout="@layout/bottom"
        android:gravity="bottom" />

</LinearLayout>
第四步:编写Java代码:
MainActivity.java:
{


    private Fragment Fragment_config=new Fragment_config();
    private Fragment Fragment_contact=new Fragment_contact();
    private Fragment Fragment_wechat=new Fragment_wechat();
    private Fragment Fragment_friend=new Fragment_friend();
    private FragmentManager fragmentManager;
    private LinearLayout linearLayout1,linearLayout2,linearLayout3,linearLayout4;

    @Override
    protected void onCreate(Bundle savedInstanceState) {
        super.onCreate(savedInstanceState);
        setContentView(R.layout.activity_main);

        linearLayout1=findViewById(R.id.linearLayout1);
        linearLayout2=findViewById(R.id.linearLayout2);
        linearLayout3=findViewById(R.id.linearLayout3);
        linearLayout4=findViewById(R.id.linearLayout4);

        linearLayout1.setOnClickListener(this);
        linearLayout2.setOnClickListener(this);
        linearLayout3.setOnClickListener(this);
        linearLayout4.setOnClickListener(this);

        initFragment();
    }

    private void initFragment(){
        fragmentManager=getFragmentManager();
        FragmentTransaction transaction=fragmentManager.beginTransaction();
        transaction.add(R.id.id_content,Fragment_wechat);
        transaction.add(R.id.id_content,Fragment_contact);
        transaction.add(R.id.id_content,Fragment_config);
        transaction.add(R.id.id_content,Fragment_friend);
        transaction.commit();
    }


    private void hideFragment(FragmentTransaction transaction){
        transaction.hide(Fragment_wechat);
        transaction.hide(Fragment_contact);
        transaction.hide(Fragment_config);
        transaction.hide(Fragment_friend);
    }
    private void background(View v) {
        switch (v.getId()) {
            case R.id.linearLayout1:
                linearLayout1.setBackgroundColor(Color.parseColor("#426F42"));
                break;
            case R.id.linearLayout2:
                linearLayout2.setBackgroundColor(Color.parseColor("#426F42"));
                break;
            case R.id.linearLayout3:
                linearLayout3.setBackgroundColor(Color.parseColor("#426F42"));
                break;
            case R.id.linearLayout4:
                linearLayout4.setBackgroundColor(Color.parseColor("#426F42"));
                break;
            default:
                break;
        }
    }

    private void backgroundreturn(View v) {
        switch (v.getId()) {
            case R.id.linearLayout1:
                linearLayout1.setBackgroundColor(Color.parseColor("#000000"));
                break;
            case R.id.linearLayout2:
                linearLayout2.setBackgroundColor(Color.parseColor("#000000"));
                break;
            case R.id.linearLayout3:
                linearLayout3.setBackgroundColor(Color.parseColor("#000000"));
                break;
            case R.id.linearLayout4:
                linearLayout4.setBackgroundColor(Color.parseColor("#000000"));
                break;
            default:
                break;
        }
    }

    private void showfragmnet(int i) {

        FragmentTransaction transaction=fragmentManager.beginTransaction();
        hideFragment(transaction);
        switch (i){
            case 0:
                transaction.show(Fragment_wechat);
                background(linearLayout1);
                backgroundreturn(linearLayout3);
                backgroundreturn(linearLayout2);
                backgroundreturn(linearLayout4);
                break;
            case 1:
                transaction.show(Fragment_friend);
                background(linearLayout2);
                backgroundreturn(linearLayout4);
                backgroundreturn(linearLayout1);
                backgroundreturn(linearLayout3);
                break;
            case 2:
                transaction.show(Fragment_contact);
                background(linearLayout3);
                backgroundreturn(linearLayout4);
                backgroundreturn(linearLayout2);
                backgroundreturn(linearLayout1);
                break;
            case 3:
                transaction.show(Fragment_config);
                background(linearLayout4);
                backgroundreturn(linearLayout1);
                backgroundreturn(linearLayout2);
                backgroundreturn(linearLayout3);
                break;
            default:
                break;
        }
        transaction.commit();
    }

    @Override
    public void onClick(View v) {
        switch (v.getId()){
            case R.id.linearLayout1:
                showfragmnet(0);
                break;
            case R.id.linearLayout2:
                showfragmnet(1);
                break;
            case R.id.linearLayout3:
                showfragmnet(2);
                break;
            case R.id.linearLayout4:
                showfragmnet(3);
                break;
            default:
                break;
        }
    }


}
initFragment函数中利用transaction来实现fragment的切换
hideFragment把没有使用的界面的fragment的内容隐藏起来
background使图标点击后变绿色
backgroundreturn让图标恢复黑色
showfragmnet显示正在使用界面的fragment的内容
onClick监听函数,监听到底是哪一个图标被击中从而显示哪一个界面的内容
Fragment_config.java:
package com.example.mywechat;

import android.app.Fragment;
import android.os.Bundle;
import android.view.LayoutInflater;
import android.view.View;
import android.view.ViewGroup;


public class Fragment_config extends Fragment {

    public Fragment_config() {
        // Required empty public constructor
    }

    @Override
    public View onCreateView(LayoutInflater inflater, ViewGroup container,
                             Bundle savedInstanceState) {
        // Inflate the layout for this fragment
        return inflater.inflate(R.layout.fragment_config, container, false);
    }
}
其余三个和上面格式相同。
五.app结果展示

代码仓库:android: android作业仓库