为什么要进行数据预处理?
有时候想要识别一个东西,在照明条件良好的情况下可能可以识别成功,但是在照明不好的时候模型没有训练过就可能识别不出来,所以使用图像的数据增强,给图片加上一点干扰来进行训练,可以使模型的精度提升。
使用什么来进行数据预处理?
torchvision.transform是包含了常用的图像变化方法的工具包
- 主要用于图像的预处理的数据增强
- 自定义类用于预处理数据
数据预处理
数据的预处理使用torchvision.transforms.Compose()类
torchvision.transforms.Compose([自定义数据处理类1,自定义数据处理类2])
自定义的数据处理类要实现__call__方法
import torch
import torchvision

class ToTensor:
    # 创建一个类用来转numpy数组为torch的Tensor张量
    # 实现__call__方法
    def __call__(self,x):
        return torch.from_numpy(x)

class MulTransform:
    # 传进来的数据*2再返回
    def __call__(self,x):
        x*=2
        return x

# 创建Compose对象传入列表,列表内是自定义的数据处理类 (多个)
composed = torchvision.transforms.Compose([ToTensor(),MulTransform()])
测试:
import numpy as np
data = np.array([1,2,3,4])
composed(data)

葡萄酒数据预处理
- 前面说了用数据加载器加载除了葡萄酒数据集,自定义一个类继承于Dataset类
from torch.utils.data import Dataset
import pandas as pd

class WineDataset(Dataset):
	"""创建自定义Dataset数据集,初始化参数传入数据预处理器"""
    def __init__(self,transform):
 		# 读取数据
        xy = pd.read_csv('./wine.csv')
        # 数据长度
        self.samples_num = xy.shape[0]
        # 特征数据
        self.datas = xy.values[:,1:]
        # 标签数据
        self.labels = xy.values[:,0].reshape(-1,1)
        # 获取到数据预处理对象
        self.transform = transform

    def __getitem__(self,index):
    	# 获取数据
        sample = self.datas[index],self.labels[index]
        if self.transform:
        	# 执行数据预处理
            return self.transform(sample)
        return sample

    def __len__(self):
    	# 返回长度
        return self.samples_num


class Normalization:
    """为了方便计算,数据归一化 最大最小归一化"""
    def __call__(self,sample):
        inputs,targets = sample
        amin,amax = inputs.min(),inputs.max()
        inputs = (inputs - amin)/(amax - amin)
        return inputs,targets


class ToTensor:
	"""numpy数组转为torch张量"""
    def __call__(self,sample):
        inputs, targets = sample
        return torch.from_numpy(inputs),torch.from_numpy(targets)

# 定义Compose对象 传入两个自定义的数据处理类
composed = torchvision.transforms.Compose([Normalization(),ToTensor()])
# 创建数据加载器对象 传入Compose对象
winData = WineDataset(transform=composed)
# 检测数据
features,labels = winData[0]
print(type(features),type(labels))

图像的预处理(数据增强)
import torchvision.transforms as transforms
from PIL import Image
import matplotlib.pyplot as plt
import cv2
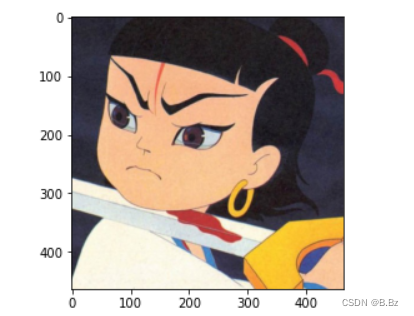
# 读取图片
img = Image.open('test.jpg')
# 展示
plt.imshow(img)
plt.show()
1. 裁剪图片:
CenterCrop()参数:
- 元组 (高度,宽度)
transforms = transforms.CenterCrop((80,300))
new_img = transforms(img)
plt.imshow(new_img)
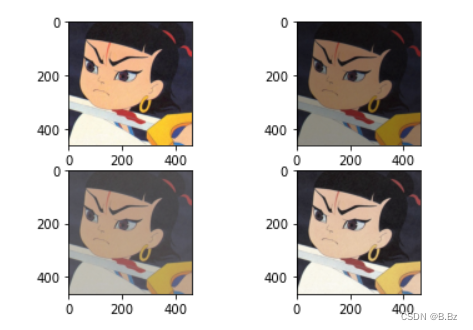
2. 改变图片的亮度、对比度和饱和度
ColorJitter()参数:
- 亮度 :
ColorJitter((0.5,0.6))(img) - 对比度:
ColorJitter(0,(0.5,0.6))(img) - 饱和度:
ColorJitter(0,0,(0.5,0.6))(img)
plt.subplot(221)
plt.imshow(img)
# 随机改变亮度
img1 = torchvision.transforms.ColorJitter((0.5,0.6))(img)
plt.subplot(222)
plt.imshow(img1)
# 随机改变对比度
img2 = torchvision.transforms.ColorJitter(0,(0.5,0.6))(img)
plt.subplot(223)
plt.imshow(img2)
# 随机改变饱和度
img3 = torchvision.transforms.ColorJitter(0,0,(0.5,0.6))(img)
plt.subplot(224)
plt.imshow(img3)
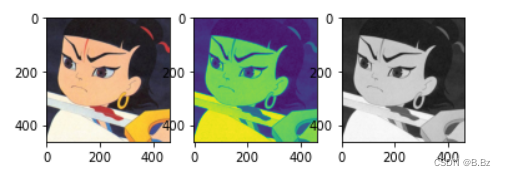
3. 图像转为灰度
plt.subplot(131)
plt.imshow(img)
# 参数1灰度
img1 = torchvision.transforms.Grayscale(1)(img)
plt.subplot(132)
plt.imshow(img1)
# 参数为3灰度
img2 = torchvision.transforms.Grayscale(3)(img)
plt.subplot(133)
plt.imshow(img2)
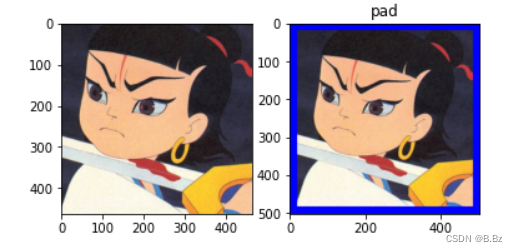
4. 图像填充
plt.subplot(121)
plt.imshow(img)
# 填充图片   padding内边距为20 fill为rgb blue255 padding_mode填充方式
img1 = torchvision.transforms.Pad(padding=20,fill=(0,0,255),padding_mode='constant')(img)
plt.subplot(122).set_title('pad')
plt.imshow(img1)
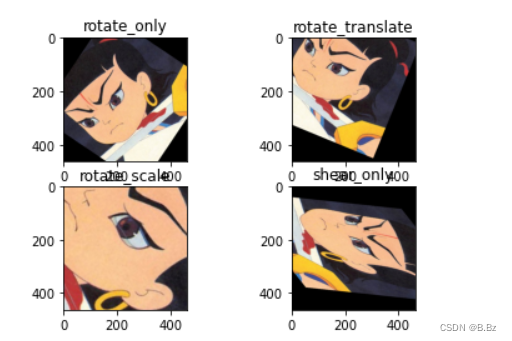
5. 仿射变换
保持图片中心不变,其余地方补0
img1 = torchvision.transforms.RandomAffine(60)(img)
plt.subplot(221).set_title('rotate_only')
plt.imshow(img1)

img2 = torchvision.transforms.RandomAffine(60,translate=(0.3,0.3))(img)
plt.subplot(222).set_title('rotate_translate')
plt.imshow(img2)

img3 = torchvision.transforms.RandomAffine(60,scale=(2.0,2.3))(img)
plt.subplot(223).set_title('rotate_scale')
plt.imshow(img3)

img4 = torchvision.transforms.RandomAffine(60,shear=60)(img)
plt.subplot(224).set_title('shear_only')
plt.imshow(img4)
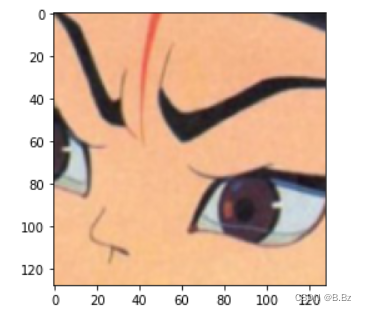
6. 随机裁剪
img1 = torchvision.transforms.RandomResizedCrop((128,128),scale=(0.08,1.0),ratio=(0.75,1.33),interpolation=2)(img)
plt.imshow(img1)