先看下效果:
首先启动了两个web 服务,一样的接口路径,只是实现不同
服务1:localhost:8003
@ResponseBody
    @RequestMapping(value = "/hello/json", produces = SystemHWUtil.RESPONSE_CONTENTTYPE_JSON_UTF)
    public String jsonHello2(Model model, HttpServletRequest request, HttpServletResponse response
            , @RequestParam(required = false) String demo) {
        System.out.println("client 2222:" );
        return "hello###";
}服务1:localhost:8004
@ResponseBody
    @RequestMapping(value = "/hello/json", produces = SystemHWUtil.RESPONSE_CONTENTTYPE_JSON_UTF)
    public String jsonHello2(Model model, HttpServletRequest request, HttpServletResponse response
            , @RequestParam(required = false) String demo) {
        return "hello2";
}这两个服务可以不是springboot项目,只要是web服务就行.
在看看zuul项目的配置
启动类:
@EnableZuulProxy
@SpringCloudApplication
public class ZuulApplication {

    public static void main(String[] args) {
        new SpringApplicationBuilder(ZuulApplication.class).web(true).run(args);
    }

}注意:启动类需要加上注解EnableZuulProxy ,才能使用zuul作为代理转发.
配置文件:application.yaml
spring:
  application:
    name: api-gateway

server:
  port: 8007
zuul:
  routes:
    user-service:
      path: /user-service/**
      serviceId: user-service2

ribbon:
  eureka:
    enabled: true
user-service2:
  ribbon:
    listOfServers: http://localhost:8003/,http://localhost:8004/

eureka:
  client:
      serviceUrl:
        defaultZone: http://localhost:8002/eureka/
在Spring Cloud Zuul中使用Ribbon 作为负载均衡器,
分发请求到两台机器:
http://localhost:8003/,http://localhost:8004/
以上是使用了负载均衡.
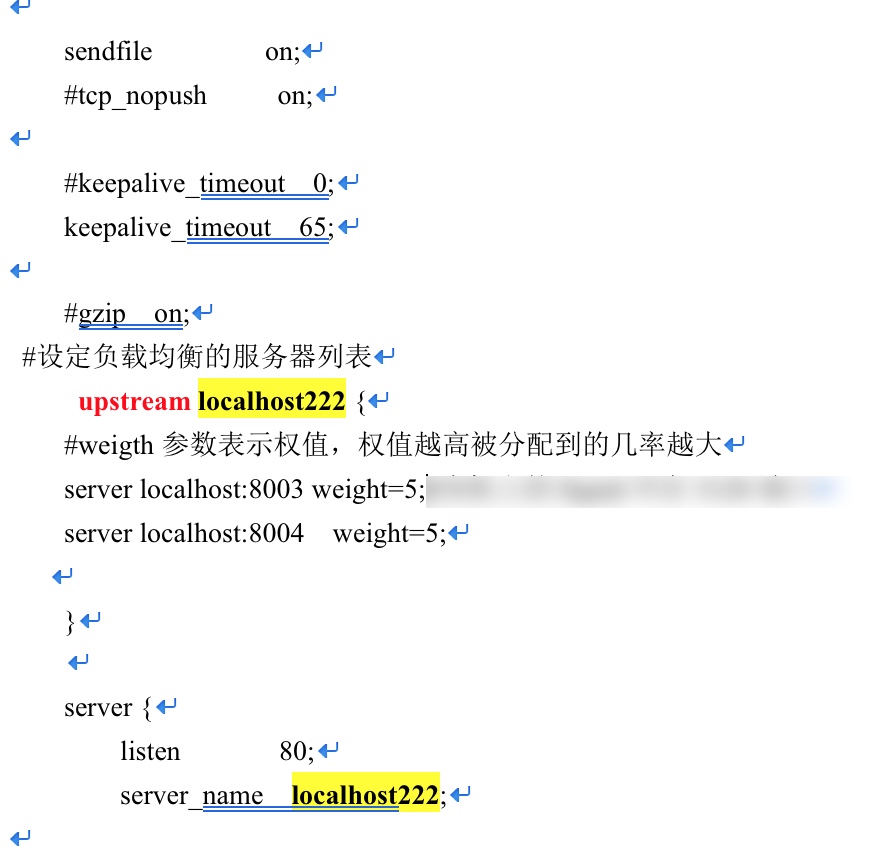
nginx 的负载均衡配置示例:
如果是单台机器,不使用负载均衡,配置就简单了:
spring:
  application:
    name: api-gateway

server:
  port: 8007
zuul:
  routes:
    user-service:
      path:  /user-service/**
      url:  http://localhost:8003
eureka:
  client:
      serviceUrl:
        defaultZone: http://localhost:8002/eureka/
注意:
(1)负载均衡的服务并不一定是spring boot项目,只要是web服务就行;
(2)yaml 配置文件中,冒号后面直接跟属性值的话,冒号后面一定要有空格;
(3)zuul项目不需要注册到eureka 中,

请参考:
http://blog.didispace.com/spring-cloud-starter-dalston-6-2/
代码:https://github.com/liuyu520/SpringCloud-Learning-Dalston-/tree/master/api-gateway