学习前言
基于B导开源的YoloV7-Pytorch源码开发了 Yolov7的旋转目标检测版本,并实现了使用onnxruntime部署模型。
源码下载
https://github.com/Egrt/yolov7-obb-deployment
喜欢的可以点个star噢。
代码特性
- 去除了解耦过程中对
torch的依赖,只需要使用numpy; - 去除了非极大抑制的
cuda实现,使用cv2内置函数代替; - 使用onnxruntime部署推理,并支持GPU。
实现过程
onnxruntime简介
ONNX Runtime是由微软开源的一个跨平台的深度学习推理引擎,可以将各种深度学习框架(如PyTorch、TensorFlow等)训练的模型进行转换和优化,然后在多种硬件和设备上进行高效推理。
ONNX Runtime支持多种硬件加速器,包括CPU、GPU和FPGA等,并提供了针对这些硬件的优化器和运算加速器。它还支持多个操作系统和开发语言,包括Windows、Linux、macOS、Android、iOS等,以及Python、C++、C#、Java等编程语言。
使用ONNX Runtime进行深度学习推理,可以获得高性能、高效率、跨平台的推理能力,同时避免针对不同硬件和操作系统的开发和调试。此外,ONNX Runtime还支持模型解释和模型加密等功能,保证模型的安全性和可解释性。
总之,ONNX Runtime为深度学习模型的部署和应用提供了强大的支持,为开发者提供了一种高性能、灵活、可扩展、跨平台的推理引擎,有助于快速构建和部署深度学习模型应用。
onnxruntime推理过程
使用onnxruntime实现GPU推理的过程可以分为以下几步:
- 安装onnxruntime库和CUDA驱动。
pip install onnxruntime-gpu
- 将ONNX模型加载到onnxruntime中。
import onnxruntime

model_path = "path/to/onnx/model.onnx"
ort_session = onnxruntime.InferenceSession(model_path)
- 准备输入数据。
import numpy as np

input_data = np.random.randn(batch_size, input_shape).astype(np.float32)
- 将输入数据传入模型进行推理。
outputs = ort_session.run(None, {

    'input_name': input_data})
其中,input_name是ONNX模型中输入节点的名称,outputs是推理的结果。
- 对于多个输出节点的模型,可以使用以下方式获取所有输出。
output_names = [x.name for x in ort_session.get_outputs()]
outputs = ort_session.run(output_names, {

    'input_name': input_data})
- 在代码中指定使用GPU设备。
javaCopy code
import onnxruntime

options = onnxruntime.SessionOptions()
options.intra_op_num_threads = 1
options.execution_mode = onnxruntime.ExecutionMode.ORT_SEQUENTIAL
options.graph_optimization_level = onnxruntime.GraphOptimizationLevel.ORT_ENABLE_ALL

providers = ['CUDAExecutionProvider']
# providers = ['CUDAExecutionProvider', 'CPUExecutionProvider']  # CPU fallback

ort_session = onnxruntime.InferenceSession(model_path, providers=providers, sess_options=options)
其中,providers参数指定使用的设备提供者,这里指定了使用CUDA设备提供者。options参数指定了会话选项,如线程数、优化级别等。
模型导出
首先在yolov7-obb或yolov7-tiny-obb的项目根目录下找到predict.py,将其中的mode修改为export_onnx,导出的onnx文件位于model_data/models.onnx
图像不失真resize
首先需要实现图片的不失真resize,B导版本的使用了Image类绘制图像,且使用了cv2读取图像,两种图像类型的转换导致了前处理与后处理部分耗时增加,fps显著降低。因此本文全部基于cv2实现,对于图像的不失真resize做出修改如下:
#---------------------------------------------------#
#   Image版本
#---------------------------------------------------#
def resize_image(image, size, letterbox_image):
    iw, ih  = image.size
    w, h    = size
    if letterbox_image:
        scale   = min(w/iw, h/ih)
        nw      = int(iw*scale)
        nh      = int(ih*scale)

        image   = image.resize((nw,nh), Image.BICUBIC)
        new_image = Image.new('RGB', size, (128,128,128))
        new_image.paste(image, ((w-nw)//2, (h-nh)//2))
    else:
        new_image = image.resize((w, h), Image.BICUBIC)
    return new_image
#---------------------------------------------------#
#   cv2版本
#---------------------------------------------------#
def resize_image(image, size, letterbox_image):
    ih, iw, _ = image.shape
    h, w = size
    if letterbox_image:
        scale = min(w/iw, h/ih)
        nw = int(iw * scale)
        nh = int(ih * scale)

        image = cv2.resize(image, (nw, nh), interpolation=cv2.INTER_CUBIC)
        new_image = np.zeros((h, w, 3), dtype=np.uint8)
        new_image[...] = 128
        new_image[(h-nh)//2:(h-nh)//2+nh, (w-nw)//2:(w-nw)//2+nw, :] = image
    else:
        new_image = cv2.resize(image, (w, h), interpolation=cv2.INTER_CUBIC)
    return new_image
resize_image函数接受一个图像、一个期望的大小和一个布尔值,指示是否要对图像进行letterboxing。如果letterbox_image为True,则函数将调整图像的大小,同时保持其宽高比,并将其粘贴到具有灰色背景的新图像上,以填充任何空白空间。如果letterbox_image为False,则函数只是将图像调整为所需的大小。该函数使用cv2库来调整大小和粘贴图像。具体来说,它使用resize方法来调整图像,使用zeros和数组切片方法来创建具有灰色背景的新图像,并将调整大小的图像粘贴到新图像上。
解码
解码部分,原版使用torch实现,本文使用numpy实现,值得注意的是torch.repeat(),需要使用np.title()方法实现
非极大抑制
原版的非极大抑制使用cuda编译的库实现,安装较为麻烦,在推理部分可使用cv2.dnn.NMSBoxesRotated(bboxes, scores, conf_thres, nms_thres),需要注意的是,该函数输入的旋转框格式与训练版本有细微差异:
cv2.dnn.NMSBoxesRotated是一个OpenCV中的函数,用于进行旋转框的非极大值抑制(Non-maximum suppression,NMS)。与传统的NMS不同,它支持旋转框,可以用于检测旋转物体。
该函数的输入参数包括:
bboxes:一个形状为(N, 5)的numpy数组,每行表示一个旋转框,包括(x, y, w, h, angle)五个值;
scores:一个形状为(N,)的numpy数组,每个元素表示对应旋转框的得分;
score_threshold:一个得分阈值,低于此阈值的旋转框将被忽略;
nms_threshold:一个NMS的阈值,高于此阈值的旋转框将被抑制;
eta:一个扩展系数,用于调整非极大值抑制算法中的交并比的阈值;
selected_indices:一个形状为(N,)的numpy数组,用于保存被保留的旋转框的索引。
该函数的输出是一个形状为(K,)的numpy数组,其中K是保留下来的旋转框的数量,
每个元素表示对应旋转框的索引。需要注意的是,输出数组中的元素顺序可能与输入数组中的元素顺序不同,因此需要按照输出数组中的顺序对输入数组进行筛选。
原版实现:
#------------------------------------------#
#   使用官方自带的非极大抑制会速度更快一些!
#   筛选出一定区域内,属于同一种类得分最大的框
#------------------------------------------#
_, keep = obb_nms(
    detections_class[:, :5],
    detections_class[:, 5] * detections_class[:, 6],
    nms_thres
)
max_detections = detections_class[keep]
cv2的实现
#------------------------------------------#
#   使用cv2.dnn.NMSBoxesRotated进行非极大抑制
#------------------------------------------#
bboxes  = [[[bbox[0], bbox[1]], [bbox[2], bbox[3]], bbox[4]* 180 / np.pi] for bbox in detections_class[:, :5]]
scores  = [float(score) for score in detections_class[:, 5] * detections_class[:, 6]]
indices = cv2.dnn.NMSBoxesRotated(bboxes, scores, conf_thres, nms_thres)
max_detections = detections_class[indices.flatten()]
完整实现
'''
Author: [egrt]
Date: 2023-03-26 09:39:21
LastEditors: Egrt
LastEditTime: 2023-03-29 10:04:38
Description:
'''
import colorsys
import numpy as np
import time
import onnxruntime
import cv2
def resize_image(image, size, letterbox_image):
ih, iw = image.shape[:2]
h, w = size
if letterbox_image:
scale = min(w/iw, h/ih)
nw = int(iw*scale)
nh = int(ih*scale)
image = cv2.resize(image, (nw,nh), interpolation=cv2.INTER_CUBIC)
new_image = 128 * np.ones((h, w, 3), dtype=np.uint8)
new_image[(h-nh)//2:(h-nh)//2+nh, (w-nw)//2:(w-nw)//2+nw, :] = image
else:
new_image = cv2.resize(image, (w, h), interpolation=cv2.INTER_CUBIC)
return new_image
def preprocess_input(image):
image /= 255.0
return image
class DecodeBox():
def __init__(self, anchors, num_classes, input_shape, anchors_mask = [[6,7,8], [3,4,5], [0,1,2]]):
super(DecodeBox, self).__init__()
self.anchors = anchors
self.num_classes = num_classes
self.bbox_attrs = 6 + num_classes
self.input_shape = input_shape
#-----------------------------------------------------------#
# 13x13的特征层对应的anchor是[142, 110],[192, 243],[459, 401]
# 26x26的特征层对应的anchor是[36, 75],[76, 55],[72, 146]
# 52x52的特征层对应的anchor是[12, 16],[19, 36],[40, 28]
#-----------------------------------------------------------#
self.anchors_mask = anchors_mask
def decode_box(self, inputs):
outputs = []
for i, input in enumerate(inputs):
#-----------------------------------------------#
# 输入的input一共有三个,他们的shape分别是
# batch_size = 1
# batch_size, 3 * (5 + 1 + 80), 20, 20
# batch_size, 255, 40, 40
# batch_size, 255, 80, 80
#-----------------------------------------------#
batch_size = input.shape[0]
input_height = input.shape[2]
input_width = input.shape[3]
#-----------------------------------------------#
# 输入为640x640时
# stride_h = stride_w = 32、16、8
#-----------------------------------------------#
stride_h = self.input_shape[0] / input_height
stride_w = self.input_shape[1] / input_width
#-------------------------------------------------#
# 此时获得的scaled_anchors大小是相对于特征层的
#-------------------------------------------------#
scaled_anchors = [(anchor_width / stride_w, anchor_height / stride_h) for anchor_width, anchor_height in self.anchors[self.anchors_mask[i]]]
#-----------------------------------------------#
# 输入的input一共有三个,他们的shape分别是
# batch_size, 3, 20, 20, 85
# batch_size, 3, 40, 40, 85
# batch_size, 3, 80, 80, 85
#-----------------------------------------------#
prediction = input.reshape(batch_size, len(self.anchors_mask[i]), self.bbox_attrs, input_height, input_width)
prediction = np.transpose(prediction, (0, 1, 3, 4, 2))
#-----------------------------------------------#
# 先验框的中心位置的调整参数
#-----------------------------------------------#
x = 1 / (1 + np.exp(-prediction[..., 0]))
y = 1 / (1 + np.exp(-prediction[..., 1]))
#-----------------------------------------------#
# 先验框的宽高调整参数
#-----------------------------------------------#
w = 1 / (1 + np.exp(-prediction[..., 2]))
h = 1 / (1 + np.exp(-prediction[..., 3]))
#-----------------------------------------------#
# 获取旋转角度
#-----------------------------------------------#
angle = 1 / (1 + np.exp(-prediction[..., 4]))
#-----------------------------------------------#
# 获得置信度,是否有物体
#-----------------------------------------------#
conf = 1 / (1 + np.exp(-prediction[..., 5]))
#-----------------------------------------------#
# 种类置信度
#-----------------------------------------------#
pred_cls = 1 / (1 + np.exp(-prediction[..., 6:]))
#----------------------------------------------------------#
# 生成网格,先验框中心,网格左上角
# batch_size,3,20,20
#----------------------------------------------------------#
grid_x = np.linspace(0, input_width - 1, input_width)
grid_x = np.tile(grid_x, (input_height, 1))
grid_x = np.tile(grid_x, (batch_size * len(self.anchors_mask[i]), 1, 1)).reshape(x.shape)
grid_y = np.linspace(0, input_height - 1, input_height)
grid_y = np.tile(grid_y, (input_width, 1)).T
grid_y = np.tile(grid_y, (batch_size * len(self.anchors_mask[i]), 1, 1)).reshape(y.shape)
scaled_anchors = np.array(scaled_anchors)
anchor_w = scaled_anchors[:, 0:1]
anchor_h = scaled_anchors[:, 1:2]
anchor_w = np.tile(anchor_w, (batch_size, 1)).reshape(1, -1, 1)
anchor_w = np.tile(anchor_w, (1, 1, input_height * input_width)).reshape(w.shape)
anchor_h = np.tile(anchor_h, (batch_size, 1)).reshape(1, -1, 1)
anchor_h = np.tile(anchor_h, (1, 1, input_height * input_width)).reshape(h.shape)
#----------------------------------------------------------#
# 利用预测结果对先验框进行调整
# 首先调整先验框的中心,从先验框中心向右下角偏移
# 再调整先验框的宽高。
# x 0 ~ 1 => 0 ~ 2 => -0.5, 1.5 => 负责一定范围的目标的预测
# y 0 ~ 1 => 0 ~ 2 => -0.5, 1.5 => 负责一定范围的目标的预测
# w 0 ~ 1 => 0 ~ 2 => 0 ~ 4 => 先验框的宽高调节范围为0~4倍
# h 0 ~ 1 => 0 ~ 2 => 0 ~ 4 => 先验框的宽高调节范围为0~4倍
#----------------------------------------------------------#
pred_boxes = np.zeros(prediction[..., :4].shape, dtype='float32')
pred_boxes[..., 0] = x * 2. - 0.5 + grid_x
pred_boxes[..., 1] = y * 2. - 0.5 + grid_y
pred_boxes[..., 2] = (w * 2) ** 2 * anchor_w
pred_boxes[..., 3] = (h * 2) ** 2 * anchor_h
pred_theta = (angle - 0.5) * np.pi
#----------------------------------------------------------#
# 将输出结果归一化成小数的形式
#----------------------------------------------------------#
_scale = np.array([input_width, input_height, input_width, input_height]).astype('float32')
output = np.concatenate((pred_boxes.reshape(batch_size, -1, 4) / _scale, pred_theta.reshape(batch_size, -1, 1),
conf.reshape(batch_size, -1, 1), pred_cls.reshape(batch_size, -1, self.num_classes)), -1)
output = np.concatenate((pred_boxes.reshape(batch_size, -1, 4) / _scale, pred_theta.reshape(batch_size, -1, 1),
conf.reshape(batch_size, -1, 1), pred_cls.reshape(batch_size, -1, self.num_classes)), -1)
outputs.append(output)
return outputs
def non_max_suppression(self, prediction, num_classes, input_shape, image_shape, letterbox_image, conf_thres=0.5, nms_thres=0.4):
#----------------------------------------------------------#
# prediction [batch_size, num_anchors, 85]
#----------------------------------------------------------#
output = [None for _ in range(len(prediction))]
for i, image_pred in enumerate(prediction):
#----------------------------------------------------------#
# 对种类预测部分取max。
# class_conf [num_anchors, 1] 种类置信度
# class_pred [num_anchors, 1] 种类
#----------------------------------------------------------#
class_conf = np.max(image_pred[:, 6:6 + num_classes], axis=1, keepdims=True)
class_pred = np.argmax(image_pred[:, 6:6 + num_classes], axis=1)
class_pred = np.expand_dims(class_pred, axis=1)
#----------------------------------------------------------#
# 利用置信度进行第一轮筛选
#----------------------------------------------------------#
conf_mask = (image_pred[:, 5] * class_conf[:, 0] >= conf_thres).squeeze()
#----------------------------------------------------------#
# 根据置信度进行预测结果的筛选
#----------------------------------------------------------#
image_pred = image_pred[conf_mask]
class_conf = class_conf[conf_mask]
class_pred = class_pred[conf_mask]
if not image_pred.shape[0]:
continue
#-------------------------------------------------------------------------#
# detections [num_anchors, 8]
# 8的内容为:x, y, w, h, angle, obj_conf, class_conf, class_pred
#-------------------------------------------------------------------------#
detections = np.concatenate((image_pred[:, :6], class_conf, class_pred), 1)
#------------------------------------------#
# 获得预测结果中包含的所有种类
#------------------------------------------#
unique_labels = np.unique(detections[:, -1])
for c in unique_labels:
#------------------------------------------#
# 获得某一类得分筛选后全部的预测结果
#------------------------------------------#
detections_class = detections[detections[:, -1] == c]
#------------------------------------------#
# 使用cv2.dnn.NMSBoxesRotated进行非极大抑制
#------------------------------------------#
bboxes = [[[bbox[0], bbox[1]], [bbox[2], bbox[3]], bbox[4]* 180 / np.pi] for bbox in detections_class[:, :5]]
scores = [float(score) for score in detections_class[:, 5] * detections_class[:, 6]]
indices = cv2.dnn.NMSBoxesRotated(bboxes, scores, conf_thres, nms_thres)
max_detections = detections_class[indices.flatten()]
# Add max detections to outputs
output[i] = max_detections if output[i] is None else np.concatenate((output[i], max_detections))
if output[i] is not None:
output[i][:, :5] = self.yolo_correct_boxes(output[i], input_shape, image_shape, letterbox_image)
return output
def yolo_correct_boxes(self, output, input_shape, image_shape, letterbox_image):
#-----------------------------------------------------------------#
# 把y轴放前面是因为方便预测框和图像的宽高进行相乘
#-----------------------------------------------------------------#
box_xy = output[..., 0:2]
box_wh = output[..., 2:4]
angle = output[..., 4:5]
box_yx = box_xy[..., ::-1]
box_hw = box_wh[..., ::-1]
input_shape = np.array(input_shape)
image_shape = np.array(image_shape)
if letterbox_image:
#-----------------------------------------------------------------#
# 这里求出来的offset是图像有效区域相对于图像左上角的偏移情况
# new_shape指的是宽高缩放情况
#-----------------------------------------------------------------#
new_shape = np.round(image_shape * np.min(input_shape/image_shape))
offset = (input_shape - new_shape)/2./input_shape
scale = input_shape/new_shape
box_yx = (box_yx - offset) * scale
box_hw *= scale
box_xy = box_yx[:, ::-1]
box_hw = box_wh[:, ::-1]
rboxes = np.concatenate([box_xy, box_wh, angle], axis=-1)
rboxes[:, [0, 2]] *= image_shape[1]
rboxes[:, [1, 3]] *= image_shape[0]
return rboxes
class YOLO(object):
_defaults = {
#--------------------------------------------------------------------------#
# 使用自己训练好的模型进行预测一定要修改model_path和classes_path!
# model_path指向logs文件夹下的权值文件,classes_path指向model_data下的txt
#
# 训练好后logs文件夹下存在多个权值文件,选择验证集损失较低的即可。
# 验证集损失较低不代表mAP较高,仅代表该权值在验证集上泛化性能较好。
# 如果出现shape不匹配,同时要注意训练时的model_path和classes_path参数的修改
#--------------------------------------------------------------------------#
"model_path" : 'model_data/models.onnx',
#---------------------------------------------------------------------#
# 输入图片的大小,必须为32的倍数。
#---------------------------------------------------------------------#
"input_shape" : [640, 640],
#---------------------------------------------------------------------#
# 只有得分大于置信度的预测框会被保留下来
#---------------------------------------------------------------------#
"confidence" : 0.5,
#---------------------------------------------------------------------#
# 非极大抑制所用到的nms_iou大小
#---------------------------------------------------------------------#
"nms_iou" : 0.3,
}
@classmethod
def get_defaults(cls, n):
if n in cls._defaults:
return cls._defaults[n]
else:
return "Unrecognized attribute name '" + n + "'"
#---------------------------------------------------#
# 初始化YOLO
#---------------------------------------------------#
def __init__(self, **kwargs):
self.__dict__.update(self._defaults)
for name, value in kwargs.items():
setattr(self, name, value)
self._defaults[name] = value
#---------------------------------------------------#
# 获得种类和先验框的数量
#---------------------------------------------------#
self.class_names = ['Car']
self.num_classes = 1
self.anchors_mask = [[6, 7, 8], [3, 4, 5], [0, 1, 2]]
self.anchors = np.array([[ 12, 16],[ 19, 36],[ 40, 28],
[ 36, 75],[ 76, 55],[ 72, 146],
[142, 110],[192, 243],[459, 401]])
self.num_anchors = 9
self.bbox_util = DecodeBox(self.anchors, self.num_classes, (self.input_shape[0], self.input_shape[1]), self.anchors_mask)
#---------------------------------------------------#
# 画框设置不同的颜色
#---------------------------------------------------#
hsv_tuples = [(x / self.num_classes, 1., 1.) for x in range(self.num_classes)]
self.colors = list(map(lambda x: colorsys.hsv_to_rgb(*x), hsv_tuples))
self.colors = list(map(lambda x: (int(x[0] * 255), int(x[1] * 255), int(x[2] * 255)), self.colors))
self.generate()
#---------------------------------------------------#
# 生成模型
#---------------------------------------------------#
def generate(self):
#---------------------------------------------------#
# 建立yolo模型,载入yolo模型的权重
#---------------------------------------------------#
self.net = onnxruntime.InferenceSession(self.model_path,
providers=['TensorrtExecutionProvider', 'CUDAExecutionProvider', 'CPUExecutionProvider'])
self.output_name = [i.name for i in self.net.get_outputs()]
self.input_name = [i.name for i in self.net.get_inputs()]
#---------------------------------------------------#
# 检测图片
#---------------------------------------------------#
def detect_image(self, image):
#---------------------------------------------------#
# 计算输入图片的高和宽
#---------------------------------------------------#
image_shape = np.array(np.shape(image)[0:2])
#---------------------------------------------------------#
# 在这里将图像转换成RGB图像,防止灰度图在预测时报错。
# 代码仅仅支持RGB图像的预测,所有其它类型的图像都会转化成RGB
#---------------------------------------------------------#
image = cv2.cvtColor(image, cv2.COLOR_BGR2RGB)
image_data = resize_image(image, (self.input_shape[1], self.input_shape[0]), True)
#---------------------------------------------------------#
# 添加上batch_size维度
# h, w, 3 => 3, h, w => 1, 3, h, w
#---------------------------------------------------------#
image_data = np.expand_dims(np.transpose(preprocess_input(np.array(image_data, dtype='float32')), (2, 0, 1)), 0)
#---------------------------------------------------------#
# 将图像输入网络当中进行预测!
#---------------------------------------------------------#
outputs = self.net.run(self.output_name, {
self.input_name[0]:image_data})
outputs = self.bbox_util.decode_box(outputs)
#---------------------------------------------------------#
# 将预测框进行堆叠,然后进行非极大抑制
#---------------------------------------------------------#
results = self.bbox_util.non_max_suppression(np.concatenate(outputs, axis=1), self.num_classes, self.input_shape,
image_shape, True, conf_thres = self.confidence, nms_thres = self.nms_iou)
if results[0] is None:
return image
top_label = np.array(results[0][:, 7], dtype = 'int32')
top_conf = results[0][:, 5] * results[0][:, 6]
top_rboxes = results[0][:, :5]
#---------------------------------------------------------#
# 图像绘制
#---------------------------------------------------------#
for i, c in list(enumerate(top_label)):
predicted_class = self.class_names[int(c)]
rbox = top_rboxes[i]
score = top_conf[i]
rbox = ((rbox[0], rbox[1]), (rbox[2], rbox[3]), rbox[4] * 180 / np.pi)
poly = cv2.boxPoints(rbox).astype(np.int32)
x, y = np.min(poly[:, 0]), np.min(poly[:, 1]) - 20
cv2.polylines(image, [poly.reshape((-1, 1, 2))], True, (0, 0, 255), thickness=2)
label = '{} {:.2f}'.format(predicted_class, score)
cv2.putText(image, label, (x, y), cv2.FONT_HERSHEY_SIMPLEX, 1, (0, 255, 0), thickness=1)
image = cv2.cvtColor(image, cv2.COLOR_RGB2BGR)
return image
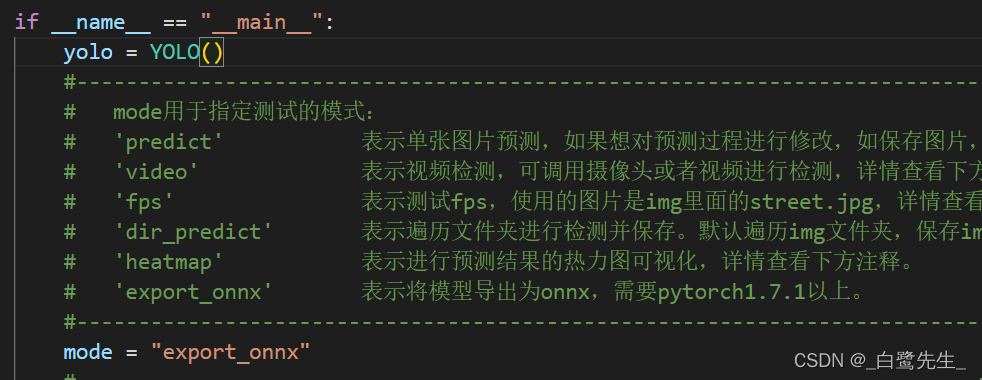
if __name__=='__main__':
yolo = YOLO()
#----------------------------------------------------------------------------------------------------------#
# mode用于指定测试的模式:
# 'predict' 表示单张图片预测,如果想对预测过程进行修改,如保存图片,截取对象等,可以先看下方详细的注释
# 'video' 表示视频检测,可调用摄像头或者视频进行检测,详情查看下方注释。
# 'fps' 表示测试fps,使用的图片是img里面的street.jpg,详情查看下方注释。
# 'dir_predict' 表示遍历文件夹进行检测并保存。默认遍历img文件夹,保存img_out文件夹,详情查看下方注释。
#----------------------------------------------------------------------------------------------------------#
mode = "video"
#----------------------------------------------------------------------------------------------------------#
# video_path 用于指定视频的路径,当video_path=0时表示检测摄像头
# 想要检测视频,则设置如video_path = "xxx.mp4"即可,代表读取出根目录下的xxx.mp4文件。
# video_save_path 表示视频保存的路径,当video_save_path=""时表示不保存
# 想要保存视频,则设置如video_save_path = "yyy.mp4"即可,代表保存为根目录下的yyy.mp4文件。
# video_fps 用于保存的视频的fps
#
# video_path、video_save_path和video_fps仅在mode='video'时有效
# 保存视频时需要ctrl+c退出或者运行到最后一帧才会完成完整的保存步骤。
#----------------------------------------------------------------------------------------------------------#
video_path = "img/input.mp4"
video_save_path = "img/output.mp4"
video_fps = 25.0
#----------------------------------------------------------------------------------------------------------#
# test_interval 用于指定测量fps的时候,图片检测的次数。理论上test_interval越大,fps越准确。
# fps_image_path 用于指定测试的fps图片
#
# test_interval和fps_image_path仅在mode='fps'有效
#----------------------------------------------------------------------------------------------------------#
test_interval = 100
fps_image_path = "img/test.jpg"
#-------------------------------------------------------------------------#
# dir_origin_path 指定了用于检测的图片的文件夹路径
# dir_save_path 指定了检测完图片的保存路径
#
# dir_origin_path和dir_save_path仅在mode='dir_predict'时有效
#-------------------------------------------------------------------------#
dir_origin_path = "img/"
dir_save_path = "img_out/"
if mode == "predict":
'''
1、如果想要进行检测完的图片的保存,利用r_image.save("img.jpg")即可保存,直接在predict.py里进行修改即可。
2、如果想要获得预测框的坐标,可以进入yolo.detect_image函数,在绘图部分读取top,left,bottom,right这四个值。
3、如果想要利用预测框截取下目标,可以进入yolo.detect_image函数,在绘图部分利用获取到的top,left,bottom,right这四个值
在原图上利用矩阵的方式进行截取。
4、如果想要在预测图上写额外的字,比如检测到的特定目标的数量,可以进入yolo.detect_image函数,在绘图部分对predicted_class进行判断,
比如判断if predicted_class == 'car': 即可判断当前目标是否为车,然后记录数量即可。利用draw.text即可写字。
'''
while True:
img = input('Input image filename:')
try:
image = cv2.imread(img)
except:
print('Open Error! Try again!')
continue
else:
r_image = yolo.detect_image(image)
cv2.imshow('result', r_image)
c = cv2.waitKey(0)
elif mode == "video":
capture = cv2.VideoCapture(video_path)
if video_save_path!="":
fourcc = cv2.VideoWriter_fourcc(*'XVID')
size = (int(capture.get(cv2.CAP_PROP_FRAME_WIDTH)), int(capture.get(cv2.CAP_PROP_FRAME_HEIGHT)))
out = cv2.VideoWriter(video_save_path, fourcc, video_fps, size)
ref, frame = capture.read()
if not ref:
raise ValueError("未能正确读取摄像头(视频),请注意是否正确安装摄像头(是否正确填写视频路径)。")
fps = 0.0
while(True):
t1 = time.time()
# 读取某一帧
ref, frame = capture.read()
if not ref:
break
# 进行检测
frame = yolo.detect_image(frame)
fps = ( fps + (1./(time.time()-t1)) ) / 2
print("fps= %.2f"%(fps))
frame = cv2.putText(frame, "fps= %.2f"%(fps), (0, 40), cv2.FONT_HERSHEY_SIMPLEX, 1, (0, 255, 0), 2)
cv2.imshow("video",frame)
c= cv2.waitKey(1) & 0xff
if video_save_path!="":
out.write(frame)
if c==27:
capture.release()
break
print("Video Detection Done!")
capture.release()
if video_save_path!="":
print("Save processed video to the path :" + video_save_path)
out.release()
cv2.destroyAllWindows()
elif mode == "fps":
img = cv2.imread(fps_image_path)
tact_time = yolo.get_FPS(img, test_interval)
print(str(tact_time) + ' seconds, ' + str(1/tact_time) + 'FPS, @batch_size 1')
elif mode == "dir_predict":
import os
from tqdm import tqdm
img_names = os.listdir(dir_origin_path)
for img_name in tqdm(img_names):
if img_name.lower().endswith(('.bmp', '.dib', '.png', '.jpg', '.jpeg', '.pbm', '.pgm', '.ppm', '.tif', '.tiff')):
image_path = os.path.join(dir_origin_path, img_name)
image = cv2.imread(image_path)
r_image = yolo.detect_image(image)
if not os.path.exists(dir_save_path):
os.makedirs(dir_save_path)
r_image.save(os.path.join(dir_save_path, img_name.replace(".jpg", ".png")), quality=95, subsampling=0)
else:
raise AssertionError("Please specify the correct mode: 'predict', 'video', 'fps', 'dir_predict'.")
性能对比
待测试,可以在评论区反馈精度与速度与原版比较。