gitee: NiterForum 瓦刀
Start
properties文件编码问题:(46条消息) Intellij IDEA 2018 properties文件Unicode转中文设置_properties文件\u6d4f\u89c8\u5668\u8868\u5355\u5185\u_程序新视界的博客-CSDN博客
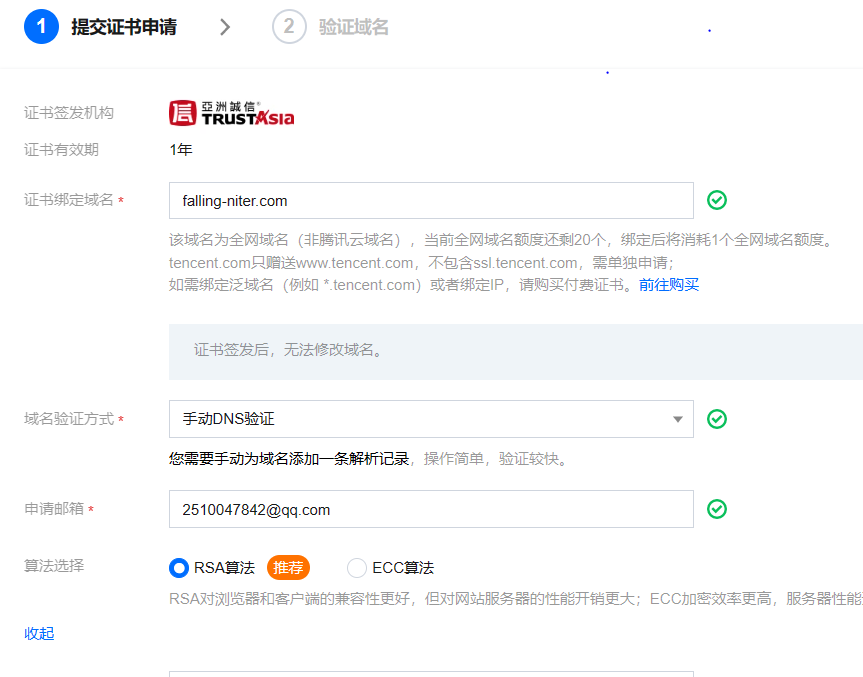
申请、下载SSL证书:在阿里云或腾讯云上找SSL证书服务,申请即可(需要提前申请域名)
不配置HTTPS的:
修改application.properties
#http端口号 80
# server.custom.httpPort=80
#https加密端口号 443
server.port=80
#SSL证书路径 一定要加上classpath:
# server.ssl.key-store=classpath:niter_cn.jks
#SSL证书密码
# server.ssl.key-store-password=***
#证书类型
# server.ssl.key-store-type=JKS
删除 cn/niter/forum/config/HttpsConfig.java 文件或注释掉其中代码
删除 resources/templates/common/header.html 里的以下meta标签
<meta http-equiv="Content-Security-Policy" content="upgrade-insecure-requests">
删除 cn/niter/forum/util/CookieUtils.java中的
cookie.setHttpOnly(true);//通过js脚本是无法获取到cookie的信息的。防止XSS攻击。
自定义信息:
自定义properties文件中的站点信息、meta标签、联系方式、搜索引擎验证标签、用户组等级名称和积分上限、积分名称和权重、用户行为积分奖励、新闻咨询接口(可跳过)、手势验证码服务(VAPTCHA)、短信相关产品、腾讯企业邮箱(可用个人邮箱)、github登录
站点信息:
#这项非常重要,请务必准确填写域名、ip或者localhost,不要加http(s)://,以及后面的/。
site.main.domain=localhost
验证码服务去https://www.vaptcha.com/创建验证单元即可,域名本地的话填localhost,复制VID、KEY到properties
#手势验证码vaptcha的vid与key,请去官网获取https://www.vaptcha.com/ 。也可以使用自己选用验证码服务,但需要修改源码!
vaptcha.vid=***
vaptcha.key=***
#腾讯企业邮箱相关配置信息,请去官网获取https://exmail.qq.com/ 。也可以使用自己的邮箱账号。修改成对应信息即可!
exmail.account=***
exmail.password=***
exmail.smtp.host=smtp.exmail.qq.com
github登录
![[外链图片转存失败,源站可能有防盗链机制,建议将图片保存下来直接上传(img-amFftk78-1681345753492)(C:\Users\Administrator\AppData\Roaming\Typora\typora-user-images\image-20230403151342356.png)]](https://img-blog.csdnimg.cn/ae86e08e3921419483bad1a82f8fdbe9.png)
#github登录 API配置信息。请去这里创建应用即可,秒审核,轻松配置 https://github.com/settings/applications/new
github.client.id=***
github.client.secret=***
github.redirect.uri=http(s)://localhost/callback
百度登录
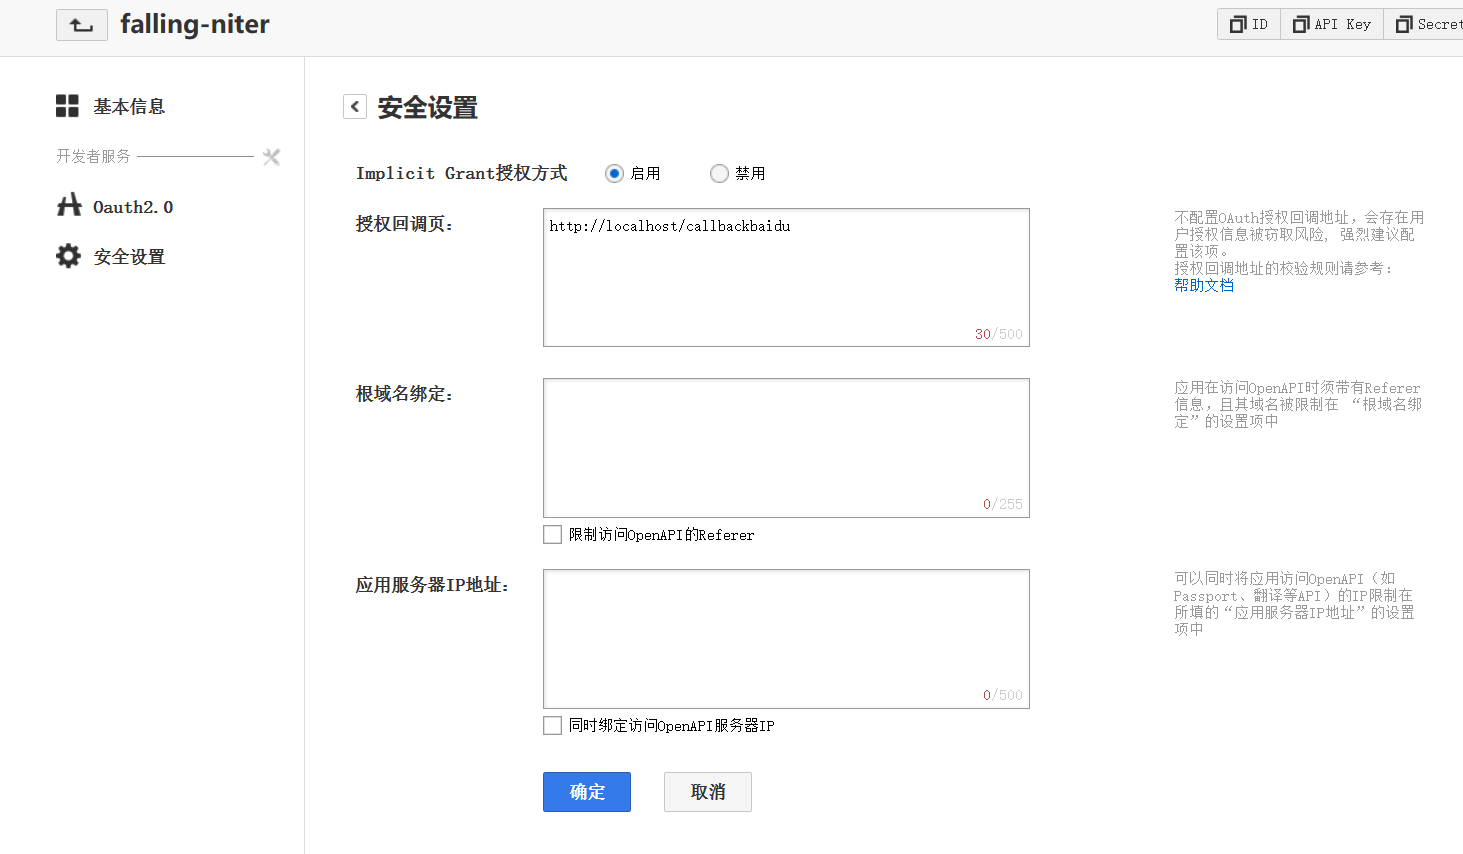
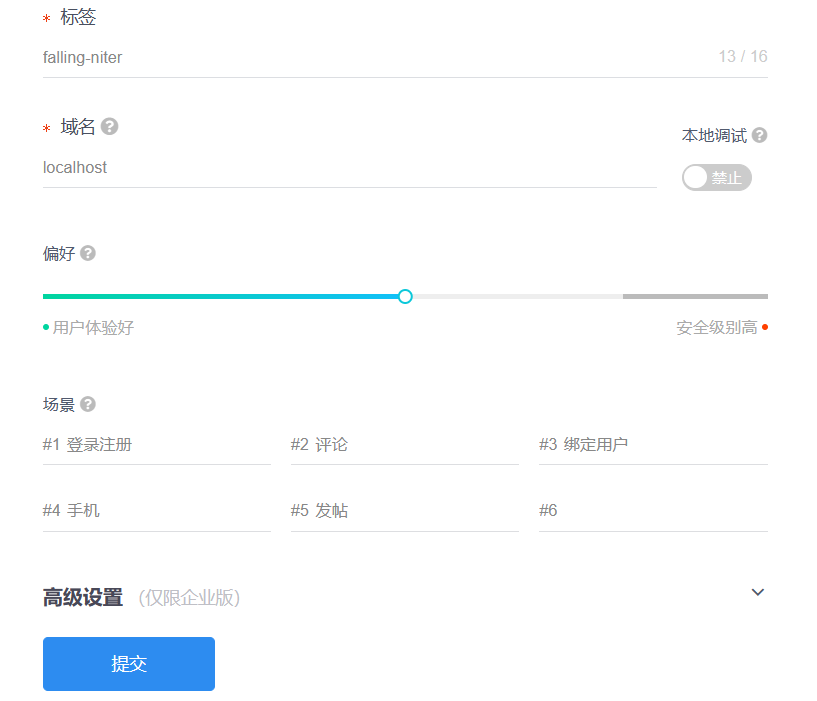
#百度登录 API配置信息。请去这里创建应用即可,秒审核,轻松配置 http://developer.baidu.com/console#app/create
baidu.client.id=***
baidu.client.secret=***
baidu.redirect.uri=http(s)://localhost/callbackbaidu
微博登录
#微博登录 API配置信息。请去这里创建应用即可,审核需要域名,无需备案  https://open.weibo.com/apps/new?sort=web
weibo.client.id=***
weibo.client.secret=***
weibo.redirect.uri=http://localhost/callbackweibo
QQ登录
#QQ登录 API配置信息。请去这里创建应用即可,审核需要域名,如申请国际域名接入,无需备案  https://connect.qq.com/manage.html#/appcreate/web
qq.client.id=***
qq.client.secret=***
qq.redirect.uri=http(s)://yourdomain/callbackqq
修改数据库配置:
#数据库配置,填写你自己的
spring.datasource.url=jdbc:mysql://localhost:3306/***
spring.datasource.username=***
spring.datasource.password=***

#数据库配置2,按需修改。如不熟悉,不建议修改
spring.datasource.hikari.connection-init-sql=set names utf8mb4;
spring.datasource.driver-class-name=com.mysql.jdbc.Driver
spring.datasource.hikari.minimum-idle=3
spring.datasource.hikari.maximum-pool-size=10
spring.datasource.hikari.max-lifetime =30000
mybatis.configuration.map-underscore-to-camel-case=true
mybatis.type-aliases-package=cn.niter.forum.mapper
mybatis.mapper-locations=classpath:mapper/*.xml
在 /resource/generatorConfig.xml 中修改:
		<plugin type="org.mybatis.generator.plugins.RowBoundsPlugin"></plugin>
        <jdbcConnection driverClass="com.mysql.jdbc.Driver"
                        connectionURL="jdbc:mysql://localhost:3306/niter"
                        userId="***"
                        password="****">
        </jdbcConnection>
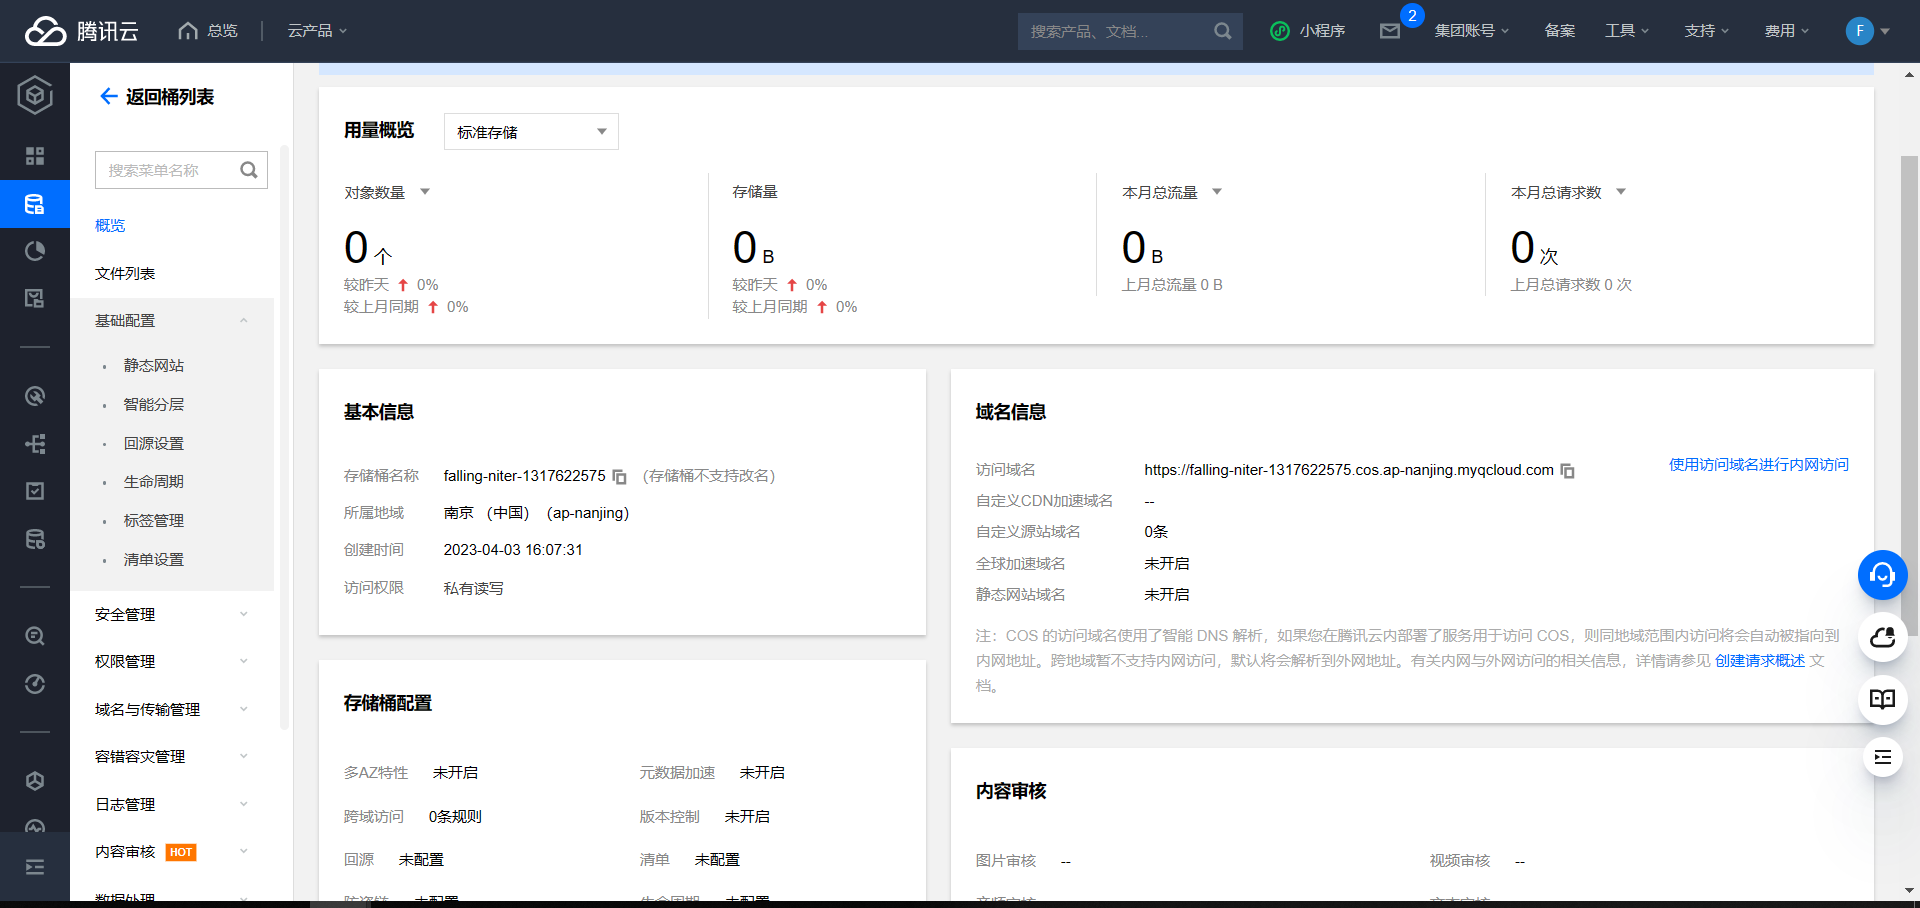
配置对象存储:
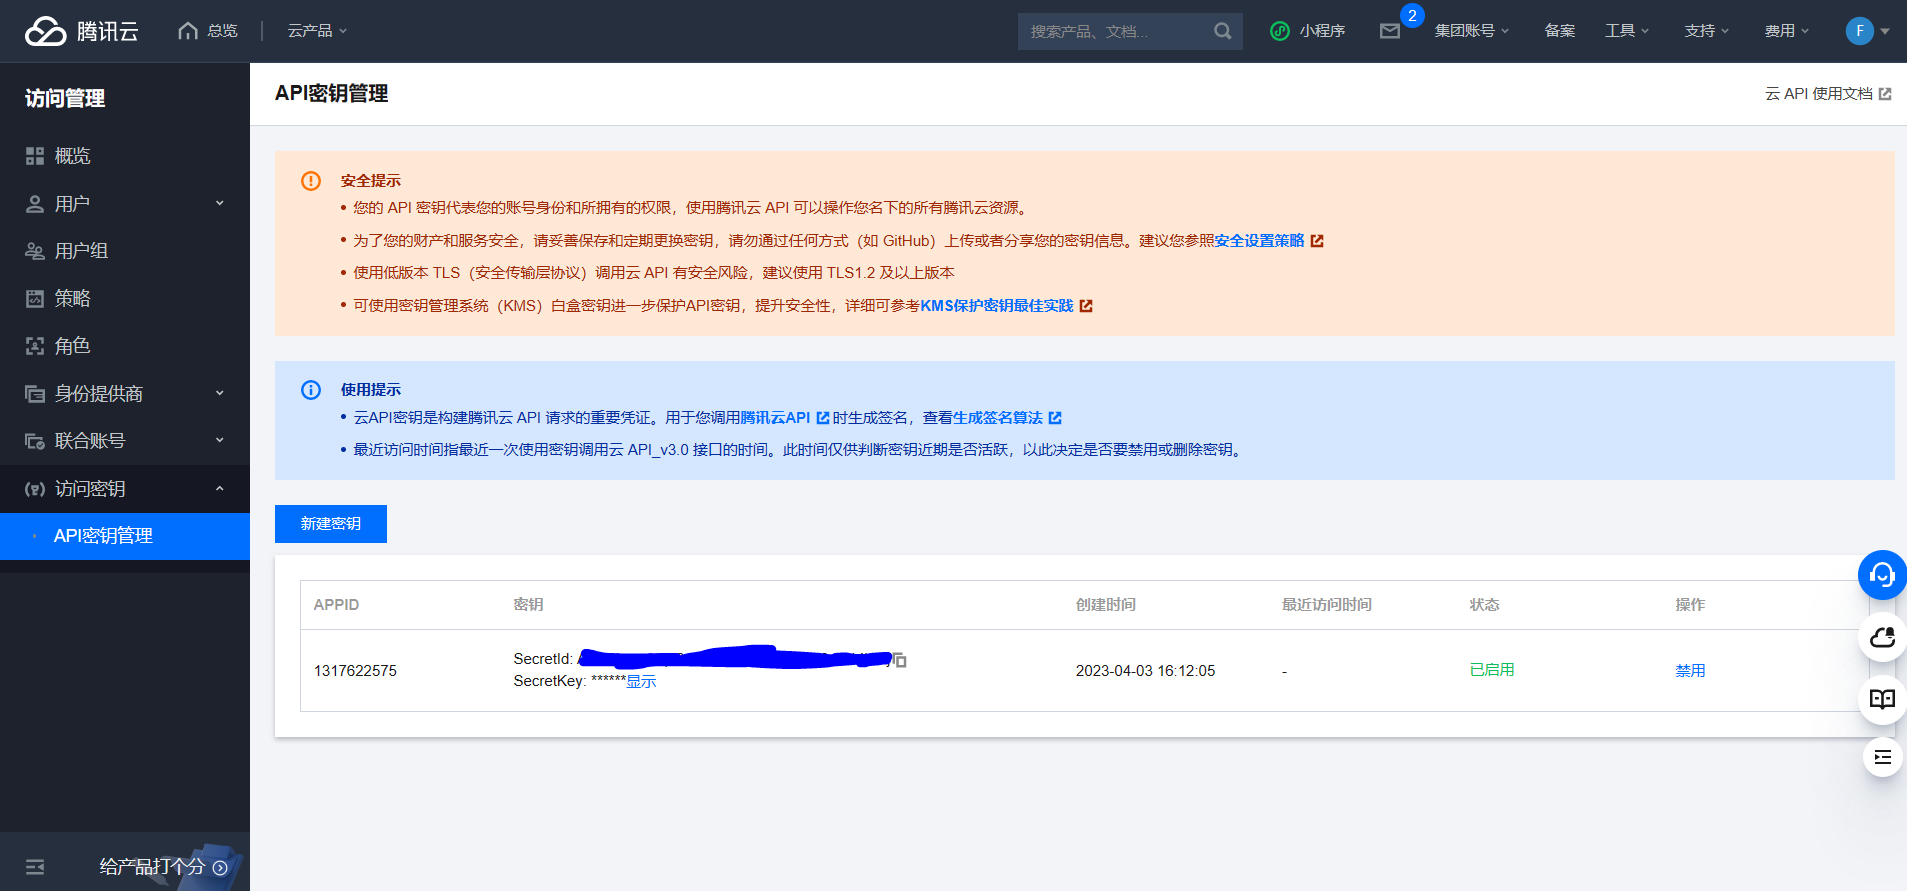
#腾讯云账户设置
qcloud.secret-id=***
qcloud.secret-key=***
#是否开启关键字自动生成,enable默认为0关闭;改为1开启
qcloud.keywords.enable=0
#是否开启数据万象功能,enable默认为0关闭;改为1开启。该功能用于上传图片的审核、压缩(仅限jpg)、水印生成,也可用于头像的剪切
qcloud.ci.enable=0
#数据万象的访问域名,最后斜杠不能省
qcloud.ci.objecturl=https://qcdn2.niter.cn/
#腾讯云对象存储配置,修改成你自己的。也可以自选对象存储服务,但需要修改源码!
qcloud.cos.bucket-name=niter-1251590924
qcloud.cos.region=ap-nanjing
#这是你对象存储的访问域名,最后斜杠不能省。
qcloud.cos.objecturl=https://qcdn.niter.cn/
qcloud.sms.appId=1400000000
qcloud.sms.sign=尼特IT
qcloud.sms.tempId=200000
其他配置:
#是否开启tinify png压缩功能,注意压缩需要时间等待,可配合压缩阈值根据需要开启关闭,默认0关闭,1开启
tinify.enable=0
#请于此处https://tinify.cn/developers 注册开发者账号,即可每月免费压缩500张,填写获取到的key
tinify.key=sadfdg
#压缩阈值,超过这个长度才压缩,否则不压缩,默认1M
tinify.minContentLength=1024000

#百度云内容审核 https://ai.baidu.com/tech/textcensoring
#是否开启内容审核自动生成,enable默认为0关闭;改为1开启
baiducloud.censor.enable=0
baiducloud.censor.appid=12345678
baiducloud.censor.apikey=***
baiducloud.censor.secretkey=***

#其它配置,按需修改,如不熟悉。不建议修改
logging.file=logs/community.log
logging.level.root=info
logging.file.max-history=15
logging.file.max-size=100MB
server.servlet.session.timeout=15552000
spring.mvc.favicon.enabled=false
spring.servlet.multipart.max-file-size=5MB
spring.servlet.multipart.max-request-size=10MB
spring:
thymeleaf:
cache: false
mode: LEGACYHTML5

#resource
# 启用缓存
spring.resources.chain.cache=true
# 资源缓存时间,单位秒-缓存7天
spring.resources.cache.period=604800
修改报错:
在 cn.niter.forum.provider.QCloudProvider 中:
// import sun.misc.BASE64Encoder;
import org.apache.commons.codec.binary.Base64;

// String encodeBase64 = new BASE64Encoder().encode(data);
String encodeBase64 = Base64.encodeBase64String(data);
在项目中,设计到64位编码的。有时开发会用到JDK中自带的BASE64工具。但sun公司是建议不这样做的。尤其是更新了JDK版本,项目甚至还存在保存的信息。可引用 import org.apache.commons.codec.binary.Base64;进行替换
(46条消息) java—IDE中找不到sun.misc.BASE64Encoder jar包 和sun.misc.Base64Decoder jar包_Sugar_ya的博客-CSDN博客
注意,mysql使用5版本的
页面的js写成了请求数据万象的水印服务,如果没有开启的话会发送错误的请求路径
https://.../upload/user/2/img/20230403174530_gh.jpeg # 没开启,正确
https://.../upload/user/2/img/20230403174530_gh.jpeg/water_mark # 没开启,错误
修改 /resource/templates/t/index.html :
// str = str + "<img data-id=" + item.id + "  layer-src=\"" + item.imageUrls[j] + "/watermark_text\" src=\"" + item.imageUrls[j] + "/t_small\">";

str = str + "<img data-id=" + item.id + "  layer-src=\"" + item.imageUrls[j] + "\" src=\"" + item.imageUrls[j] + "\">";
登录
访问首页
首先进入IndexController.forum方法
检查登录状态、处理置顶提问和提问列表,热门tag、注册的用户使用缓存(List)
点击登录-输入信息-人机验证,通过后进入ValidateController#post方法(‘/validate’,post)。post方法,提交访问的token,scene,ip
这里使用了一个 ExpiringMap 的Map用于对登录ip进行限制(验证时间间隔):
ExpiringMap<String,String> interval = ExpiringMap.builder() // 存ip, token
    .maxSize(20)//设置最大容量,增大攻击难度,值越大存储的可疑ip越多,过大会占用额外资源
    .expiration(30, TimeUnit.SECONDS)//过期时间30秒
    .expirationPolicy(ExpirationPolicy.CREATED)//每次访问重置过期时间
    .variableExpiration()
    .build();

ExpiringMap<String,Integer> ipScores = ExpiringMap.builder() // 存ip, scene
    .maxSize(100)//设置最大容量,增大攻击难度,值越大存储的可疑ip越多,过大会占用额外资源
    .expiration(1, TimeUnit.DAYS)//过期时间1天
    .expirationPolicy(ExpirationPolicy.CREATED)//每次更新重置过期时间
    .variableExpiration()
    .build();
ExpiringMap功能:
1.可设置Map中的Entry在一段时间后自动过期。
2.可设置Map最大容纳值,当到达Maximum size后,再次插入值会导致Map中的第一个值过期。
3.可添加监听事件,在监听到Entry过期时调度监听函数。
4.可以设置懒加载,在调用get()方法时创建对象。
之后使用 VaptchaProvider.getValidateResult(token,scene,ip) 进行二次人机验证
选中 UserService.registerOrLoginWithMail 使用 Ctrl + Alt + H 查看方法调用链,发现SsoApi.registerOrLoginWithMail调用,且在该类中发现对 ‘/login’ 请求的映射方法login
在这里有一个要点:selectByExample的使用
(48条消息) 通用Mapper中selectByExample的使用_ccity86155的博客-CSDN博客
/*
Example 查询范例
Criteria 查询标准,Example的静态内部类
*/
Example example=new Example(要查询的表对应的实体类.class);
Example.Criteria criteria=example.createCriteria();//创建查询标准
criteria.andEqualTo("字段","值");//调用方法,编写自己想要查询的条件
List list=userMapper.selectByExample(example);
List list=userMapper.selectByExampleAndRowBounds(example,new RowBounds(0,2));// 指定获取几条特定的查询语句,类似于limit。可以在分页的时候使用
还有JWT:
resultDTO.setData(tokenUtils.getToken(getUserDTO(users.get(0))));
                -----------------^
                |
public String getToken(UserDTO user) {


        String token = "";
        token = JWT.create()
                .withIssuer("NiterUser")
                //.withAudience(""+user.getId())// 将 user id 保存到 token 里面
                .withClaim("name", user.getName())
                .withClaim("id",user.getId())
                //.withClaim("userId",""+user.getId())
                .withClaim("avatarUrl",user.getAvatarUrl())
                .withClaim("groupId",user.getGroupId())
                .withClaim("vipRank",user.getVipRank())
                .withExpiresAt(new Date(System.currentTimeMillis() + 3600000 * 24 * 3))//三天
                .sign(Algorithm.HMAC256(SECRET));// 以 password 作为 token 的签名/密钥
        return token;
}
在拦截器(AOP编程,拦截"/**")中有如下代码,用于验证tocken:
HandlerMethod handlerMethod=(HandlerMethod)handler;
Method method=handlerMethod.getMethod();
String token=null;
ResultDTO resultDTO=null;
Cookie[] cookies = request.getCookies();
boolean hashToken = false;
if(cookies!=null&&cookies.length!=0){


    for (Cookie cookie : cookies) {


        if(cookie.getName().equals("token")){


            token=cookie.getValue(); // 获取cookie里的tocken
            if(token!=null) {


                hashToken=true; // 标记tocken有值
                resultDTO = tokenUtils.verifyToken(token); // 验证tocken
                if(resultDTO.getCode()==200){

     // 成功
                    UserDTO userDTO = (UserDTO) resultDTO.getData();
                    request.setAttribute("loginUser",userDTO);
                    loginUserCache.putLoginUser(userDTO.getId(),
                                                System.currentTimeMillis());//写入loginCache
                }
            }
            break;
        }
    }
}

if (method.isAnnotationPresent(UserLoginToken.class)) {

     //如果请求的映射方法有自定义注解
    UserLoginToken userLoginToken = method.getAnnotation(UserLoginToken.class);
    if (userLoginToken.required()) {

     // 注解的required属性为true(需要认证)
        // 执行认证
        if ((!hashToken)||resultDTO.getCode()!=200) {


            throw new CustomizeException(CustomizeErrorCode.NO_LOGIN);
        }
    }
}
// 自定义注解
@Target({

    ElementType.METHOD, ElementType.TYPE})
@Retention(RetentionPolicy.RUNTIME)
public @interface UserLoginToken {


    boolean required() default true;
}
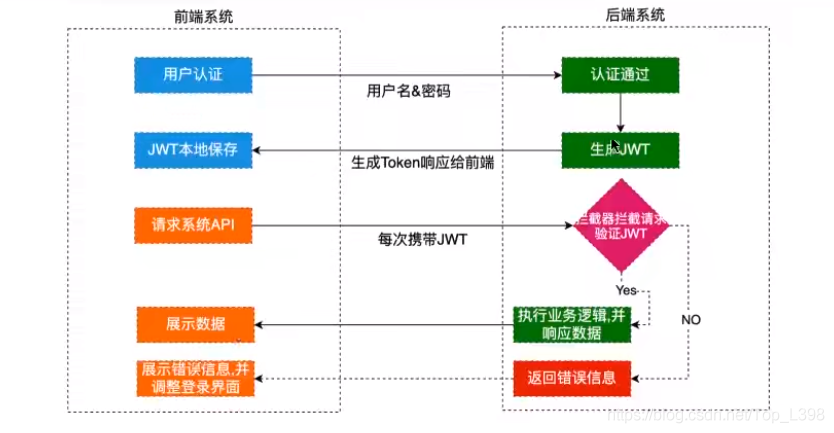
详见:JWT详细教程与使用_jwt教程_一支有理想的月月鸟的博客-CSDN博客
之后转到首页,处理首页帖子显示和用户消息提示(“"/api/notification/mine"请求)