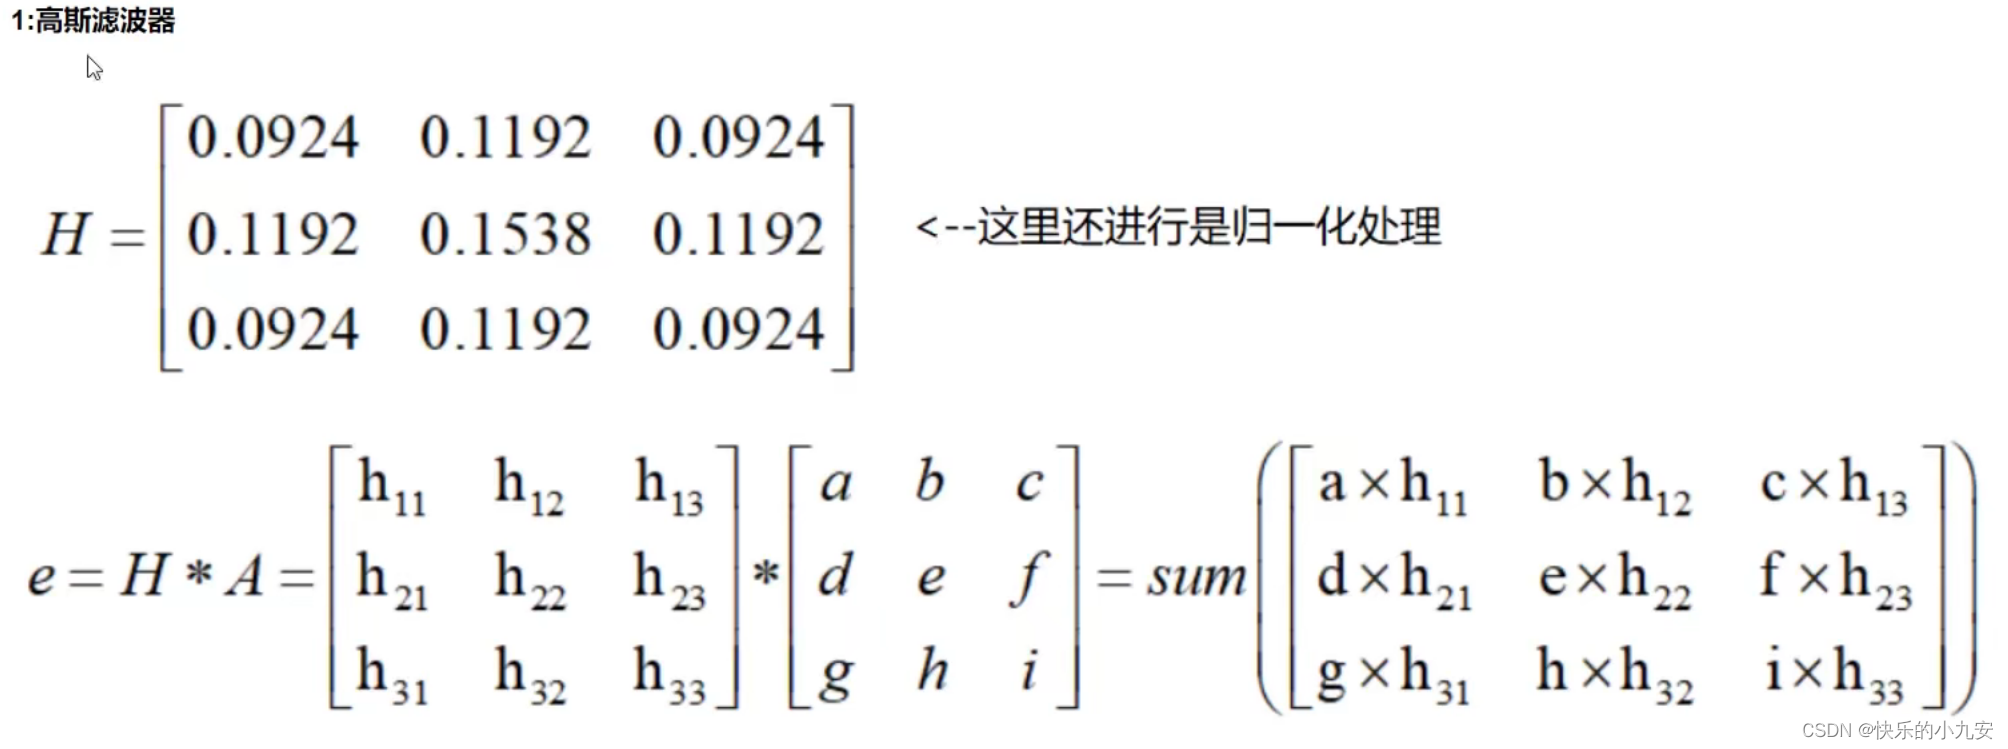
图像梯度-Scharr算子
scharrx = cv2.Scharr(img, cv2.CV_64F,1,0)
scharrx = cv2.convertScaleAbs (scharrx)# 负数的觉对值
scharry = cv2.Scharr(img, cv2.CV_64F,0,1)
scharry = cv2.convertScaleAbs (scharry)# 负数的觉对值
scharrxy =cv2.addWeighted(scharrx,0.5,scharry,0.5,0)
cv_show('First',sobelxy)
图像梯度-laplacian算子
laplacian =cv2.Laplacian(img,cv2.CV_64F)
laplacian =cv2.convertScaleAbs(laplacian)
Canny边缘检测
1高斯滤波 平滑处理 消除噪音
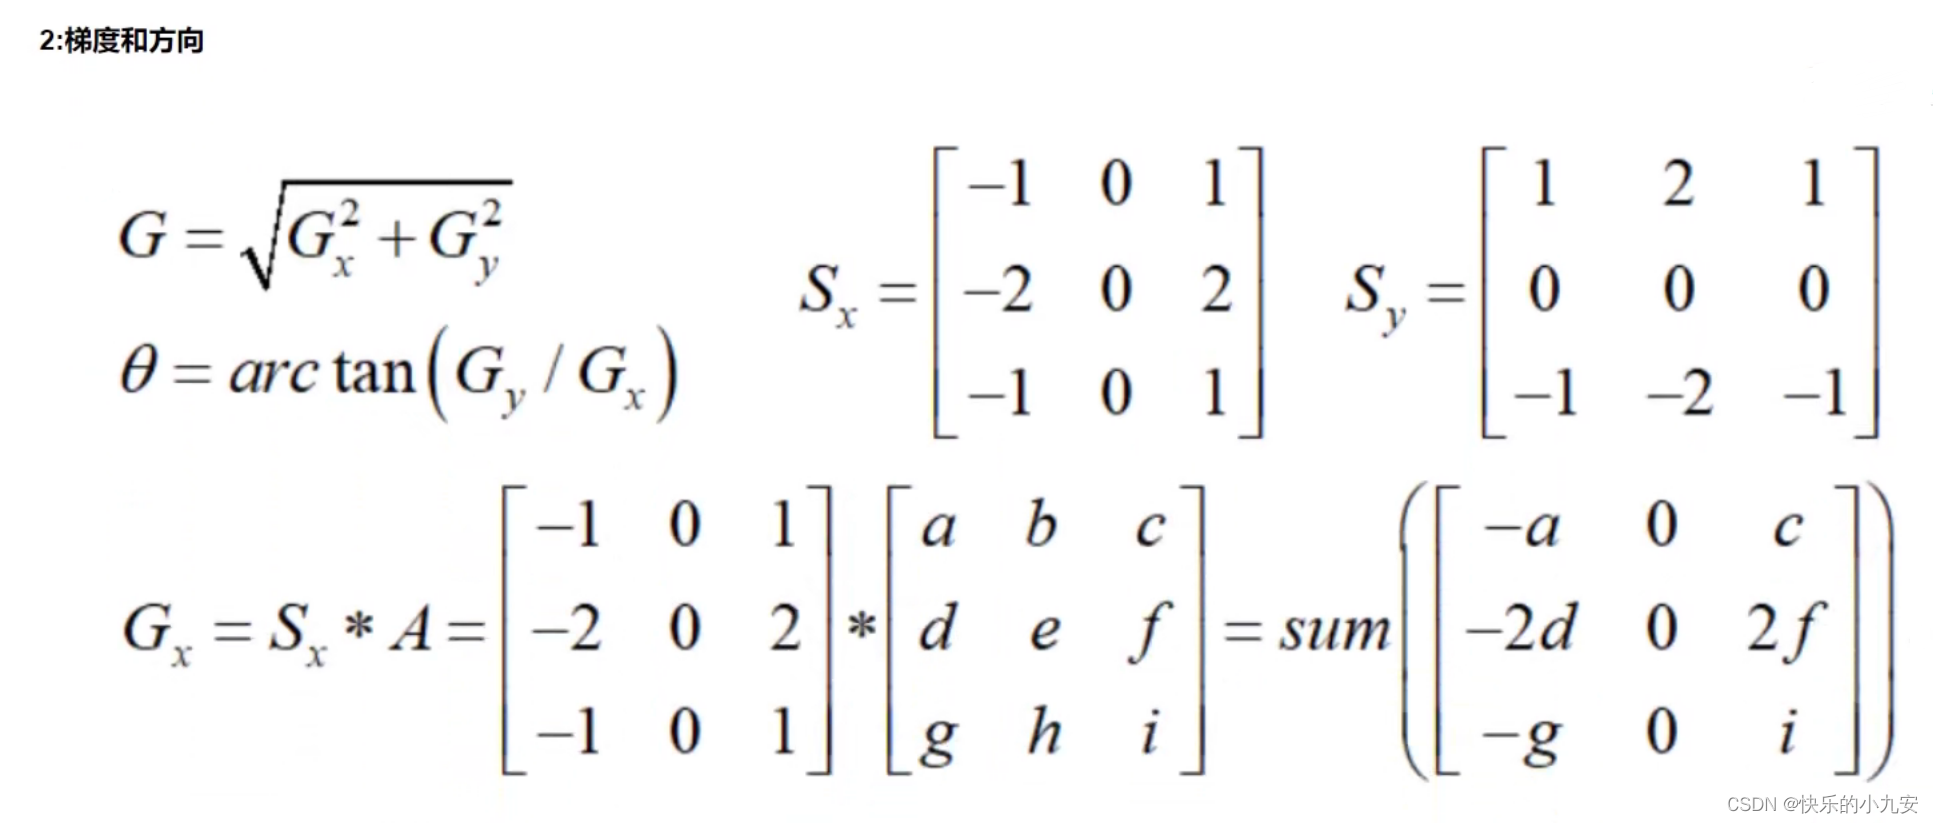
2计算图像的每个像素点的梯度强度和方向
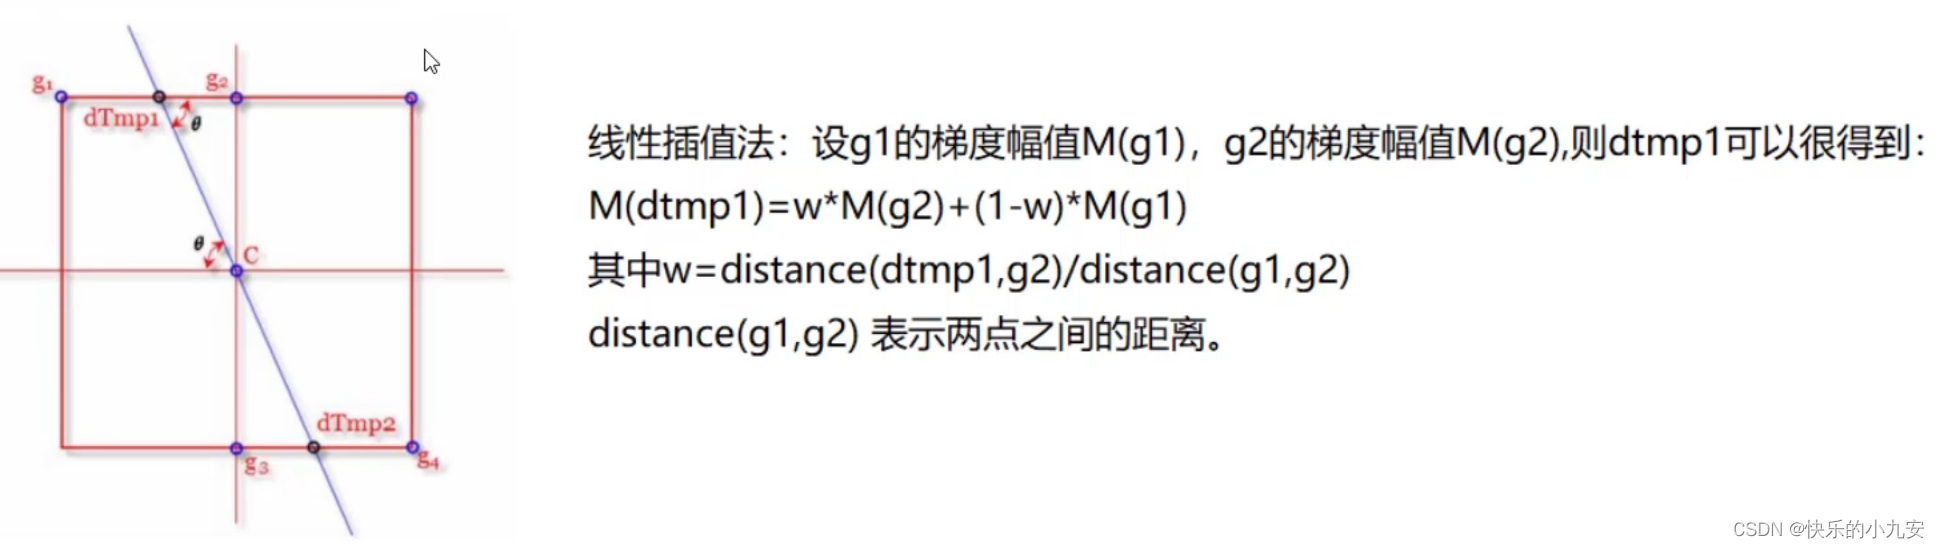
3应用非极大值抑制 一消除边缘检测带来的杂散响应
4应用双阈值检测来确定真实的和潜在的边缘
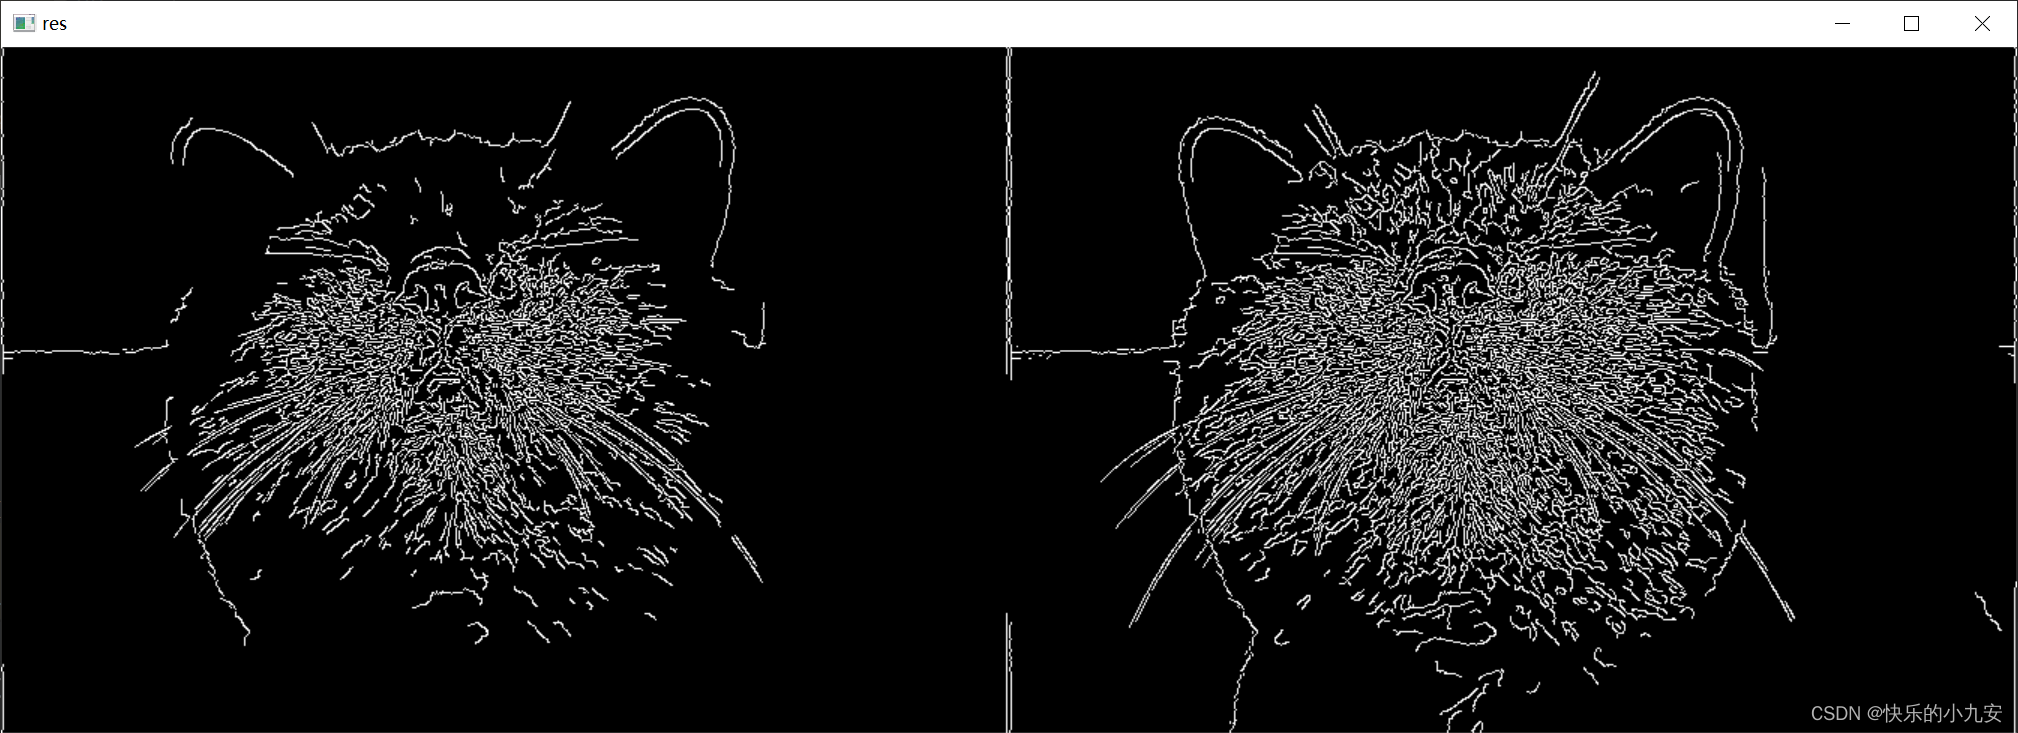
v1 =cv2.Canny(img,80,150)
v2 =cv2.Canny(img,50,100)
res =np.hstack((v1,v2))
cv_show("res",res)
5通过抑制孤立的弱边缘最终完成边缘检测
图像金字塔
沿着金字塔往上走 越来越小叫做(向下采样方法 缩小)
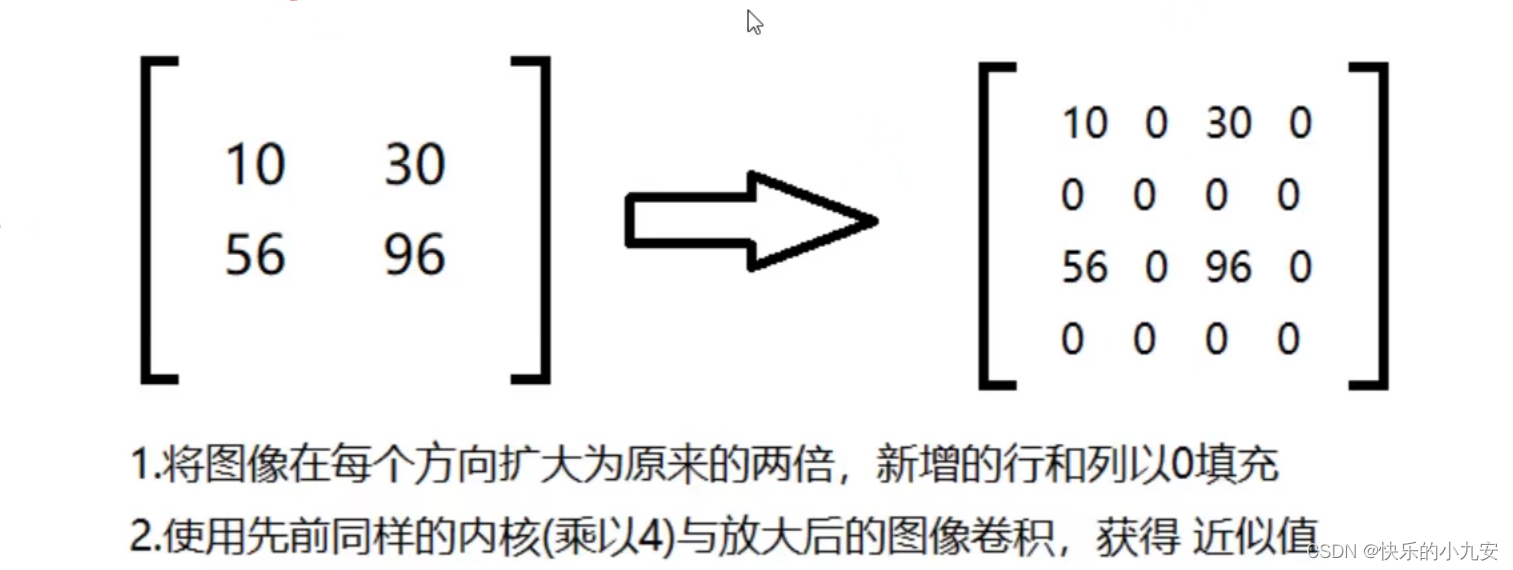
沿着金字塔往下走 越来越大叫做(向上采样方法 放大)
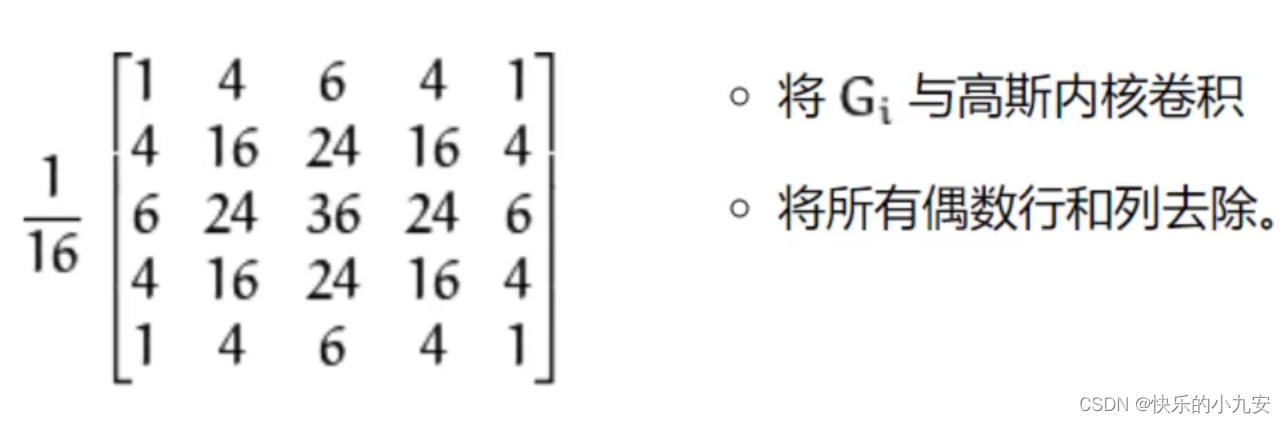
高斯金字塔
向下采样
print(img.shape)
up =cv2.pyrUp(img)
cv_show("1",up)
向上采样
print(img.shape)
down =cv2.pyrDown(img)
cv_show("2",up)
可以多次上采样或者下采样(注意先上采样再下采样只是大小一样 信息会丢失变得不清晰)
高斯金字塔
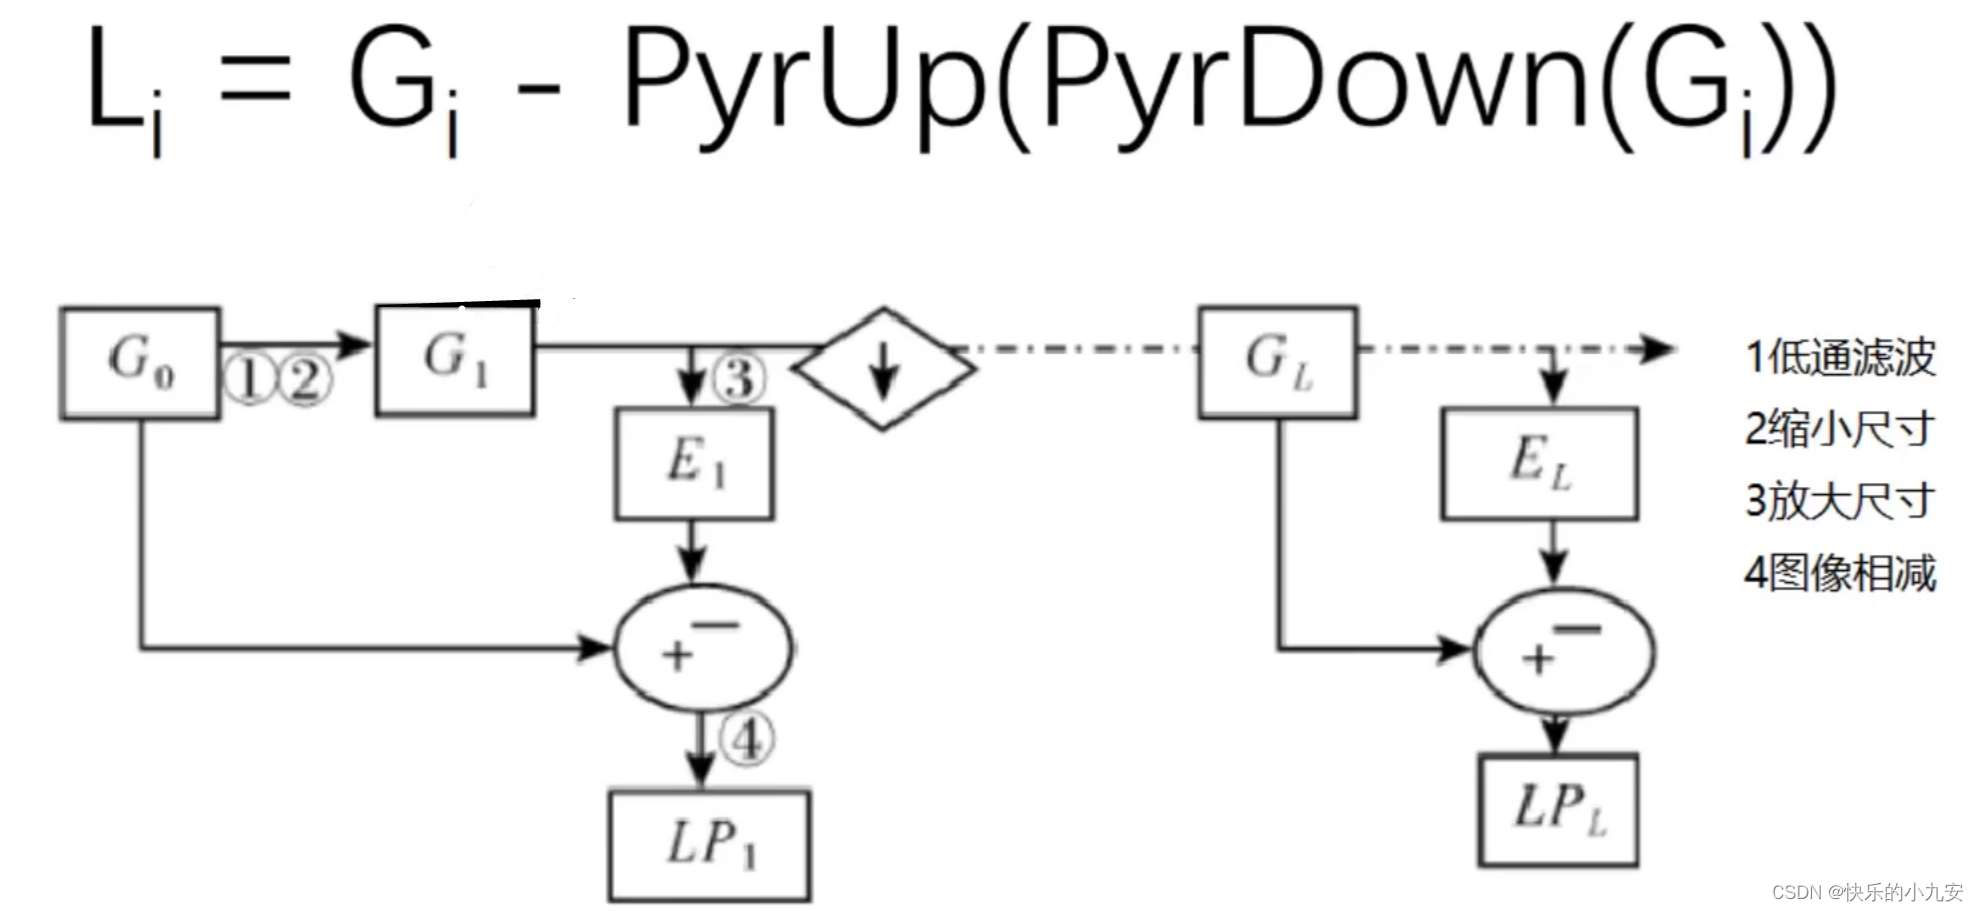
down =cv2.pyrDown(img)
down_up =cv2.pyrUp(down)
down_up =cv2.resize(down_up,(672,457))  # 大小不一样要resize
cha =img-down_up
cv_show("1",cha)
图像轮廓
查找轮廓
gray =cv2.cvtColor(img,cv2.COLOR_BGR2GRAY) # 灰度处理
ret,thresh =cv2.threshold(gray,127,255,cv2.THRESH_BINARY) # 二值化处理
cv_show("1",thresh)
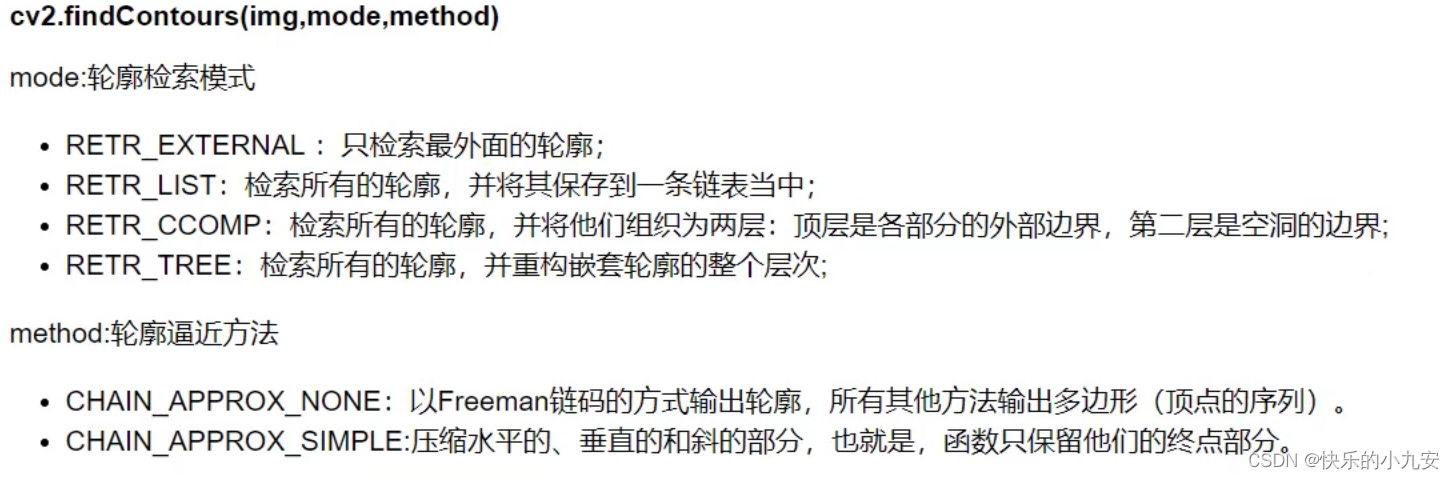
contours,hierachy =cv2.findContours(thresh,cv2.RETR_TREE,cv2.CHAIN_APPROX_NONE)
绘制轮廓
draw_img =img.copy()     # 复制原图
res =cv2.drawContours(draw_img,contours,-1,(0,0,255),2)  #-1全部绘画 1第一个轮廓里面
                                                         # 2第一个外面 依次数
cv_show("1",img)
浅拷贝
轮廓特征
cut =contours[0]                              # 0第一个轮廓 1第二个轮廓
print(cv2.contourArea(cut))                   # 面积
cut =contours[2]
print(cv2.arcLength(cut,True))               # 周长,Ture表示闭合
轮廓近似
cut =contours[0]
epsilon =0.1*cv2.arcLength(cut,True)
approx =cv2.approxPolyDP(cut,epsilon,True)
draw_img =img.copy()
res =cv2.drawContours(draw_img,[approx],-1,(0,0,255),2)
cv_show('res',res)