目录
方法1-栈
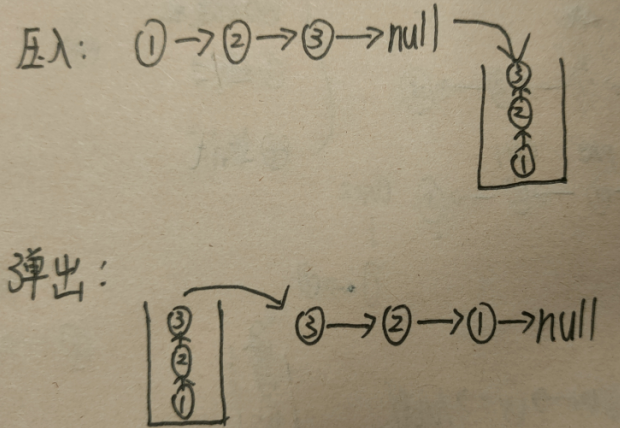
将一个个数据推入栈区,然后再一个个弹出来。注意点:弹出完成之后,要把最后一个节点的next指向null,否则链表就闭环了。
/*
struct ListNode {
	int val;
	struct ListNode *next;
	ListNode(int x) :
			val(x), next(NULL) {
	}
};*/
#include<stack>
class Solution {
public:
	ListNode* ReverseList(ListNode* pHead) {
		stack<ListNode*> stack_temp;
		ListNode* cur = pHead;
		while (cur != NULL) {
			stack_temp.push(cur);
			cur = cur->next;
		}
		ListNode* pHead2=new ListNode(0);
		ListNode* cur2 = pHead2;
		while (stack_temp.empty()!=true) {
			cur2->next=stack_temp.top();
			stack_temp.pop();
			cur2 = cur2->next;
		}
		cur2->next = NULL;
		return pHead2->next;
	}
};
方法2-双链表(和迭代法是一个意思)
建立链表1和链表2,循环遍历链表1,在每一个循环内部,将链表1的当前节点接入到链表2的头节点。图中是两种图形描述,代码是一样的,图形化理解方式不一样。


/*
struct ListNode {
	int val;
	struct ListNode *next;
	ListNode(int x) :
			val(x), next(NULL) {
	}
};*/
#include<stack>
class Solution {
public:
	ListNode* ReverseList(ListNode* pHead) {
		ListNode* cur2 = NULL;
		ListNode* cur1 = pHead;
		while (cur1 != NULL) {
			ListNode* temp = cur1->next;//备份cur1下一个节点
			cur1->next = cur2;//将cur1的节点连接到cur2的节点
			cur2 = cur1;//更新cur2的头节点
			cur1 = temp;//cur1往后移动一位
		}
		return cur2;
	}
};
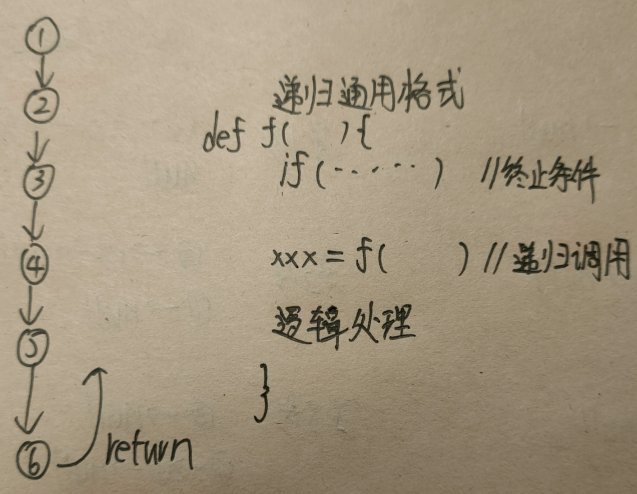
方法3-递归
递归(深度优先)遍历到最底层,然后逐级往上进行反转,每一次递归内部,将当前节点的next节点的next节点指向自身,同时将自身的next节点指向NULL(为了在最后一次递归时候,不让链表形成闭环)。
扫描二维码关注公众号,回复:
15196373 查看本文章

/*
struct ListNode {
	int val;
	struct ListNode *next;
	ListNode(int x) :
			val(x), next(NULL) {
	}
};*/
#include<stack>
class Solution {
public:
	ListNode* ReverseList(ListNode* pHead) {
		//终止条件
		if (pHead==NULL||pHead->next == NULL){
			return pHead;
		}
		//递归调用
		ListNode* ans = ReverseList(pHead->next);
		pHead->next->next = pHead;
		pHead->next = NULL;
		return ans;

	}
};