【物资准备】
esp32-wroom
max30102
点灯科技账号or阿里云物联网平台账号
(本来是想用屏幕去显示的,但是我发现我的esp32只有一个iic引出来,而max30102模块正好是iic通讯,我又懒得弄spi的屏幕,所以用手机app或者网页去起到显示数据的一个作用了)
1、阿里云物联网平台
先上代码
#include <WiFi.h>
#include <PubSubClient.h>
#include <ArduinoJson.h>
// 这里添加要连的wifi名称和密码
const char* ssid = "";
const char* password = "";
/* 设备证书信息,根据情况修改*/
#define PRODUCT_KEY ""
#define DEVICE_NAME ""
#define DEVICE_SECRET ""
#define REGION_ID "cn-shanghai"
#define CLIENT_ID ""
#define MQTT_PASSWD ""
#define ALINK_BODY_FORMAT "{\"params\":%s}"
#define ALINK_TOPIC_PROP_POST "/sys/" PRODUCT_KEY "/" DEVICE_NAME "/thing/event/property/post"
/* 线上环境域名和端口号,不需要改 */
#define MQTT_SERVER PRODUCT_KEY ".iot-as-mqtt." REGION_ID ".aliyuncs.com"
#define MQTT_PORT 1883
#define MQTT_USRNAME DEVICE_NAME "&" PRODUCT_KEY
WiFiClient espClient;
PubSubClient client(espClient);
void WiFiInit()
{
WiFi.begin(ssid, password);
while(WiFi.status() != WL_CONNECTED){
delay(500);
Serial.print(".");
}
Serial.println("WIFI CONNECTED!");
}
// 连接MQTT,每隔5s自动重连
void mqttCheckConnect()
{
while(!client.connected())
{
Serial.println("Connecting to MQTT Server ...");
if(client.connect(CLIENT_ID, MQTT_USRNAME, MQTT_PASSWD))
{
Serial.println("MQTT Connected!");
}
else
{
Serial.print("MQTT Connect err:");
Serial.println(client.state());
delay(5000);
}
}
}
// publish(ESP32发送,阿里云接收)
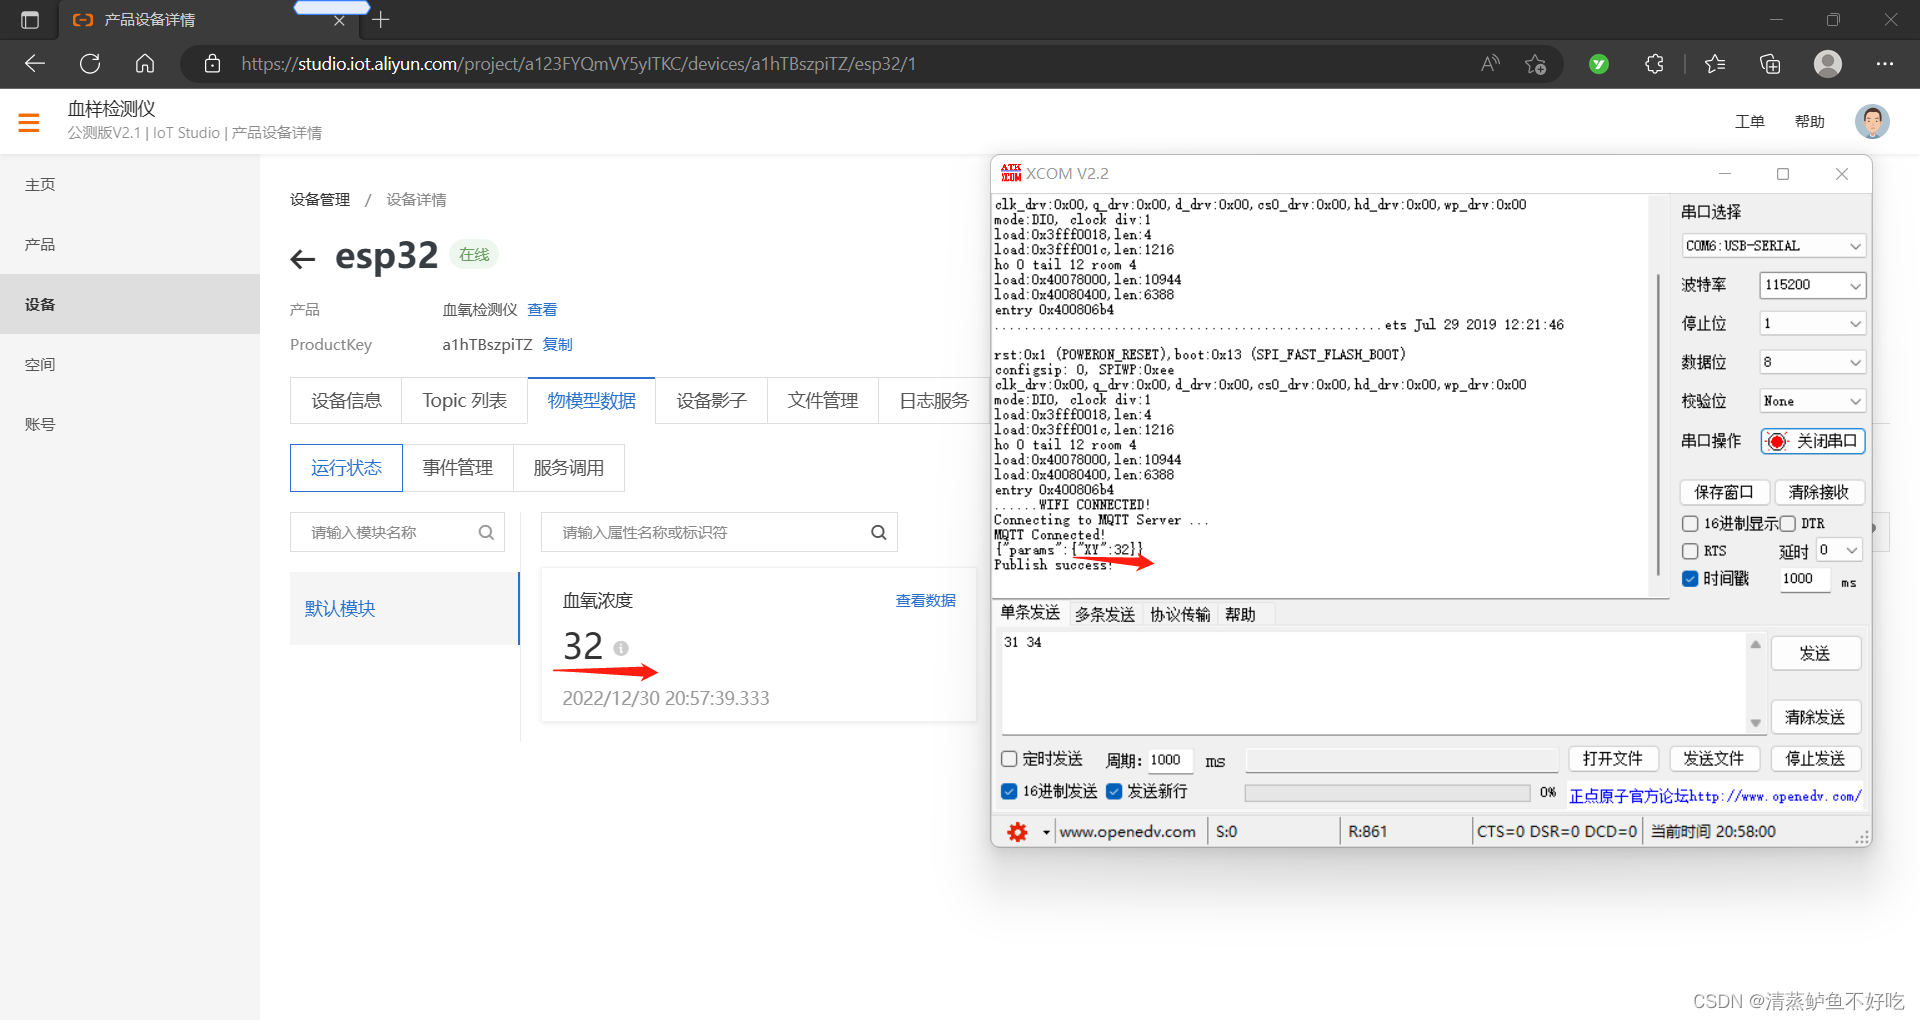
void mqttIntervalPost()
{
char param[32]; // 存放参数数据
char jsonBuf[128]; // 存放json格式数据
sprintf(param, "{\"XY\":%d}", 32); //这是测试的发送数据
sprintf(jsonBuf, ALINK_BODY_FORMAT, param);
Serial.println(jsonBuf);
if(client.publish(ALINK_TOPIC_PROP_POST, jsonBuf))
{
Serial.println("Publish success!");
}
else
{
Serial.println("Publish error!");
}
}
void setup()
{
Serial.begin(115200);
WiFiInit();
client.setServer(MQTT_SERVER, MQTT_PORT);
client.setCallback(callback);
}
void loop()
{
if(!client.connected())
{
mqttCheckConnect();
//mqttIntervalPost();
}
mqttIntervalPost();//定期发送血氧数据
client.loop();
delay(500);
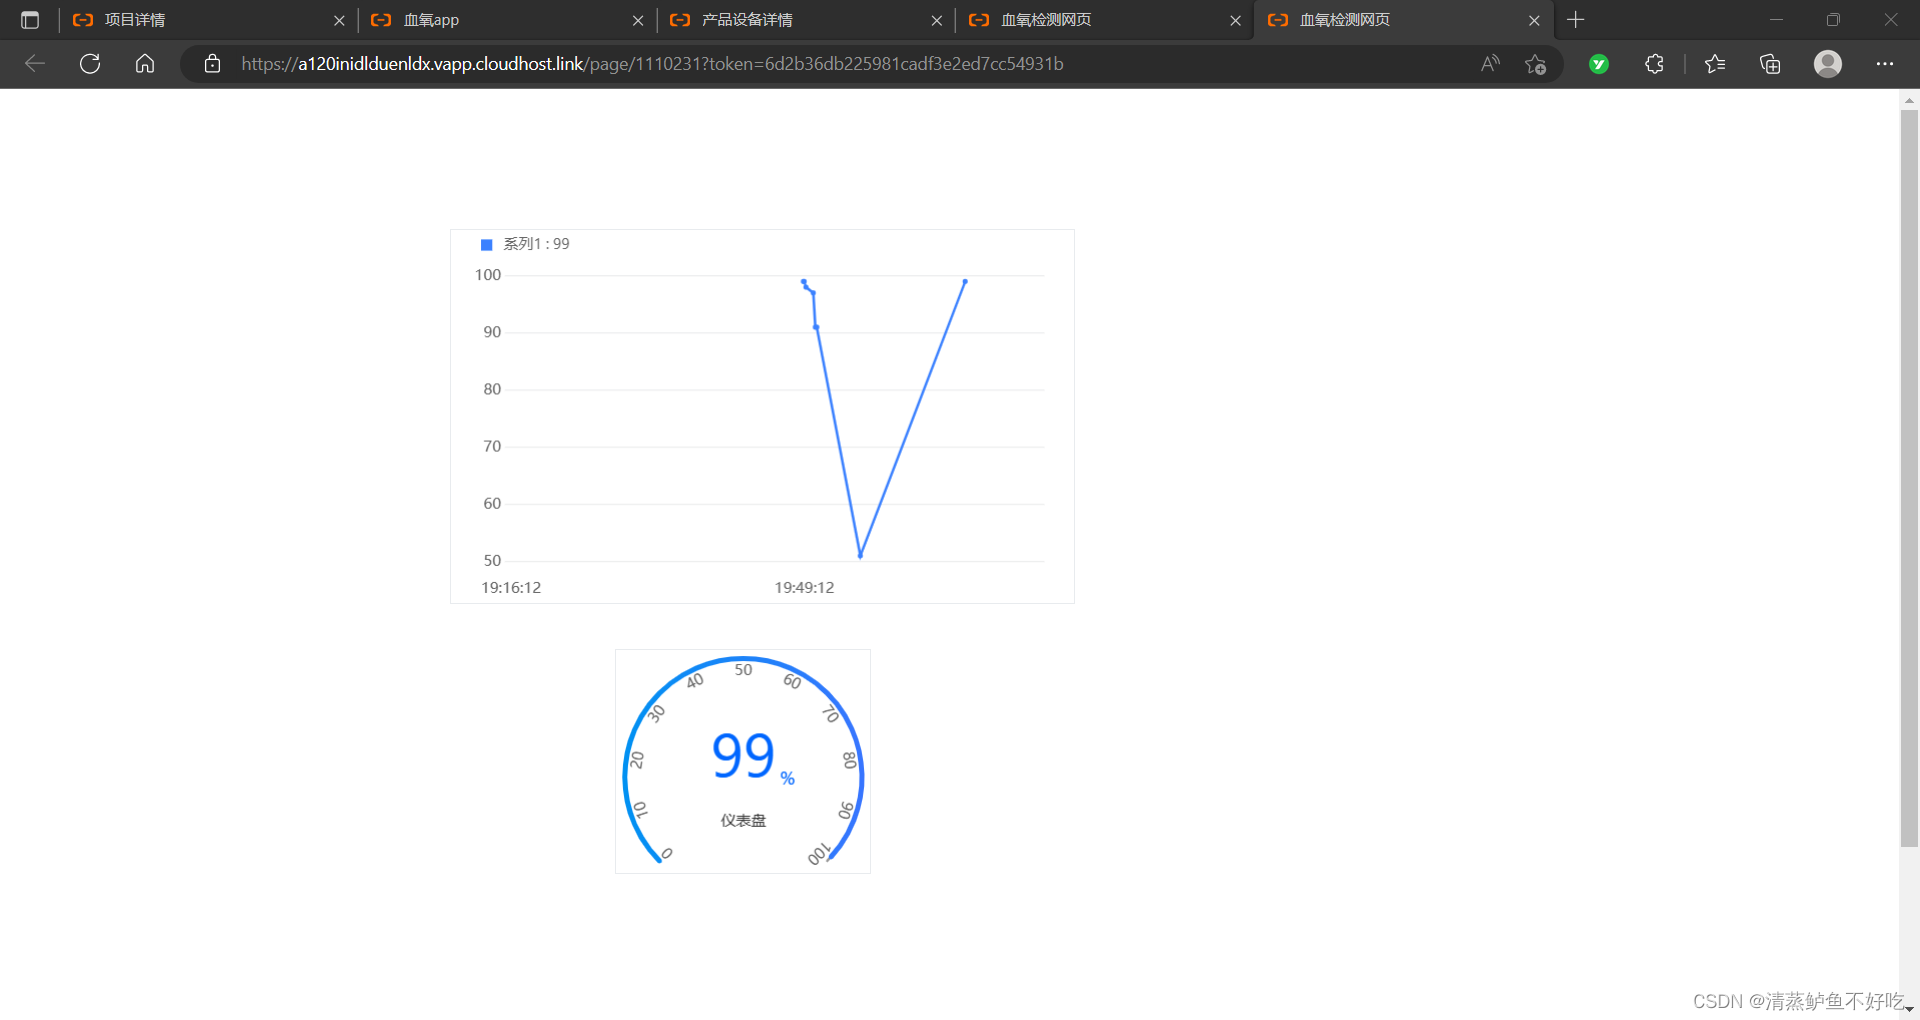
}阿里云我用的是物联网平台接收数据+物联网平台内置的lot Studio来实现网页上线显示数据

2、用点灯科技来实现app
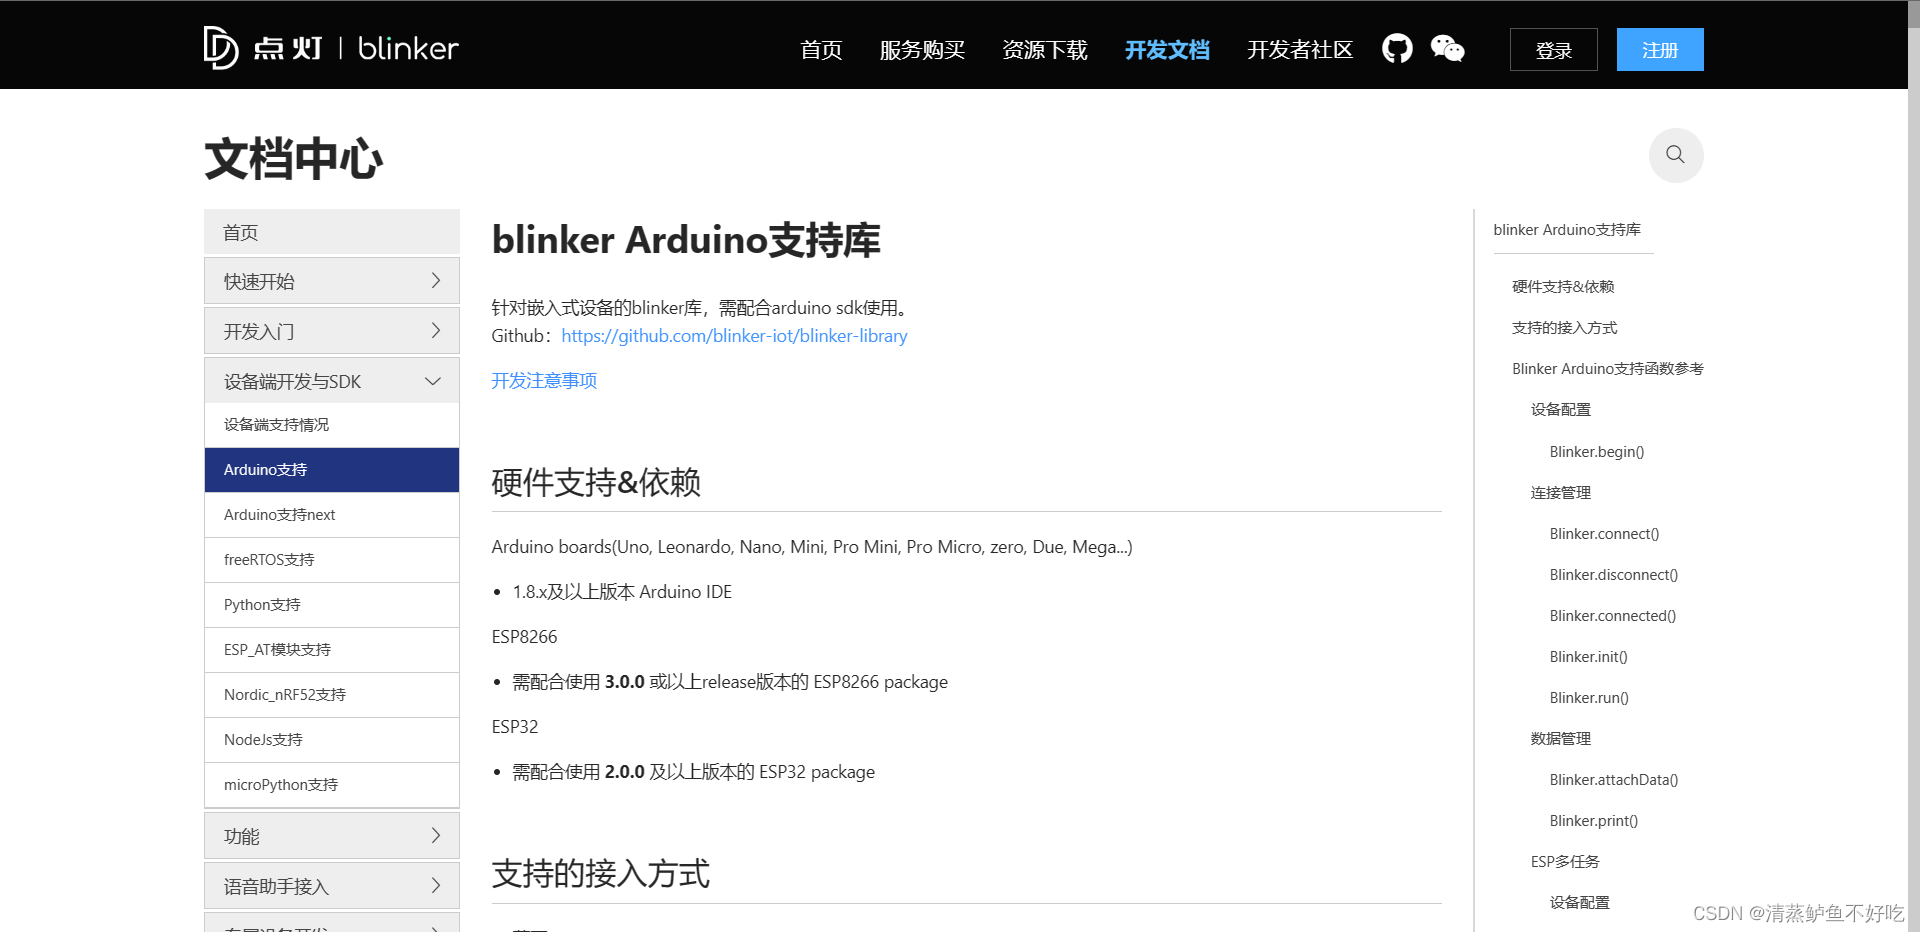
先直接上代码,用的是blinker库
#define BLINKER_PRINT Serial
#define BLINKER_WIFI

#include <Blinker.h>

char auth[] = "";
char ssid[] = "";
char pswd[] = "";

// 新建组件对象
BlinkerNumber Number1("num-gwy"); //xueyang
BlinkerNumber Number2("num-xoe"); //xinlv

void setup() {
  // put your setup code here, to run once:
  // 初始化串口
  Serial.begin(115200);

    // 初始化有LED的IO
    pinMode(LED_BUILTIN, OUTPUT);
    digitalWrite(LED_BUILTIN, HIGH);
    // 初始化blinker
    Blinker.begin(auth, ssid, pswd);
}

void loop() {
  Number1.print(93);    //血氧测试数据
  Blinker.run();
}
外面的资料都比较少,只能看官方文档
3、MAX30102
直接上代码
void setup() {
  // put your setup code here, to run once:
  // 初始化串口
    Serial.begin(115200);

    #if defined(BLINKER_PRINT)
        BLINKER_DEBUG.stream(BLINKER_PRINT);
    #endif

    // 初始化有LED的IO
    pinMode(LED_BUILTIN, OUTPUT);
    digitalWrite(LED_BUILTIN, HIGH);
    // 初始化blinker
    Blinker.begin(auth, ssid, pswd);

    // Initialize sensor
  if (!particleSensor.begin(Wire, I2C_SPEED_FAST)) //Use default I2C port, 400kHz speed
  {
    Serial.println(F("MAX30105 was not found. Please check wiring/power."));
    while (1);
  }
  byte ledBrightness = 60; //Options: 0=Off to 255=50mA
  byte sampleAverage = 4; //Options: 1, 2, 4, 8, 16, 32
  byte ledMode = 2; //Options: 1 = Red only, 2 = Red + IR, 3 = Red + IR + Green
  byte sampleRate = 100; //Options: 50, 100, 200, 400, 800, 1000, 1600, 3200
  int pulseWidth = 411; //Options: 69, 118, 215, 411
  int adcRange = 4096; //Options: 2048, 4096, 8192, 16384

  particleSensor.setup(ledBrightness, sampleAverage, ledMode, sampleRate, pulseWidth, adcRange); //Configure sensor with these settings

}

void loop() {
  // put your main code here, to run repeatedly:

  bufferLength = 100; //buffer length of 100 stores 4 seconds of samples running at 25sps

  //read the first 100 samples, and determine the signal range
  for (byte i = 0 ; i < bufferLength ; i++)
  {
    while (particleSensor.available() == false) //do we have new data?
      particleSensor.check(); //Check the sensor for new data

    redBuffer[i] = particleSensor.getRed();
    irBuffer[i] = particleSensor.getIR();
    particleSensor.nextSample(); //We're finished with this sample so move to next sample

    Serial.print(F("red="));
    Serial.print(redBuffer[i], DEC);
    Serial.print(F(", ir="));
    Serial.println(irBuffer[i], DEC);
  }

  //calculate heart rate and SpO2 after first 100 samples (first 4 seconds of samples)
  maxim_heart_rate_and_oxygen_saturation(irBuffer, bufferLength, redBuffer, &spo2, &validSPO2, &heartRate, &validHeartRate);

  //Continuously taking samples from MAX30102.  Heart rate and SpO2 are calculated every 1 second
  while (1)
  {
    //dumping the first 25 sets of samples in the memory and shift the last 75 sets of samples to the top
    for (byte i = 25; i < 100; i++)
    {
      redBuffer[i - 25] = redBuffer[i];
      irBuffer[i - 25] = irBuffer[i];
    }

    //take 25 sets of samples before calculating the heart rate.
    for (byte i = 75; i < 100; i++)
    {
      while (particleSensor.available() == false) //do we have new data?
        particleSensor.check(); //Check the sensor for new data

      digitalWrite(readLED, !digitalRead(readLED)); //Blink onboard LED with every data read

      redBuffer[i] = particleSensor.getRed();
      irBuffer[i] = particleSensor.getIR();
      particleSensor.nextSample(); //We're finished with this sample so move to next sample

      //send samples and calculation result to terminal program through UART
      //Serial.print(F("red="));
      //Serial.print(redBuffer[i], DEC);
      //Serial.print(F(", ir="));
      //Serial.print(irBuffer[i], DEC);

      Serial.print(F(", HR="));
      Serial.print(heartRate, DEC);

      Serial.print(F(", HRvalid="));
      Serial.print(validHeartRate, DEC);

      Serial.print(F(", SPO2="));
      Serial.print(spo2, DEC);

      Serial.print(F(", SPO2Valid="));
      Serial.println(validSPO2, DEC);
    }

    //After gathering 25 new samples recalculate HR and SP02
    maxim_heart_rate_and_oxygen_saturation(irBuffer, bufferLength, redBuffer, &spo2, &validSPO2, &heartRate, &validHeartRate);
  }

  Number1.print(spo2);
  Blinker.run();
}
但是不知道是不是模块问题还是我测量方式不对,好难测出准确的血氧数据= =