3、cuDNN和Pytorch安装
cmd 输入conda -V查看笔记本已安装的miniconda版本。
使用conda安装cuDNN和Pytorch
首先,cmd 输入conda create -n your_name jupyter notebook
创建一个名为your_name的虚拟环境,并且这个虚拟环境额外安装jupyter notebook第三方库。环境名为cjy。
随后,输入y进行安装:
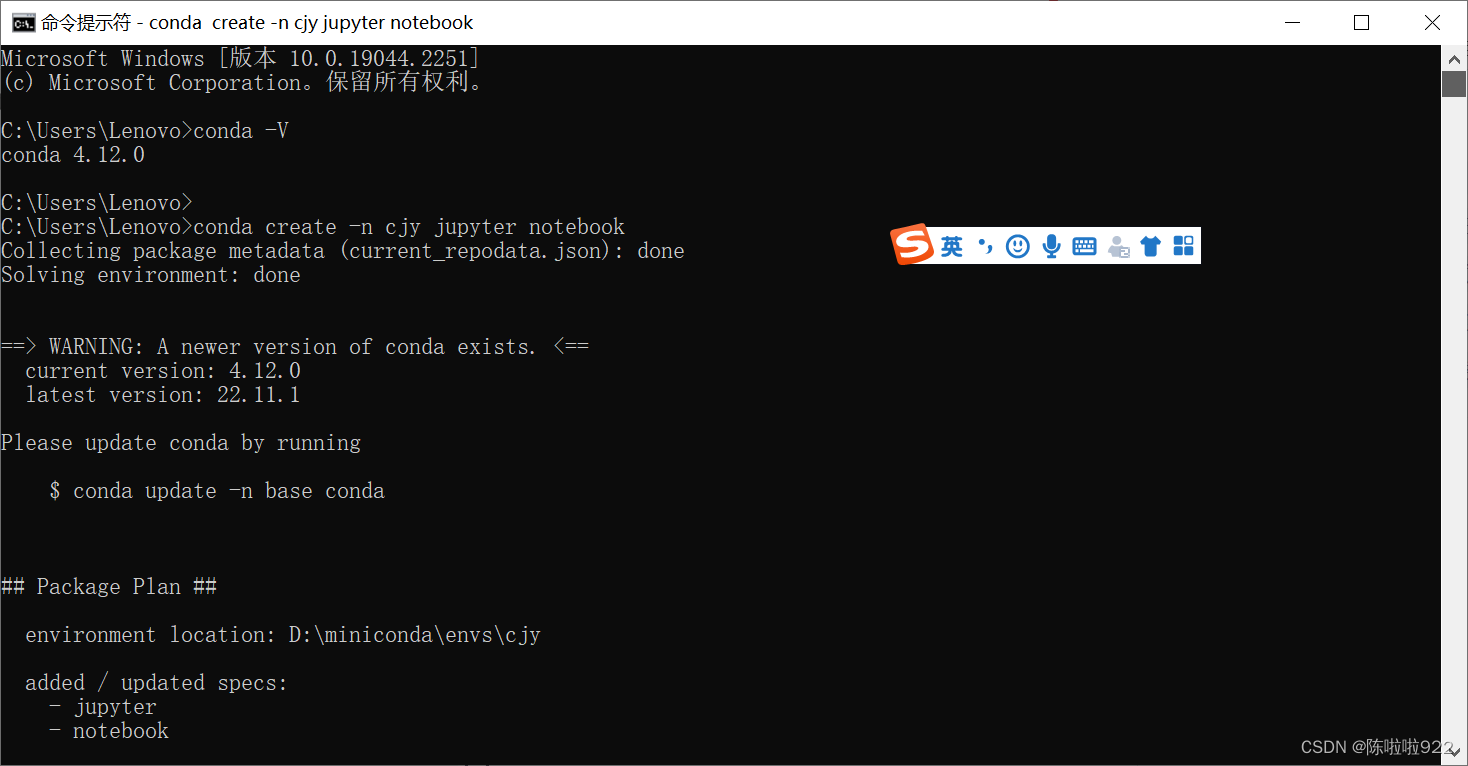
此处安装需要一段时间。。。。
安装好后,可以通过指令conda info -e查看已有环境情况。
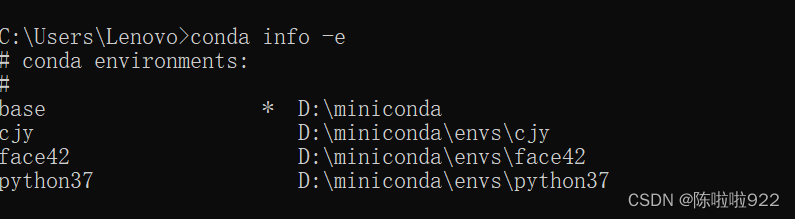
上图中有四个环境。base 基本安装环境,face42与python37是之前搞得,cjy是刚才创建的。新建环境的原因是,我们可以分开管理我们配置的环境。
安装好环境后,我们就可以激活cjy环境,并安装cuDNN和GPU版的Pytorch了。激活名为cjy的环境:
activate jack
在cjy环境中安装cuDNN conda install cudnn

还是安装了很久,啊啊啊

装好了
安装Pytorch,打开Pytorch官网(使用cuda 安装不成功)
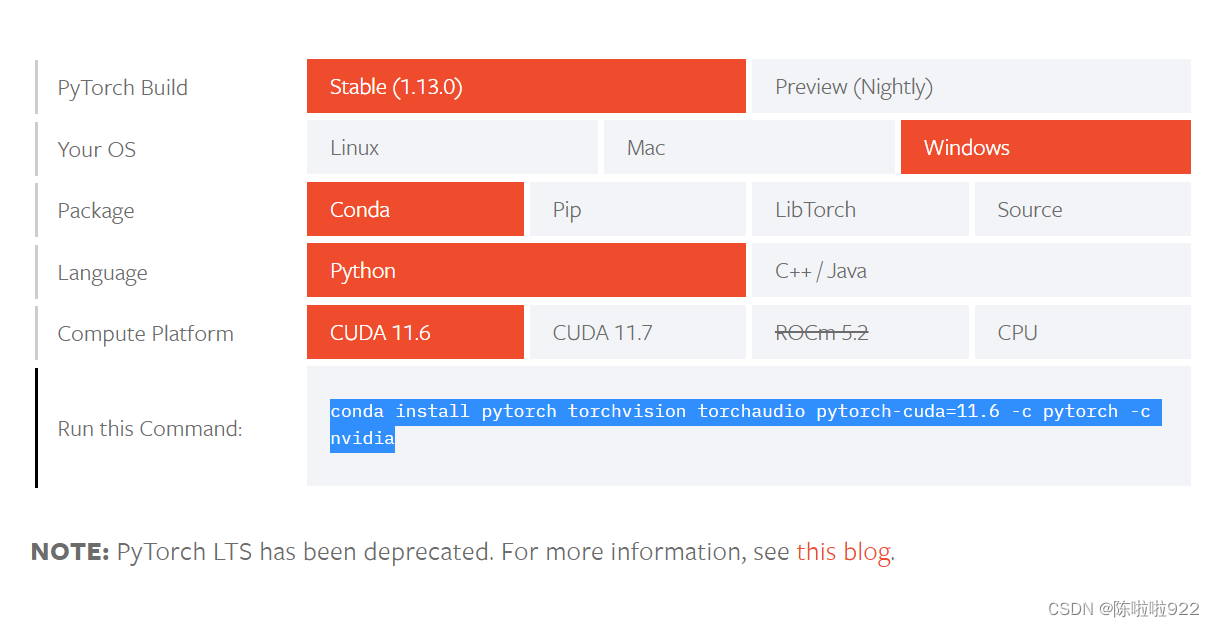
下面一行输入到cmd中cuda版本10.0
使用官网代码会报错 cuda版本过低,于是参照别人用cuda10.0版本的安装代码。
conda install pytorch torchvision torchaudio cudatoolkit=10.0 -c pytorch
又出现了一个错误。
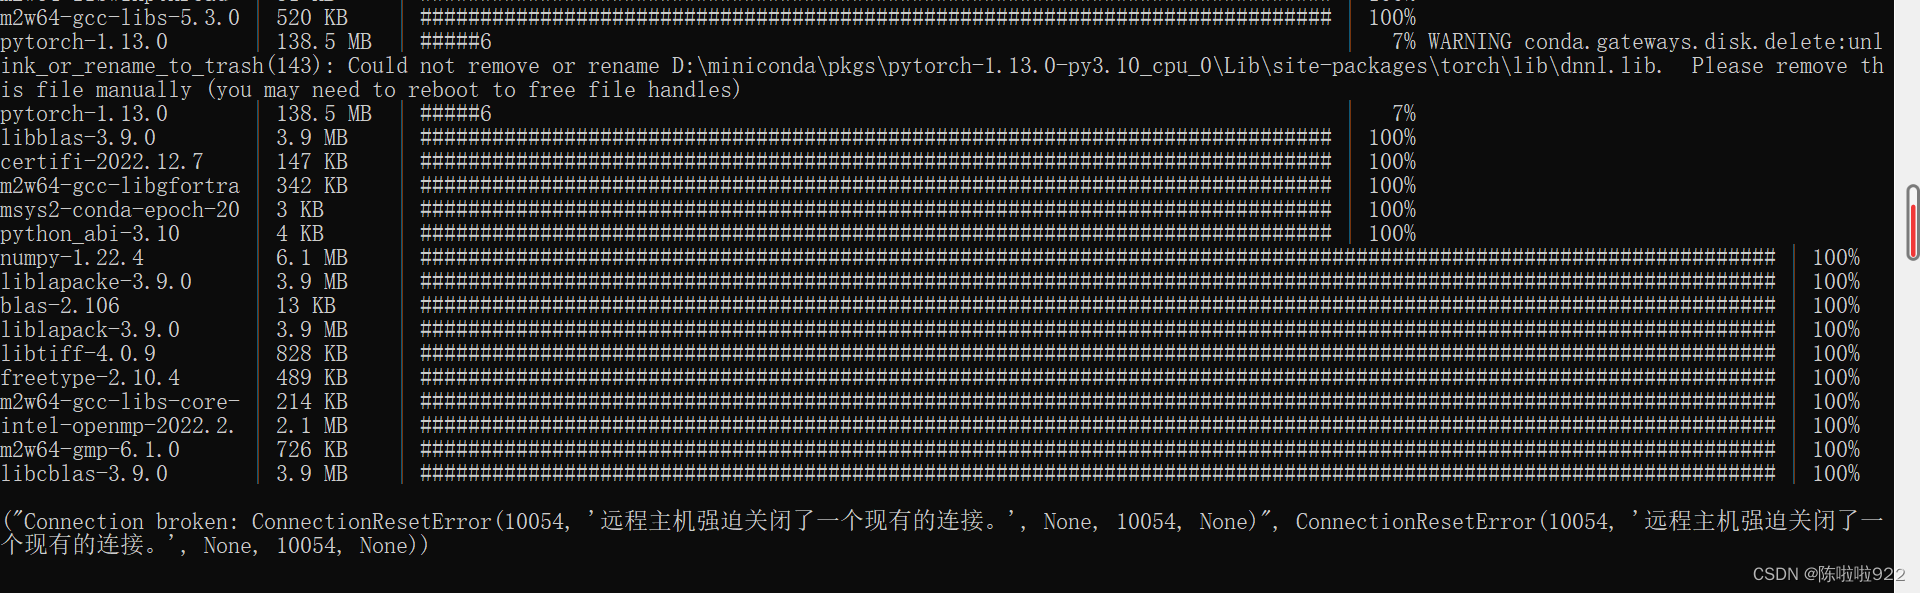
Downloaded bytes did not match Content-Length
使用pip安装:
#查看cudnn 版本
nvcc -V
#查看cuda版本
set cuda
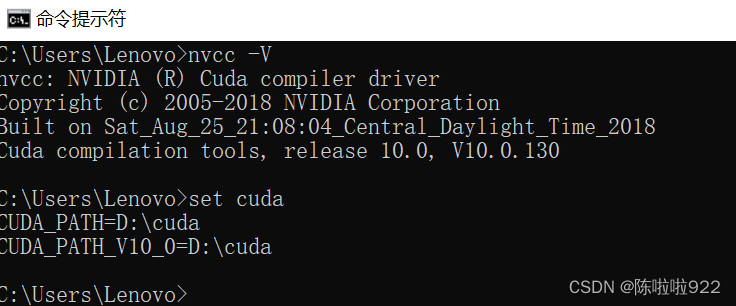
cuda为10.0版本
进入pytorch官网:https://pytorch.org,下载对应版本(PyTorch和CUDA版本对应关系)
使用pip安装

pycharm终端,报错
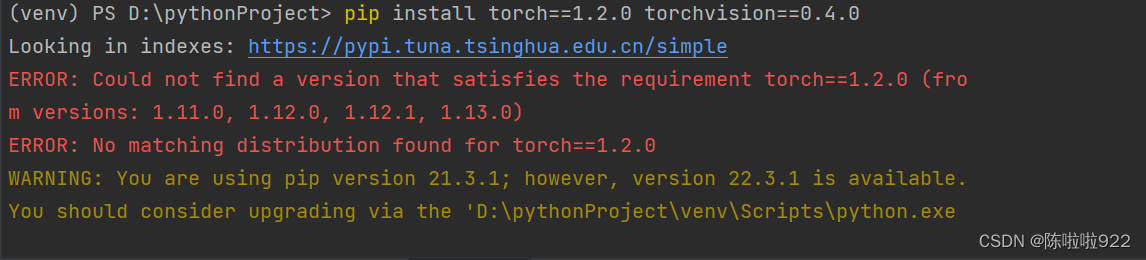
解决办法1:更新pip python -m pip install --upgrade pip
pip install torch==0.4.1 -f https://download.pytorch.org/whl/torch_stable.html
还是不行12.13总结 pytorch安装不行