由于为了更好演示,文章中有很多动图,所以文章存储有限分为几篇
那么我需要设置控件的属性,可以在代码中修改也可以在右侧属性中更改:例如以下我修改text文本等属性

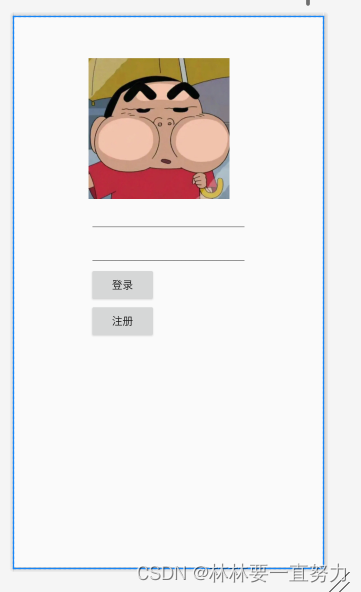
以下我快速的演示一下 做一个简单的登陆界面


第二种是LinearLayout布局,在期末中可以应对95%的界面布局情况,适合新手,且代码量不多,实现效果好
首先要明白布局排列方式包括了横向(水平)与竖向(垂直),例如下图,而且该图片中很明显用到了5个控件,都是竖向(垂直)排列的所以我们用LinearLayout只需要设置
orientation="vertical"那么这个也是LinearLayout一个最重要的属性,并且缺少这个属性布局也会报错
那么水平(横向)排列呢?
android:orientation="horizontal"
所以比如上一个使用ConstraintLayout布局实现的简单登录,我可以使用LinearLayout来编写:代码如下:
<?xml version="1.0" encoding="utf-8"?>
<LinearLayout xmlns:android="http://schemas.android.com/apk/res/android"
    xmlns:app="http://schemas.android.com/apk/res-auto"
    xmlns:tools="http://schemas.android.com/tools"
    android:layout_width="match_parent"
    android:layout_height="match_parent"
    android:orientation="vertical"
    tools:context=".MainActivity70">

    <ImageView
        android:id="@+id/imageView6"
        android:layout_width="187dp"
        android:layout_height="187dp"
        android:layout_marginStart="99dp"
        android:layout_marginTop="56dp"

        app:srcCompat="@drawable/a111" />

    <EditText
        android:id="@+id/editTextTextPassword3"
        android:layout_width="wrap_content"
        android:layout_height="wrap_content"
        android:layout_marginStart="100dp"
        android:ems="10"
        android:inputType="textPassword" />

    <EditText
        android:id="@+id/editTextTextEmailAddress2"
        android:layout_width="wrap_content"
        android:layout_height="wrap_content"
        android:ems="10"
        android:layout_marginStart="100dp"
        android:inputType="textEmailAddress" />

    <Button
        android:id="@+id/button14"
        android:layout_width="wrap_content"
        android:layout_height="wrap_content"
        android:text="登录"
        android:layout_marginStart="100dp" />

    <Button
        android:id="@+id/button15"
        android:layout_width="wrap_content"
        android:layout_height="wrap_content"
        android:text="注册"
        android:layout_marginStart="100dp" />
</LinearLayout>