SpringCloud它是一款分布式微服务框架。两个概念,一个分布式,一个微服务,顾名思义,名字和其意思一模一样。
学SpringCloud之前需要先了解SpringBoot,因为它是在SpringBoot的基础上,下面直接开始。
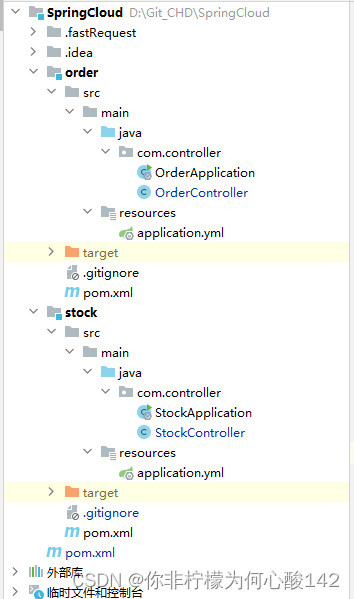
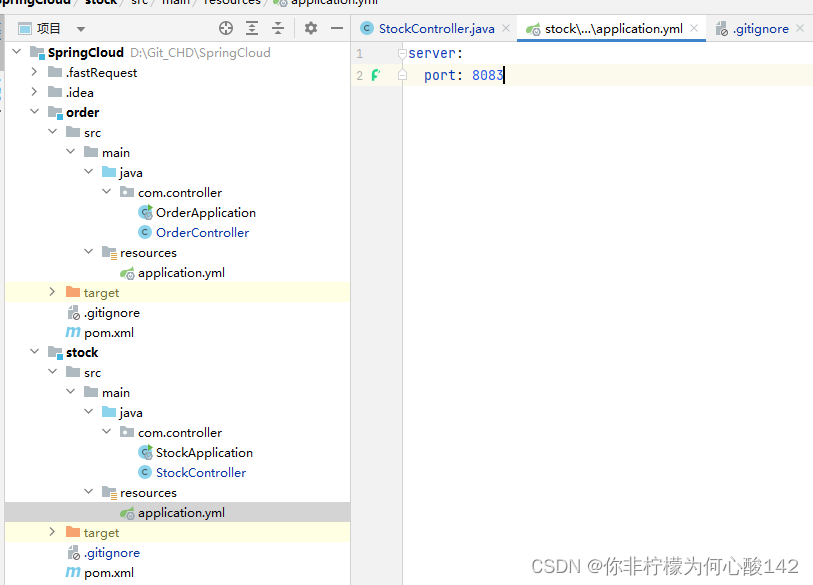
首先我们需要一个maven的父项目。下图SpringCloud为一个父工程,order与stock为两个子模块
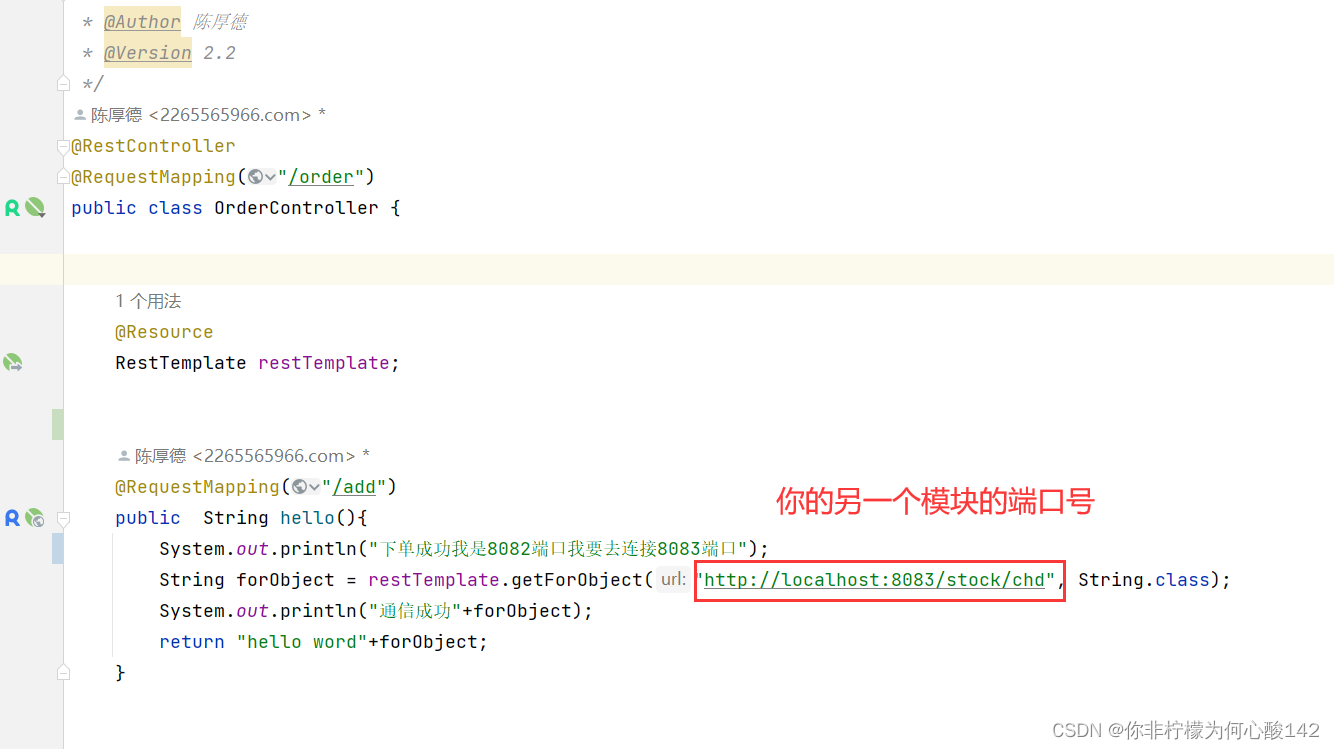
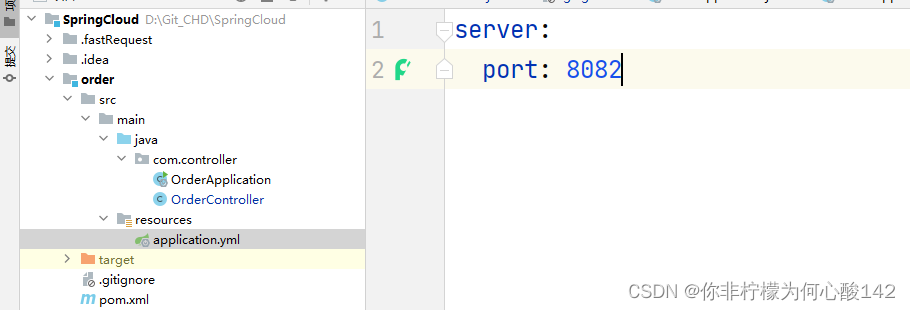
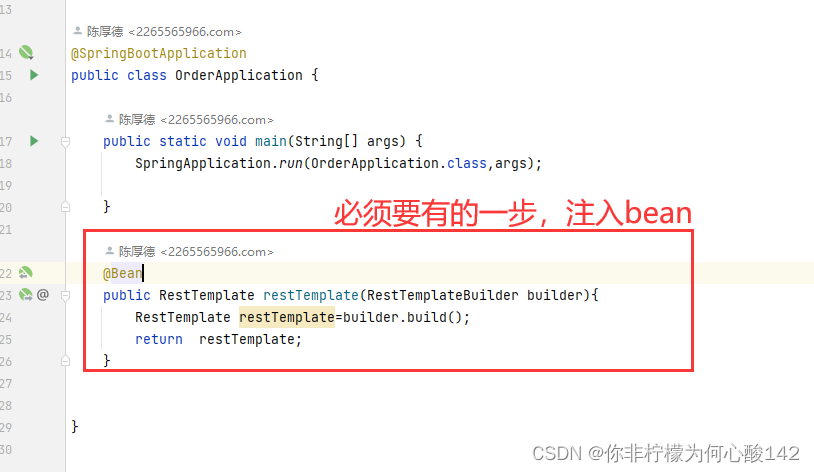
项目结构如上,我们在每个模块里面新建一个controller层并新建一个文件,下面分别是两个controller的代码。以及端口号,还需要注入Bean
package com.controller;
import jakarta.annotation.Resource;
import org.springframework.beans.factory.annotation.Autowired;
import org.springframework.web.bind.annotation.RequestMapping;
import org.springframework.web.bind.annotation.RestController;
import org.springframework.web.client.RestTemplate;
/**
* @Author 陈厚德
* @Version 2.2
*/
@RestController
@RequestMapping("/order")
public class OrderController {
@Resource
RestTemplate restTemplate;
@RequestMapping("/add")
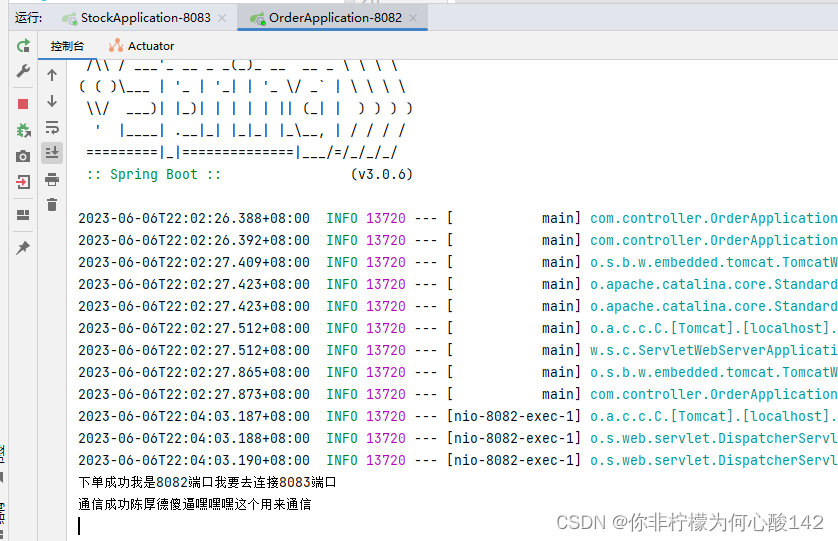
public String hello(){
System.out.println("下单成功我是8082端口我要去连接8083端口");
String forObject = restTemplate.getForObject("http://localhost:8083/stock/chd", String.class);
System.out.println("通信成功"+forObject);
return "hello word"+forObject;
}
}
接下来是stock的编写,只需要与另外一个模块的路径对应上就行

到这里就编写玩了,下面是运行效果。两个模块我们都可以启动,SpringBoot是支持的,所以不用担心。接下来我们就可以输入端口号。下面我就可以输入端口号进行测试了


到这里我们的SpringCloud就完成了,主要表现为两个模块之间的通信,希望能帮到各位小伙伴