前面的富文本编辑器Ueditor实战(一)和富文本编辑器Ueditor实战(二)-图片上传简单介绍了Ueditor能做啥以及Ueditor的简单配置。实际项目中,我们会结合具体的技术栈来进行扩展,本文以Springboot单体架构为例,前端使用thymeleaf集成ueditor。通过本文,您可了解springboot如何集成ueditor,如何自定义扩展后端的文件上传功能。
环境说明:
springboot2.2.13.RELEASE+jdk1.8+maven3.3.9+thymeleaf2.3.13+ueditor1.4.3
第一步、创建springboot项目以及pom.xml 配置
<project xmlns="http://maven.apache.org/POM/4.0.0"
	xmlns:xsi="http://www.w3.org/2001/XMLSchema-instance"
	xsi:schemaLocation="http://maven.apache.org/POM/4.0.0 http://maven.apache.org/xsd/maven-4.0.0.xsd">
	<modelVersion>4.0.0</modelVersion>
	<groupId>com.yelang</groupId>
	<artifactId>boot-ueditor</artifactId>
	<version>1.0.0</version>
	<name>ueditor with springboot</name>
	<description>ueditor集成springboot案例,集成图片上传等功能</description>
    <properties>
		<project.build.sourceEncoding>UTF-8</project.build.sourceEncoding>
	</properties>
	<parent>
		<groupId>org.springframework.boot</groupId>
		<artifactId>spring-boot-starter-parent</artifactId>
		<version>2.2.13.RELEASE</version>
	</parent>
	<dependencies>
		<dependency>
			<groupId>org.springframework.boot</groupId>
			<artifactId>spring-boot-starter-web</artifactId>
		</dependency>
		<dependency>
			<groupId>org.springframework.boot</groupId>
			<artifactId>spring-boot-starter-test</artifactId>
			<scope>test</scope>
		</dependency>
		<dependency>
			<groupId>org.springframework.boot</groupId>
			<artifactId>spring-boot-starter-thymeleaf</artifactId>
		</dependency>
		<dependency>
		    <groupId>org.projectlombok</groupId>
		    <artifactId>lombok</artifactId>
		    <scope>provided</scope>
		</dependency>
        <dependency>
            <groupId>com.github.theborakompanioni</groupId>
            <artifactId>thymeleaf-extras-shiro</artifactId>
            <version>2.0.0</version>
        </dependency>
	</dependencies>
</project>
系统配置文件说明:
# 项目相关配置
system:
  # 名称
  name: boot-ueditor
  # 版本
  version: 1.0.0
  # 文件路径 示例( Windows配置D:/boot-ueditor,Linux配置 /home/boot-ueditor)
  profile: D:/boot-ueditor

server:
  port: 8080

spring:
  thymeleaf:
    cache: false
    encoding: UTF-8
    mode: HTML
    #prefix: classpath:/templates/
    #suffix: .html
    servlet:
      content-type: text/html
  # 文件上传
  servlet:
     multipart:
       # 单个文件大小
       max-file-size:  50MB
       # 设置总上传的文件大小
       max-request-size:  300MB
第二步、工程目录结构大致如下:

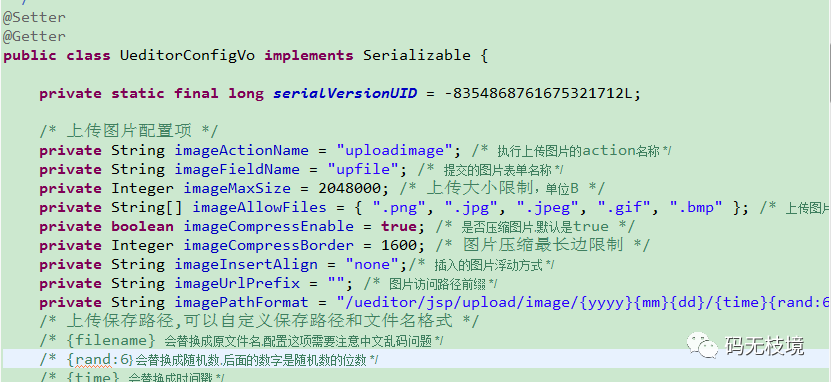
第三步、修改自定义的json配置,使用后台bean的方式进行配置。首先定义一个普通的javaBean,如下:
在controller中定义ueditor配置文件的访问接口
    @GetMapping(value="/opt",params="action=config")
	@ResponseBody
    public Object config() {
		UeditorConfigVo config = new UeditorConfigVo();
		String urlPrefix = Constants.RESOURCE_PREFIX+"/upload/";
		config.setImageUrlPrefix(urlPrefix);
		config.setVideoUrlPrefix(urlPrefix);
		config.setFileUrlPrefix(urlPrefix);
		return config;
    }
在这里,设置映射的静态资源目录为图片、视频、附件等资源的访问前缀,在文件上传成功后直接返回访问的前缀即可。
第四步、thymeleaf页面定义,引入相关的js资源
<!DOCTYPE html>
<html lang="zh" xmlns:th="http://www.thymeleaf.org">
<head>
<title>springboot整合thymeleaf和ueditor实例</title>
<meta http-equiv="Content-Type" content="text/html;charset=utf-8" />
<script type="text/javascript" charset="utf-8"
	th:src="@{/ueditor1_4_3_3/ueditor.config.js?v=1.4.3.3}"></script>
<script type="text/javascript" charset="utf-8"
	th:src="@{/ueditor1_4_3_3/ueditor.all.js?v=1.4.3.3}">

</script>
<!--建议手动加在语言,避免在ie下有时因为加载语言失败导致编辑器加载失败-->
<!--这里加载的语言文件会覆盖你在配置项目里添加的语言类型,比如你在配置项目里配置的是英文,这里加载的中文,那最后就是中文-->
<script type="text/javascript" charset="utf-8"
	th:src="@{/ueditor1_4_3_3/lang/zh-cn/zh-cn.js?v=1.4.3.3}"></script>

<style type="text/css">
div {
	width: 100%;
}
</style>
</head>
<body>
	<div>
		<script id="editor" type="text/plain"
			style="width: 100%; height: 500px;"></script>
	</div>
	<script th:inline="javascript">
	    var url = [[@{/ueditor/opt}]];
		//实例化编辑器
		//建议使用工厂方法getEditor创建和引用编辑器实例,如果在某个闭包下引用该编辑器,直接调用UE.getEditor('editor')就能拿到相关的实例
		var ue = UE.getEditor('editor',{serverUrl: url});
	</script>
</body>
</html>
第五步、自定义后台文件上传接收器
@PostMapping(value="/opt",params="action=uploadimage")
@ResponseBody
public Map<String,String> uploadImage(@RequestParam("upfile") MultipartFile file) throws IOException {
	return this.fileProcess(file);
}

@PostMapping(value="/opt",params="action=uploadvideo")
@ResponseBody
public Map<String,String> uploadVideo(@RequestParam("upfile") MultipartFile file) throws IOException {
	return this.fileProcess(file);
}

@PostMapping(value="/opt",params="action=uploadfile")
@ResponseBody
public Map<String,String> uploadFile(@RequestParam("upfile") MultipartFile file) throws IOException {
	return this.fileProcess(file);
}

private Map<String,String> fileProcess(MultipartFile file) throws FileSizeLimitExceededException, IOException{
    	Map<String,String> map = new HashMap<String, String>(4);
        String originalFilename = file.getOriginalFilename();
        String fileType = originalFilename.substring(originalFilename.lastIndexOf("."));
	    String fileName = FileUploadUtils.upload(SysConfig.getUploadPath() + "/",file,fileType);
	    map.put("state", "SUCCESS");
	    map.put("url", fileName);
	    map.put("title", originalFilename);
	    map.put("original", originalFilename);
		return map;
  }
上述代码采用params参数来区分不同的请求,前台也可以设置后台指定一个固定的上传接口即可(可参考官方的说明)。
通过以上的实例可以完成自定义的图片、附件等上传的功能,并且可以在前台看到上传的资源在富文本编辑器中。最后的效果图如下:

ps:有兴趣的朋友可以试下mp4资源的上传是什么效果。怎么解决mp4上传后的问题,后续会再出一篇博文进行详细的介绍,欢迎关注。