创建一个最基本的Activity

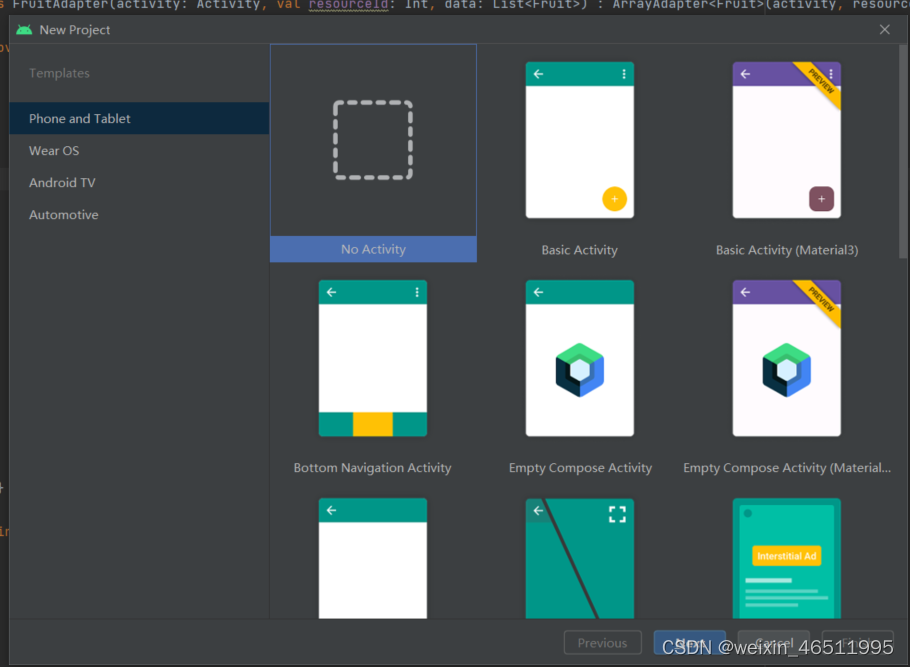
打开Android Studio点击file--->New Project,选择No Activity创建一个空的Activity
点击nex他,等项目创建好之后,在com.example.listviewtest右键点击New->Activity->Empty Activity
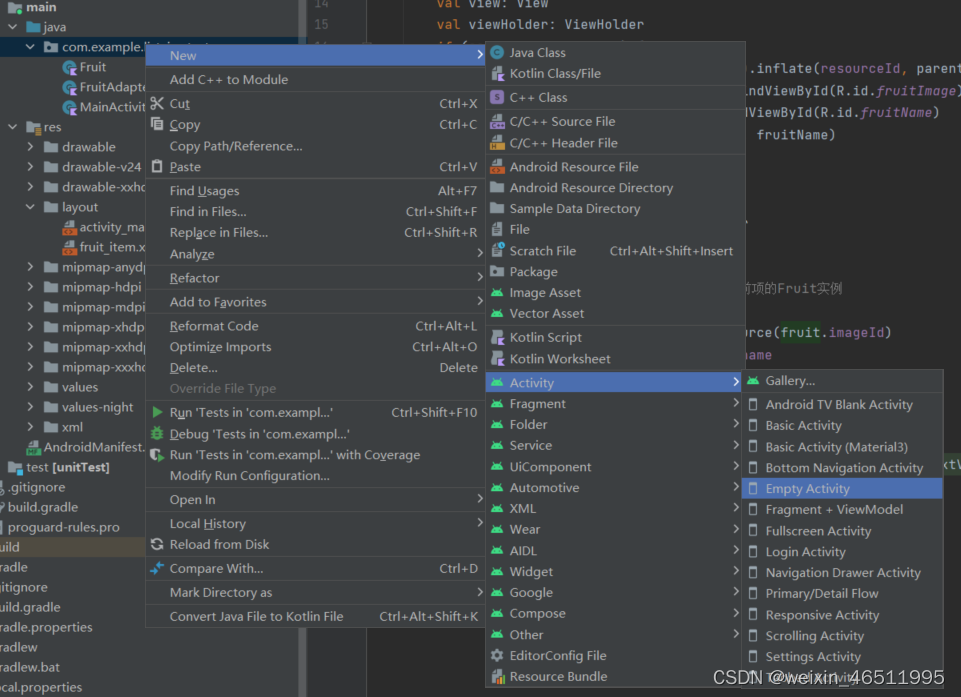
勾选Generate a Layout File让Android Studio自动帮我们创建一个layout布局xml文件

这时再去AndroidManifest.xml里面注册刚刚创建的Activity(一般AndroidStudio会自动注册),如果这是这个空项目里面第一个Activity(Android:name是来指定具体注册哪一个Activity),但是现在项目还是启动不起来,因为还没有配置主Activity,所以在标签<activity>里面加入<intent-filter>标签并在这个标签里面添加<action>和<category>
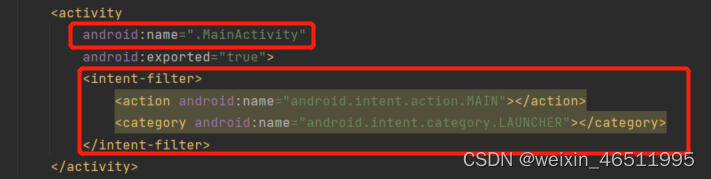
       <activity
            android:name=".MainActivity"
            android:exported="true">
            <intent-filter>
                <action android:name="android.intent.action.MAIN"></action>
                <category android:name="android.intent.category.LAUNCHER"></category>
            </intent-filter>
        </activity>
在app目录下的build.gradle中在加入一个kotlion插件
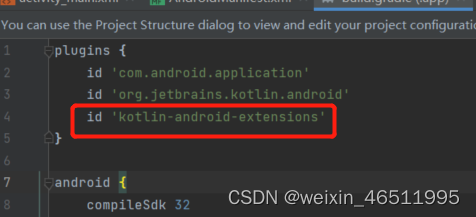
id 'kotlin-android-extensions'现在这个Activity已经创建好了,我们在创建的Activity里面试一下
首先在layout文件夹中该Activity的.xml文件里面添加了一个Button元素
<?xml version="1.0" encoding="utf-8"?>
<LinearLayout xmlns:android="http://schemas.android.com/apk/res/android"
    android:orientation="vertical"
    android:layout_width="match_parent"
    android:layout_height="match_parent">

    <Button
        android:id="@+id/button1"
        android:layout_width="match_parent"
        android:layout_height="wrap_content"
        android:text="BUTTON1"
        />

</LinearLayout>
然后在Button元素内部添加了几个属性,android:id是给当前的元素定义一个唯一的标识符,之后可以在代码里面对这个元素进行操作,android:layout_width指定当前元素的宽度这里使用match_parent表示让当前元素和父元素一样宽,android:layout_height指定当前元素的高度,这里使用wrap_content表示当前元素的高度只要能刚好包含里面的内容就行,Android:text指定了元素中显示的内容
然后去Activity里面加载这个布局
class FirstActivity : BaseActivity() {
    override fun onCreate(savedInstanceState: Bundle?) {
        super.onCreate(savedInstanceState)
        Log.d("FirstActivity", "Task id is $taskId")
        setContentView(R.layout.XXXX_layout)


}
最后运行一下