这里写目录标题
前言
最近在写app的时候,需要将tabbar导航栏中间的发布按钮设置为大图标,于是就和我另一个伙伴一起研究这个功能。有两种实现方式:①通过设置midButton属性放大图标,通过调用uni.onTabBarMidButtonTap实现页面跳转;②通过设置tabbar-list对应的iconfont属性,将图标转换为字体图标。具体实现如下。
方法一:midButton的使用
官方描述:
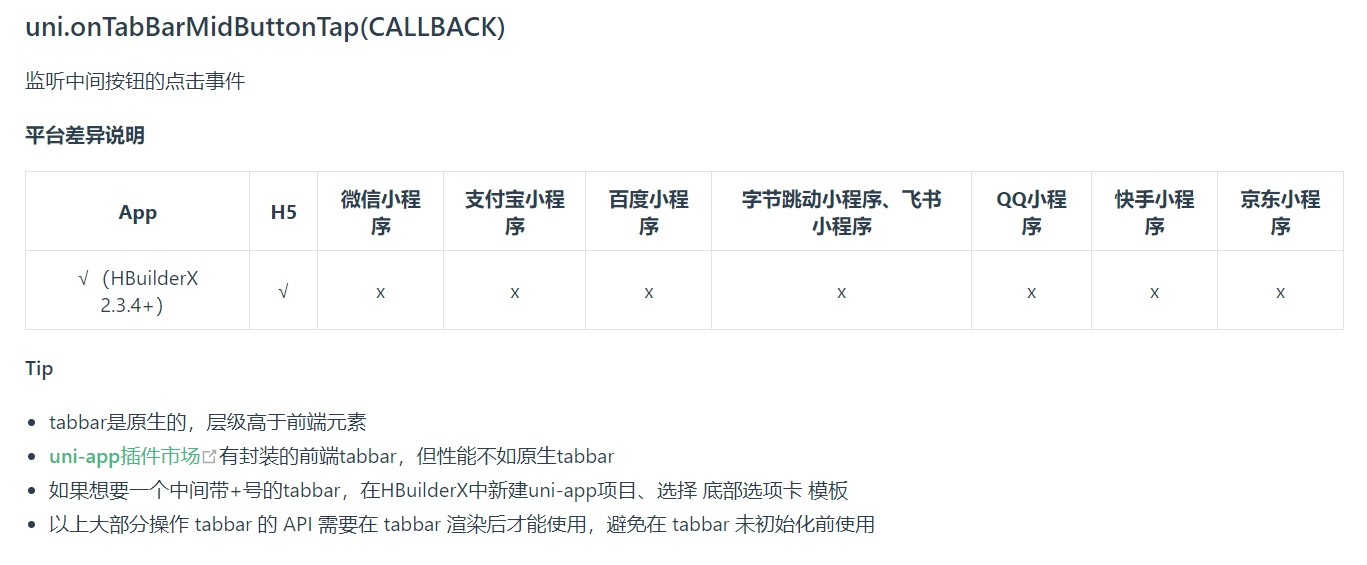
官方文档:uni.onTabBarMidButtonTap(CALLBACK)
使用说明:
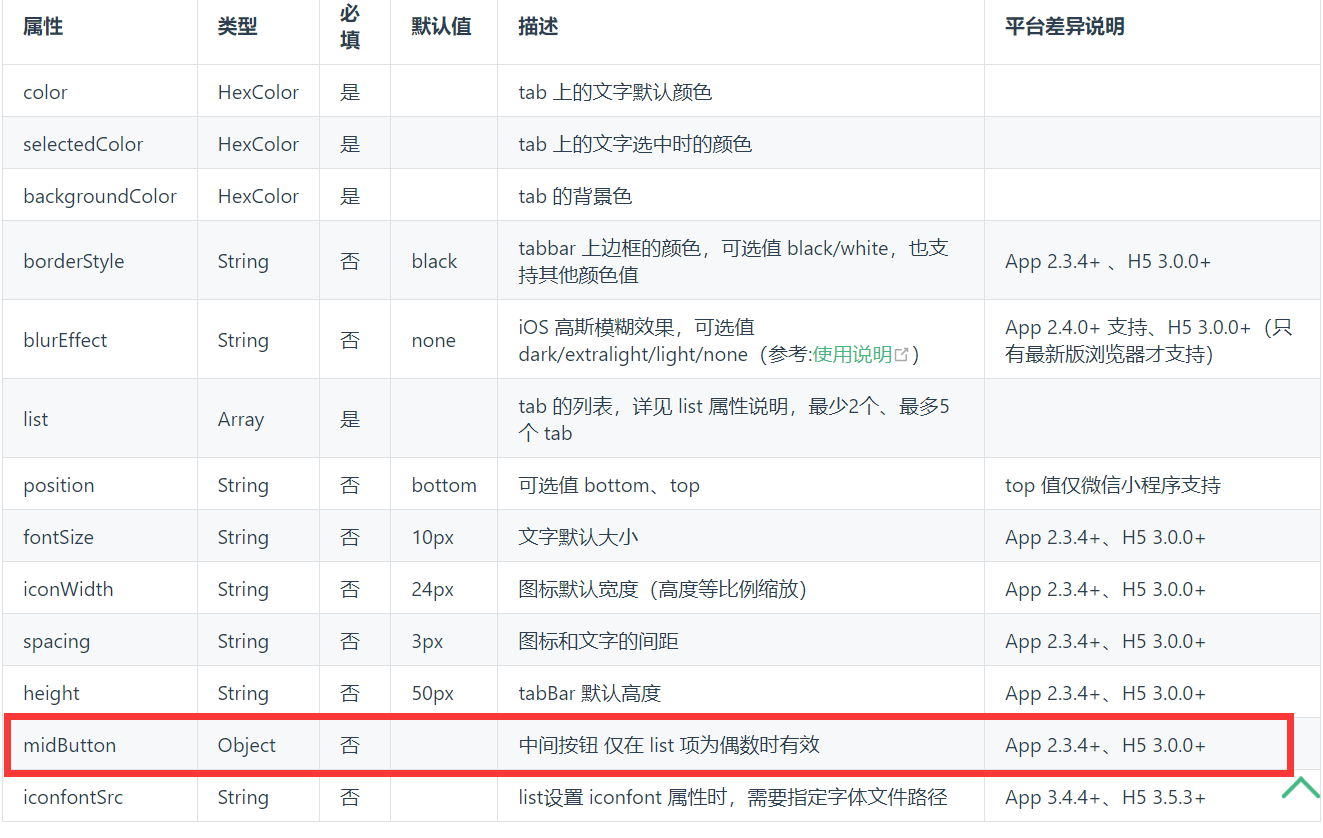
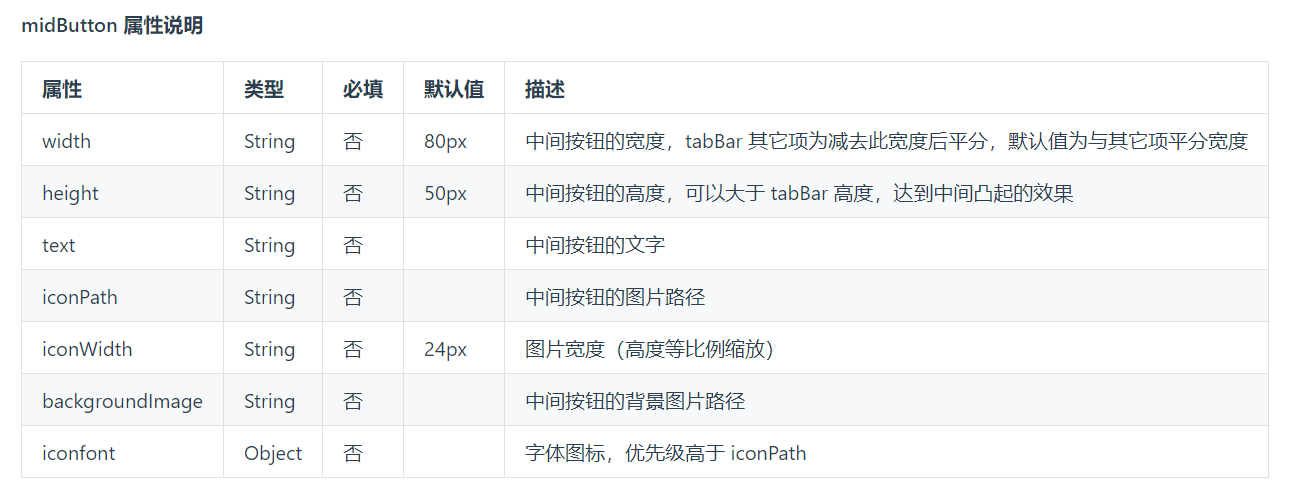
uniapp官方推出midButton属性,可以用来实现中间按钮样式的自定义,使用时需要注意list必须是偶数,也就是在tabbar-list数组中定义的导航数为偶数。且midButton中没有pagePath的属性,所以我们需要调用uni.onTabBarMidButtonTap()来实现页面跳转(uni.onTabBarMidButtonTap只支持app,所以使用midButton需要跳转的话,记得加上条件判断)。
代码展示:
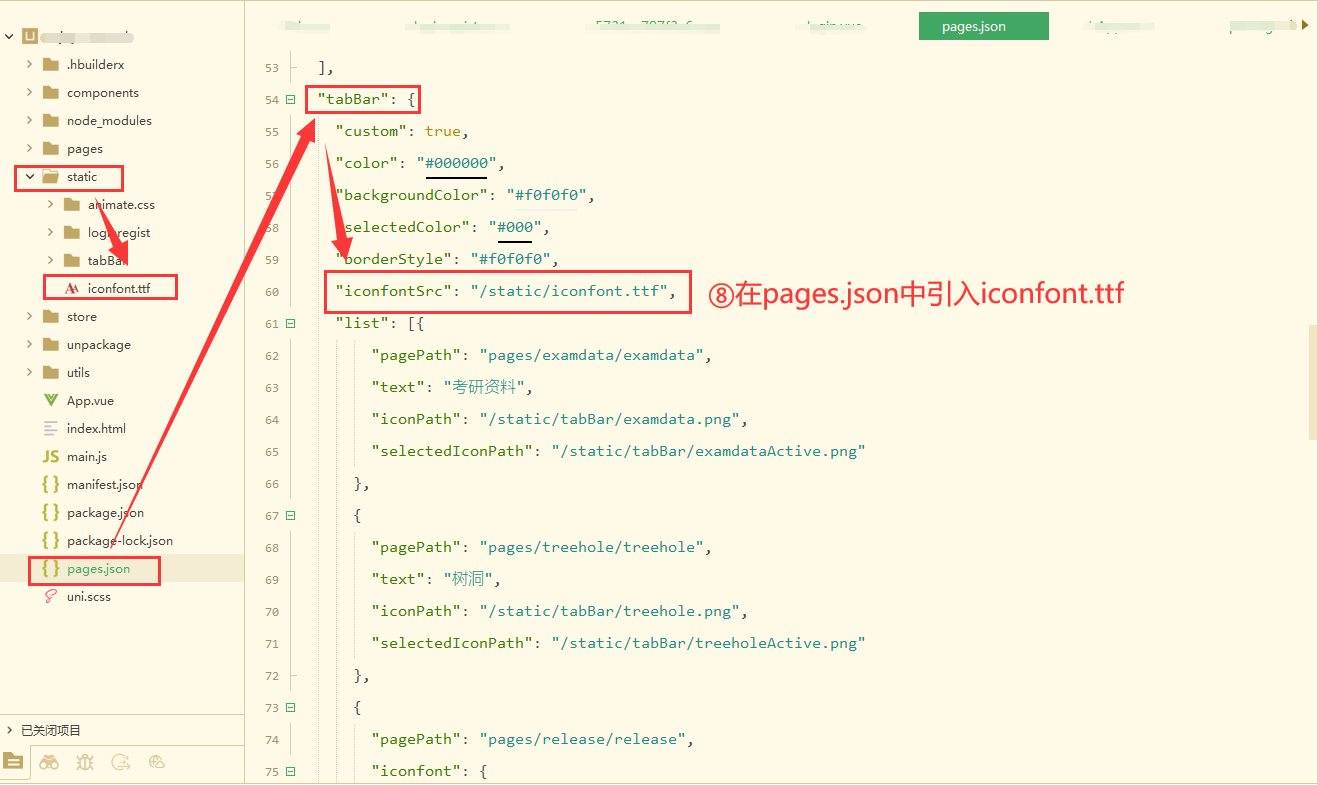
pages.json
{


...
"tabBar": {


    "custom": true,
    "color": "#000000",
    "backgroundColor": "#f0f0f0",
    "selectedColor": "#a9f3f8",
    "borderStyle": "#f0f0f0",
    "list": [{


        "pagePath": "pages/examdata/examdata",
        "text": "资料",
        "iconPath": "/static/tabBar/examdata.png",
        "selectedIconPath": "/static/tabBar/examdataActive.png"
      },
      {


        "pagePath": "pages/treehole/treehole",
        "text": "树洞",
        "iconPath": "/static/tabBar/treehole.png",
        "selectedIconPath": "/static/tabBar/treeholeActive.png"
      },
      {


        "pagePath": "pages/tutorship/tutorship",
        "text": "辅导",
        "iconPath": "/static/tabBar/tutorship.png",
        "selectedIconPath": "/static/tabBar/tutorshipActive.png"
      },
      {


        "pagePath": "pages/mypage/mypage",
        "text": "我的",
        "iconfont": {


        },
        "iconPath": "/static/tabBar/mypage.png",
        "selectedIconPath": "/static/tabBar/mypageActive.png"
      }
    ],
    "midButton": {


      "width": "60px",
      "height": "60px",
      "iconWidth": "50px",
      "iconPath": "/static/tabBar/release.png"
    }
  },
  ...
}
app.vue
<script>
  export default {


    onLaunch: function() {


      console.log('App Launch')
      //在
      uni.onTabBarMidButtonTap(() => {


        uni.navigateTo({


          url: '/pages/release/release',
        });
      })
    },
    onShow: function() {


      console.log('App Show')
    },
    onHide: function() {


      console.log('App Hide')
    }
  }
</script>
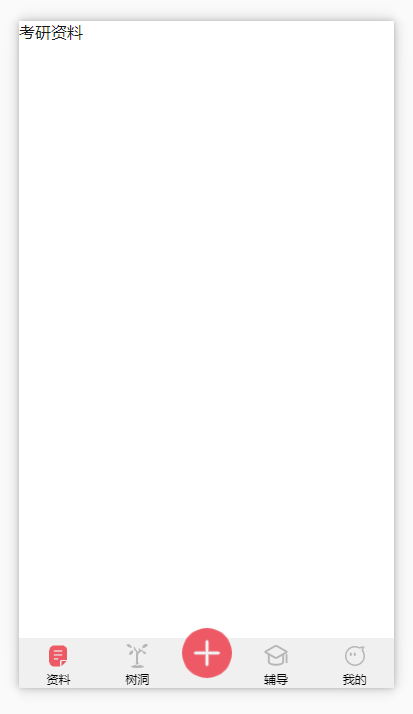
效果展示:
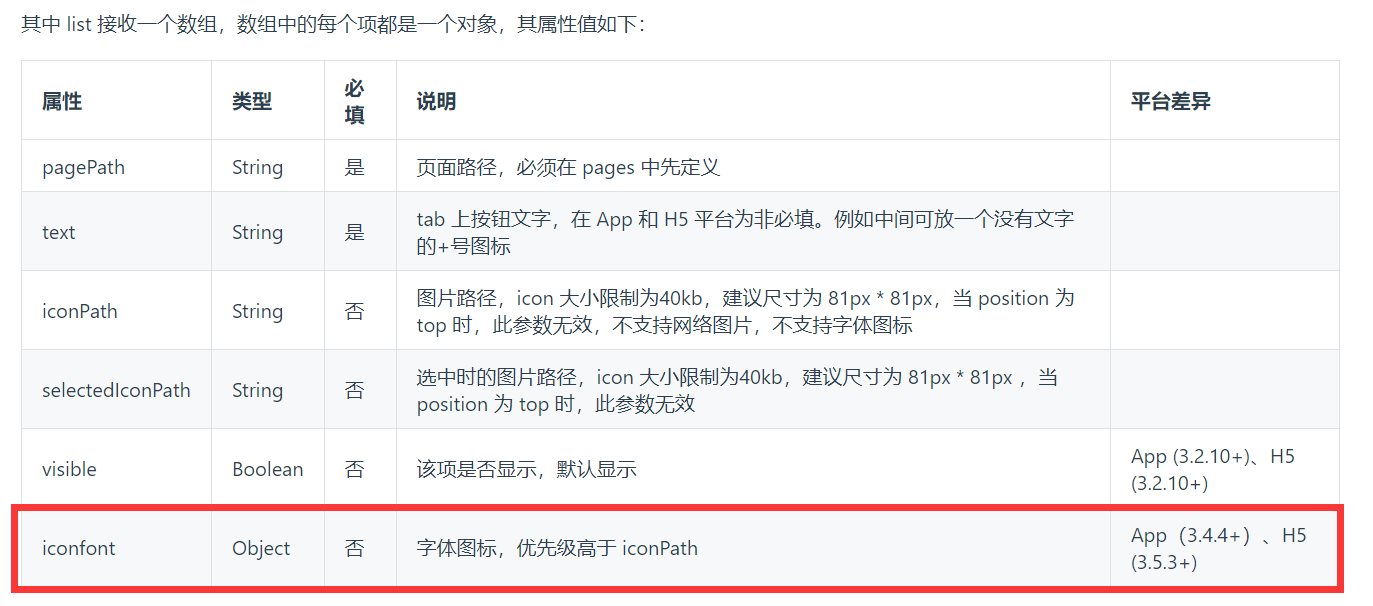
方法二:iconfont的使用
官方文档: css语法-字体图标
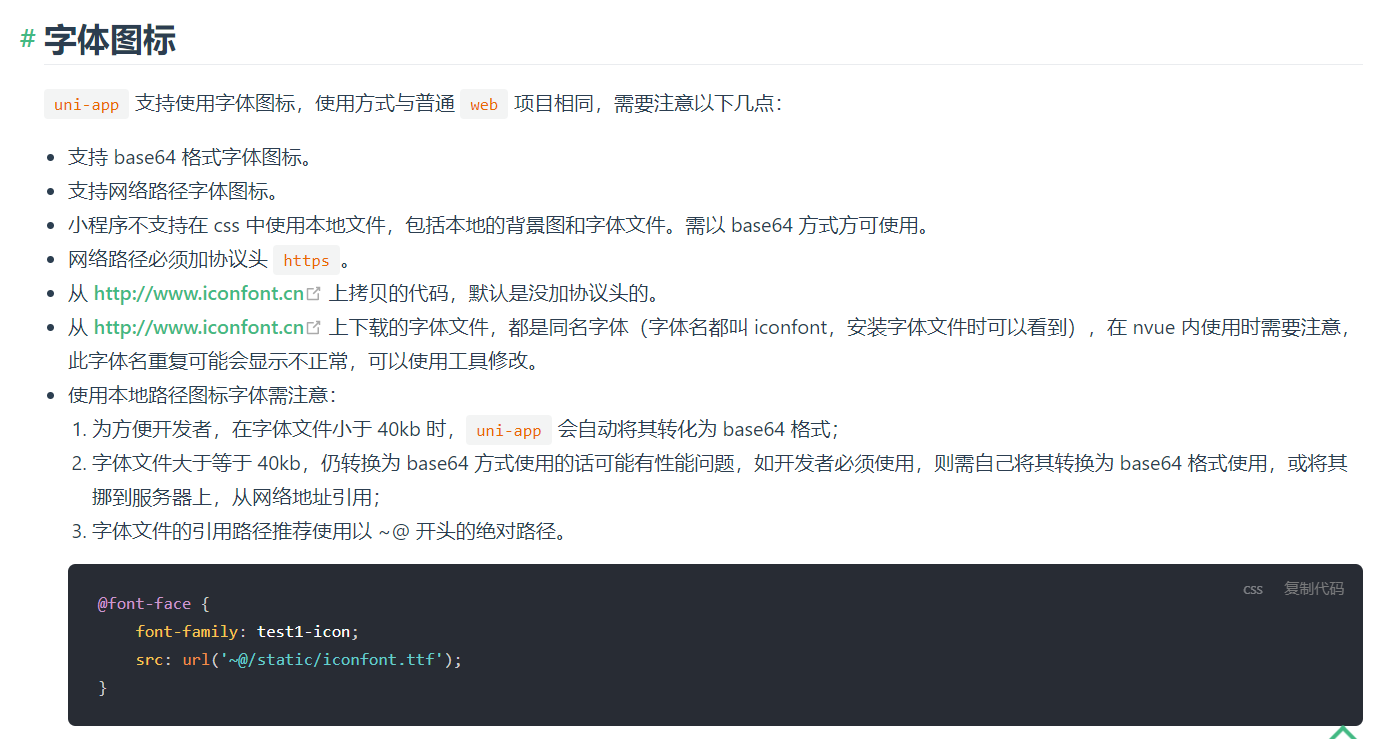

使用步骤:
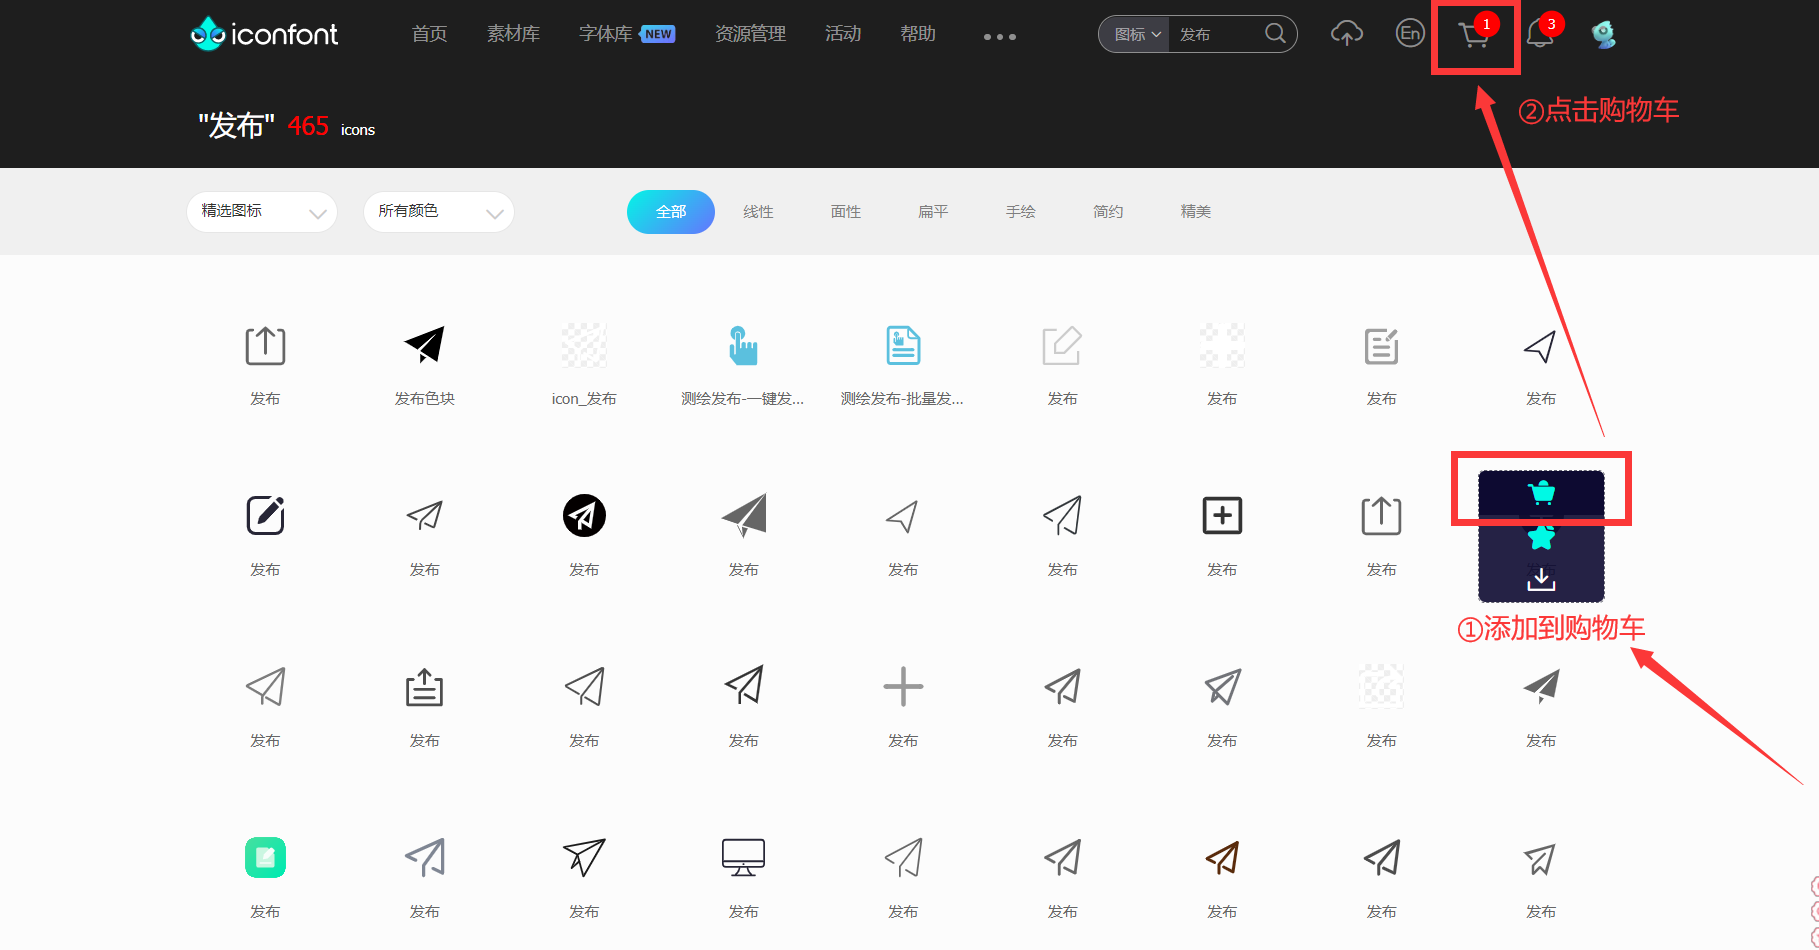
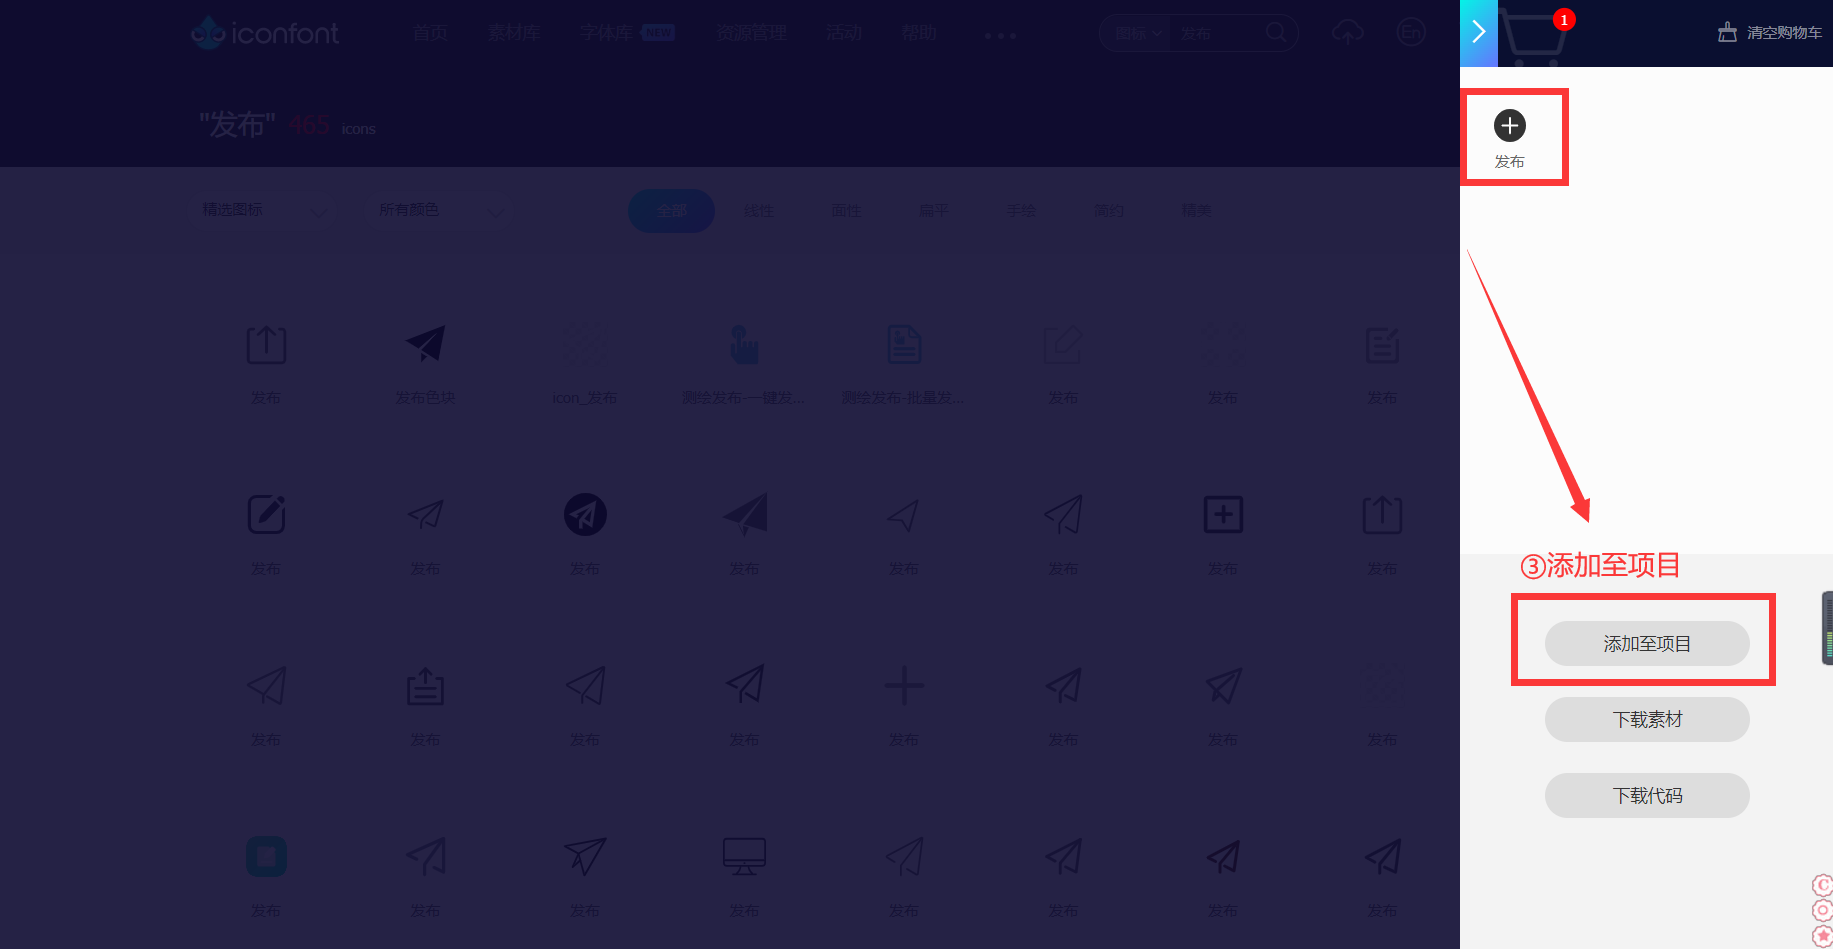
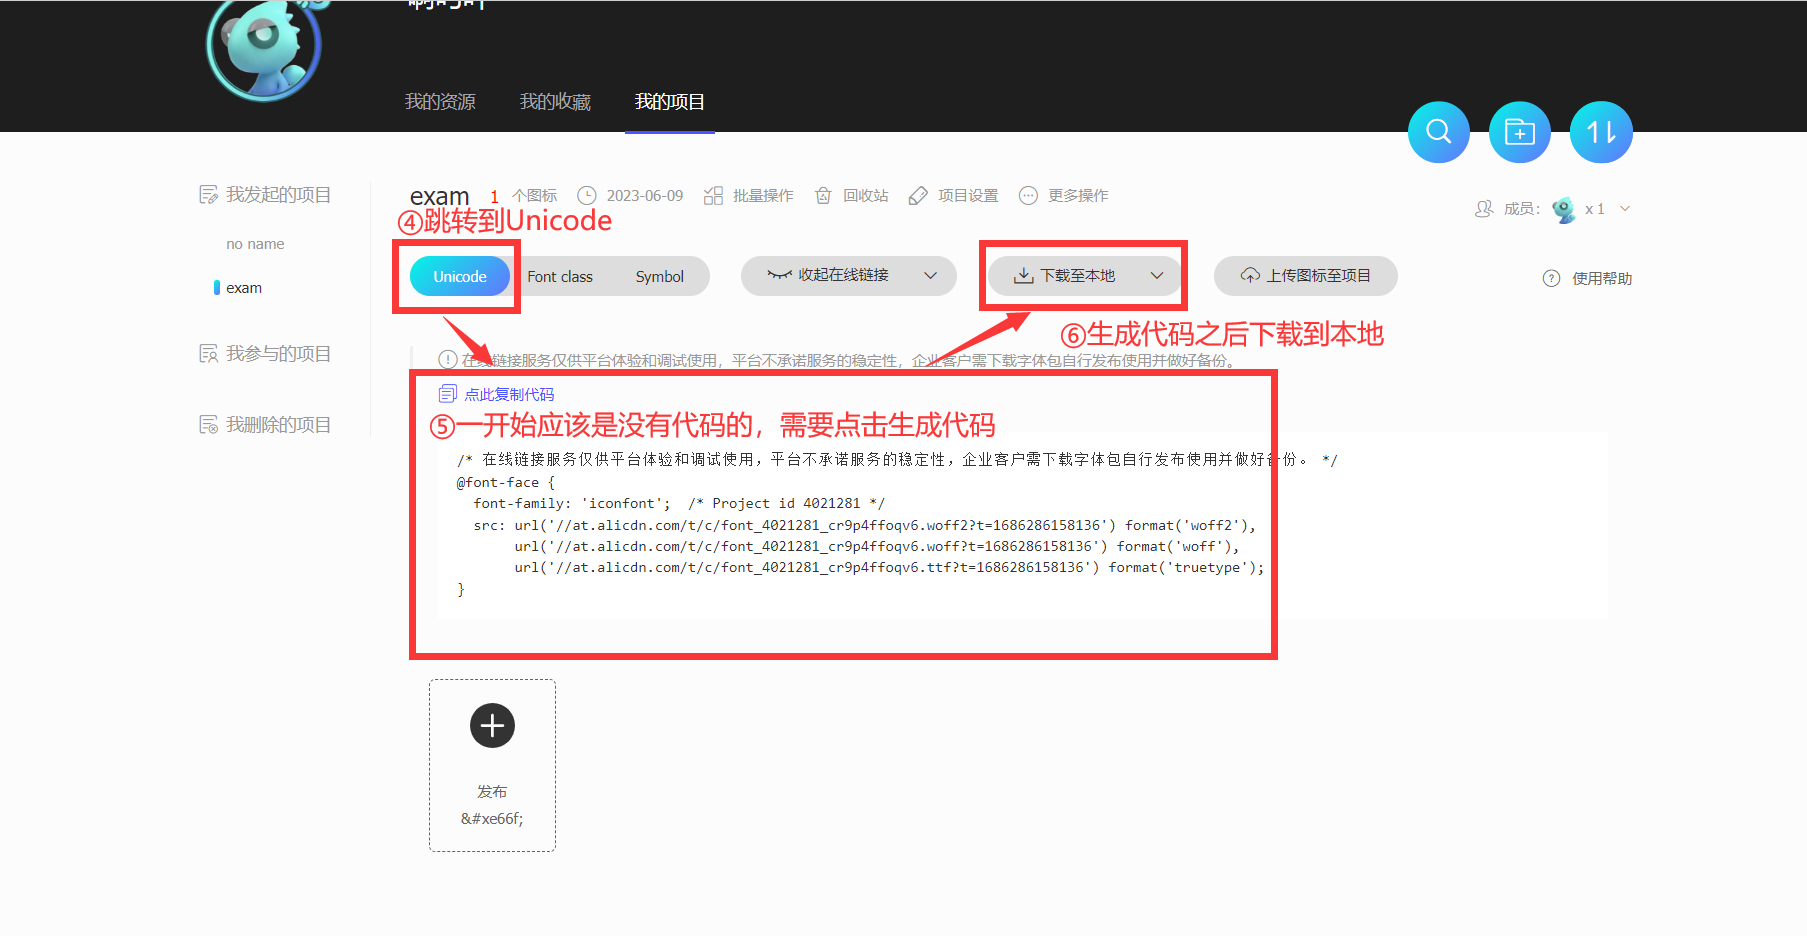

此处需要注意,从阿里巴巴图标库中复制下来的图标代码是,需要将转换为\ue。
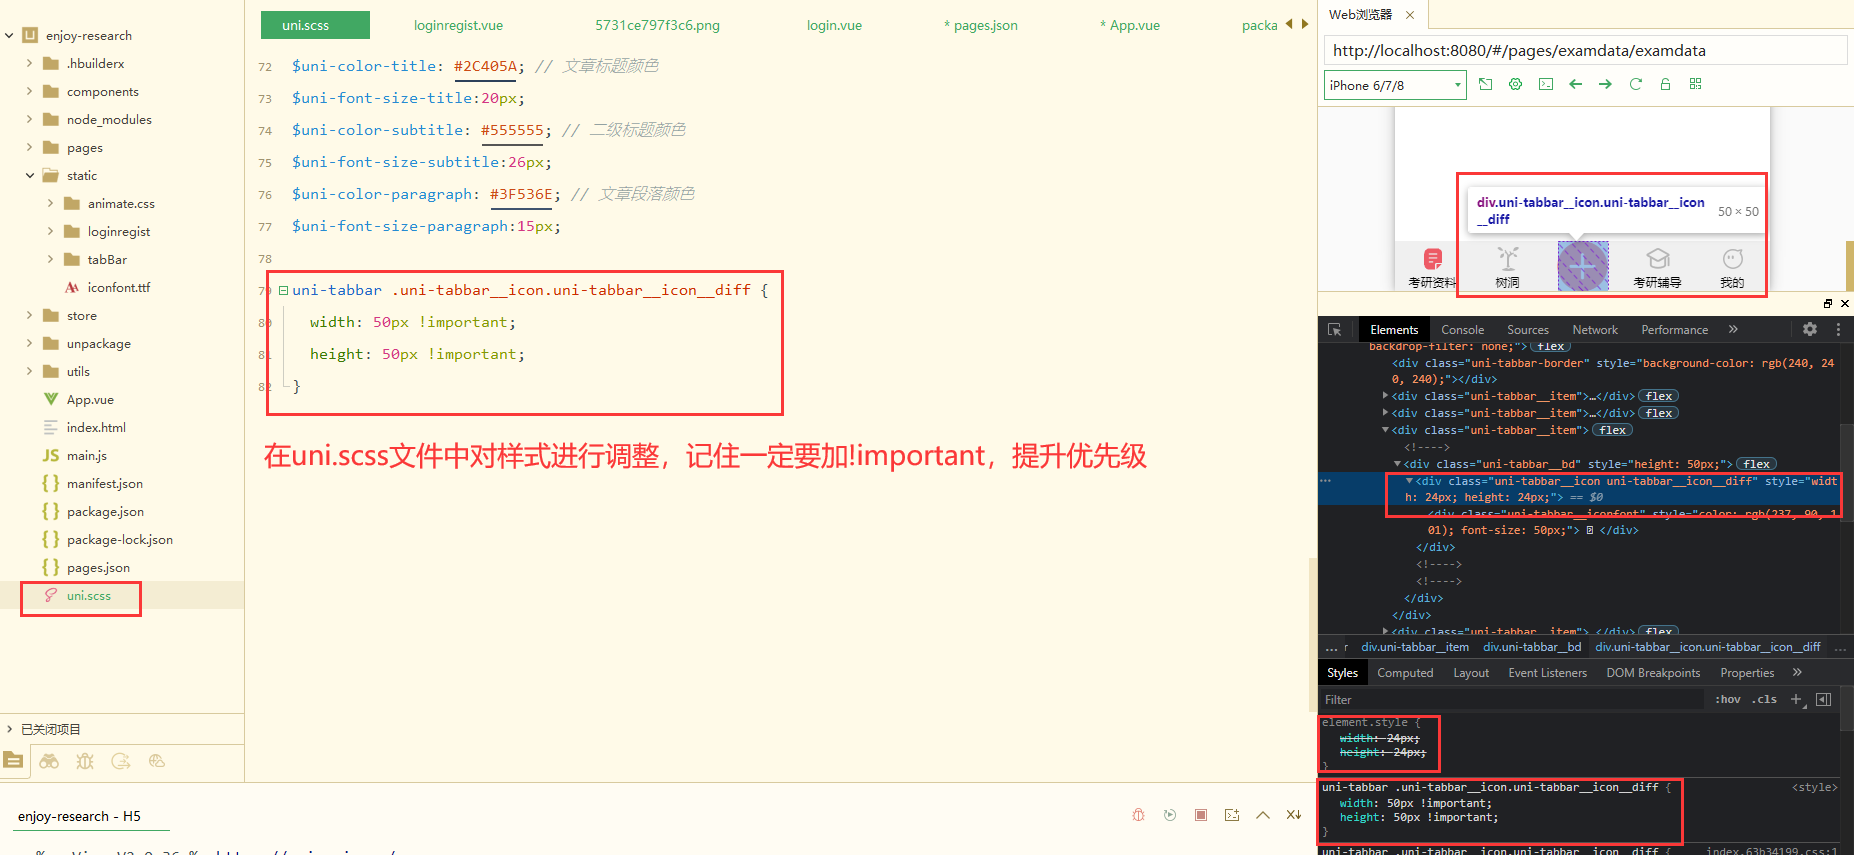
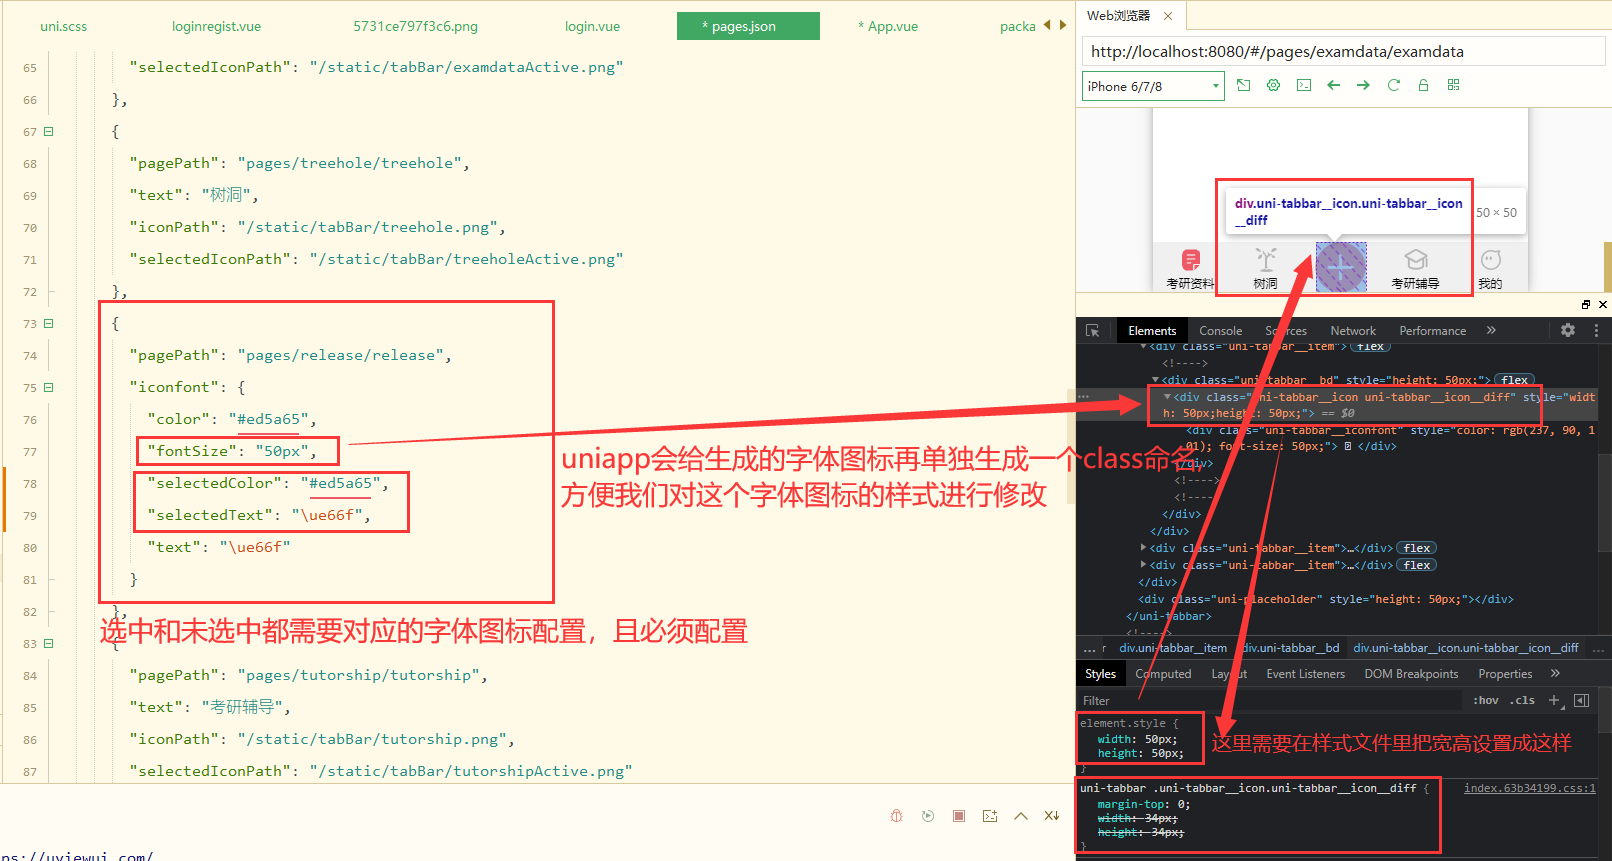
使用说明:
以上我们会发现用iconfont可以成功在内置浏览器显示,但是在手机调试或者打包成app的时候这种样式会出现一些问题。因为app版本适配问题,iconfont对app版本要求比较高,适用于3.4.4以上版本。


以上就是我们在实现功能过程中,总结的两种方法。
如有误,请指正!