概述
本文记录工作中使用Spring Boot + ElasticSearch的实战,Spring Boot版本:2.1.6.RELEASE。
基础
Spring Boot已是Java开发标配,使用SB提供的starter,简单高效。
配置
引入依赖:
<dependency>
	<groupId>org.springframework.boot</groupId>
	<artifactId>spring-boot-starter-data-elasticsearch</artifactId>
</dependency>
增加配置文件:
spring:
  data:
    elasticsearch:
      cluster-nodes: 100.200.33.203:9300,100.200.33.204:9300,100.200.33.205:9300
      cluster-name: elasticsearch6
      repositories:
        enabled: true
定义实体类:
import org.springframework.data.annotation.Id;
import org.springframework.data.elasticsearch.annotations.Document;

@Data
@Document(indexName="symptom-inquiry", type="symptom", createIndex = false)
public class SymptomEntity {


    /**
     * 根据key由指定hash算法生成
     */
    @Id
    private Long id;
    private String key;
    // 省略其他字段定义
}
主键Id生成算法util工具类:
import com.google.common.base.Charsets;
import com.google.common.hash.HashCode;
import com.google.common.hash.HashFunction;
import com.google.common.hash.Hasher;
import com.google.common.hash.Hashing;

@Slf4j
public class HashUtils {


    /**
     * 针对 SymptomEntity key 计算hash值
     */
    public static Long getHashCode(String key) {


        if (StringUtils.isEmpty(key)) {


            return 0L;
        }
        /*
         * 使用 MURMUR3_128 hash算法计算hash值
         */
        HashFunction function = Hashing.murmur3_128();
        Hasher hasher = function.newHasher();
        HashCode code = hasher.putString(key, Charsets.UTF_8).hash();
        log.info("目标 key = {}, 生成ID = {}", key, code.asLong());
        return code.asLong();
    }
}
基于Repository提供一个空实现的查询接口类:
import org.springframework.data.domain.Page;
import org.springframework.data.domain.Pageable;
import org.springframework.data.elasticsearch.repository.ElasticsearchRepository;

import java.util.Optional;

@Configuration
public interface SymptomSearchRepository extends ElasticsearchRepository<SymptomEntity, Long> {


}
根据业务需要,上述接口里可以新增自定义查询方法,满足命名规范即可。如,findByFieldname,Filedname是SymptomEntity实体类里面定义的字段,也是ES文档的字段:
    Page<SymptomEntity> findByKey(String key, Pageable pageable);
    Optional<SymptomEntity> findByDescription(String description);
使用:
@Resource
private SymptomSearchRepository symptomSearchRepository;
@Test
public void test() {


	// 基础使用
    symptomSearchRepository.saveAll();
    symptomSearchRepository.save();
    symptomSearchRepository.findAll();
    symptomSearchRepository.findById(1L);

	// 进阶使用, 拼接组装ES SQL
	BoolQueryBuilder allBoolQueryBuilder = QueryBuilders.boolQuery();
	BoolQueryBuilder bodyTagBoolQueryBuilder = this.setBodyTagBoolQueryBuilder(Sets.newHashSet("手", "胳膊"));
	BoolQueryBuilder sexBoolQueryBuilder = this.setSexBoolQueryBuilder(Sex.MALE);
	allBoolQueryBuilder.should(bodyTagBoolQueryBuilder);
	allBoolQueryBuilder.must(sexBoolQueryBuilder);
    symptomSearchRepository.search(allBoolQueryBuilder);
}

private BoolQueryBuilder setSexBoolQueryBuilder(Sex sex) {


    BoolQueryBuilder boolQueryBuilder = QueryBuilders.boolQuery();
    String notSex = Sex.getNotSex(sex);
    boolQueryBuilder.mustNot(QueryBuilders.matchPhraseQuery("sex", notSex));
    return boolQueryBuilder;
}

private BoolQueryBuilder setBodyTagBoolQueryBuilder(Set<String> allBodyTags) {


    BoolQueryBuilder boolQueryBuilder = QueryBuilders.boolQuery();
    /*
     * 部位匹配逻辑 封装 bodyTagBoolQueryBuilder
     */
    for (String bodyTag : allBodyTags) {


        QueryBuilder queryBuilderSearchCondition = QueryBuilders.termQuery("bodyTags", bodyTag);
        boolQueryBuilder.should(queryBuilderSearchCondition);
    }
    return boolQueryBuilder;
}
上述API封装得到的ES SQL如下:
{
  "bool" : {
    "must" : [
      {
        "bool" : {
          "must_not" : [
            {
              "match_phrase" : {
                "sex" : {
                  "query" : "FEMALE",
                  "slop" : 0,
                  "zero_terms_query" : "NONE",
                  "boost" : 1.0
                }
              }
            }
          ],
          "adjust_pure_negative" : true,
          "boost" : 1.0
        }
      }
    ],
    "should" : [
      {
        "bool" : {
          "should" : [
            {
              "term" : {
                "bodyTags" : {
                  "value" : "手",
                  "boost" : 1.0
                }
              }
            },
            {
              "term" : {
                "bodyTags" : {
                  "value" : "胳膊",
                  "boost" : 1.0
                }
              }
            }
          ],
          "adjust_pure_negative" : true,
          "boost" : 1.0
        }
      }
    ],
    "adjust_pure_negative" : true,
    "boost" : 1.0
  }
}
kibana + ES 使用
Dev-Tools
上面拼接的SQL,可以在ES可视化平台,执行并查看数据。
ES可视化客户端工具,首选一般就是Kibana。Dev-Tools,提供自动补全提示功能,支持手写SQL语法,适合有要求的开发者。

常用的语法:
- 查询
POST symptom-inquiry/_search
{
  "query": {
    "match": {
      "commonName": "腹痛"
    }
  }
}
- 删除:以主键Id删除
POST symptom-inquiry/_delete_by_query
{
  "query": {
    "match": {
      "_id": "2193474183642781887"
    }
  }
}
- 新增
PUT symptom-inquiry-stg/symptom/<_id>
{
  "_id": "111",
  "commonName": "aaa",
  "key": "find:ss"
}
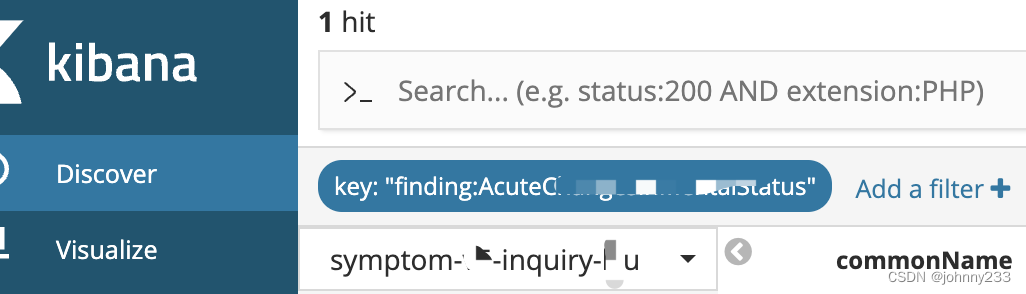
Discover
除了上面的Dev-Tools方式,还提供如下简单点点点操作的Discover
配置2
除了上面这种使用spring-data-jpa提供的封装好的
数据源配置类的另一种方式:
@Configuration
public class EsConfig {


    @Bean(name = "stgHigh", destroyMethod = "close")
    public RestHighLevelClient stgHigh() {


        final CredentialsProvider provider = new BasicCredentialsProvider();
        provider.setCredentials(AuthScope.ANY, new UsernamePasswordCredentials("", ""));
        RestClientBuilder builder = RestClient.builder(
                new HttpHost("100.199.222.111", 9200),
                new HttpHost("100.199.222.112", 9200),
                new HttpHost("100.199.222.113", 9200));
        builder.setHttpClientConfigCallback(inner -> inner.setDefaultCredentialsProvider(provider));
        return new RestHighLevelClient(builder);
    }
}
使用上面的,测试程序如下:
@Autowired
@Qualifier("stgHigh")
private RestHighLevelClient restHighLevelClient;

@Test
public void test() {


	SearchRequest searchRequest = new SearchRequest("symptom-inquiry");
    searchRequest.source().size(1500);
    SearchResponse stgResponse = restHighLevelClient.search(searchRequest, RequestOptions.DEFAULT);
    JSONObject stgJson = (JSONObject) JSON.parse(stgResponse.toString());
    JSONObject stgHits = (JSONObject) stgJson.get("hits");
    Integer total = stgHits.getInteger("total");
    JSONArray stgArray = stgHits.getJSONArray("hits");
    for (int i = 0; i < total; i++) {


        JSONObject item = (JSONObject) stgArray.get(i);
        SymptomEntity stgEntity = JSON.parseObject(item.getString("_source"), SymptomEntity.class);
        if (StringUtils.isEmpty(stgEntity.getKey()) || StringUtils.isEmpty(stgEntity.getCommonName())) {


            log.info("symptomEntity {}", JsonUtil.beanToJson(item));
            continue;
        }
    }
}
多数据配置
如下代码
@Configuration
public class EsConfig {


    @Primary
    @Bean(name = "prod", destroyMethod = "close")
    public RestClient prod() {


        final CredentialsProvider provider = new BasicCredentialsProvider();
        provider.setCredentials(AuthScope.ANY, new UsernamePasswordCredentials("es7", "root"));
        RestClientBuilder clientBuilder = RestClient.builder(
                new HttpHost("170.188.116.203", 9200),
                new HttpHost("170.188.117.204", 9200),
                new HttpHost("170.188.118.205", 9200));
        // 根据需求配置身份验证
        clientBuilder.setHttpClientConfigCallback(builder -> builder.setDefaultCredentialsProvider(provider));
        return clientBuilder.build();
    }

    @Bean(name = "stg", destroyMethod = "close")
    public RestClient stg() {


        final CredentialsProvider provider = new BasicCredentialsProvider();
        provider.setCredentials(AuthScope.ANY, new UsernamePasswordCredentials("es6", "root"));
        RestClientBuilder builder = RestClient.builder(
                new HttpHost("100.119.222.11", 9200),
                new HttpHost("100.119.222.12", 9200),
                new HttpHost("100.119.222.13", 9200));
        builder.setHttpClientConfigCallback(inner -> inner.setDefaultCredentialsProvider(provider));
        return builder.build();
    }
}
使用上面配置好的两个ES数据源,从stg和prod两个数据源取数:
@Component
public class queryFromStgAndProdService {


    @Autowired
    @Qualifier("prod")
    private RestClient prodClient;

    @Autowired
    @Qualifier("stg")
    private RestClient stgClient;
}